
News
The Ultimate Catch-All Bib - Courtesy of Amy of Peek-A-Boo Pattern Shop and I Like Big Buttons! June 21 2016
A while back, Amy of Peek-A-Boo Pattern Shop made this Ultimate Catch-All Bib and shared how she did it with us. I thought this would be a great time to revisit the tutorial with a busy summer of babies ahead of us.
Supplies:
- Laminated Cotton Fabric of your choosing
- 3 KAM Snap Sets
- KAM Snap Pliers and Awl
- Standard Sewing Machine
- Ultimate Catch-All Bib Pattern
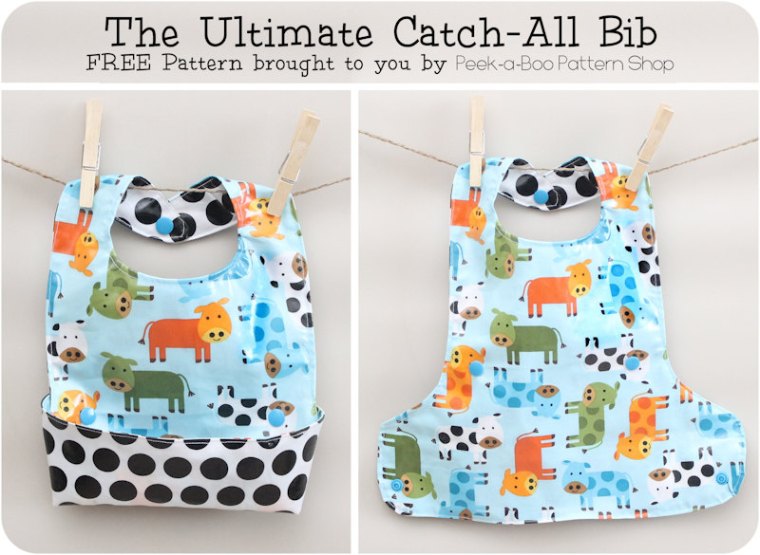
"Let’s get started!
1. Download your FREE PATTERN. The pattern has a 1″ scale box for you to check that it printed correctly. As-is the bib is a good size for a 1-2 year old. If you’d like a bigger or smaller bib just print the pattern out at more or less than 100% scale..."

To read the rest of the Tutorial, go here.

How To Make A Cover Button Paper Clip Bookmark June 14 2016
Who needs some more Gunmetal craft items? Well, I do. Brand New! Gunmetal Jumbo Paper Clips are now in.
Jumbo Paper clips are commonly used to make bookmarks:
- Attach size 36 (7/8" - 23 mm), size 45 (1 1/8" - 28 mm), or size 60 (1 1/2" - 38 mm) flat back cover buttons.
- Glue on cover buttons, flat beads, paper punches, charms, gemstones, cabochons, silk flowers, and much more!
- Assembling fabric covered buttons is easy and fun but did you know you can use them to embellish Jumbo Paper Clips to make darling Bookmarks?
- Watch how easy it is below:
I Like Big Buttons! - How To Make A Cover Button Paper Clip Bookmark
To see other great Fabric Cover Button ideas, visit our DIY Project section here.
Reusable Snack Bag Tutorial - Courtesy of Nap-Time Creations and I Like Big Buttons! KAM Plastic Snaps June 09 2016
A while back, Emily of Nap-Time Creations made this adorable Snack Bag and shared how she did it with us. I thought this would be a great time to revisit the tutorial with a busy summer of outings ahead of us.
Supplies:
- Laminated/plastic fabric for the inside*
- Fabric of your choice for the outside
- 1 KAM Snap Set
- KAM Snap Pliers and Awl
- Standard Sewing Machine
- Snack Bag - Full Tutorial
*Small size snack pack: cut 1 of laminate and 1 of regular fabric 12 1/2 x 4 1/2
**Large size reusable snack pack: cut 1 of laminate and 1 of regular fabric 5 1/2 x 16
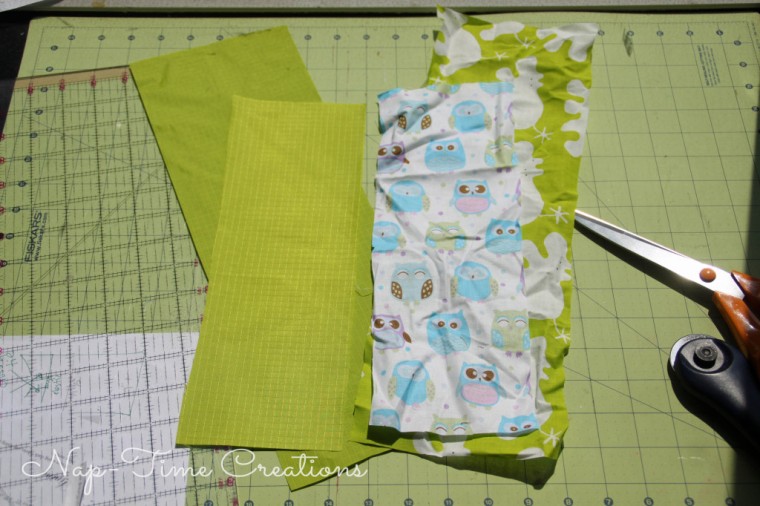
Instructions:
- Place the fabric right sides together and sew along the two long sides and one of the short sides. Leave one end open to turn ...

To read the rest of the Tutorial, go here.

Bandana Bib with KAM Snaps and a PDF Pattern June 07 2016
One of our most popular tutorials, Bandana Bibs are a great gift for those little droolers and mess makers in your life or as an outfit accessory. So cute! I, also, used our Heart Shaped KAM Snaps for added pizazz, check it out!
Just 6 days left in our KAM Snaps Heart and Star Starter Pack Kit with Pliers (Approximately 1000 Sets)!?! (A $90.00 value) Don't forget to ENTER:
Also, if you don’t want to wait, you can get 10% off our Heart Snaps on our website: HEART10
Or 10% off our Star Snaps on our website: STAR10
#ilikebigbuttons #giveaway #win #kamsnaps #snappress #bandanabib #tutorial
Supplies:
- Fabrics of your choice
- 1 Heart Shaped KAM Snap Set
- KAM Snap Pliers and Awl
- Bandana Bib PDF Pattern (may need to adjust for your child's size or add more KAM Snaps settings)
- Standard Sewing Machine


Instructions:
1. Download the Bandana Bib PDF Pattern. Print out the pattern making sure the 1″ square in the corner measures 1″ square when printed that will indicate the pattern is the right size.

2. Cut out the pattern.
3. Place your pattern, with long straight side on fabric folded in half, and pin in place.

4. Cut the 2 pieces of Fabric you will use.
5. Place Fabrics right sides together.

6. Pin together.

7. Sew pieces together with a 1/4" seam allowance, back stitching at the start and finish of sewing, make sure to leave a 3-4" gap so that you can pull the piece right side out.

8. Pull piece right side out and make sure to push all the round and square corners out until they lay flat.

9. Fold in the opening's seams and pin in place.

10. Stitch a finish stitch 1/8" to 1/4" all the way around the bib, making sure to ease your way around the left and right tabs. I do a couple stitches, stop, then lift the foot, turn the fabric slightly, put the foot down, and do a couple more stitches and repeat. Make sure the back stitch at the beginning and end of your sewing.

11. Use the template to mark the KAM Snap placement, you many want to check the measurement of your child's neck and adjust the pattern or snap placement accordingly. This bib worked for a toddler but with an extra set of snaps can work for more sizes.

12. I decided as I was getting ready to install the KAM Snaps to go with our new Heart Shaped snaps. Install the Heart Shaped KAM Snap Cap and Stud in the left and a Cap and Socket on the right tab.

13. Interested in Heart Shaped KAM Snaps, check out our great 25 colors, in smaller package quantities for more great variety!
14. Totally cute, don't you think! ;) Happy Snapping!!!
Smart Phone Case and Wristlet with KAM Snaps and Key Fob Hardware May 31 2016
Today's inspiration came to me as I was packing the kids up for a walk down the road to the neighbors to check out their yard sale and visit. I thought I wish I had a case for my iPhone and a place to put a couple "just in case" dollars but instead, I held my phone and tucked the money into my bra :P and headed out with all the kiddos in tow. When I got home, I whipped this up. I am prepared for next time :).
Supplies:
- Fabric or Fabrics of your choice
- Interfacing
- 2x 10" Piece of 1″ Cotton Webbing
- 2x 10″ Piece of Ribbon
- 1 KAM Snap Set
- KAM Snap Pliers and Awl
- 1 Key Fob Hardware and Split Ring
- Smart Phone Case PDF Pattern (works for iPhone 4s and iphone 5, may need to adjust the pattern for other models of phones)
- Standard Sewing Machine and Iron

Instructions:
1. Download the Smart Phone Case PDF Pattern. Print out the pattern making sure the 1″ square in the corner measures 1″ square when printed that will indicate the pattern is the right size.
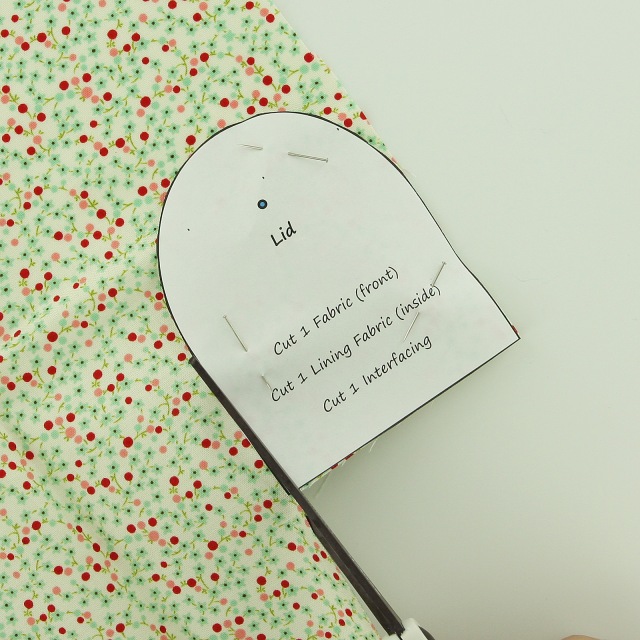
2. Cut out each Pattern piece as many times as instructed.

3. You will end up with:
2 pieces of Fabric/1 Interfacing (back)
2 pieces of Fabric/1 Interfacing (front)
2 piece of Fabric/1 Interfacing (pocket)
2 pieces of Fabric/1 Interfacing (lid)

4. Iron the Interfacing onto a piece of Fabric for matching side making sure to iron it to the wrong side of the Fabric.
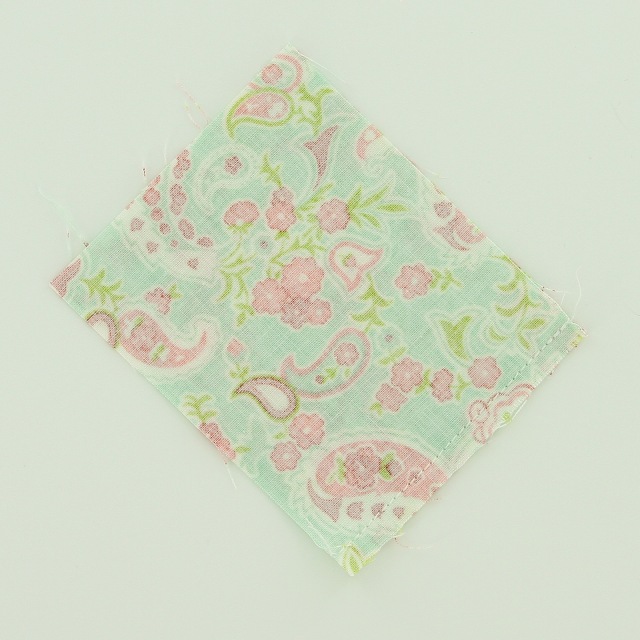
5. Place right sides of Fabric for Pocket together and sew 1/4" seam along the top of the piece.
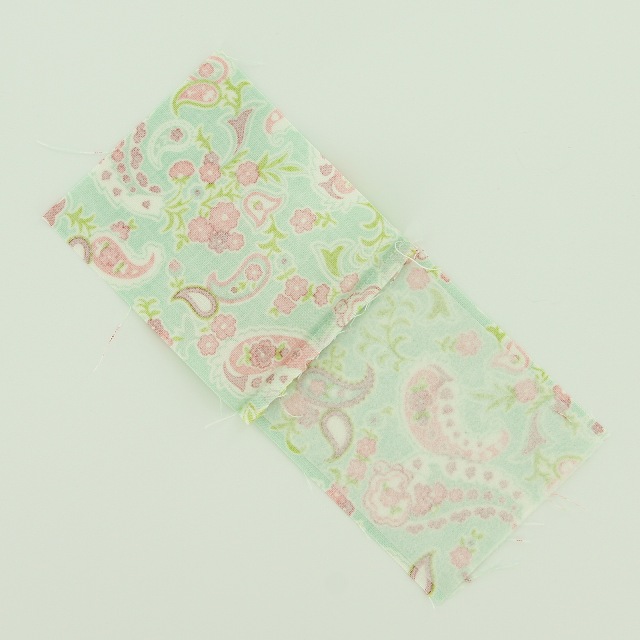

6. Iron Fabric for the Pocket open and then over wrong sides together forming the Pocket face.

7. Take 1 of the 10" pieces of Ribbon and 1" Cotton Webbing and sew them together. I stitched a straight line as close to the edge as possible on the Ribbon.
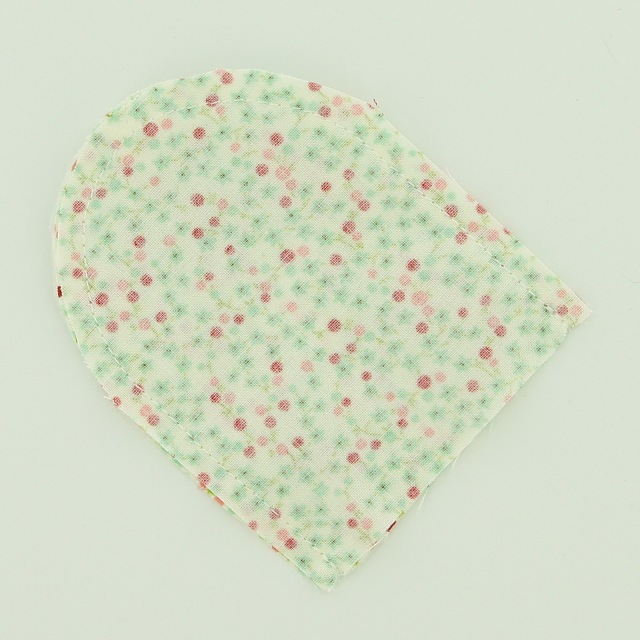
8. Take the 2 pieces of Fabric for the Lid/Lip of the case, put them right side together, and sew them with a 1/4" allowance.


9. Turn the Lid right side out and iron flat.

10. Then take the Fabric (right side up), I am using more of those recycled holey jeans :), that will be the Back and place the Cotton Webbing/Ribbon strip (right side up) centered across it with just a bit of it hanging off the top edge.

11. Place the internal Back Fabric wrong side up.
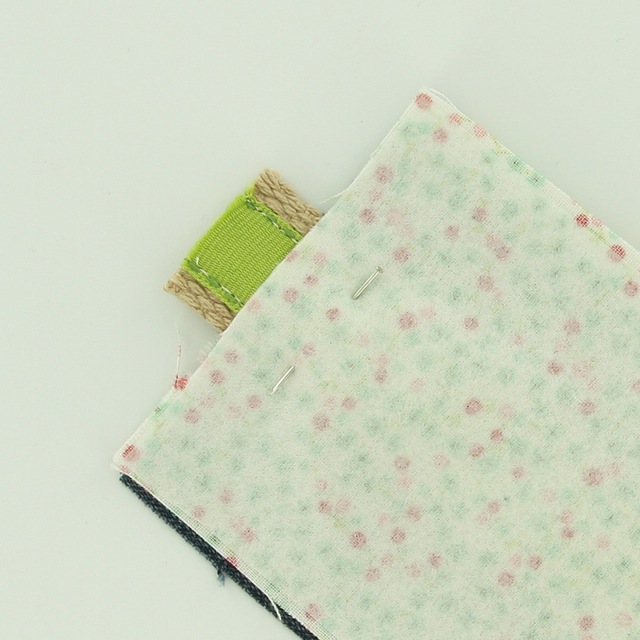
12. Pin them together.

13. Stitch a 1/4" seam along the piece, back stitching to reinforce Cotton Webbing/Ribbon strip. Cut away some of the excess Cotton Webbing/Ribbon if needed.


14. Iron back the Fabric and fold over, wrong sides together. Now stitch a 1/4" seam allowance across the top of the Back piece.

15. Now slide the Split Ring from the Key Fob Hardware on the Cotton Webbing/Ribbon Strip.


16. Now leave about 1" to 1 1/2" overlapped Cotton Webbing above the Back of the Case and pin the Cotton Webbing/Ribbon centered down the back of the Fabric.

17. Now stitch it in place down the back, with the internal Back out of the way, not as pictured, and I also stitched along the Cotton Webbing/Ribbon to gather the loop.
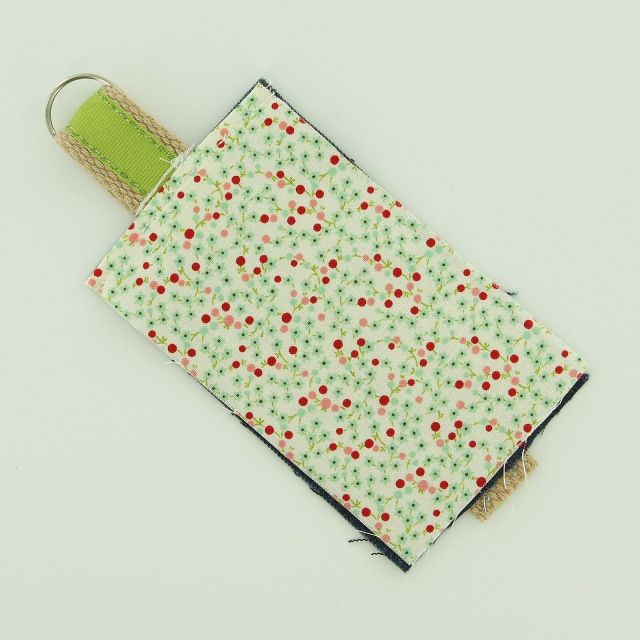
18. It will look like this.


19. Center the Lid along the back, pin and sew with a 1/4" seam allowance. This maybe should have been done a couple steps sooner so that I didn't have 2 stitch lines across the Back but I was when I got to it.

20. Place the finished Front down right side up, I added a 1/4" top stitch to the top of each piece (Front, Pocket and Back).

21. Add the Pocket right side up.

22. Place the Back wrong side up and pin it all together.


23. Sew a 1/4" seam allowance all the way around making sure to back stitch at the beginning and end.


24. Turn the whole thing right side out and push the corners out to get them as square as possible.

25. Install the KAM Snap Cap and Socket in the Pocket.
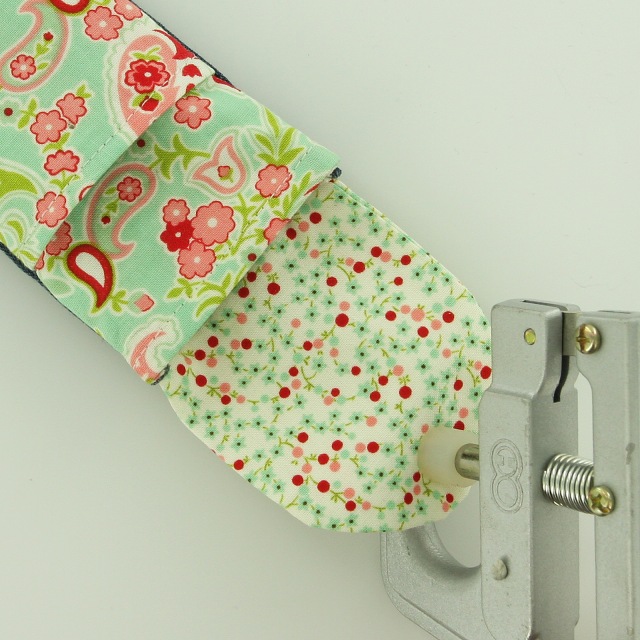
26. Install the KAM Snap Cap and Stud in the Lid.

27. What it looks like with KAM Snaps installed.
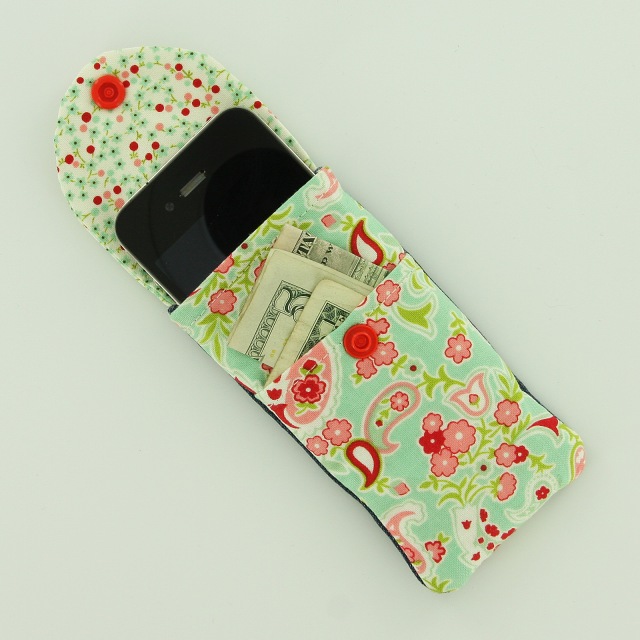
28. This pattern will work with iPhone 4 or iPhone 5, you may need to adjust the pattern somewhat if you have a different model.

29. Snapped closed.

30. Add a Wristlet to complete your project. Check out our Key Fob Hardware Wristlet Tutorials to see how to make our Cotton Webbing and Ribbon Wristlets.
Making a “No Sew” Leash for a Toddler Cup with KAM Snaps May 26 2016
A while back, I tackled making a Leash for a toddler cup. My toddlers love to chuck food, cups, dishes, toys, you name it they will throw it from their highchair. KAM Snaps to the rescue!
With a couple minutes and a few supplies, you can make this handy Leash and eliminate a least one thing from flying through the air.
Supplies:
- 4-5' of Grosgrain Ribbon
- 3 KAM Snap Sets
- KAM Snap Pliers and Awl
- Lighter or Chef's Torch

Instructions:
1. Measure off a piece of Grosgrain ribbon that is long enough to wrap around both the arms of the high chair, around the cup and enough length for your child to lift the cup to their mouth comfortably. I went with 5' but 4 1/2' would have been enough.

2. The ribbon I was using was made of polyester so I used a lighter to seal the ends of the ribbon so it doesn't fray. (If you are unsure, you may want to practice on a scrap piece if this is your first time or you are unsure of the what the material is made of.)
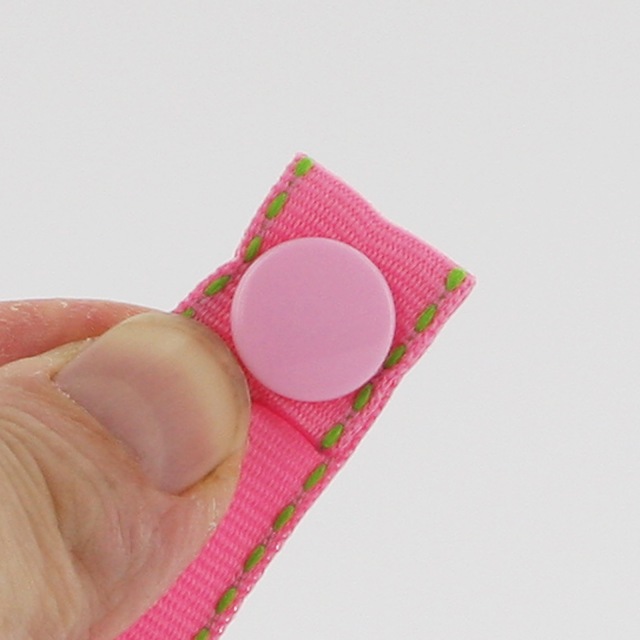
3. To make the ends more secure and long lasting, I folded the ribbon over about 1/2" to help reinforce the ends and pushed the cap through.
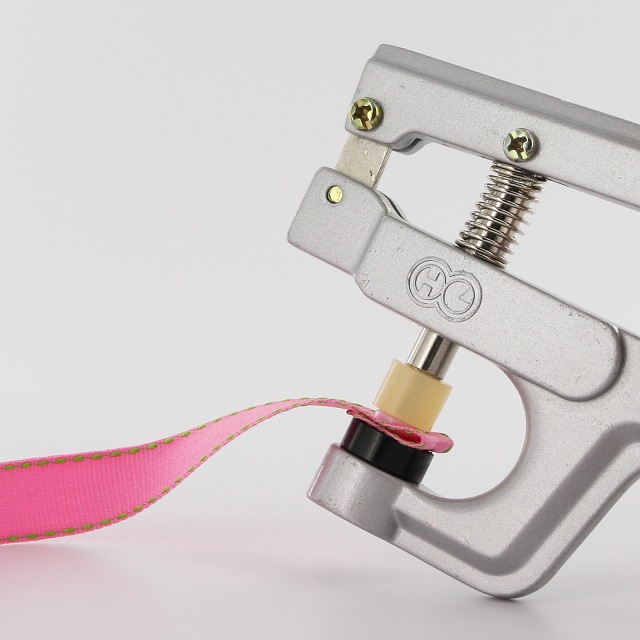
4. Install the KAM Snap at each end.
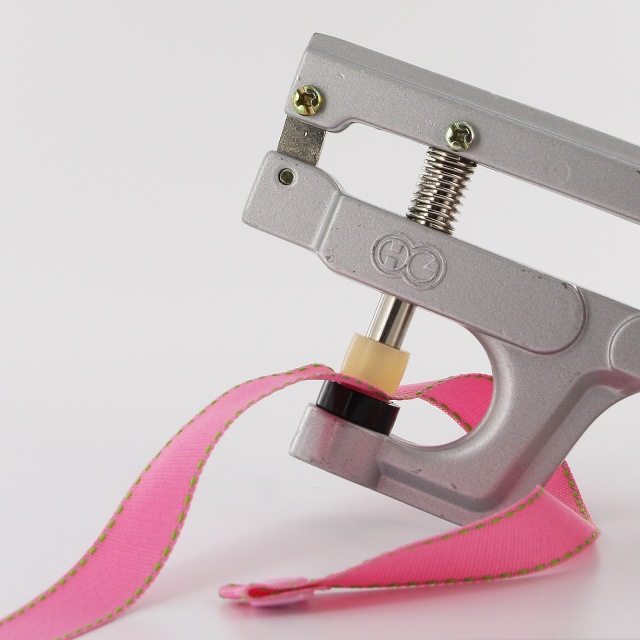
5. Measure or wrap the ribbon around the arms of the highchair and install a snap where the ribbon intersects. On my highchair it was 8" but each brand will vary. Install a KAM Snap on each end about 8" (or your measurement) in from the end.
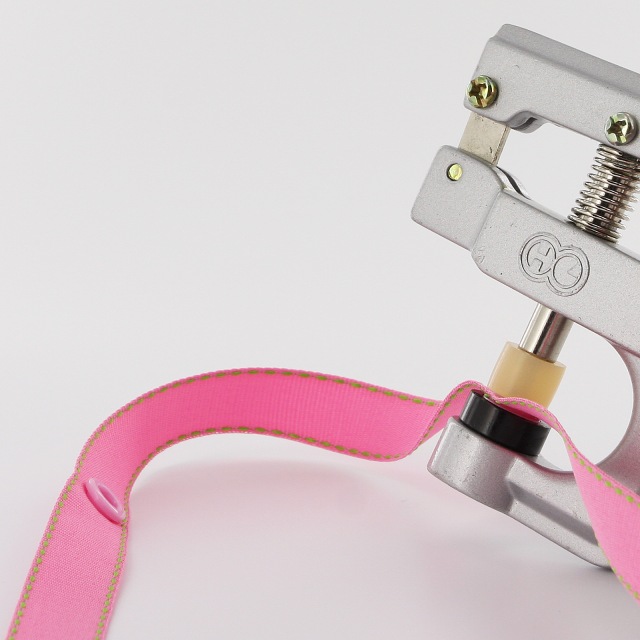
6. Install the ribbon on your highchair, put a Toddler Cup in the ribbon and pull until you have two equal lengths. Now pinch the ribbon loosely together around the cup, loose enough to allow for different cup sizes but tight enough to hold the cup well. Install a set of snaps at the point where the ribbon met.


7. Installed it should look like this.
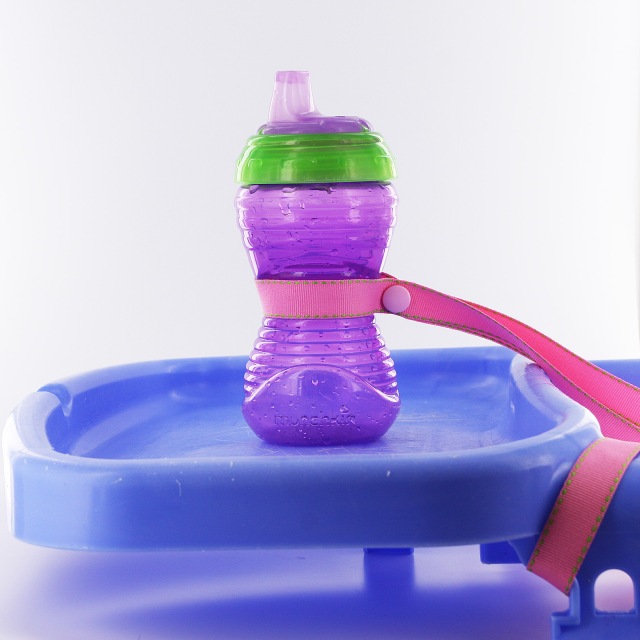
8. Tada! Enjoy your throw-free cup zone! My toddler was suspicion of it at first but after grunting at it for while :) she happily settled into drinking from her cup and eating her snack.
Turning a Milk Jug into a Storage Container with KAM Snaps May 24 2016
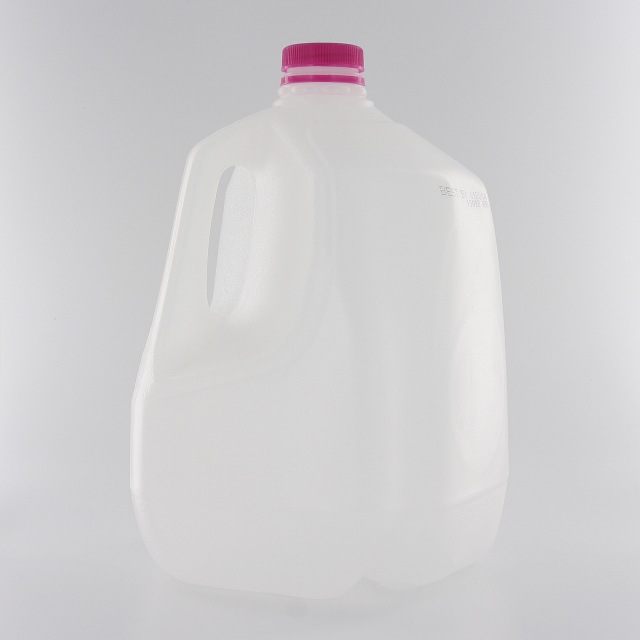
Today I am recycling one of the most common items in our house. With so many kids, we are constantly going through milk and I have collected quite the stack of Milk Jugs. What to do with them all!?!
Supplies:
- 1 Milk Jug
- Scissors
- Marker
- 1 Set of KAM Snaps
- 1 KAM Snaps Plier and Awl
Instructions
1. Take a clean, rinsed, dried Milk Jug and remove all the labels and date stamps.
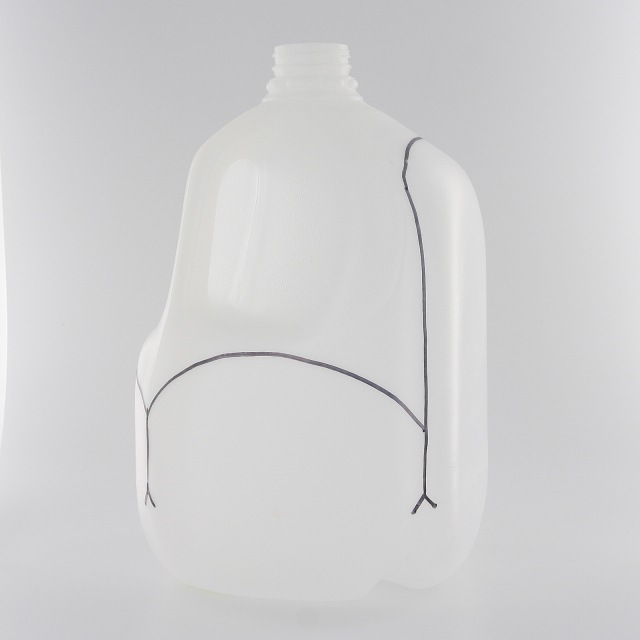
2. Trace the outline of the shape you want to cut. You will have one tall, full length flap and 3 half size flaps. Stay about an 1 to 1 1/2 above the bottom of the container.

3. Cut the Milk Jug on the lines. The Milk Jug will fold inward about were the dashes are, the dashes are just a visual, no extra cutting is needed.
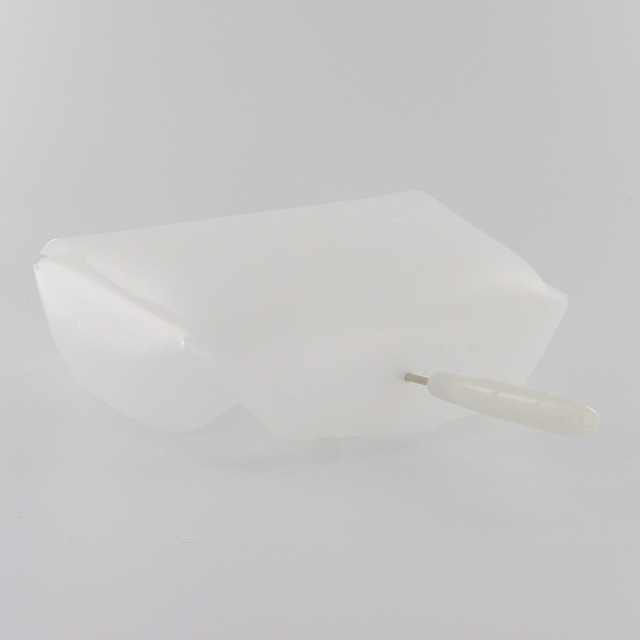
4. Fold the front flap in, then the 2 side flaps and finally the tall flap over and down. Use your Awl to decide on the position of the snap and poke it through both the flap and the body of the jug.
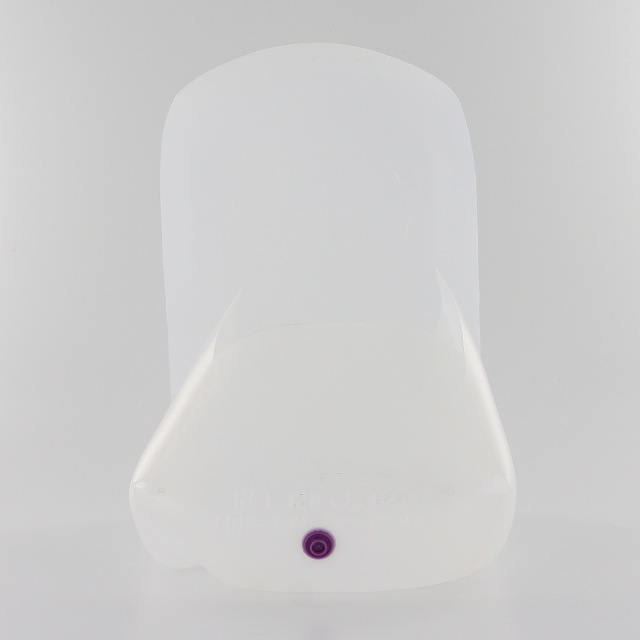
5. Attach the inside KAM Snap to the body of the Milk Jug, Stud facing out. This may require a KAM tabletop Press, if you only have pliers, you may need to adjust the length of the front flap.
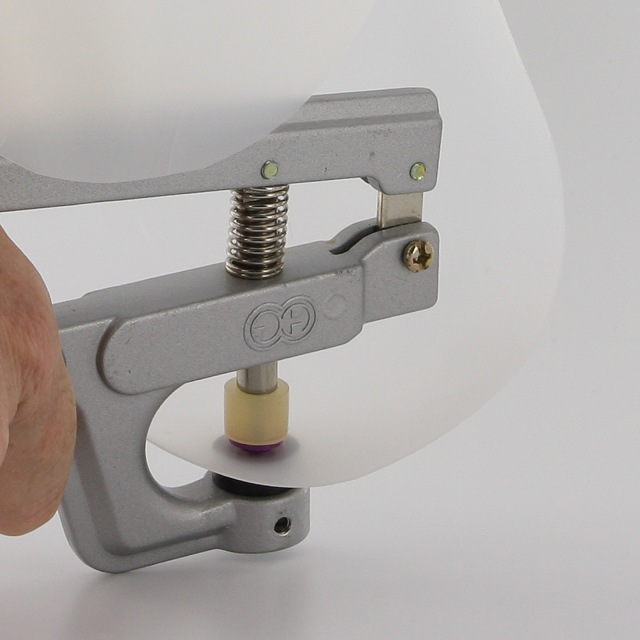
6. Now attach the KAM Snap to the tall flap, Socket inward, Cap on top.
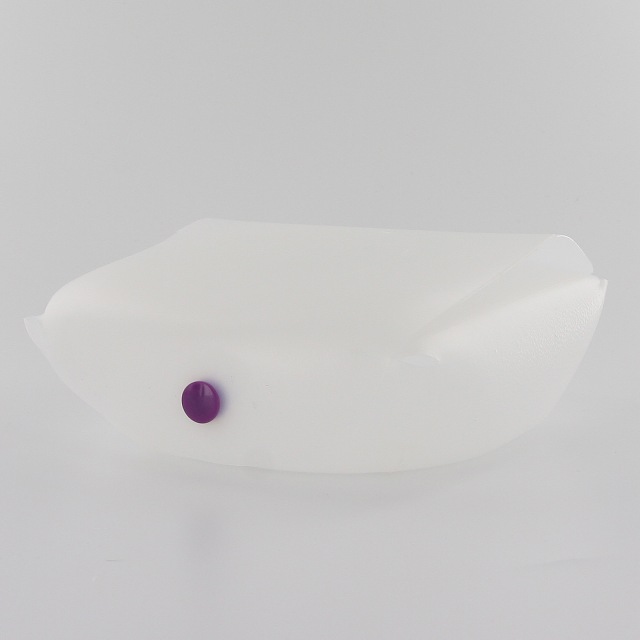
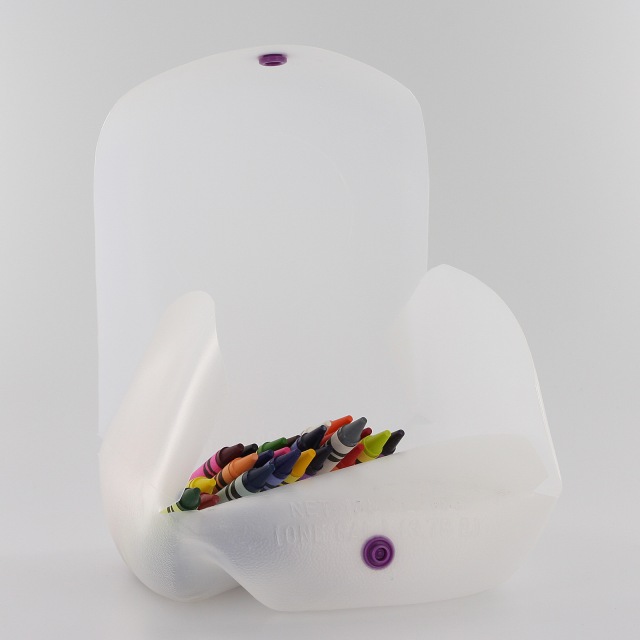
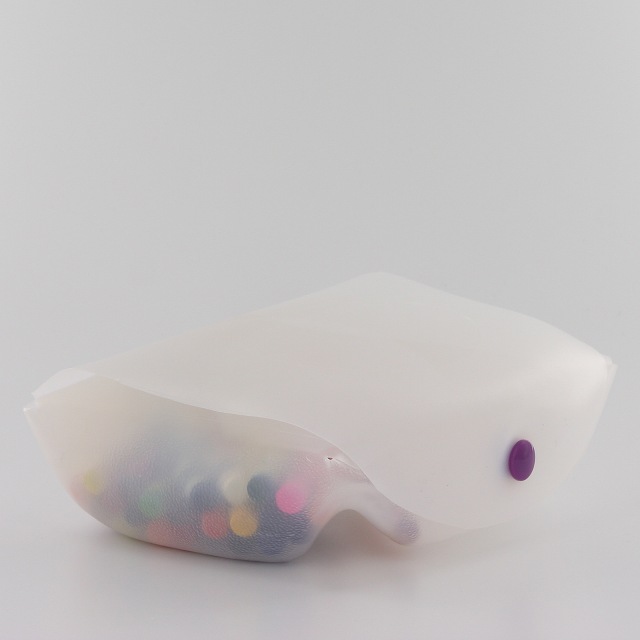
7. Snap and Go!!! You can use this container to store sandwiches, snacks, toys or as I plan, crayons for each kid. I making a different one for each kid with their "color" of KAM Snaps.
Cover Button Metal Pacifier Clips with Cover Buttons, Round Faced Metal Suspender Clips and KAM Snaps May 17 2016
How to make a Cover Button Metal Pacifier Clips with Cover Buttons, Round Faced Metal Suspender Clips and KAM Snaps
Today I am making Cover Button Pacifier Clips using Round Faced Metal Pacifier Clips (Metal Suspender Clips), Size 36 Cover Buttons, and KAM Snaps, of course ;). I have had a lot of questions in the last year about how to make these clips so I decided to take it on. Keep in mind that although I have rough tested these I in no way recommend you leave your baby alone with these as there are small pieces and if not done properly they may come apart and become a choking hazard. I would recommend these clips under adult supervision only. The maker and/or parent assumes full responsibility when using these pacifier clips.
That being said I did rough test these and was unable to break them apart after they had proper time to dry and cure. I didn't take a hammer to them :) but I did my best to undo my hard work and was not able to.
Supplies:
- 2 KAM Snap Sets
- KAM Snap Pliers and Awl
- Round Faced Metal Clips or Enamel Pacifier Clips
- 1 Size 36 Flat Back Cover Button
- Size 36 Assembly Tool
- Size 36 Template
- Fabric Scraps
- E6000 Adhesive
- Pre-made Pacifier Clips (see Pacifier Clip and Supply Tutorials)


Instructions:
1. Using our Pacifier Clip and Supply Tutorials make either Ribbon or Fabric Pacifier Clips.

2. Cut your fabric scrap. You will want a circle that is about twice the diameter of your button blank. I cut out a Piece of Fabric using my Size 36 Template.

3. Put your fabric piece in the larger assembly tool piece (RIGHT SIDE DOWN). When you look into the tool you want to see the back of the fabric.


4. Place the button front (the domed piece) on top of the fabric. Leave the fabric edges hanging out. Double check the transparent underside to see if your print is how you would like it. Then press the cover button fabric edges down into the tool.

5. Add a dab of E6000 Adhesive to the middle of the cover button cap before installing the Flat Back.

6. Place the back cover button piece on top of your fabric and button front.

7. Take the smaller piece of the assembly tool and with the open side down place it on the button back.
8. Press down. You may hear a pop when the last bit of the button back slips into place. If you take the tool out and the button is not completely secured, just put it back in and press down again.

9. When you take the small assembly tool piece off, the fabric edges will be secured underneath the button back.

10. Remove the button from the larger assembly tool piece. Tada! My Cover Button is ready to be adhered to a Round Faced Metal Clip.

11. Here are the Cover Buttons I made in just a few minutes. Seriously easy, fun and so cute!

12. Now take the E6000 Adhesive and put a medium size dab of glue on the back of the Cover Button about 1/2 of what would fill the back area of the back. This glue is great to work with so don't overly worry about getting the amount just right. I was able to cleanly wipe of any excess off when I put on too much and I was also able to remove the button and add a little more when I under did it. This glue is very forgiving.

13. Now place the Cover Button over the Round Faced Metal Pacifier Clips and straighten and center your button.

14. Press firmly and let set to dry and cure 24-72 hours as recommended by the manufacturer (E6000).

15. These are my finished products. I love them and think they turned out beautifully. Below are my examples, completed and installed on Pacifier Clips.


16. Tada!!!
Disclaimer: Keep in mind that although I have rough tested these I in no way recommend you leave your baby alone with these as there are small pieces and if not done properly they may come apart and become a choking hazard. I would recommend these clips under adult supervision only. The maker and/or parent assumes full responsibility when using these pacifier clips.
Recycling Jeans into a Pacifier Clip using KAM Snaps and a Pacifier Clip May 12 2016
Recycling Jeans into a Pacifier Clip using KAM Snaps and a Pacifier Clip
Every time I do a load of jeans in the laundry, I inevitable find ANOTHER pair of jeans with the knees split from seam to seam and, really, how many jean shorts can a boy use :P. They even wear though patches and re-enforced knees. I have active boys :). I have been trying to find creative ways to recycle holey jeans. Today I am recycling a pair of holey jeans into a Pacifier Clip.
Supplies for a Recycled Jean Pacifier Clip:
- 1 Pair of Holey Jeans
- 1 Pacifier Clip
- 1 KAM Snap Sets
- KAM Snap Pliers and Awl
- Standard Sewing Machine


Instructions:
1. Using an old, holey pair of Jeans cut two 1 1/2" x 14" strips of material.

2. Pin the material, wrong sides together, right sides facing out.

3. Stitch around the strip of fabric about a 1/4 to 3/8" in all the way round making sure to back stitch at the start and end.

4. Pull on the edges to fray the jean material up to the stitch you made. I used a crafty child :) with a cutting board and a fork. It will also fray over time but I was going for a this look.

5. Put the Pacifier Clip on the Fabric strip about 1″ in.
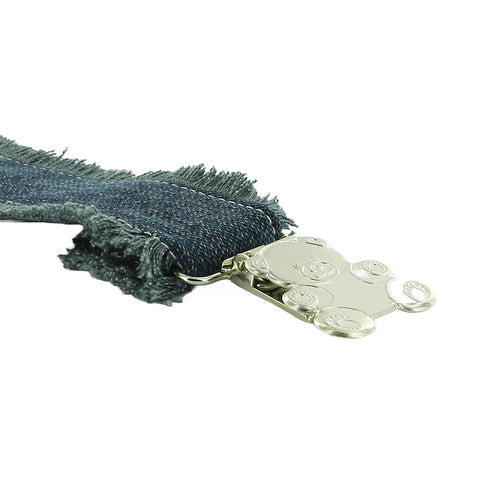
6. Fold back 1″ of the strip back onto itself.

7. Straight stitch across the Fabric strip just behind the Pacifier Clip and again a 1/2″ later, I did a Zig-Zag Stitch for fun, just before the end of the doubled over Fabric strip. Make sure to set the stitch both times.

8. Make sure that the internal snap in a comfortable distance to accommodate the width of the handle, I spaced my KAM Snaps about 2″ apart using the Pacifier I have with the biggest handle.

9. Now on the side where the Pacifier will be attached, I installed a Cap and Socket about 1/2″ from the edge. I used Size 20 snaps for this tutorial but either Size 20 or Size 16 will work great.

10. Now snap the Pacifier in place, attach to your child’s outfit and go.

11. Tada! Okay, I think this may be my favorite so far. How cute! Happy Snapping!!!
How to make a "No Sew" Pacifier Clip with KAM Snaps and an Enamel Clip May 10 2016
Making a "No Sew" Pacifier Clip with KAM Snaps and Enamel Clip
Today, I am making a "No Sew" Pacifier Clip. All the usefulness, no sewing necessary!
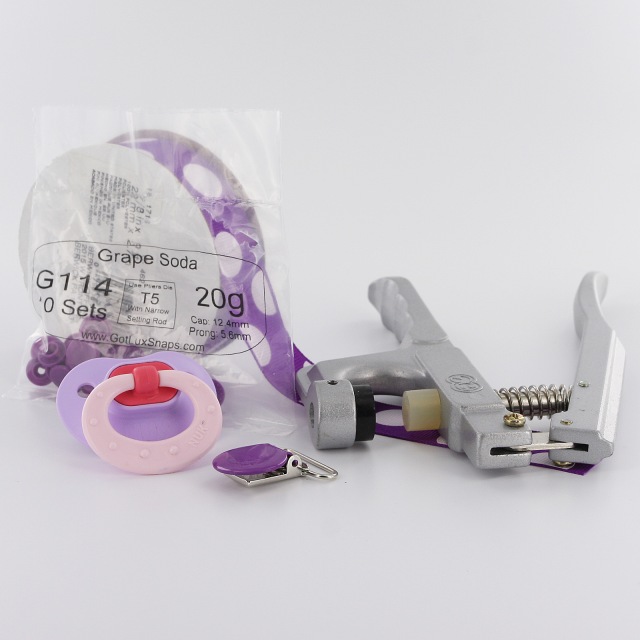
Supplies for a "No Sew" Pacifier Clip:
- Pacifier with Hinged Handle
- 14-15" of 7/8" Grosgrain Ribbon
- 1 Enamel Clip or Plastic Clip
- 2 KAM Snap Sets
- KAM Snap Pliers and Awl
- Fabric Tac
- Lighter or Chef's Torch
Instructions:
1. Choose a 7/8" or 3/4" Grosgrain Ribbon, cut a 14" to 16" length of ribbon. I did 7/8" Grosgrain Ribbon and I cut it 16" long so when it was completed it was approximately 12" long.
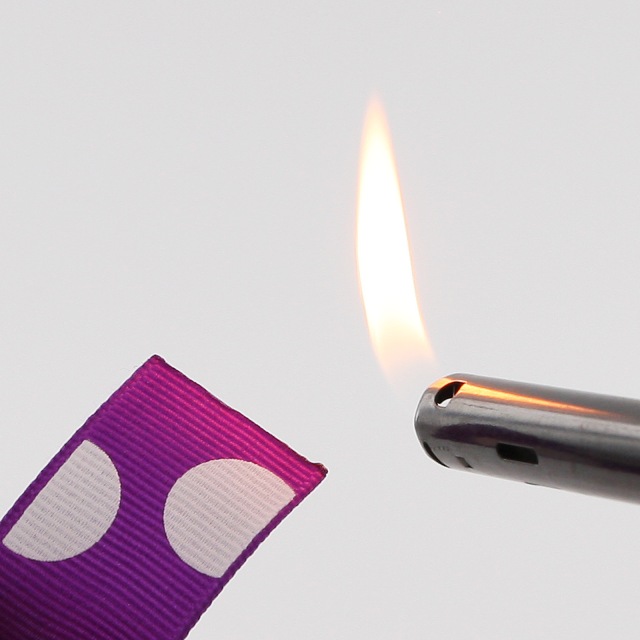
2. The ribbon I was using was made of polyester so I used a lighter to seal the ends of the ribbon so it doesn't fray. (If you are unsure, you may want to practice on a scrap piece if this is your first time or you are unsure of the what the material is made of.)


3. Then I used a bit of Fabric Tac and folded over an 1" of the ribbon back on itself to reinforce the ribbon and pressed it firmly and let it dry. Repeat on the opposite end.

4. Once dry, I installed a Cap and Socket in each end of the ribbon about 1/2" from the edge. I used Size 20 snaps for this tutorial but either Size 20 or Size 16 will work great.

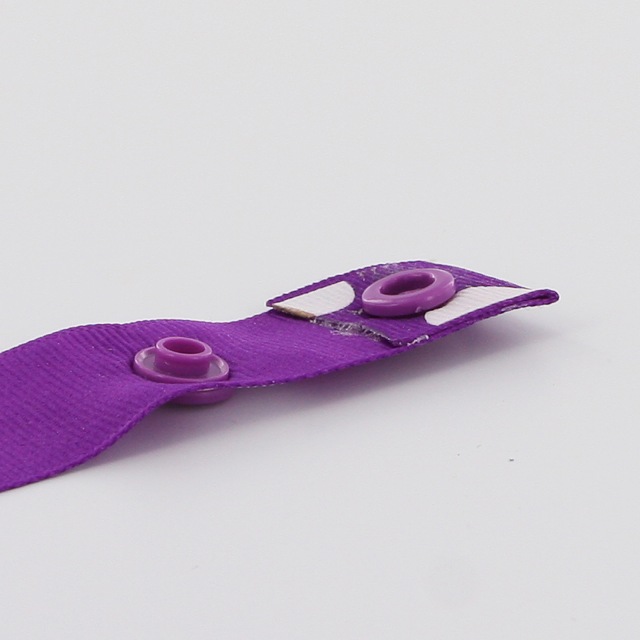
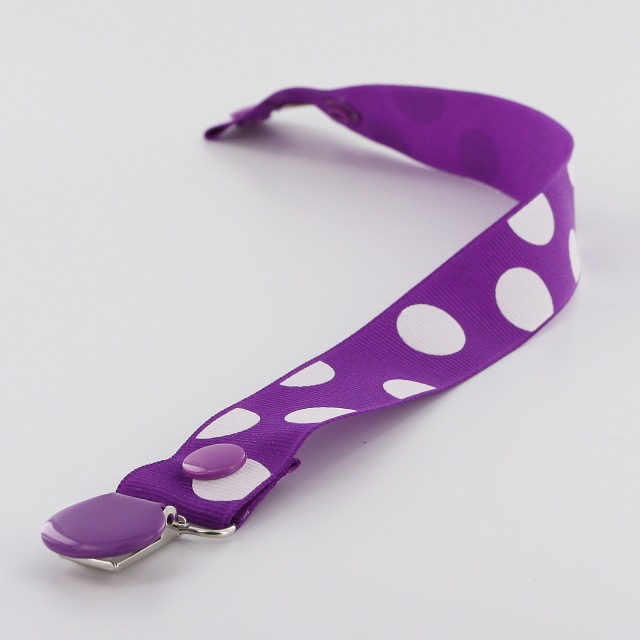
5. On the side that will hold the Enamel Clip I simply folded the ribbon over at the 1" mark and installed a Cap and Stud where it would meet. I, then, feed the Enamel Clip onto the ribbon and snapped it into place. It may have been easier to thread on the pacifier clip before installing any Snap parts but I was able to feed it through without much trouble.
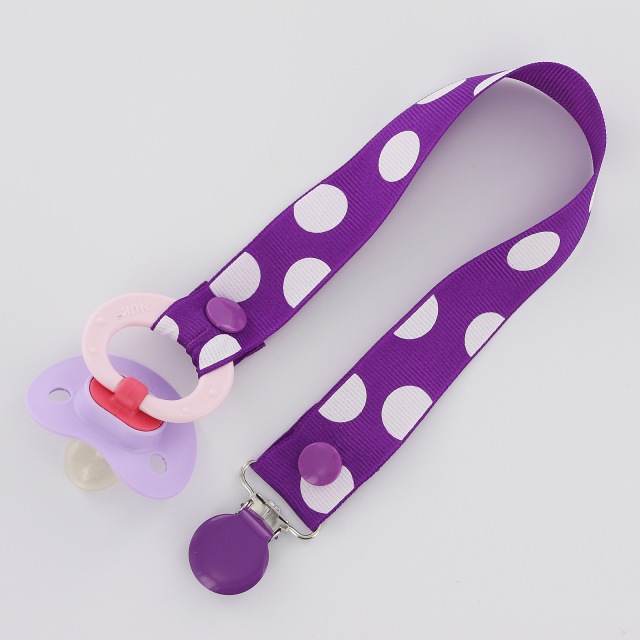
6. Now on the side where the Pacifier will be attached, adjust the internal snap in a comfortable distance to accommodate the width of the handle. I went an additional 1/2" for the Pacifier, I used.
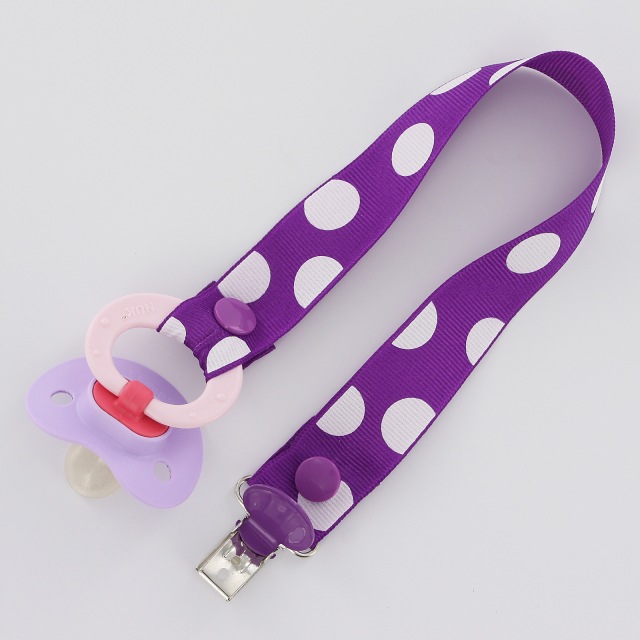
7. Now snap the Pacifier in place, attach to your child's shirt and go.
8. Tada! Happy Snapping!!!
Cover Button FAQs: How To Convert Wire Back To Flat Back Tip #2 April 13 2016
-
Assembling fabric covered buttons is easy and fun but did you know you can convert Wire Back Cover Buttons to Flat Back Cover Buttons in 1 simple step?
- Watch how easy it is below:
I Like Big Buttons! - How To Covert Wire Back To Flat Back
To see other great Fabric Cover Button ideas, visit our DIY Project section here.
I Like Big Buttons! How to remove Plastic Snaps with a Cuticle Cutter (Studs) March 01 2016
How to remove a plastic snap (stud side) with Cuticle Cutters.
Supplies:
- Broken or incorrectly installed plastic snaps
- Cuticle Cutter
Want our KAM Plastic Snap Removal Pliers, shop here.
© ILikeBigButtons.com and I Like Big Buttons Blog, 2016.
I Like Big Buttons! How to remove Plastic Snaps with a Cuticle Cutter (Socket) February 22 2016
How to remove a plastic snap (socket side) with Cuticle Cutters. In most cases, you can reuse the socket if done with care.
Supplies:
- Broken or incorrectly installed plastic snaps
- Cuticle Cutter
Want our KAM Plastic Snap Removal Pliers, shop here.
Crafty Saturday! February 20 2016
Working on a project using ILikeBigButtons.com for a new sweet cousin. Can't wait to meet her!!!
#ilikebigbuttons #sootherblanket #pacifierclip #craftsupplies #lazysaturday #kamsnaps #plasticsnaps

Cover Button FAQs: How To Assemble A Fabric Cover Button Tip #1 February 09 2016
- Assembling fabric covered buttons is easy and fun but here is a handy trick to make it even simpler.
- This tip is great for saving your thumbs or when using slightly thicker fabric.
How To Assemble A Fabric Cover Button Tip #1
To see other great Fabric Cover Button ideas, visit our DIY Project section here.
Valentine's Day Fabric Cover Button Badge Reels February 04 2016
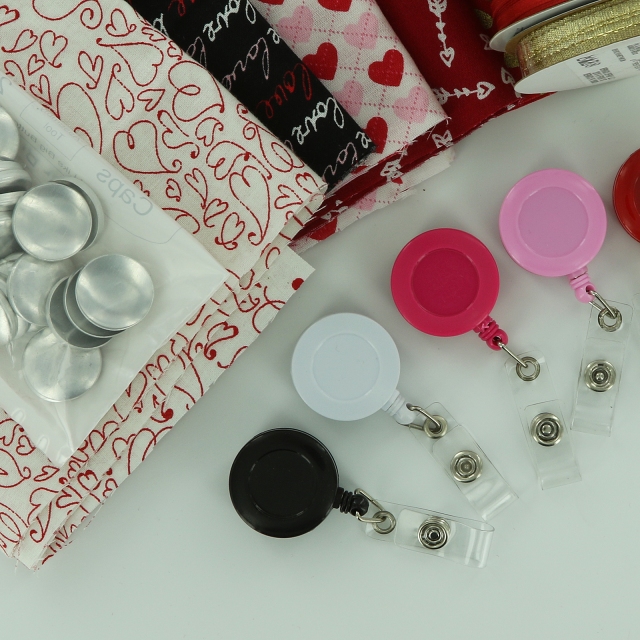
Use these adorable Valentine's Day Badge Reels to hold your ID for work, school, or play. Enjoy!
Supplies:
- 1 Completed Flat Back Fabric Cover Button (Size 45 sits on top of Badge Reel, Size 60 rest over Badge Reel)
- 1 Badge Reel
- E6000 or comparable adhesive
- Sand Paper

Steps:
1. Follow these instructions to make Flat Back Fabric Covered Buttons.

2. Lightly scuff the top of the Badge Reel so glue will adhere better (not essential but recommended).
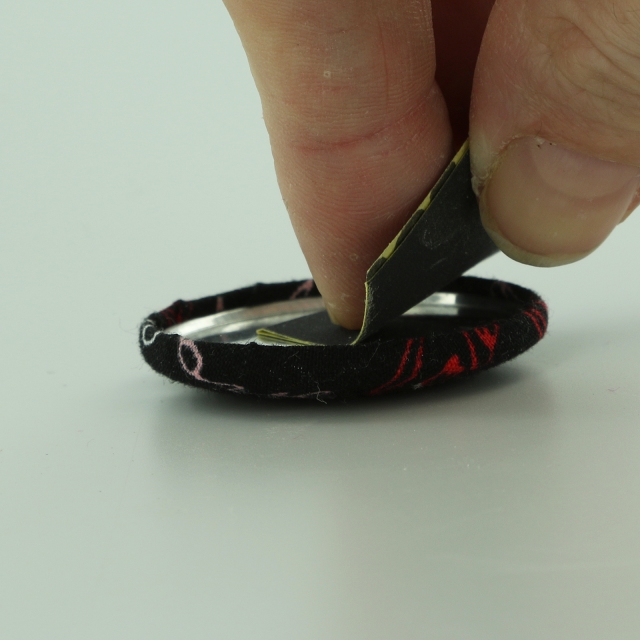
3. Lightly scuff the back of the Cover Button so glue will adhere better (not essential but recommended).
4. Clean both surfaces of dust.
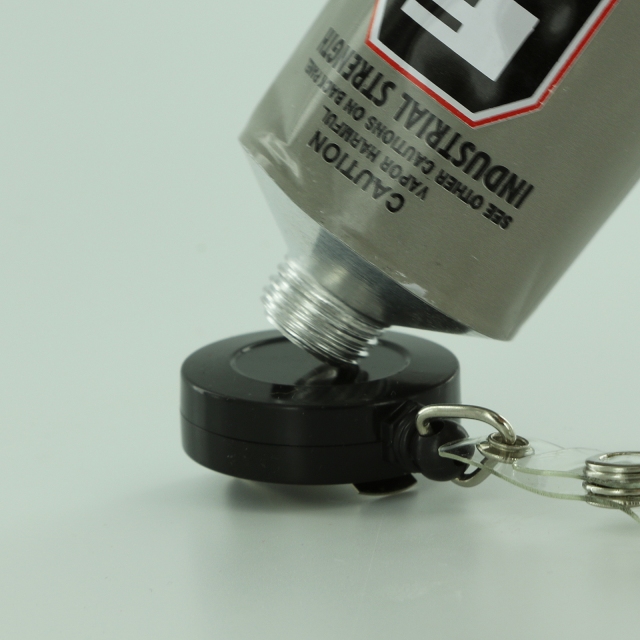
5. Apply E6000 to back of Cover Button or Badge Reel.

6. Press into place over the face of the Badge Reel and remove any extra Adhesive.
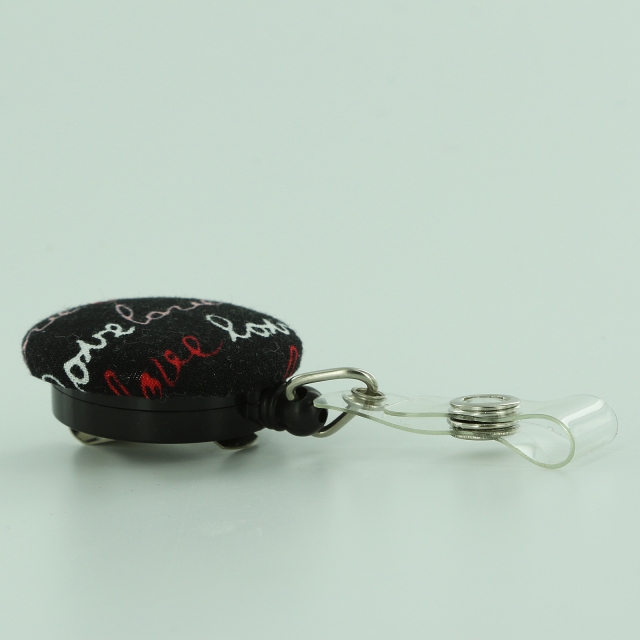
7. Let dry and enjoy.
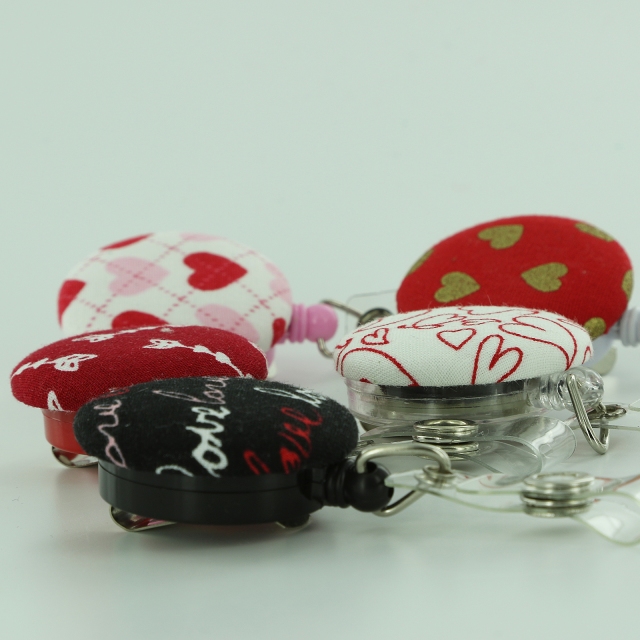
8. Tada!

View Full Tutorial, plus many other great Fabric Cover Button ideas here.
Valentine's Day Fabric Cover Button Barrettes January 27 2016
Wear these adorable Snap Barrettes to match or accent your favorite outfit for Valentine's Day or dress up your favorite t-shirt and jeans for an afternoon outing. Enjoy!
Supplies:
- 1-2 Completed Flat Back Fabric Cover Button (Choose your size, Size 20 through Size 36 all work great, size depends on the statement you want to make)
- 2 Snap Barrettes
- E6000 or comparable adhesive


Steps:
1. Follow these instructions to make Flat Back Fabric Covered Buttons.

2. Lightly scuff the back of the Cover Button so the glue will adhere better (not essential but recommended).
3. Clean both surfaces of dust.
4. Apply E6000 to back of Cover Button.

5. Press Snap Barrette into place and remove any extra Adhesive. On smaller sized Cover buttons center on the glue pad, as they increase in size adjust glue pad accordingly.

6. Let dry and enjoy.
7. Tada!

View Full Tutorial, plus many other great Fabric Cover Button ideas here.
Valentine's Day Fabric Cover Button Jumbo Paper Clip Bookmarks January 19 2016
Use these adorable Paper Clip Bookmarks to accent a Valentine for your special loved one or hold your place in your favorite book or cookbook. Enjoy!
Supplies:
- 1 Completed Flat Back Fabric Cover Button (Attach size 36 (7/8" - 23 mm), size 45 (1 1/8" - 28 mm), or size 60 (1 1/2" - 38 mm) flat back cover buttons.)
- 1 Jumbo Paper Clip
- 1 6" Piece of Ribbon
- E6000 or comparable adhesive


Steps:
1. Follow these instructions to make Flat Back Fabric Covered Buttons.
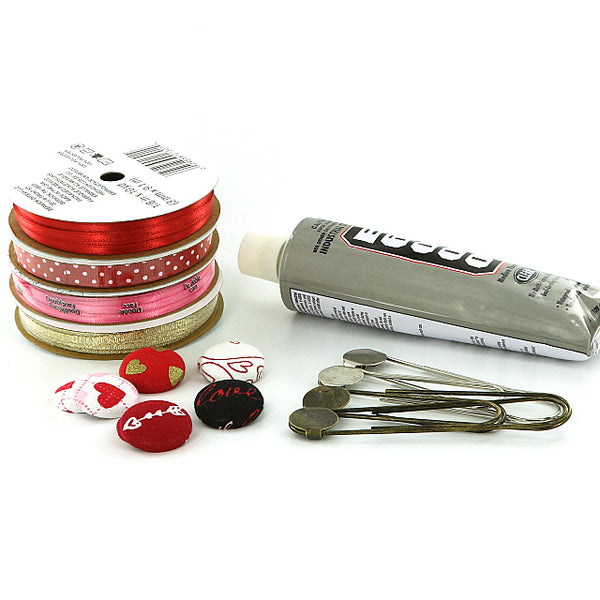
2. Make sure the surfaces of the Cover Button back and Paper Clip gluepad are clean and free of oil.
3. Apply E6000 to the back of the Cover Button.

4. Press into place over the glue pad on the Paper Clip at the desired height and remove any extra Adhesive. The bigger the Cover Button the higher you will want to center the cover button.

5. Cut a 6" piece of Ribbon and knot it on the side of the Paper Clip. Slide it up against the Cover Button. Straighten and cut ends at an angle at the desired length.

6. Let dry and enjoy.

7. Tada!

View Full Tutorial, plus many other great Fabric Cover Button ideas here.
An I Like Big Buttons Christmas! Idea #7: 3 Ways To Make Unpaper Towels with KAM Snaps December 21 2015
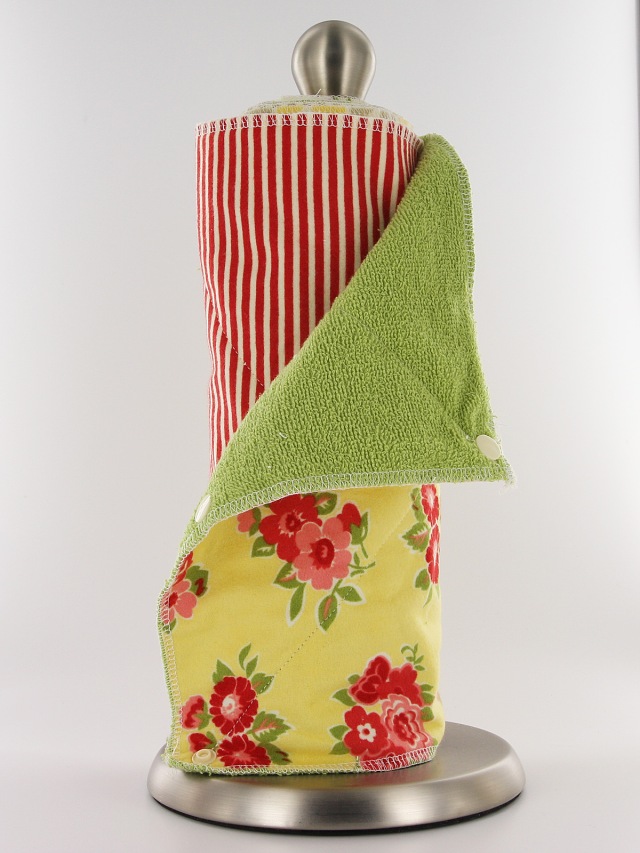
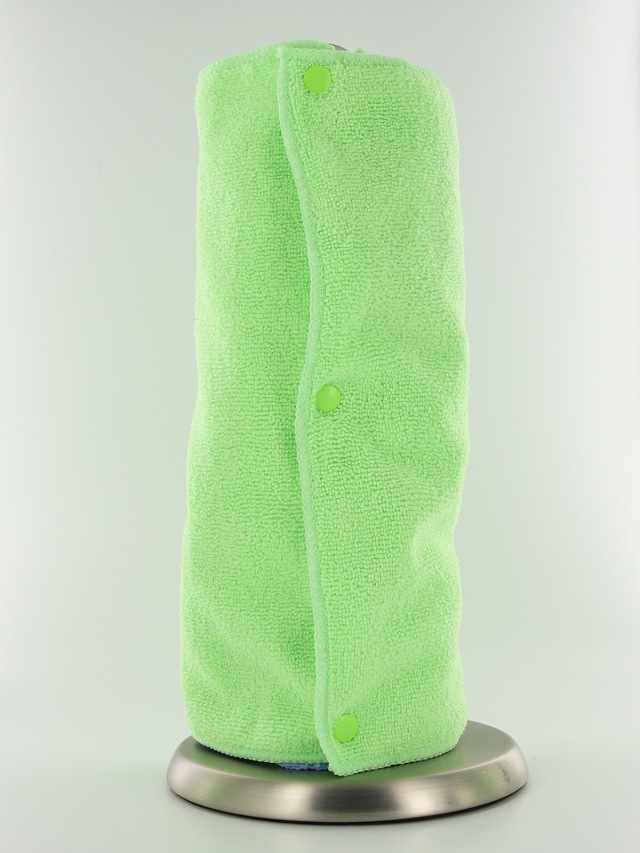
Gift Idea #7: Unpaper towels make a great, attractive, and functional gift for your loved ones. We have 3 easy tutorials that show you how to make them. Standard Sewing Machine, Serger, or "No Sew" just pick your skill level and you can have these decorative and functional unpaper towels in your kitchen.
Supplies:
- 12 11"x11" Flannel squares
- 12 11"x11" Terry Cloth or Micro Fiber squares
- 72 KAM Snap Sets
- Rotary Cutter or Scissors
- Cutting Mat
- Serger
- KAM Snap Pliers and Awl
Instructions:
- Choose your flannel, I went to Etsy, of course, and found almost too many choices :). I finally settled on Moda's Marmalade collection. See More
#ilikebigbuttons #kamsnaps #plasticsnaps #unpapertowels #christmasideas

An I Like Big Buttons Christmas! Idea #6: How to make a Sensory Ribbon Baby Tag Blanket with KAM Snaps & Pacifier Supplies December 16 2015
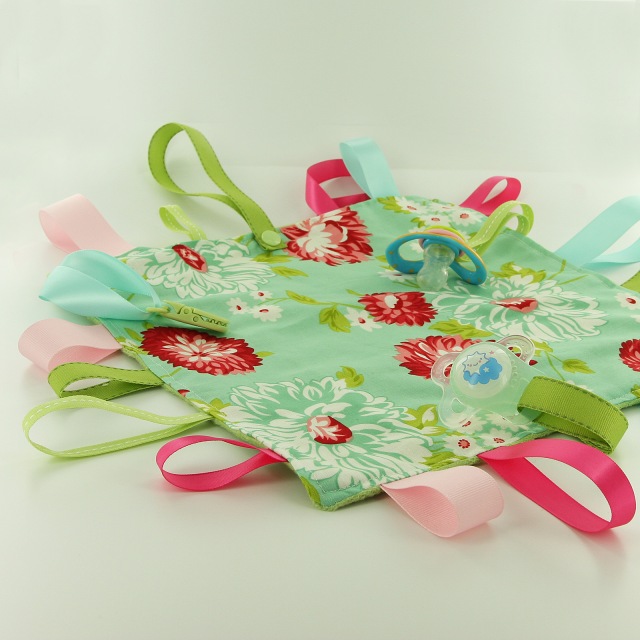
Gift Idea #6: Fun and functional, Sensory Ribbon Tag Blanket with BONUS accessories make a great gift for any sweet little person in your life. Use KAM Snaps or a KAM Pacifier Clip to make your blanket attachable or unthrowable :). Add KAM Snaps, MAM Pacifier Rings or Pacifier O-Rings to add a Pacifier holder to your tag blanket. I used them all :P to show you the different options.
Supplies:
- 2 12″x12″ Pieces of Fabric (1 Cotton and 1 Minky)
- 8x 5″ Piece of Ribbons (mix of Grosgrain and Satin)
- 7x 8" Piece of Ribbons (mix of Grosgrain and Satin)
- 1x 12" Piece of Ribbon
- 1 KAM Snap Set
- KAM Snap Pliers and Awl
- 1 KAM Pacifier Clip
- 1 MAM Pacifier Ring
- 1 Pacifier O-Ring
- Standard Sewing Machine
Instructions:
1. Cut the Fabric and Minky material to 12"x12" squares and cut your mix of ribbon 8 in 5" lengths, 7 in 8" lengths, and 1 in 12" length. See More
#ilikebigbuttons #kamsnaps #plasticsnaps #sootherblanket #christmasideas

An I Like Big Buttons Christmas! Idea #5: How to Make Key Fob Hardware Wristlets December 09 2015

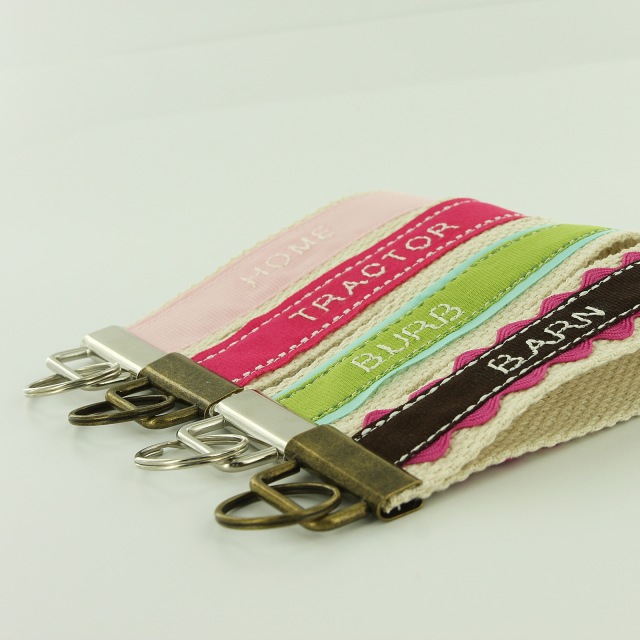
Gift idea #5: Key Fob Hardware Wristlets are a great useful and personal gift to give. Key Fob Hardware is simple to use and produces amazing results. Just add your fabric, ribbon, webbing, or embroidery for an instant, elegant wristlet. Check it out!
Four fun and simple tutorials:
- Fabric and Cotton Webbing Wristlet
- Ribbon and Cotton Webbing Wristlet
- Making a Smart Phone Case with Wristlet using Key Fob Hardware, KAM Snaps and PDF Pattern
- Making a Embroidered Key Fob Hardware Wristlet
#ilikebigbuttons #keyfob #keyfobwristlets #christmasideas

An I Like Big Buttons Christmas! Idea #4: How To Make Fabric Cover Button Christmas Cards December 04 2015

Gift idea #4: These charming Christmas cards are adorable and easy to make using Fabric Cover Buttons. You could embellish these additionally by make the Cover Buttons actual earrings with our Earring Supplies: Earring Posts or Clip Ons and it could double as a gift and Christmas Card. Check it out!
Supplies:
- Flat Back Cover Buttons (I used Size 20, Size 24, and Size 30 Cover Buttons)
- Cover Button Assembly Tools
- Cover Button Templates
- Fabric Scraps
- E6000 Adhesive or Hot Glue
- Sharpie Permanent Marker
- Card Stock or Pre-Made Card
Instructions:
1. Cut your fabric scrap. You will want a circle that is about twice the diameter of your button blank or use one of our handy Plastic Cover Button Templates. See More
#ilikebigbuttons #tutorials #coverbuttons #christmas #christmascards

An I Like Big Buttons Christmas! Idea #3: How To Make Fabric Cover Button Earrings December 01 2015
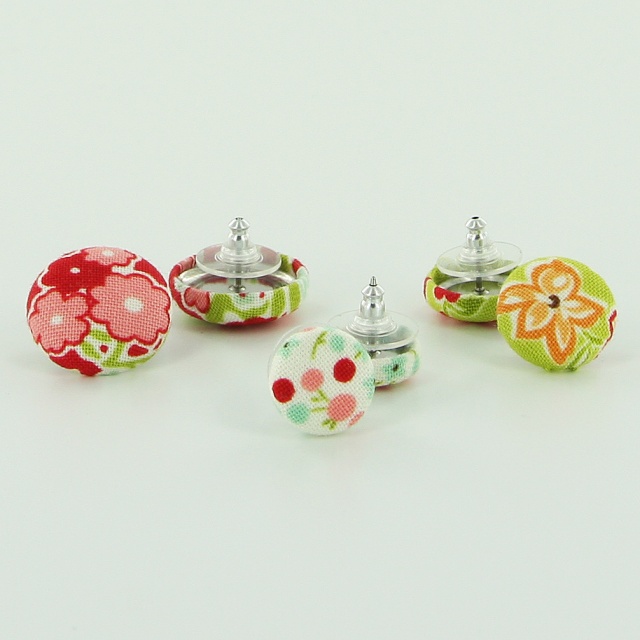
Gift idea #3: Super easy with a lot of impact these cute Earrings using Fabric Cover Buttons and Earring Backs or Clip On Earring Backs. I made these as gifts for some of my trendy cousins last Christmas and they loved them. Easy to embellish, monogram or personalize and add extra pizzazz to your loved ones attire!
Supplies:
- 2 Completed Flat Back Fabric Cover Button (Choose your size, Size 20 through Size 60 all work great, size depends on the statement you want to make)
- 1 set of Earring Post & Backs
- E6000 or comparable adhesive
Steps:
- Follow these instructions to make Flat Back Fabric Covered Buttons. See More
Pin for Later:
#ilikebigbuttons #earrings #tutorials #coverbuttons #coverbuttonearrings
An I Like Big Buttons Christmas! Idea #1: How to make a Bandana Bib with KAM Snaps and a PDF Pattern November 13 2015

Gift idea #1: One of our most popular tutorials, Bandana Bibs are a great gift for those little droolers and mess makers in your life or as an outfit accessory. So cute! I, also, used our newly stocked Heart Shaped KAM Snaps for added pizazz, check it out!
Supplies:
- Fabrics of your choice
- 1 Heart Shaped KAM Snap Set
- KAM Snap Pliers and Awl
- Bandana Bib PDF Pattern (may need to adjust for your child's size or add more KAM Snaps settings)
- Standard Sewing Machine
Instructions:
- Download the Bandana Bib PDF Pattern. Print out the pattern making sure the 1″ square in the corner measures 1″ square when printed that will indicate the pattern is the right size. ... See More
How to make a Snow Queen Inspired Costume with KAM Snaps October 27 2015
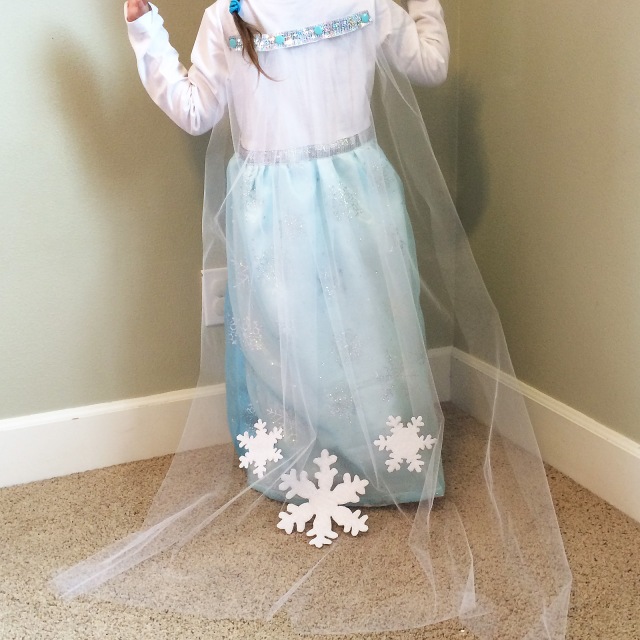
Last year I made a set of Snow Queen Inspired Costumes for my littlest girls. My preschool aged daughter is obsessed with Frozen and Elsa as all girls her age. She told me the other day, "Mama, Elsa and I are good friends because we both LOVE tutus." :) She, of course, insisted that she needed a Elsa dress for Halloween and her little sister an Anna dress but I, in my wisdom, decided if I had to make 2 dresses they would be full size and mini me sized version of the same dress with KAM Snaps. I think they turned out great and I made them just big enough that they work this year too. Yay, me :)!
Supplies:
- 1 Yard of Snow Queen Snowflake Organza
- 1 Yard of White Fabric
- 1 Yard of Tulle (White)
- 4 Sheets of Felt (White)
- Silver Sequined Ribbon
- Teal thread
- 4 KAM Snap Sets
- KAM Snap Pliers and Awl
- Serger Sewing Machine
- Standard Sewing Machine
- Long Sleeve T-Shirt (we went with White)

It's a Crafty Day!!! What are you working on right now? October 13 2015
It's a crafty day!!! It's that time of year again. I am busy making Soother Blankets for our church's Operation Christmas Child shoe boxes :).
I am turning clearance winter fleece blankets into 18x18 blankets to wrap a little stuffed animal or dolls in.
What are you working on today?
#operationchristmaschild #samaritanspurse #sootherblankets

Because We Love Color And We Love Choices!!! How We Prepare Our Plastic Snaps And Why October 08 2015
For all our new friends and followers of I Like Big Buttons!, it seemed like a great time to introduce you to our amazing Plastic Snaps!!! For those of you who have been with us for a long time, here is a refresher.
We carry a variety of package deals for our snaps from 10 sets, 25 sets, 100 sets up to thousands of KAM snaps with and without pliers or professional press all at a great price. We have a listing for just about everyone at the price range and quantity you desire.
25 packs sets came to be largely for cloth diapers. Most customers that replace Velcro on cloth diapers with snaps have numerous diapers in varying colors. Many found purchasing 100 of each color wasteful, as they ended up with 75% of their snaps left over.
We provide the best of both worlds, smaller packs to those that want greater variety and larger packs for those looking to use snaps in bulk.
Some of these reasons we offer these great options include:
*A large demand from customers for just 25 snaps to convert or complete a single diaper.
*An equally large demand for “just a sampling of every color”, which gave birth to our sets of 10 and Starter Packs.
* More compact, informational packaging that includes instructions about which Die and Rod to use.
* We also offer individual parts in quantities of 100 and 1000 in all of KAM Plastic Snaps 130+ colors.
If you aren't sure how to jump into plastic snaps, we also carry starter packs including multi-packs of 10 or 25 sets of snaps. If you are new to snapping, we have starter packs with plastic snap pliers, awl, and an instructional DVD. These Starter Packs are a great way to get addicted :). We have 18 preset themes including Rainbow Spectrum, Pastel Spectrum, Baby Boy Blue, Baby Girl Pink, Earth Tones, Military, and many others. We also offer an option to choose your own colors. You can pick from any of KAM Plastic Snaps 130+ fun colors. Check out our KAM Snaps selection and use Coupon Code: SnapLove for 10% off your order.
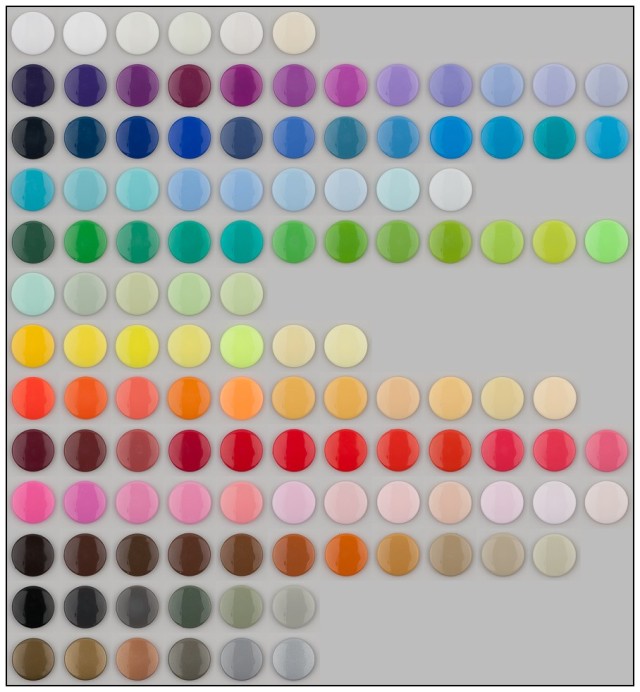
Here is our chart of available colors, we carry over 130+ great KAM Plastic Snap colors.
Have a great day!
I Like Big Buttons!


Adorable Pacifier Clips from House Of Jars May 14 2015
Super cute, pacifier clips from House Of Jars! Thank you for sharing your adorable craftiness! Check out their Etsy shop for more cute options using I Like Big Buttons! supplies.

How We Prepare Our Plastic Snaps And Why April 28 2015
For all our new friends and followers of I Like Big Buttons, it seemed like a great time to introduce you to our amazing Plastic Snaps!!! For those of you who have been with us for a long time, here is a refresher.
We carry a variety of package deals for our snaps from 10 sets, 25 sets, 100 sets up to thousands of KAM snaps with and without pliers or professional press all at a great price. We have a listing for just about everyone at the price range and quantity you desire.
25 packs sets came to be largely for cloth diapers. Most customers that replace Velcro on cloth diapers with snaps have numerous diapers in varying colors. Many found purchasing 100 of each color wasteful, as they ended up with 75% of their snaps left over.
We provide the best of both worlds, smaller packs to those that want greater variety and larger packs for those looking to use snaps in bulk.
Some of these reasons we offer these great options include:
*A large demand from customers for just 25 snaps to convert or complete a single diaper.
*An equally large demand for “just a sampling of every color”, which gave birth to our sets of 10 and Starter Packs.
* More compact, informational packaging that includes instructions about which Die and Rod to use.
* We also offer individual parts in quantities of 100 and 1000 in all of our 130+ colors.
Check out our KAM Snaps selection and use Coupon Code: SnapLove for 10% off your order.
Here is our chart of available colors, we carry over 130+ great colors.
Have a great day!
I Like Big Buttons!


How To Remove a Plastic Snap (stud) with KAM Snap Removal Pliers March 19 2015
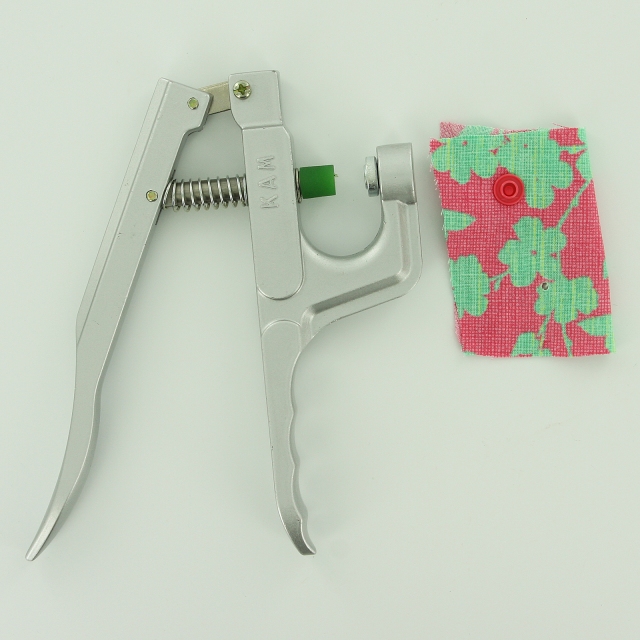
How to remove a plastic snap (stud side) with KAM Snap Removal Pliers.
Supplies:
- Broken or incorrectly installed plastic snaps
- KAM Snap Removal Pliers

Instructions:
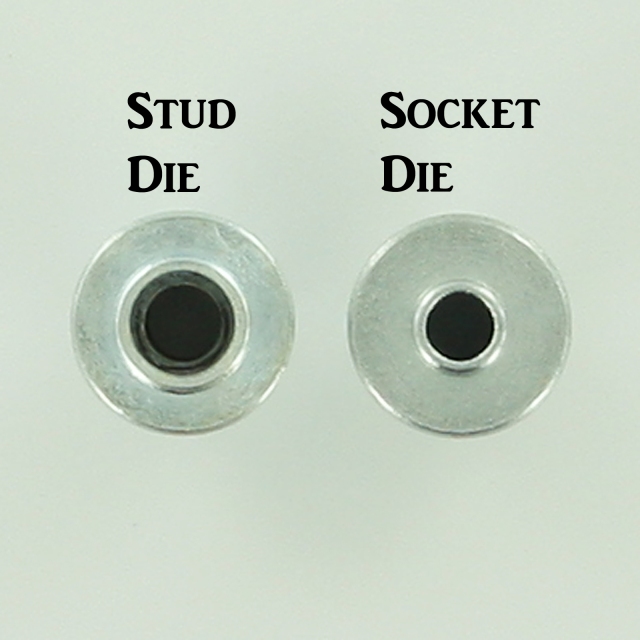
1. With the die die installed, locate the broken snap.
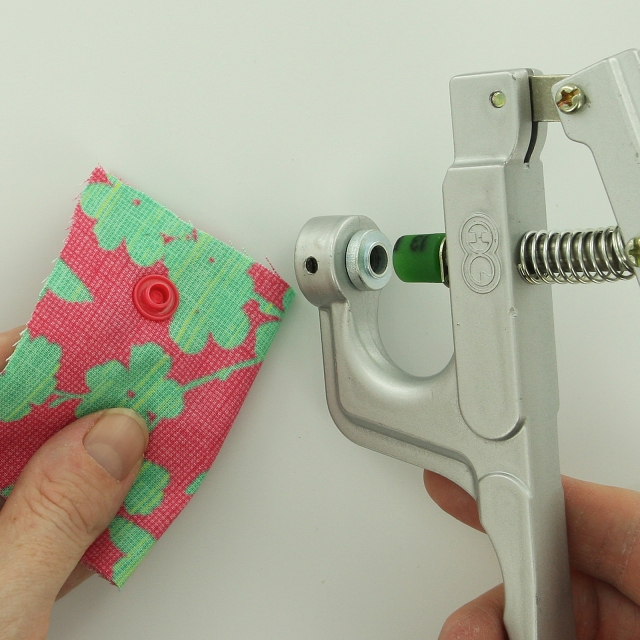

2. Turn snap cap side up with stud facing down.
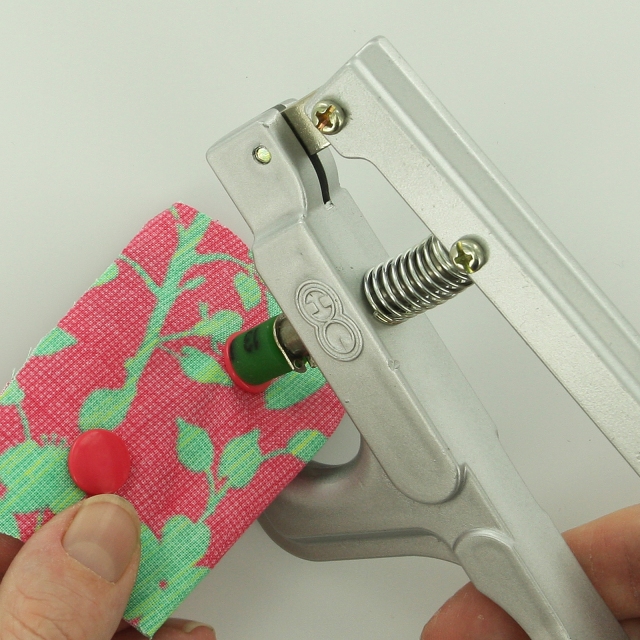
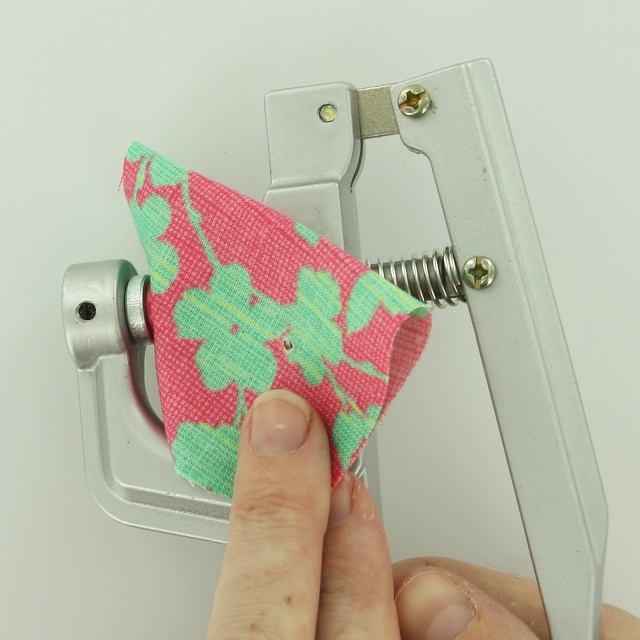
3. Place broken snap in pliers, stud face down. The stud will settle in the raised dome in die.

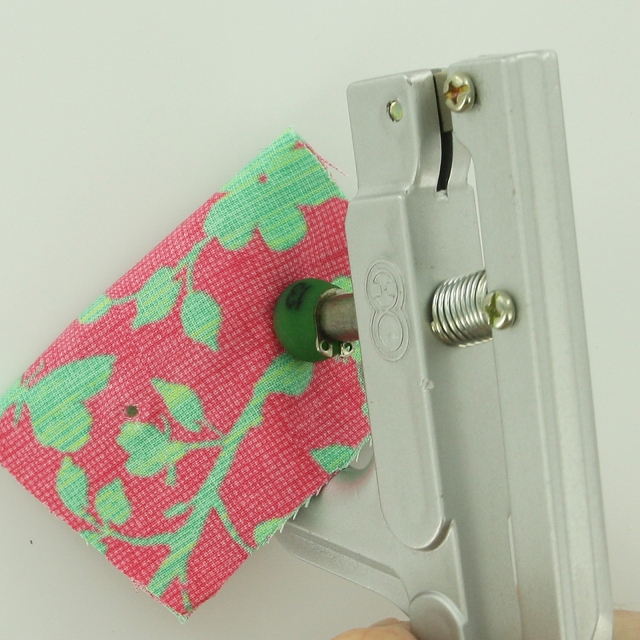
4. Apply firm pressure to the snap with the KAM Snap Removal Pliers. You will hear a pop when the snap has broken.

5. This is what the cap and stud will look like once they have been broken.

6. Tada! It is that easy!!!
How To Remove a Plastic Snap (socket) with KAM Snap Removal Pliers February 25 2015
How to remove a plastic snap (socket side) with KAM Snap Removal Pliers.
Supplies:
- Broken or incorrectly installed plastic snaps
- KAM Snap Removal Pliers

Instructions:
1. With the socket die installed, locate the broken snap.
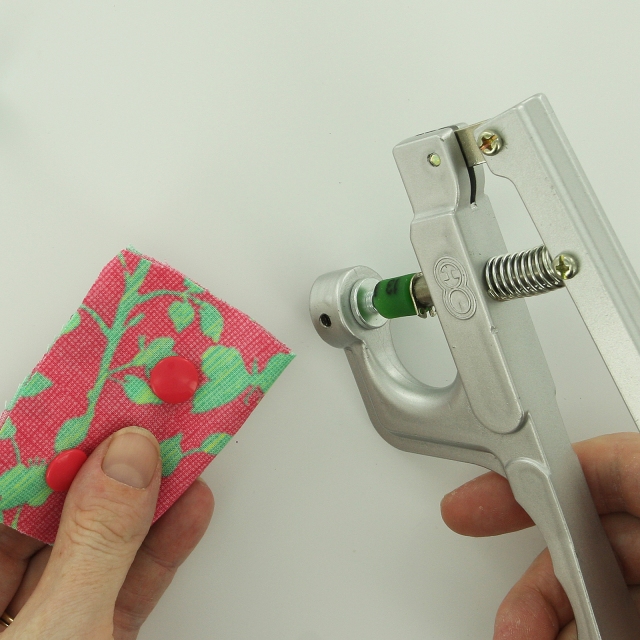
2. Turn snap cap side up with socket facing down.
3. Place broken snap in pliers, socket face down. The socket will settle over the raised dome in die.
4. Apply firm pressure to the snap with the KAM Snap Removal Pliers. You will hear a pop when the snap has broken.
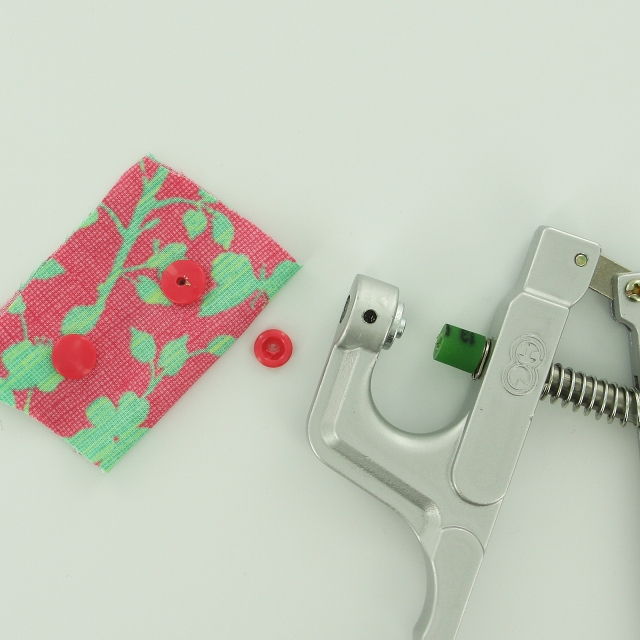
5. This is what the cap and socket will look like once they have been broken.
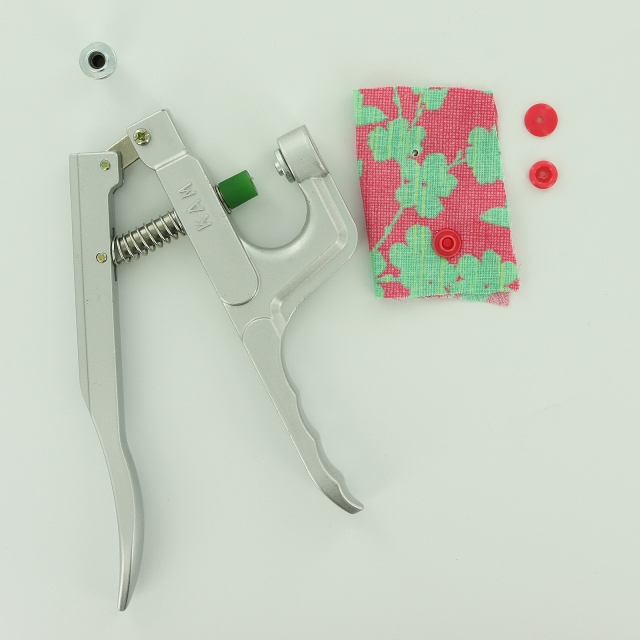
6. Tada! It is that easy!!!
Lace & Fabric Cover Button Earrings February 09 2015
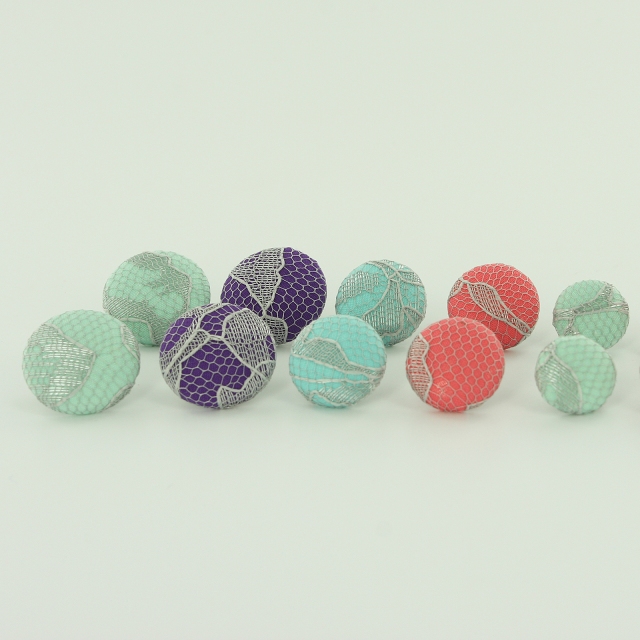
Today, I am working on some cute Lacy Earrings using Fabric Cover Buttons*. I made these as gifts for some of my trendy cousins for Christmas and they loved them. Check them out!
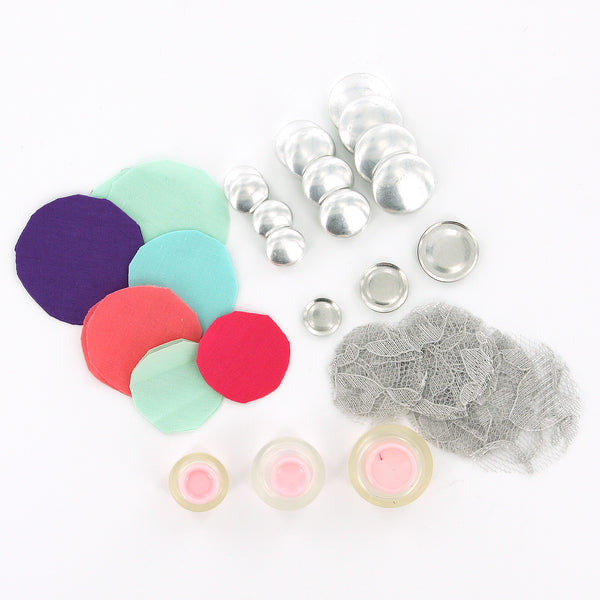
Supplies:
- Flat Back Cover Buttons (I used Size 24, Size 30, and Size 36 Cover Buttons)
- Cover Button Assembly Tools
- Cover Button Templates
- Fabric Scraps
- Lace Scraps
- E6000 Adhesive or Hot Glue
- Sharpie Permanent Marker
- Surgical Stainless Steel Earring Posts and Backs


Instructions:
1. Cut your fabric scrap. You will want a circle that is about twice the diameter of your button blank or use one of our handy Plastic Cover Button Templates.

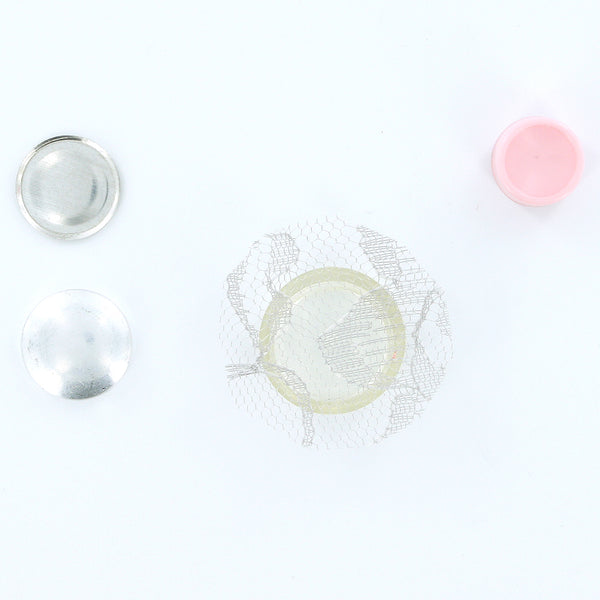

2. Put your lace piece in the larger assembly tool piece (RIGHT SIDE DOWN). Then, put your fabric piece in the larger assembly tool piece (RIGHT SIDE DOWN). When you look into the tool you want to see the back of the fabric.

3. Place the button front (the domed piece) on top of the fabric. Leave the fabric edges hanging out.

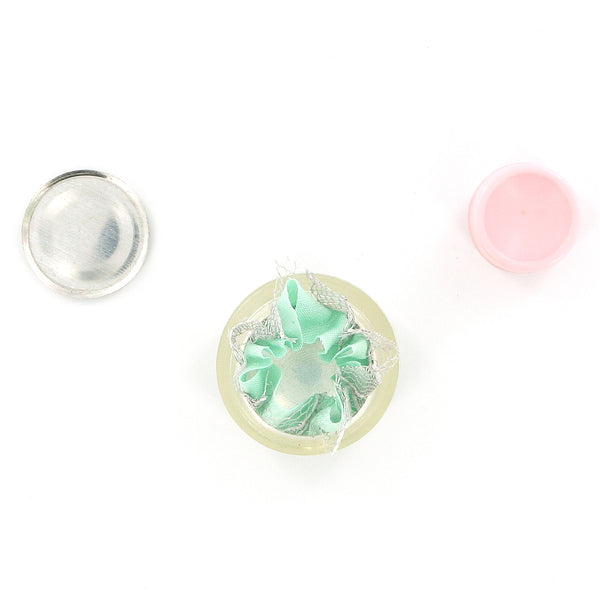

4. Press the Cover Button edges down into the tool.

5. Place the back cover button piece on top of your fabric and button front. If the cover button will be subject to repeated tugging from the back, you may want to add a little e6000 adhesive before attaching the back.

6. Take the smaller piece of the assembly tool and with the open side down place it on the button back.
7. Press down. You may hear a pop when the last bit of the button back slips into place. If you take the tool out and the button is not completely secured, just put it back in and press down again.

8. When you take the small assembly tool piece off, the fabric edges will be secured underneath the button back.


9. Remove the button from the larger assembly tool piece.

10. Tada! First step complete.


11. Lightly scuff the back of the Cover Button so the glue will adhere better (not essential but recommended).

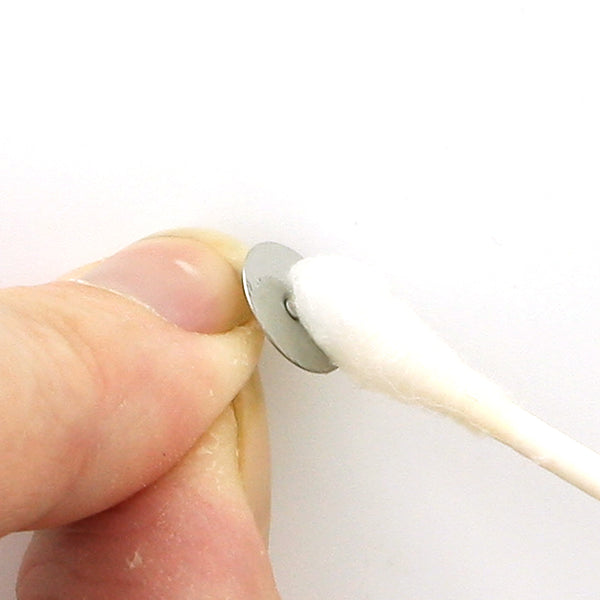
12. Clean both surfaces of dust. I used rubbing alcohol and a cotton swab.

13. Apply E6000 to back of Cover Button or Earring Post.

14. Press Earring Post into place and remove any extra Adhesive. On smaller sized Cover Buttons center the post, as they increase in size adjust post towards top.

15. Let dry, add Earring Backing/Nut, and enjoy.

16. Tada! You could also make the Cover Button Clip Ons Earrings and these are great a gifts or as products for your shop.
New Spring Colors!!! Enamel Clips, More Colors January 28 2015
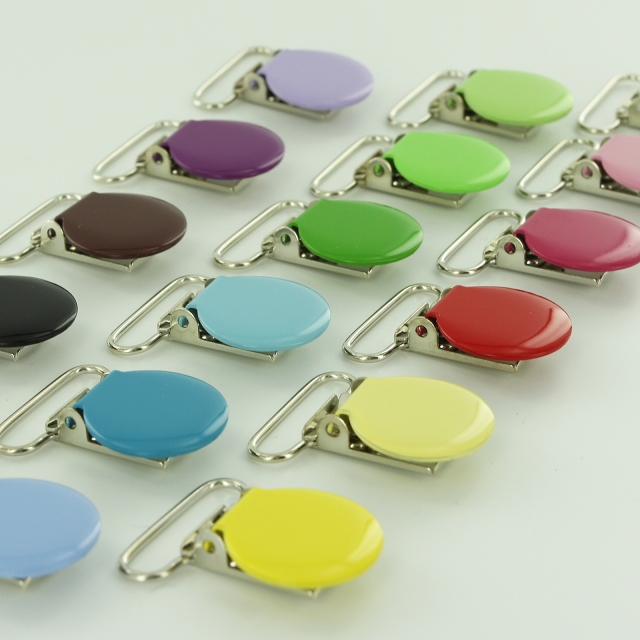
We now carry Enamel Pacifier Clips (metal) in 20+ colors!!! Lead Free and Nickel Free Enamel Clips for your craft and clip projects.
We now carry:
- B45 - Silver Colored (non-enameled)
- B5 - Black
- G89 - Milk Chocolate
- G72 - Chocolate
- G114 - Grape Soda
- B41 - Violet
- G79 - Lavender
- B48 - Periwinkle
- B46 - Teal
- B59 - Pool Blue
- B14 - Spring Green
- B50 - Lime Green
- G65 - Grasshopper (Light Green)
- G116 - Lemon Zest
- G76 - Butter (Light Yellow)
- B38 - Deep Red
- G97 - Sassy
- G122 - Fuchsia
- B57 - Medium Pink
- B3 - White (enamel)
The Enamel Pacifier Clips, of course, match up with our I Like Big Buttons! KAM Snaps to make coordinating projects easier. If you haven't had a chance to check them out, please, see them on our website.
We also have Pacifier Clip Tutorials for your use.


Have you seen our Professional Snap Press at work? January 28 2015
It makes installing Plastic Snaps a breeze! I am in love with it and we carry them in two custom colors Bright Pink and Light Teal.
They are 10% on our website right now with Free Shipping to the US on orders over $70:
#ilikebigbuttons #kamsnaps #plasticsnaps #snappress


Fabric Cover Button Christmas Card Tutorial December 12 2014
Fabric Cover Button Christmas Cards
Today, I am working on some cute Christmas cards using Fabric Cover Buttons*. Check them out!
*Just a reminder our Cover Buttons are 10%OFF on our website today using Coupon Code: COVERBUTTON10
Supplies:
- Flat Back Cover Buttons (I used Size 20, Size 24, and Size 30 Cover Buttons)
- Cover Button Assembly Tools
- Cover Button Templates
- Fabric Scraps
- E6000 Adhesive or Hot Glue
- Sharpie Permanent Marker
- Card Stock or Pre-Made Card


Instructions:
1. Cut your fabric scrap. You will want a circle that is about twice the diameter of your button blank or use one of our handy Plastic Cover Button Templates.

2. Put your fabric piece in the larger assembly tool piece (RIGHT SIDE DOWN). When you look into the tool you want to see the back of the fabric.


3. Place the button front (the domed piece) on top of the fabric. Leave the fabric edges hanging out.

4. Press the cover button edges down into the tool.

5. Place the back cover button piece on top of your fabric and button front. If the cover button will be subject to repeated tugging from the back, you may want to add a little e6000 adhesive before attaching the back.

6. Take the smaller piece of the assembly tool and with the open side down place it on the button back.
7. Press down. You may hear a pop when the last bit of the button back slips into place. If you take the tool out and the button is not completely secured, just put it back in and press down again.

8. When you take the small assembly tool piece off, the fabric edges will be secured underneath the button back.


9. Remove the button from the larger assembly tool piece.

10. Tada! First step complete.

11. Using a ruler, I made 8 straight lines of varying lengths. Then I drew a bow on top of each and a small ornament top.


12. Then in your best print write Merry Christmas. Who else doesn't like their own handwriting :P ? I need to practice my pretty cursive more often.

13. I think it turned out lovely. You could also make the Cover Buttons actual earrings with our Earring Supplies: Earring Posts or Clip Ons and it could double as a gift and Christmas Card.
30 Days of KAM Snaps and Beyond!!! KAM Snap Felt Christmas Ornaments December 10 2014
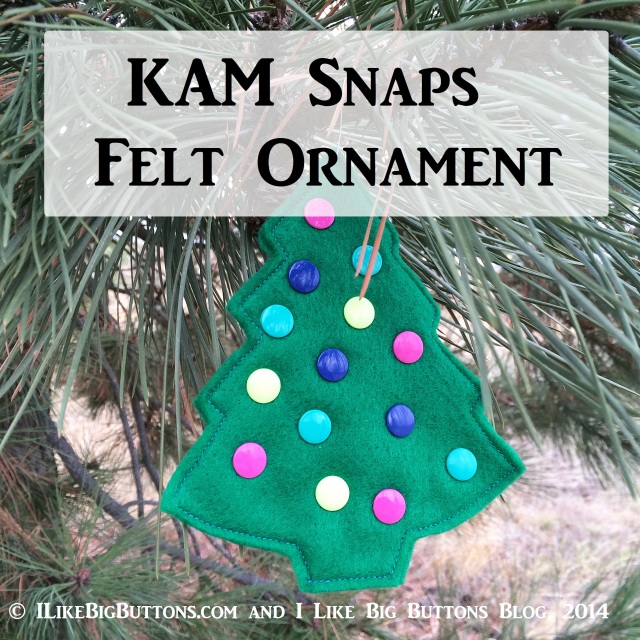
KAM Snap Felt Christmas Ornaments
Day #41
Today I am making some child-proof Christmas ornaments with KAM Snaps. With lots of little helpful hands in my house our Christmas tree needs some durable and cute ornaments. These ornaments remind me of ones my mom and dad had on our tree in our curious stages :). KAM Snap Felt Christmas Ornaments to the rescue!!!
Supplies:
- A couple Sheets of Colored Felt
- KAM Snap Caps and Sockets or Studs
- KAM Snap Pliers and Awl
- Standard Sewing Machine
- Scissors


Instructions:
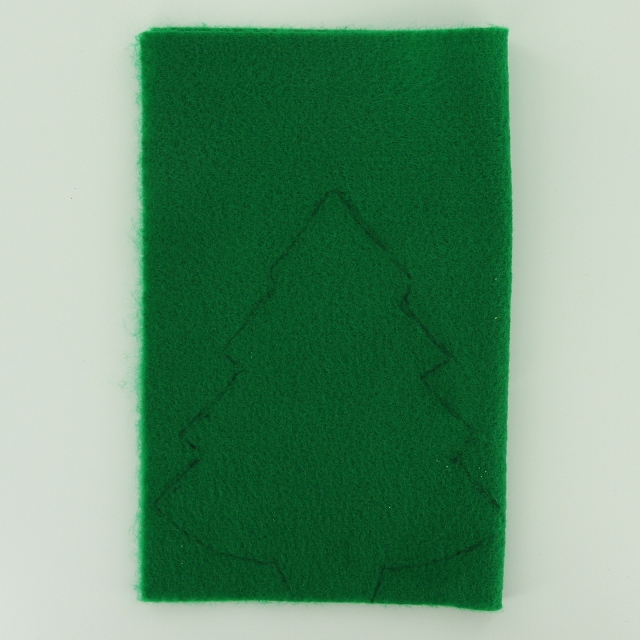
1. Trace the shapes that you want on your felt. I used large cookie cutters to give me the general shape. I folded the felt in half and cut out double of each shape.
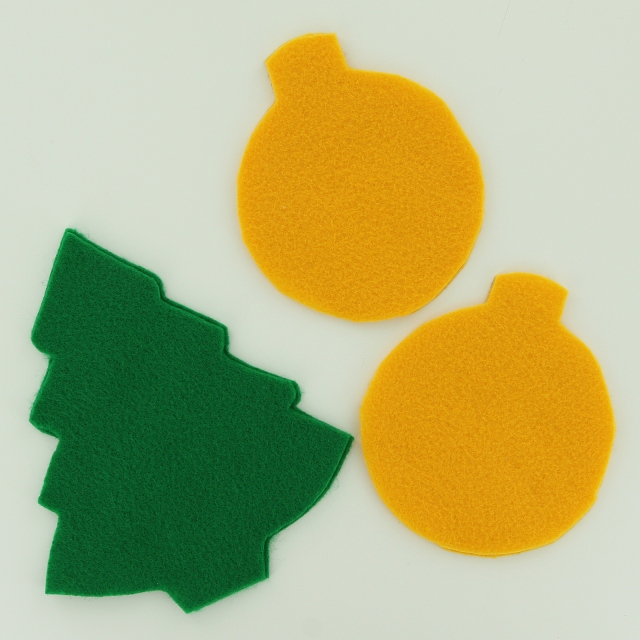
2. Here is how they turned out.
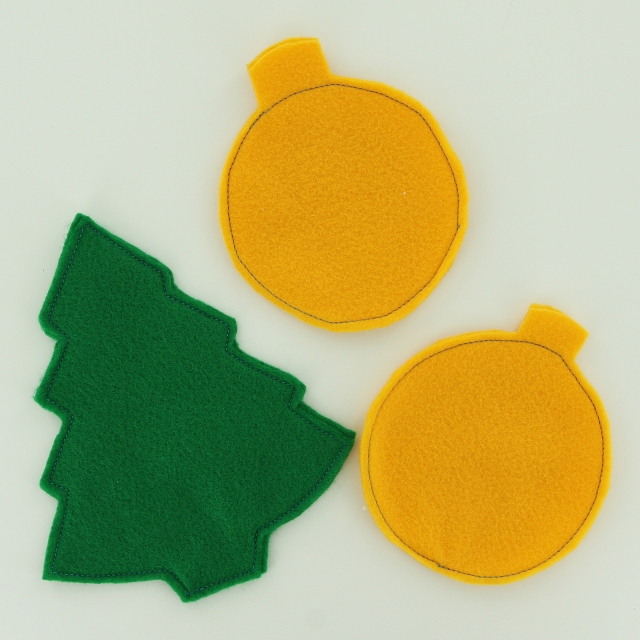
3. Using a standard sewing machine I stitched around the doubled layer of felt with about a 1/8" seam allowance and then cleaned up the edges of the felt with my scissors.

4. Then I added KAM Snap Caps and Sockets or Studs to the front of each ornament in playful colors and patterns.

5. Front view.
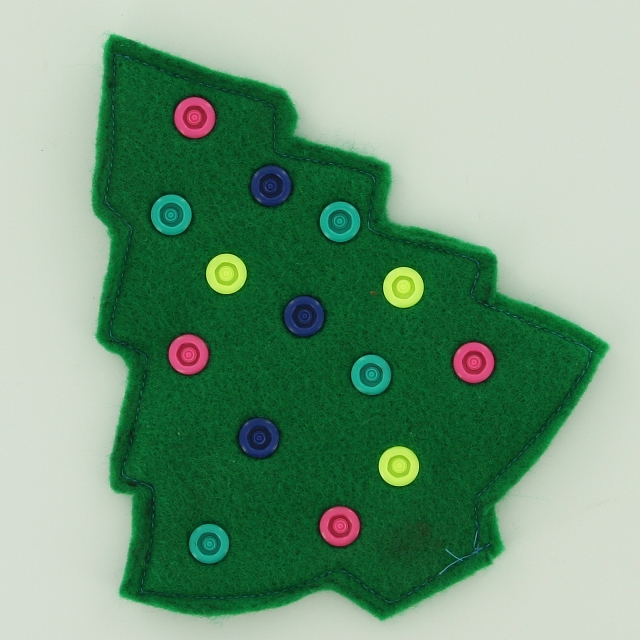
6. View from back.
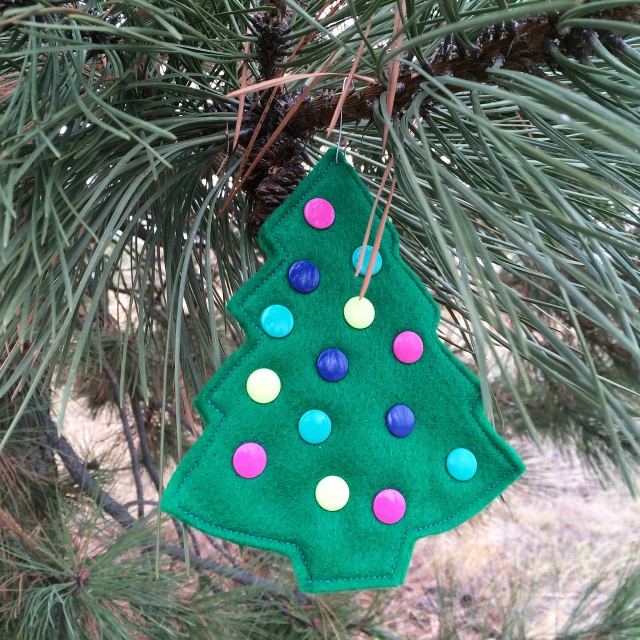


7. Tada! FWIW, these ornaments have already been stolen off the tree and are being hauled around by one of my youngest :).