News
An I Like Big Buttons Christmas! Idea #24: Making a Felt Coin Purse with KAM Snaps and PDF Pattern December 22 2017

Gift Idea #24:
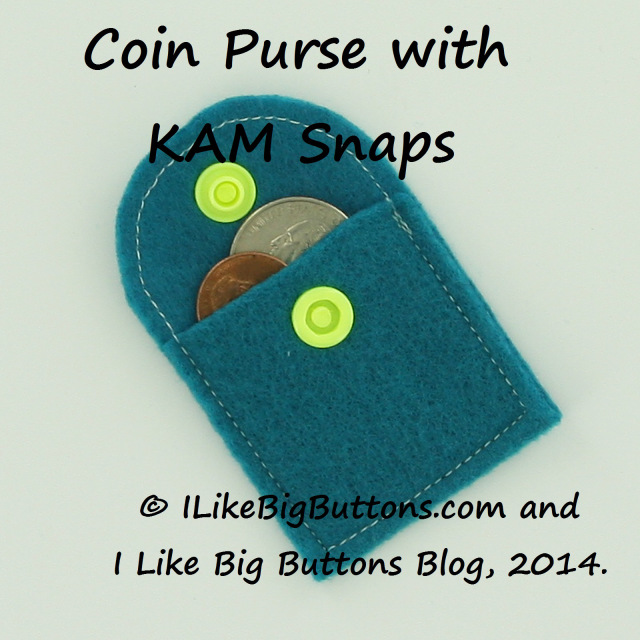
As the hours draw to a close before Christmas day. A felt coin purse is a great last minute gift that takes only minutes to make.
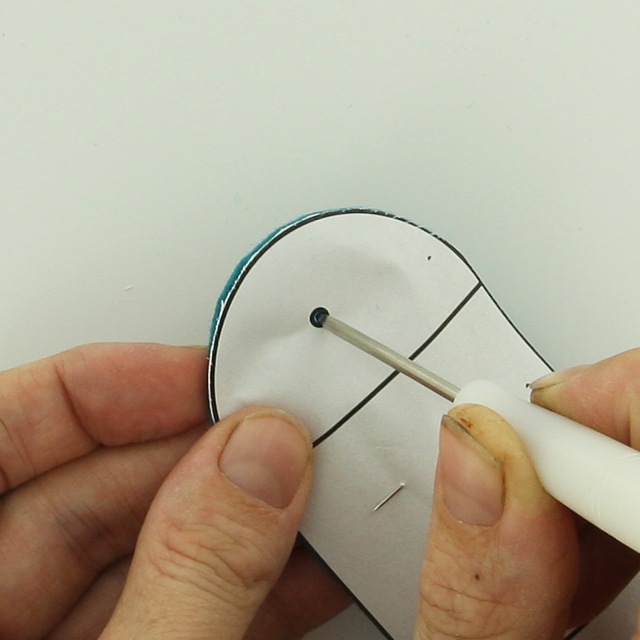
Making a Felt Coin Purse with KAM Snaps and PDF Pattern
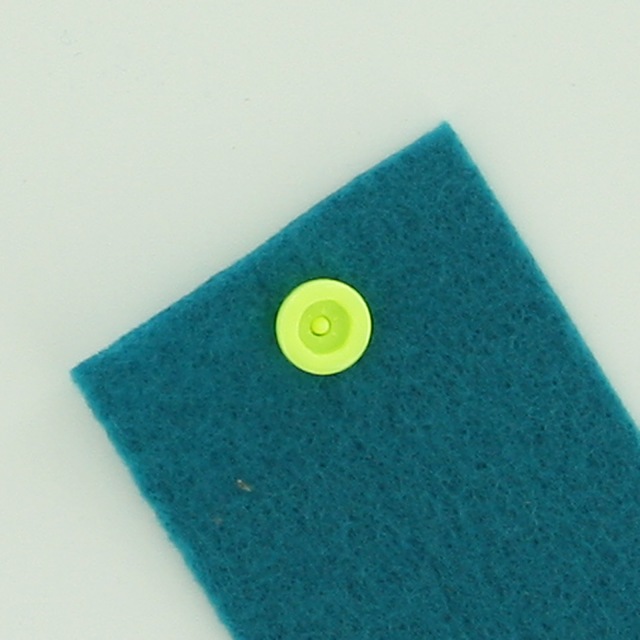
Supplies:
- Sheet of Felt
- 1 KAM Snap Set
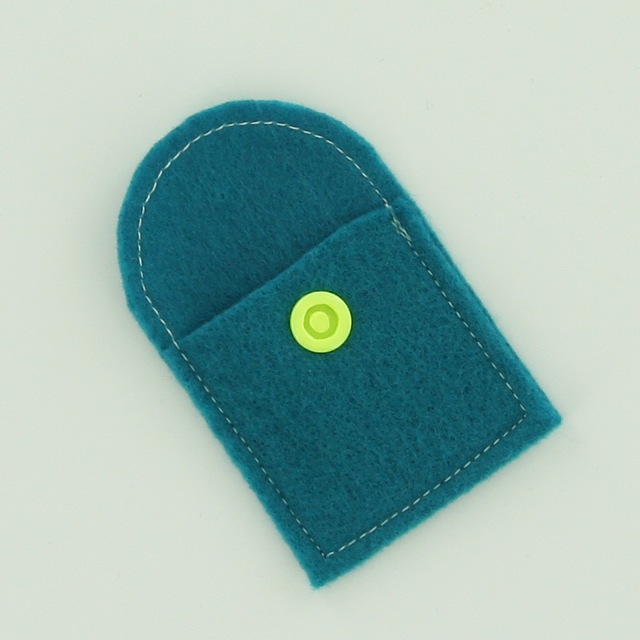
- KAM Snap Pliers and Awl
- Coin Purse PDF Pattern
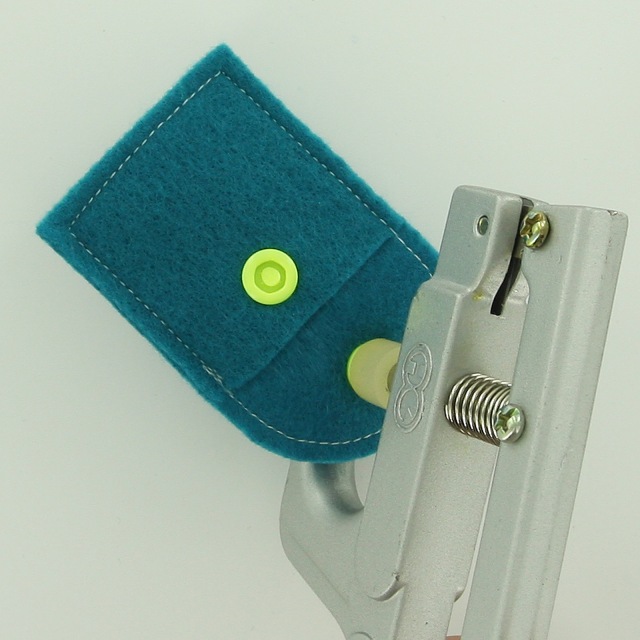
- Standard Sewing Machine See More

#ilikebigbuttons #shopilikebigbuttons #kamsnaps #plasticsnaps #snapping #itsasnap #coinpurse #kamsnapcoinpurse #pdfpattern #christmasidea #gift #christmasgift
An I Like Big Buttons Christmas! Idea #18: How to make a Mini Hobo Purse with KAM Snaps and a PDF Pattern December 18 2017

Gift Idea #18:
I am making a Mini Hobo Purse with KAM Snaps for my mini fashionista :P. There is sure something about miniaturizing any project that makes it even cuter! I hope you like it as much as I do.
Making a Mini Hobo Purse with KAM Snaps and PDF Pattern
Supplies:
- Fabric or Fabrics of your choice
- Interfacing
- 1 KAM Snap Set
- KAM Snap Pliers and Awl
- Mini Hobo Purse PDF Pattern
- Standard Sewing Machine and Iron See More

#ilikebigbuttons #shopilikebigbuttons #kamsnaps #plasticsnaps #snapping #itsasnap #minihobopurse #freepdf #hobopurse #everythingtinyiscuter #christmasidea #gift #christmasgift
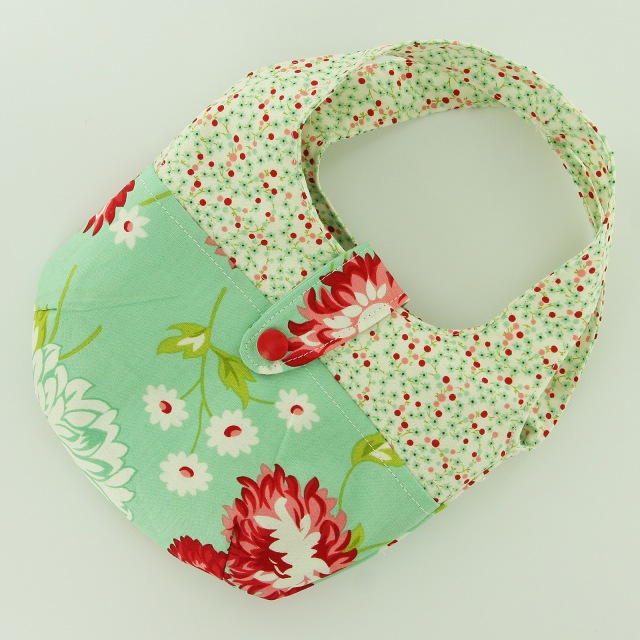
An I Like Big Buttons Christmas! Idea #7: How to make a Bandana Bib with KAM Snaps and a PDF Pattern December 05 2017

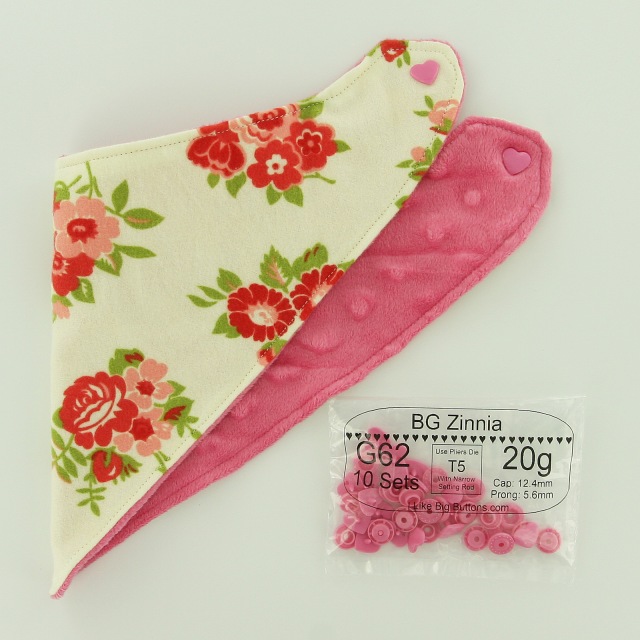
Gift idea #7: One of our most popular tutorials, Bandana Bibs are a great gift for those little droolers and mess makers in your life or as an outfit accessory. So cute! I, also, used our Heart Shaped KAM Snaps for added pizazz, check it out!
Supplies:
- Fabrics of your choice
- 1 Heart Shaped KAM Snap Set
- KAM Snap Pliers and Awl
- Bandana Bib PDF Pattern (may need to adjust for your child's size or add more KAM Snaps settings)
- Standard Sewing Machine
Instructions:
- Download the Bandana Bib PDF Pattern. Print out the pattern making sure the 1″ square in the corner measures 1″ square when printed that will indicate the pattern is the right size. ... See More
Pin it for later: http://www.pinterest.com/pin/201184308328918372/
#ilikebigbuttons #kamsnaps #plasticsnaps #bandanabib #droolbib #tutorial #pdfpattern #shopilikebigbuttons
Snapping is so easy! You can do it!

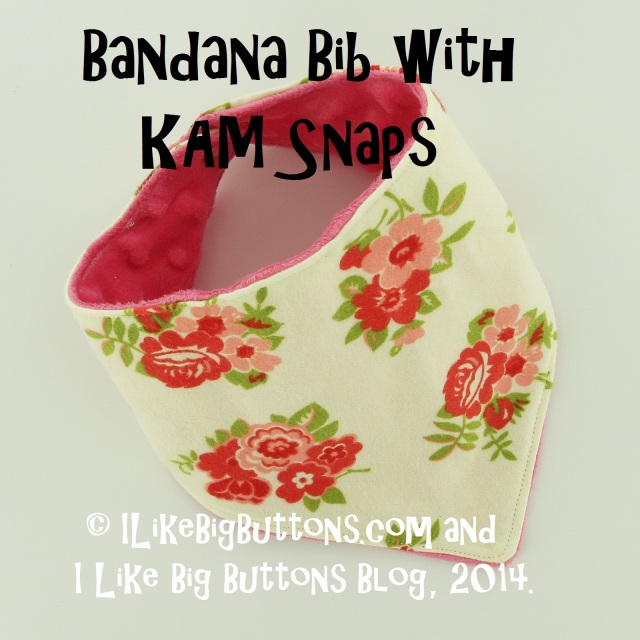
Bandana Bib with KAM Snaps and a PDF Pattern by I Like Big Buttons! May 18 2017

One of our most popular tutorials, Bandana Bibs are a great gift for those little droolers and mess makers in your life or as an outfit accessory. So cute! I, also, used our Heart Shaped KAM Snaps for added pizazz, check it out!
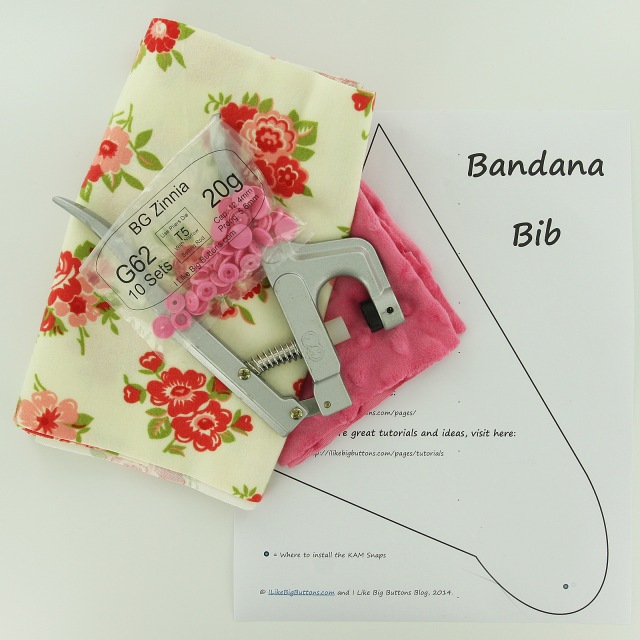
Supplies:
- Fabrics of your choice
- 1 Heart Shaped KAM Snap Set
- KAM Snap Pliers and Awl
- Bandana Bib PDF Pattern (may need to adjust for your child's size or add more KAM Snaps settings)
- Standard Sewing Machine

Instructions:
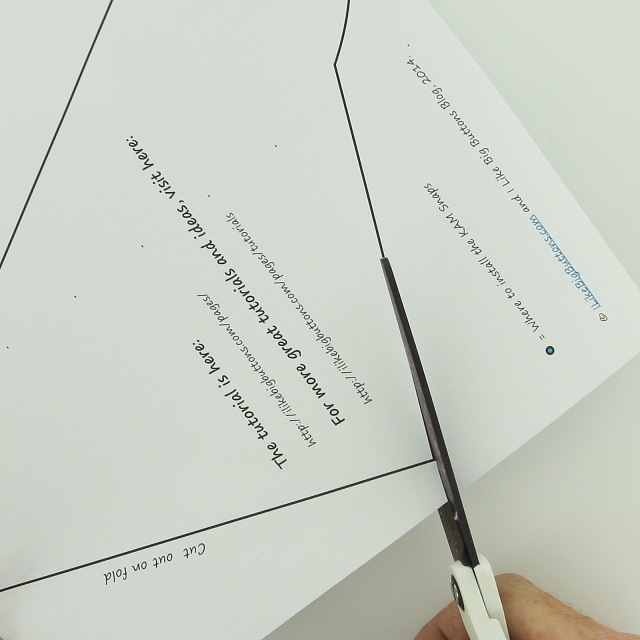
1. Download the Bandana Bib PDF Pattern. Print out the pattern making sure the 1″ square in the corner measures 1″ square when printed that will indicate the pattern is the right size.

2. Cut out the pattern.

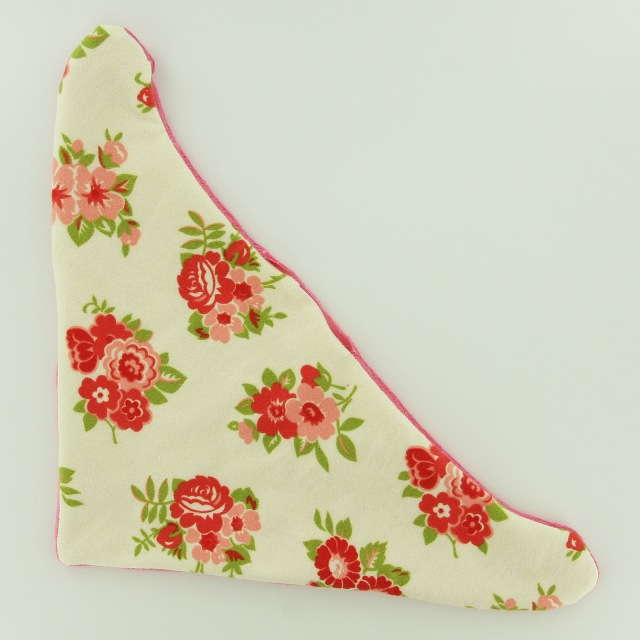
3. Place your pattern, with long straight side on fabric folded in half, and pin in place.

4. Cut the 2 pieces of Fabric you will use.

5. Place Fabrics' right sides together.

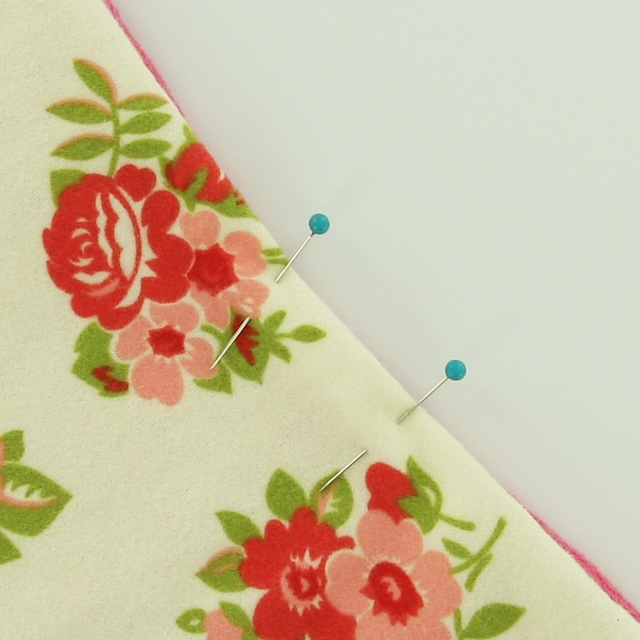
6. Pin together.

7. Sew pieces together with a 1/4" seam allowance, backstitching at the start and finish of sewing, make sure to leave a 3-4" gap so that you can pull the piece right side out.

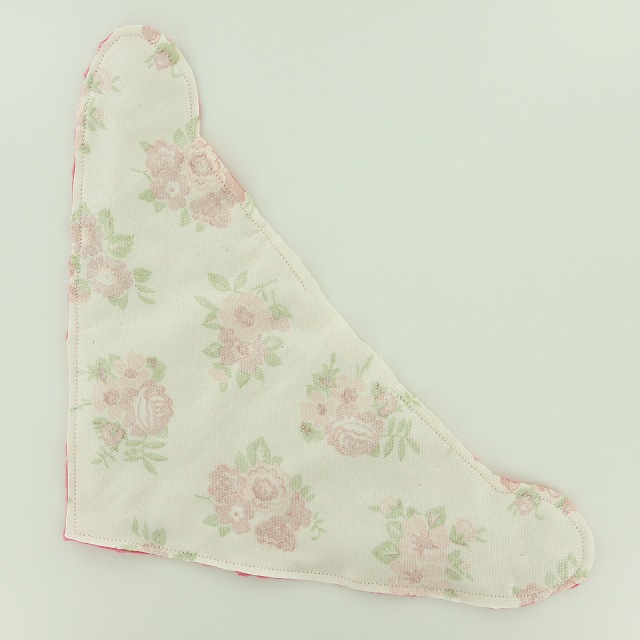
8. Pull piece right side out and make sure to push all the round and square corners out until they lay flat.

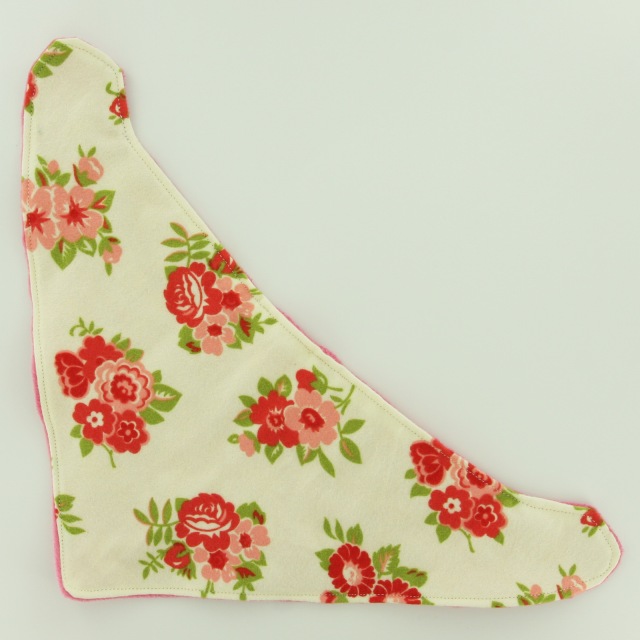
9. Fold in the opening's seams and pin in place.

10. Stitch a finish stitch 1/8" to 1/4" all the way around the bib, making sure to ease your way around the left and right tabs. I do a couple of stitches, stop, then lift the foot, turn the fabric slightly, put the foot down, and do a couple more stitches and repeat. Make sure the backstitch at the beginning and end of your sewing.

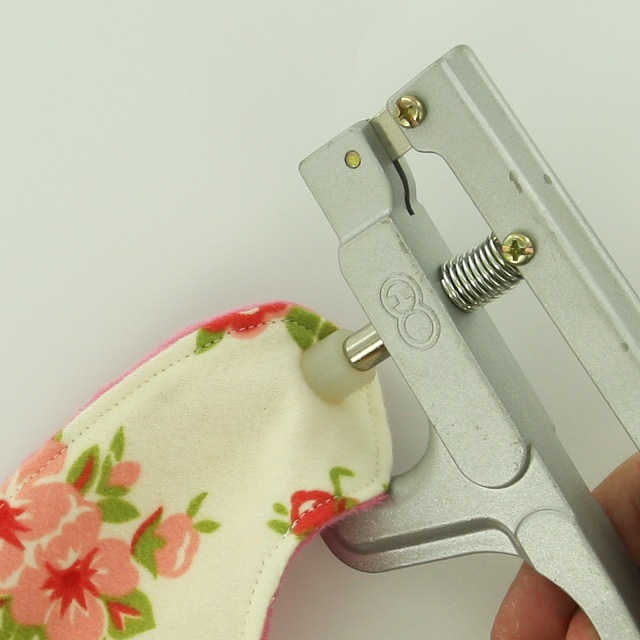
11. Use the template to mark the KAM Snap placement, you may want to check the measurement of your child's neck and adjust the pattern or snap placement accordingly. This bib worked for a toddler but with an extra set of snaps can work for more sizes.

12. I decided as I was getting ready to install the KAM Snaps to go with our new Heart Shaped snaps. Install the Heart Shaped KAM Snap Cap and Stud in the left and a Cap and Socket on the right tab.
13. Interested in Heart Shaped KAM Snaps, check out our great colors, in smaller package quantities for more great variety!

14. Totally cute, don't you think! ;) Happy Snapping!!!
Free Romper Pattern {0-12 months} - Courtesy of Nap-Time Creations and I Like Big Buttons! KAM Plastic Snaps August 11 2016
A while back, Emily of Nap-Time Creations made this sweet Romper and shared how she did it with us. I thought you all would enjoy seeing it.
Supplies:
- Fabric of your choice for the outside
- 6 KAM Snap Set
- KAM Snap Pliers and Awl
- 1/4" Elastic
- Standard Sewing Machine
- Romper Pattern & Full Tutorial


Pattern NOTES {READ FIRST!}
1. I made the 6-9 month romper and it wasn’t very long. {new pattern has updated length included… you can always add length at dotted line on pattern.
2. You will need 3/4 of a yard fabric, 1/4″ Elastic and 6 snaps. I used KAM snaps...
To read the rest of the Tutorial, go here.

How to make a Peacock Costume and a "No Sew" Tutu with KAM Snaps October 23 2014
Day #38
Today, I am made a Halloween costume for my Peacock loving girl. I was inspired by my friend, Barbara of Das Mach Ich Nachts (Roughly translates to "I'm doing this at night"), earlier this year she made the most amazing costume for her daughter here. I was inspired to make one for my daughter with some adjustments. Less fine details, more "No Sew" and KAM Snaps, of course :).
Supplies:
- 1-2 Yards of Fabric (I used Royal Blue Fleece)
- 4-6 Sheets of Felt
- Elastic for Tutu
- 4-8 Spools of Tulle (15-25 Yards each)
- 2 KAM Snap Sets
- KAM Snap Pliers and Awl
- Accucut Die Cutter and Dies or Scissors to cut out the Peacock Feathers
- Standard Sewing Machine
- Long Sleeve T-Shirt (we went with Teal)
- Long Black Leggings


Instructions:
1. Barbara's orginal Peacock Costume Tutorial, I adjusted her pattern for times sake and went with a "less is more" approach. I reasoned to myself that this costume will mostly be viewed in the dark and a lot of the details of the costume will be lost :). I, also, own a Accucut Die Cutter (great tool!) with handy dandy Circle dies so I decided to do circle shaped feathers rather than tear drop shaped. I used a 4.5", 3.5", and 2.5" circle dies.
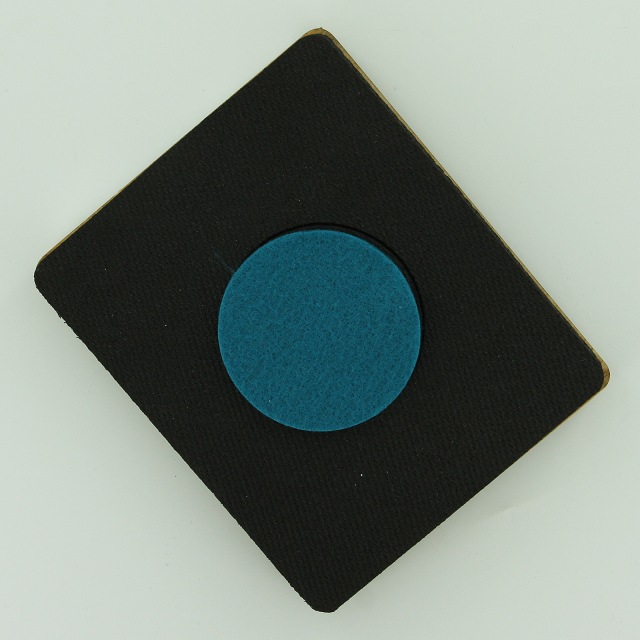
2. These can easily be done by hand but I was able to run 4 layers of Felt at a time. Awesome! My daughter wanted 2 different sets of Feathers in Purple, Apple Green and Teal. We alternated between Purple and Teal as the front and back circle with the Apple Green always as the middle piece. This was my fashionista's preference :).

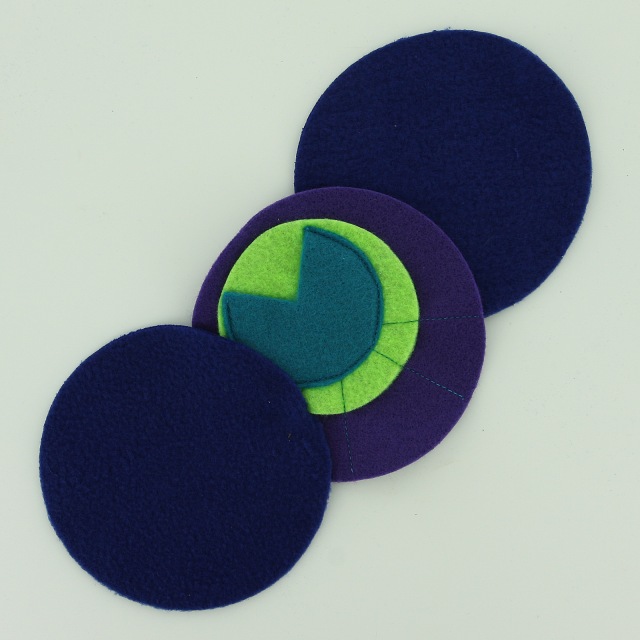
3. I also cut out 2x 4.5" Royal Blue Fleece for each feather. We made 16 Peacock "Eye" Feather total and about 40 Royal Blue Fleece Circles.

4. Take the 2.5" Felt circles and cut a wedge out of each of them.

5. They will look like this.

6. Take each 4.5" Circle and lay the 3.5" Circle off center.

7. Stitch 2 "V"s in Teal thread from the edge to the middlish and back to the edge again to stabilize the circles together.

8. Lay the 2.5" 3/4 Circle on top slightly off center again.

9. Stitch around the edge of the circle, repeat 16 times. My daughter and I did this with dueling sewing machines and it took just a few minutes to complete.

10. Now lay out and plan your cape, I laid out my yardage of Royal Blue fleece and had my daughter lay down on it to get her wing span :). Then using one of the 4.5" Circle feathers, starting at the top edge I chalked the round shape and worked my way down. I drew a rough sketch of what I did above. I did one side and folded fabric and half and cut both sides at once.
11. Then I laid the feathers like this and pinned them in place in a random pattern to fill in the cape.
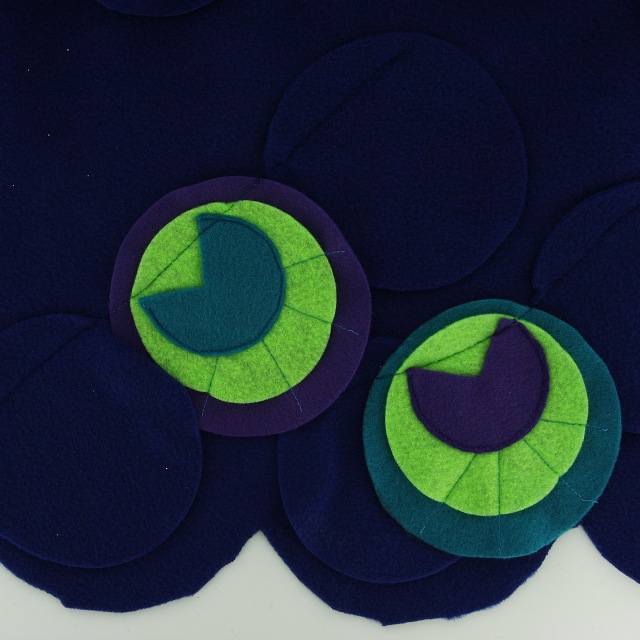

12. I straight stitched across my sets of feathers using back stitch at the start and end of each set to make sure they were secure.

13. On the tabs in the front of the cap, I doubled over the fleece and put a 2 sets of KAM Snaps in on the left and right. The Cape is finished. You can do more or less details. I didn't bother finishing the edges of the fleece as it will not fray. This may get used a couple times at most and then as dress up for siblings and cousins, so I didn't feel the extra effort was necessary. On to the "No Sew" Tutu!!!
14. Make the Elastic waist for your Tutu by wrapping tutu around your child's waist. Stitch the Elastic together by going back and forth repeatedly with a zig zag stitch or straight stitch.

15. Cut your spools of Tulle into lengths, mine were for an older girl so I did measured to just below her knee and doubled that measurement. I cut my Tulle in 5" pieces and it took 8 spools to complete the skirt. It is very full but that was the look I was going for.
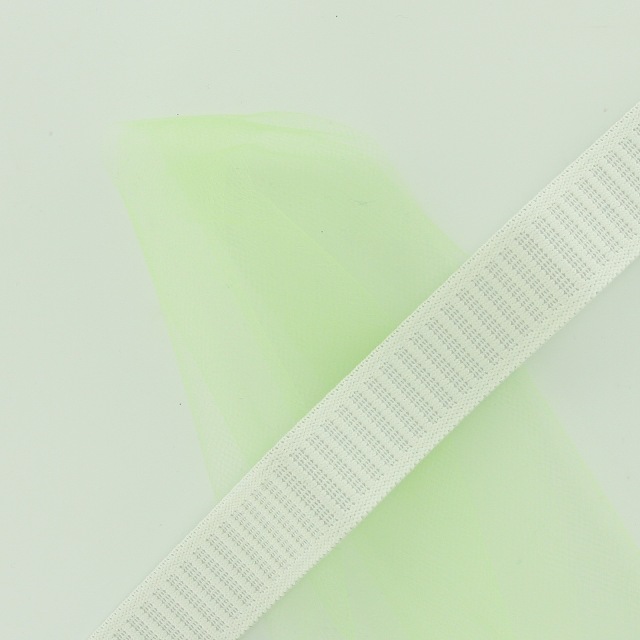
16. Take 1-2 pieces of Tulle fold them in half and place them behind the Elastic.

17. Bring the Tulle ends up, over the Elastic and thread them through the open Tulle loop from behind.

18. Pull taut and repeat.

19. It will end up like this. We used Purple, Purple Glitter, Teal, Teal Glitter, and Apple Green Tulle.


20. Here is my proud Peacock! She loves it and she and I had a wonderful time making it together :).
30 Days of KAM Snaps and Beyond!!! How to make a Reversible Finished Edge Coffee Cozy with KAM Snaps and Free PDF Pattern October 16 2014
Day #37
How to make a Reversible Coffee Cozy with KAM Snaps and Free PDF Pattern
A couple days ago, I made a couple cute Coffee Cozys for my cousin's birthday. Here is the second promised tutorial showing how to make the Reversible Finished Edge Coffee Cozy. KAM Snaps to the rescue again!
Supplies:
- Fabric of your choosing
- Insulation/batting layer
- 2 KAM Snap Sets
- KAM Snap Pliers and Awl
- Standard Sewing Machine


Instructions:
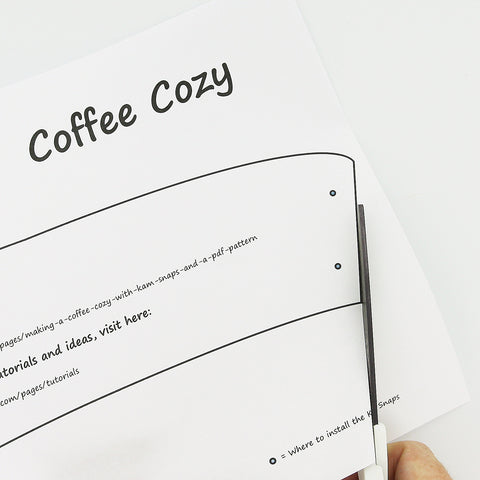
1. Download the Reversible Finished Edge Coffee Cozy PDF Pattern. Print out the pattern making sure the 1″ square in the corner measures 1″ square when printed that will indicate the pattern is the right size. This pattern works on standard sized 12 ounce and 16 ounce cups. My models were Dixie and Chinet brands.
2. Cut out each Pattern piece as many times as instructed. The first time I made this the pattern, though it fitted the cup as a paper template, did not fit when fully finished. I have added an additional 2" to the pattern to adjust for the loss in length as fabric sewn and fitted (the pattern has been adjusted and 1/4" seam allowance tabs were added). Make sure to wash and dry your fabrics before making this pattern if you plan to wash them later to avoid shrinkage.

3. Original picture of pattern on fabric (pattern has been adjusted).

4. Cut out 3 pieces, front and back fabric and interlining because this is going to be an exposed layer I used Felt. You can use whichever material you like, this layer is for protection from the heat of the cup of coffee, tea, or hot chocolate.

5. Pin the 3 layers of fabric together. Bottom fabric right side up, batting, and top fabric right side down.

6. Starting just off center on the bottom, stitch all a 1/4" seam allowance all the way around the Cozy stopping 2-3" from finishing. Leaving an opening to turn the piece right side out.

7. Turn the Cozy right side out, I used a small butter/frosting knife to get the corners as square as possible.

8. Carefully fold and pin the opening closed.

9. Top stitch a 1/4" seam allowance all the way around the Cozy making sure to back stitch at the beginning and end of your work.

10. Install 2 KAM Snap Caps and 2 Studs on the left side and install 2 KAM Snap Caps and 2 Sockets on the other side. I have included "blue dots" on the template to approximate where to place them but it is best to wrap the snap-free Coffee Cozy around a Coffee Cup to see how it fits and where you would like to place the snaps. I placed the top and bottom KAM Snaps about 1/2" down from the finished seam edge of the Cozy.

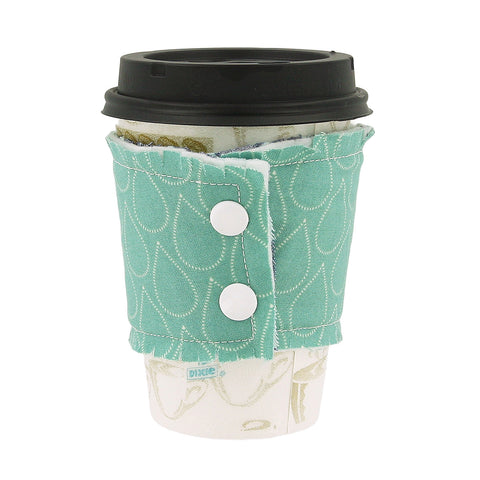
11. Here is the finished product both front and back. You will note that it is reversible and that I coordinated the snaps so that it has different color snaps parts on each side. Just seemed extra fun :)!


12. Tada! I think they turned out great! I did another tutorial to show the Reversible Frayed Edge Coffee Cozy too. Check it out here!!!
30 Days of KAM Snaps and Beyond!!! How to make a Reversible Frayed Edge Coffee Cozy with KAM Snaps and Free PDF Pattern October 09 2014
Day #36
How to make a Reversible Frayed Edge Coffee Cozy with KAM Snaps and Free PDF Pattern
Today, I am making a couple cute Coffee Cozys for my cousin. She called me a week ago super excited with the great idea to make Coffee Cozy with KAM Snaps :). Since, it was just a week until her birthday I thought it was a sign ;P. Happy Birthday Dear Cousin!!! KAM Snaps to the rescue again!
Supplies:
- Fabric of your choosing
- Felt or other insulation/batting layer
- Frayed Edge Coffee Cozy Pattern
- 2 KAM Snap Sets
- KAM Snap Pliers and Awl
- Standard Sewing Machine

Instructions:
1. Download the Frayed Edge Coffee Cozy PDF Pattern. Print out the pattern making sure the 1″ square in the corner measures 1″ square when printed that will indicate the pattern is the right size. This pattern works on standard sized 12 ounce and 16 ounce cups. My models were Dixie and Chinet brands.
2. Cut out each Pattern piece as many times as instructed. The first time I made this the pattern, though it fitted the cup as a paper template, did not fit when fully finished. I have added an additional 1" to the pattern to adjust for the loss in length as fabric sewn and fitted. Make sure to wash and dry your fabrics before making this pattern if you plan to wash them later to avoid shrinkage.

3. Original picture of pattern on fabric.
4. Pattern after I added 1", PDF Pattern has been fixed.

5. Cut out 3 pieces, front and back fabric and interlining because this is going to be an exposed layer I used Felt. You can use whichever material you like, this layer is for protection from the heat of the cup of coffee, tea, or hot chocolate.

6. Pin the 3 layers of fabric together. Bottom fabric right side down, felt or batting, and top fabric right side up.

7. Sew a 3/8" seam allowance all the way around the Coffee Cozy making sure to back stitch at the start and finish of your piece. I trimmed the edges where the fabric didn't line up exactly perfect after it was sewn together.

8. Snip small cuts into the edge of the material about every 1/4" to help the fraying process. This will happen more fully over time and multiple washings. Do both the top and bottom, I left the short sides alone.

9. Finished look.

10. Install 2 KAM Snap Caps and 2 Studs on the left side and install 2 KAM Snap Caps and 2 Sockets on the other side. I have included "blue dots" on the template to approximate where to place them but it is best to wrap the snap-free Coffee Cozy around a Coffee Cup to see how it fits and where you would like to place the snaps. I placed the top and bottom KAM Snaps about 1/2" down from the finished seam edge of the Cozy.


11. Here is the finished product both front and back. You will note that it is reversible and that I coordinated the snaps so that it has different color snaps parts on each side. Just seemed extra fun :)!


12. Tada! I think they turned out great! There will be another tutorial in a couple days to show the Reversible Finished Edge Coffee Cozy too. So stay tuned!!!
30 Days of Snaps Summary!!! Day #1 through Day #30 Summary August 05 2014
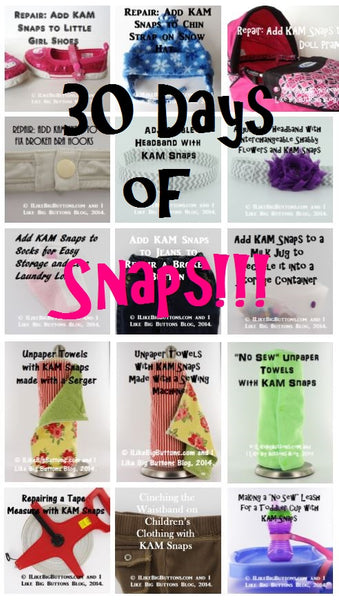
30 Days of Snaps Summary!!!
I made it! 30 Days of KAM Snap ideas and tutorials, I am so proud of myself :). Here is a summary of what I did for all of you who are have only seen a few or are just joining us.

Day #1

Day #2

Day #3

Day #4
Day #5

Day #6

Day #7
Day #8

Day #9
Day #10
Day #11

Day #12

Day #13

Day #14
Day #15
Day #16

Day #17
Day #18

Day #19
Day #20
Day #21
Day #22
Day #23
Day #24
Day #25

Day #26

Day #27

Day #28

Day #29
Day #30

30 Days of Snaps Summary:
- Day #1: How To Repair Toddler Shoes with KAM Snaps
- Day #2: How To Repair a Snow Hat with KAM Snaps
- Day #3: How To Repair a Doll Pram with KAM Snaps
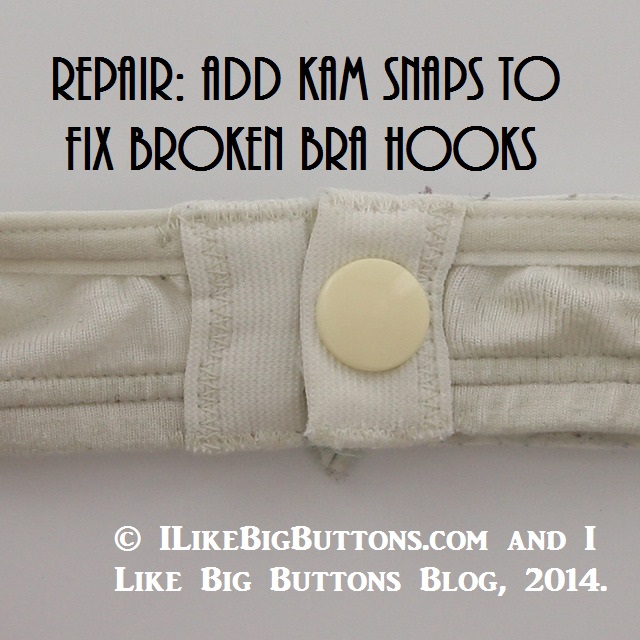
- Day #4: How To Repair a Bra with KAM Snaps
- Day #5: How to make an Adjustable Headband
- Day #6: How to make Interchangeable Shabby Flowers
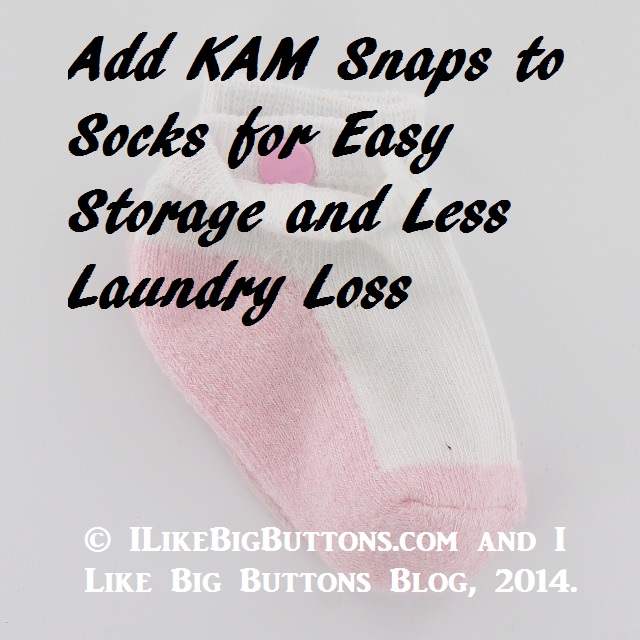
- Day #7: How To Match Socks with KAM Snaps
- Day #8: How To Repair A Pair Of Jeans with KAM Snaps
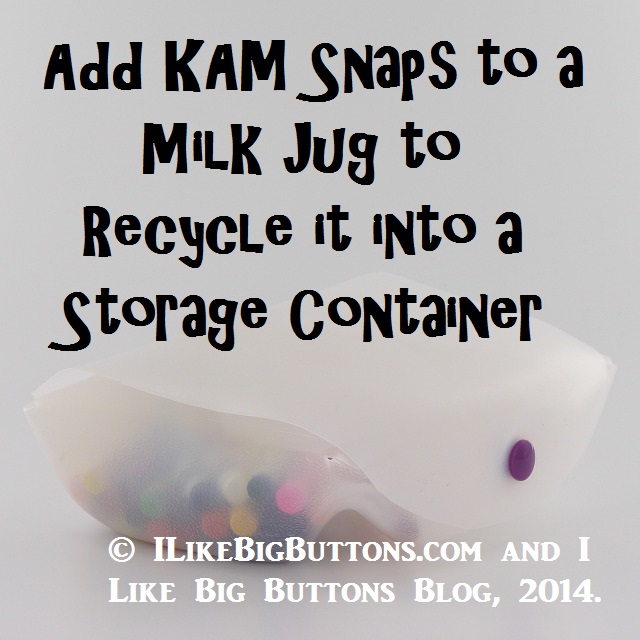
- Day #9: How To Recycle a Milk Jug into a Storage Container with KAM Snaps
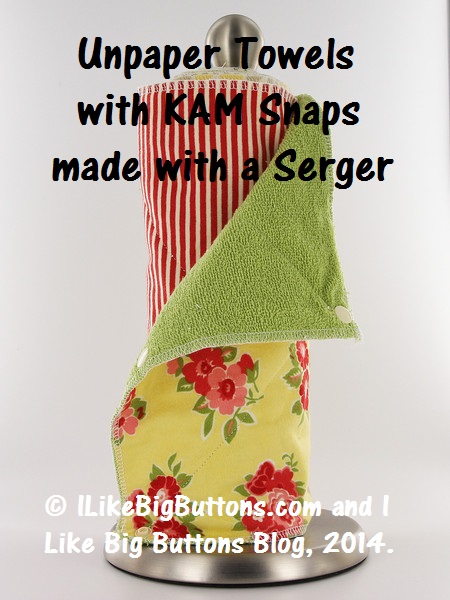
- Day #10: How To Make Unpaper Towels with KAM Snaps and a Serger
- Day #11: How To Make Unpaper Towels with KAM Snaps and a Standard Sewing Machine
- Day #12: How To Make "No Sew" Unpaper Towels with KAM Snaps
- Day #13: How to Repair a Tape Measure with KAM Snaps
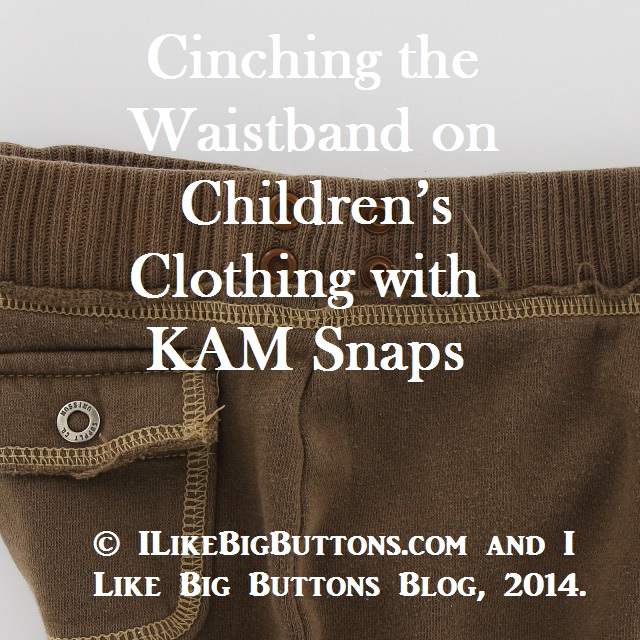
- Day #14: How to Cinch the Waistband on Children's Clothing with KAM Snaps
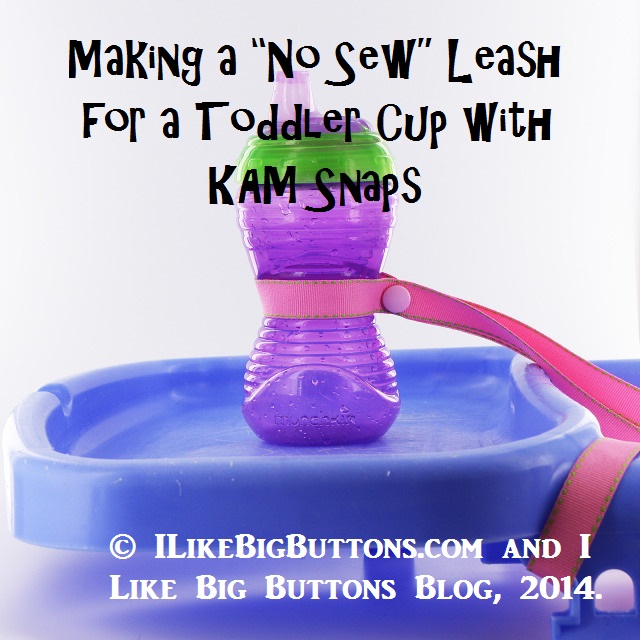
- Day #15: How to make a "No Sew" Leash for a Toddler Cup with KAM Snaps
- Day #16: How to make a "No Sew" Pacifier Clip with KAM Snaps and an Enamel Clip
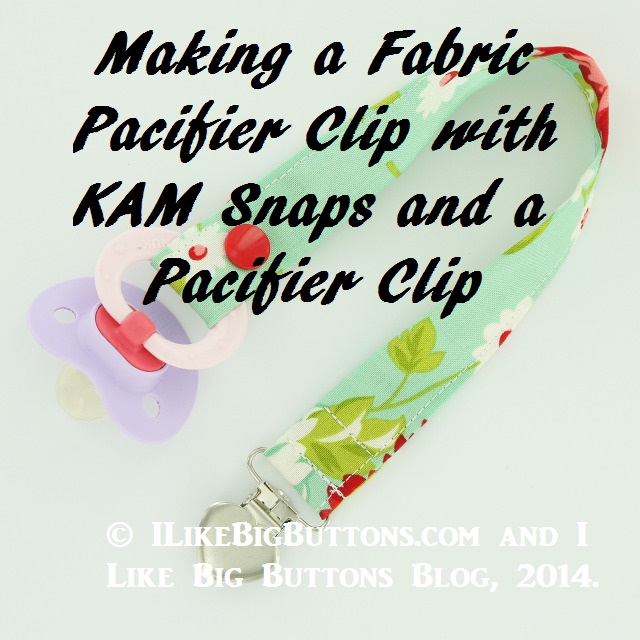
- Day #17: How to make a Fabric Pacifier Clip with KAM Snaps and a Pacifier Clip
- Day #18: How to do a Emergency Easter Basket Repair with KAM Snaps
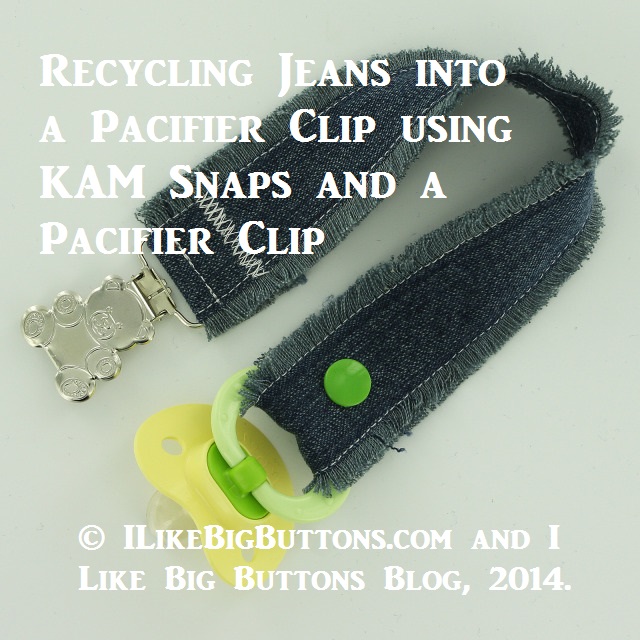
- Day #19: How to make a Pacifier Clip Using Recyled Jeans, KAM Snaps, and a Pacifier Clip
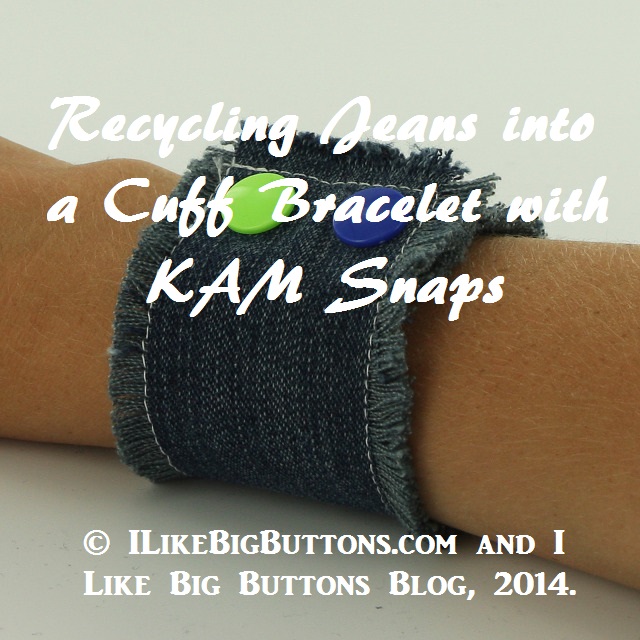
- Day #20: How to make a Cuff Bracelet with Recycled Jeans and KAM Snaps
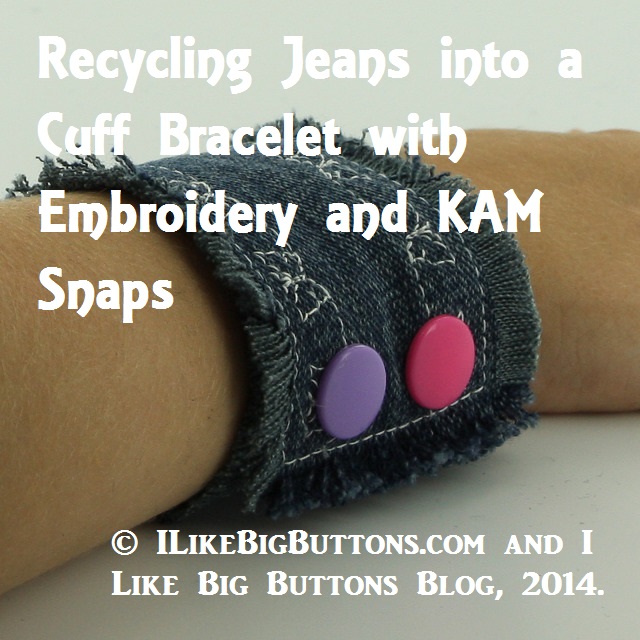
- Day #21: How to make a Cuff Bracelet with Recycled Jeans, Embroidery and KAM Snaps
- Day #22: How to make a Felt Coin Purse with KAM Snaps and PDF Pattern
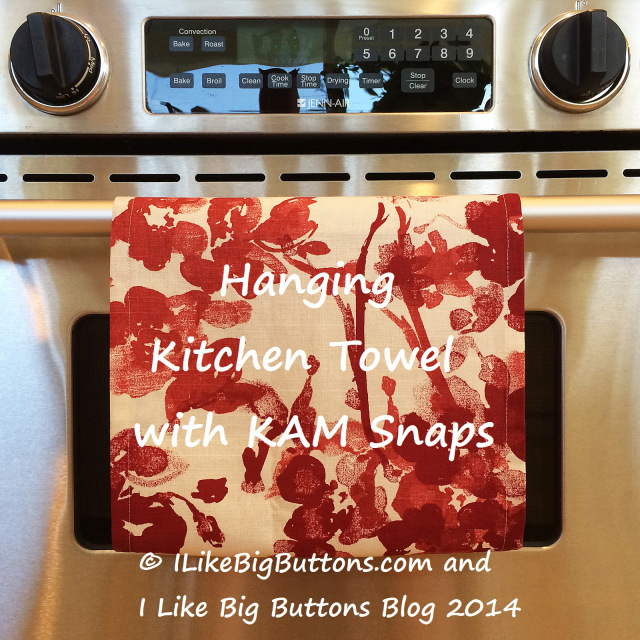
- Day #23: How to make a Hanging Kitchen Towel with KAM Snaps
- Day #24: How to make a Felt Crown with KAM Snaps and PDF Pattern
- Day #25: How to Make a Crayon Roll with KAM Snaps
- Day #26: How to make a Sensory Ribbon Baby Tag Blanket with KAM Snaps and Pacifier Supplies
- Day #27: How to make a Smart Phone Case and Wristlet with KAM Snaps and Key Fob Hardware
- Day #28: How to make a Bandana Bib with KAM Snaps and a PDF Pattern
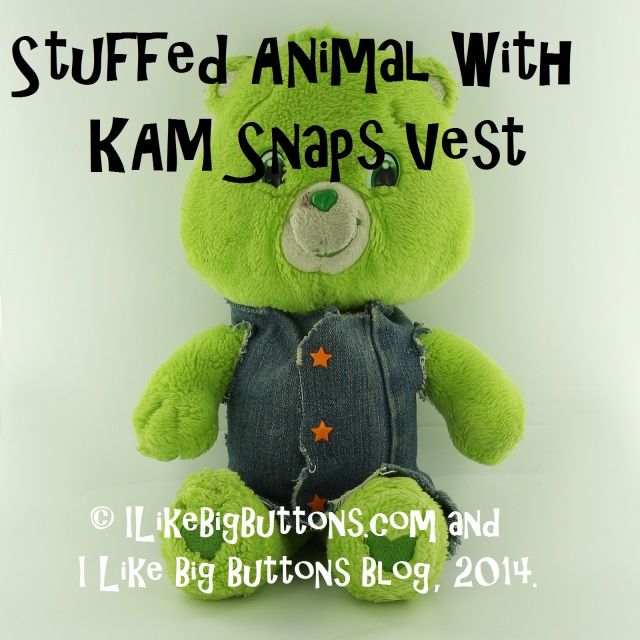
- Day #29: How to make a vest for a Stuffed Animal with KAM Snaps and Holey Jeans
- Day #30: How to make a Mini Hobo Purse with KAM Snaps and a PDF Pattern
30 Days of Snaps!!! Day #30: How to make a Mini Hobo Purse with KAM Snaps and a PDF Pattern August 04 2014
Day #30
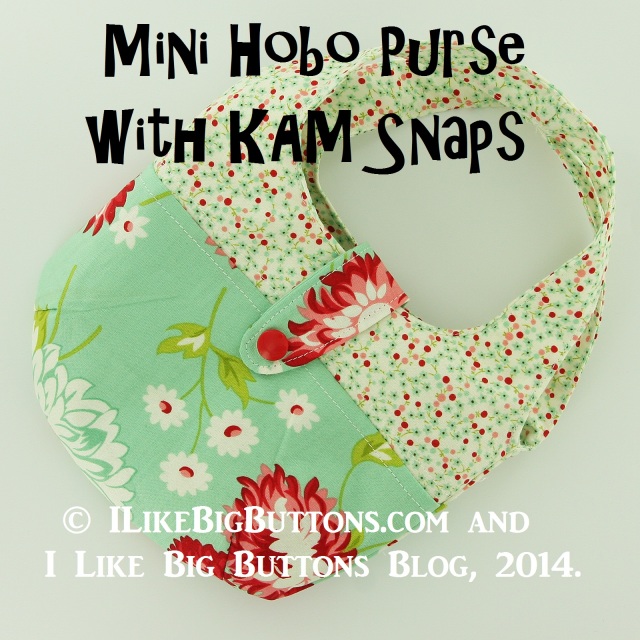
Today I am making a Mini Hobo Purse with KAM Snaps for my mini fashionista :P. There is sure something about miniaturizing any project that makes it even cuter! I hope you like it as much as I do.
Making a Mini Hobo Purse with KAM Snaps and PDF Pattern
Supplies:
- Fabric or Fabrics of your choice
- Interfacing
- 1 KAM Snap Set
- KAM Snap Pliers and Awl
- Mini Hobo Purse PDF Pattern
- Standard Sewing Machine and Iron

Instructions:
1. Download the Mini Hobo Purse PDF Pattern. Print out the pattern making sure the 1″ square in the corner measures 1″ square when printed that will indicate the pattern is the right size.

2. Cut out each Pattern piece as many times as instructed.

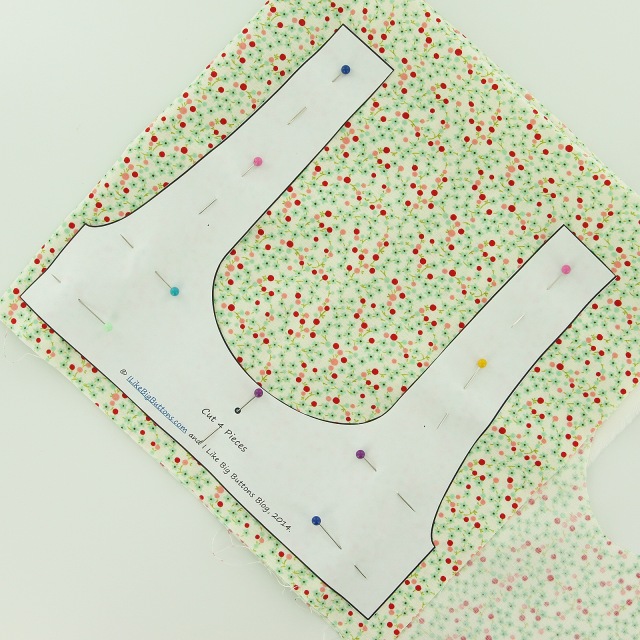

3. You will end up with:
- 4 pieces of Fabric/2 Interfacing (body of purse)
- 4 pieces of Fabric/2 Interfacing (top and handle of purse)
- 2 pieces of Fabric (lid/tab)

4. Iron the Interfacing onto a 2 pieces of Fabric that will be used for the outer body of the purse and 2 pieces of the handle for the outer side making sure to iron it to the wrong side of the Fabric. If you would like you can do interfacing on all the pieces or use a heavier weight fabric than I used. I was making this as an accent purse for my little girl so it will not get as much abuse as a daily use purse would.
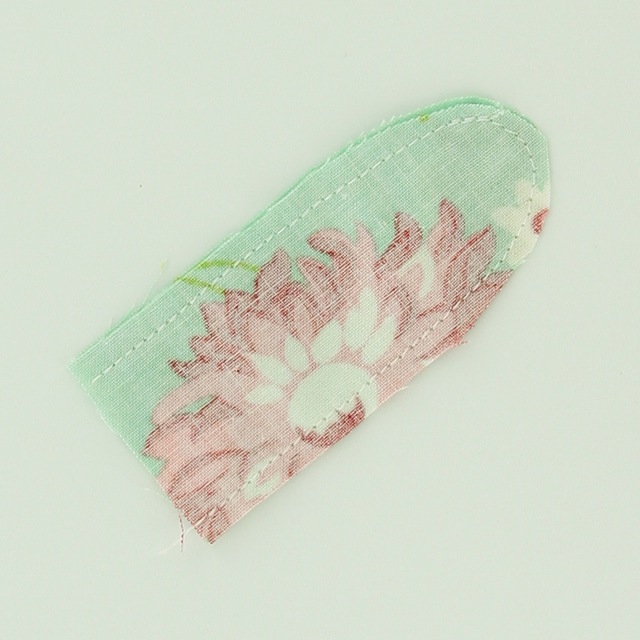
5. Take the 2 pieces of Fabric for the Lid/Tab of the case, put them right side together, and sew them with a 1/4" allowance.


6. Turn the Lid right side out and iron flat and top stitch a 1/8" stitch around the piece.

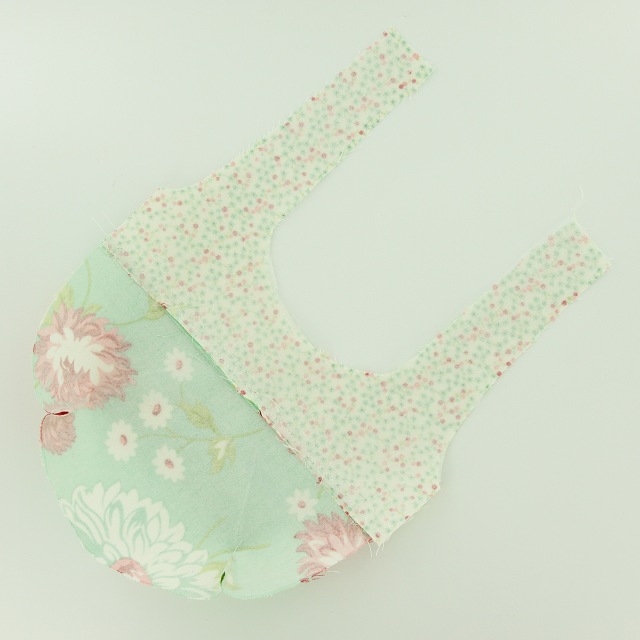
7. Pin the handle piece to the body of the purse, right sides together, and sew the pieces together with a 1/4" seam allowance. Repeat 4 times.
8. Iron flat.

9. Straight stitch an accent stitch 1/4" above where the 2 styles of Fabric meet and 1/4" above. Repeat 4 times.

10. Now add darts to the 2 bottom corner of each of the pieces. I placed a pin 1" in and started 1/4" out and sewed towards the edge until I reached no fabric (creating a triangle). Repeat 8 times, 2 times for each piece.


11. Pin the sides and bottom of 2 pieces together right sides together. Repeat with the other 2 pieces.

12. Sew 1/4" seam allowance on both sets and turn one right side out.
13. Turn the 1 pieces right side out and tuck the other piece inside it, it should be wrong side out still.

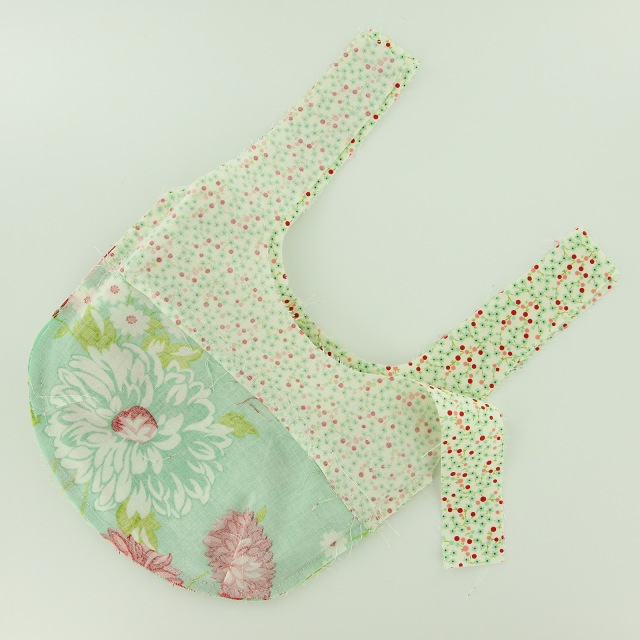
14. Take the little Tab you sewed and put it in between the 2 back pieces in the center, rounded side down and pin it in place. When you turn everything right side out it will be right side out in the back seam.

15. Pin the length of the handles together, back 2 together front 2 together on both the left and right. Pin together the top front and back of the purse together also as pictured.

16. On the outer side of each handle, sew 1/4" seam allowance starting 2" below where the pieces start down to the bottom making sure to back stitch at the top and bottom.

17. On the front internal handle and top of the purse, starting 2" from the top sew a 1/4" seam allowance around from the left to the right, stopping 2" below the top. Make sure to back stitch and the beginning and end of this stitch.
18. On the back internal handle and top of the purse (with the Tab located in it), start your 1/4" seam allowance stitch just before the Tab and sew from left to right stopping 2" below the top. Make sure to back stitch and the beginning and end of this stitch.


19. Now the not so fun part :P. We need to turn the whole purse right side out. With some patience, it will right itself. I also used the back of the seam ripper to help get the handles right side out.

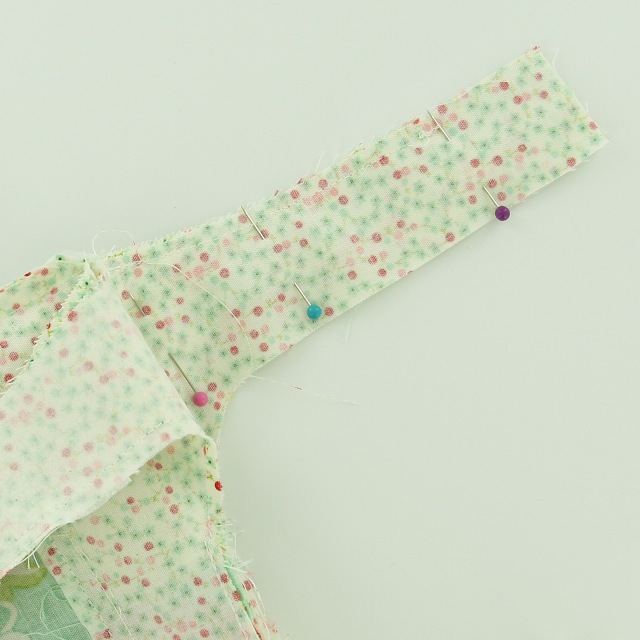
20. Once you have it right side out, pin the top handles together making sure to pin the the handles next to each other on the left and right together. Repeat 4 times.
21. Now sew them together with a 1/4" seam allowance.


22. Then iron in any exposed edges 1/4" and pin all open seams together. It took quite a few pins to do this properly so that it laid nicely and looked right.

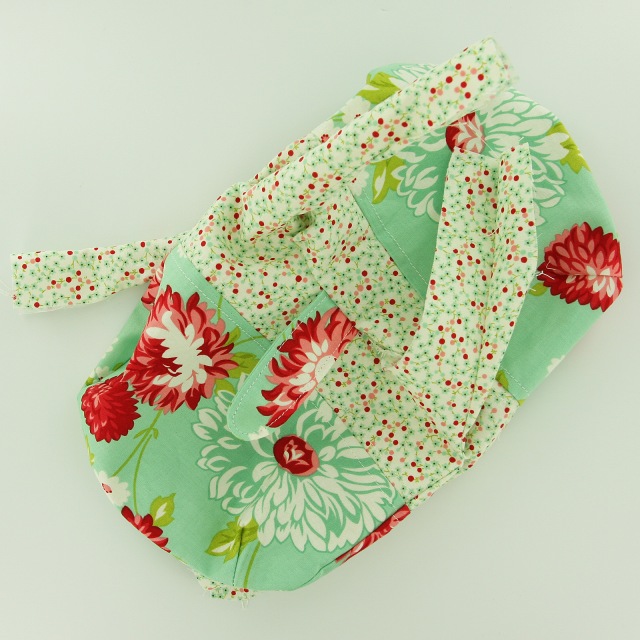
23. Top stitch each handle, inside and out as close to the edge as you are comfortable with, I did a 1/8" seam here.

24. Install the KAM Snap Cap and Socket in the Front of the Purse.
25. Install the KAM Snap Cap and Stud in the Tab.

26. What it looks like with KAM Snaps installed.
27. Snapped closed. Tada! As a note of after thought, I could have gone with a sold piece for the internal lining of the purse. At the time, I dreamed and built it that didn't come to mind. If you would like to do so place the pattern for the body of the purse and handle of the purse together and overlap them 1/4" or so and tape the patterns together (please double check my measurements on it, if that is your plan). Happy Snapping!!!
30 Days of Snaps!!! Day #28: How to make a Bandana Bib with KAM Snaps and a PDF Pattern July 16 2014
Day #28
Making a Bandana Bib with KAM Snaps and a PDF Pattern
Supplies:
- Fabrics of your choice
- 1 Heart Shaped KAM Snap Set
- KAM Snap Pliers and Awl
- Bandana Bib PDF Pattern (may need to adjust for your child's size or add more KAM Snaps settings)
- Standard Sewing Machine
Instructions:
1. Download the Bandana Bib PDF Pattern. Print out the pattern making sure the 1″ square in the corner measures 1″ square when printed that will indicate the pattern is the right size.
2. Cut out the pattern.
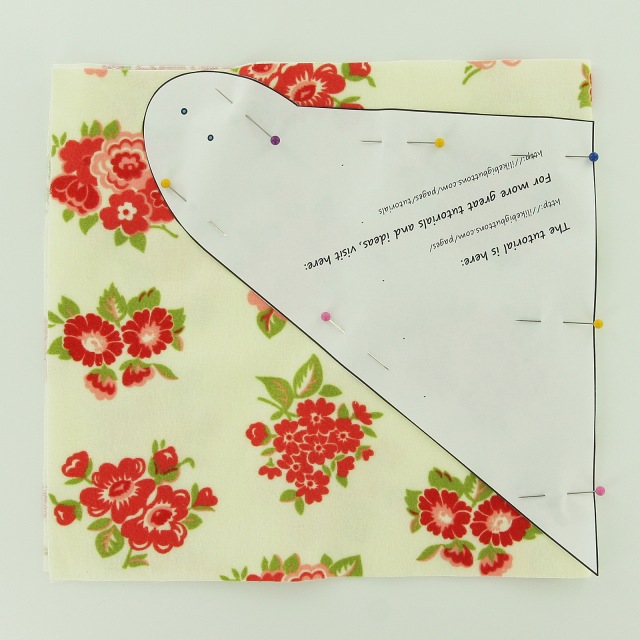
3. Place your pattern, with long straight side on fabric folded in half, and pin in place.

4. Cut the 2 pieces of Fabric you will use.
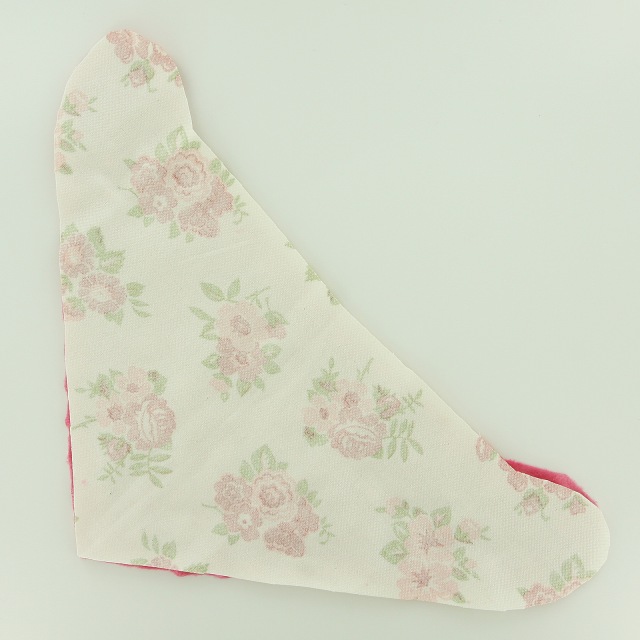
5. Place Fabrics right sides together.
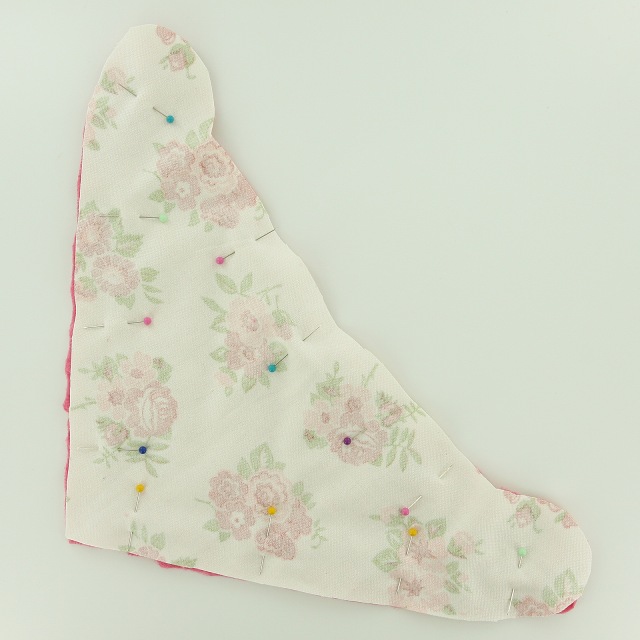
6. Pin together.
7. Sew pieces together with a 1/4" seam allowance, back stitching at the start and finish of sewing, make sure to leave a 3-4" gap so that you can pull the piece right side out.
8. Pull piece right side out and make sure to push all the round and square corners out until they lay flat.
9. Fold in the opening's seams and pin in place.
10. Stitch a finish stitch 1/8" to 1/4" all the way around the bib, making sure to ease your way around the left and right tabs. I do a couple stitches, stop, then lift the foot, turn the fabric slightly, put the foot down, and do a couple more stitches and repeat. Make sure the back stitch at the beginning and end of your sewing.

11. Use the template to mark the KAM Snap placement, you many want to check the measurement of your child's neck and adjust the pattern or snap placement accordingly. This bib worked for a toddler but with an extra set of snaps can work for more sizes.
12. I decided as I was getting ready to install the KAM Snaps to go with our new Heart Shaped snaps. Install the Heart Shaped KAM Snap Cap and Stud in the left and a Cap and Socket on the right tab.
13. Interested in Heart Shaped KAM Snaps, check out our great 25 colors, in smaller package quantities for more great variety!
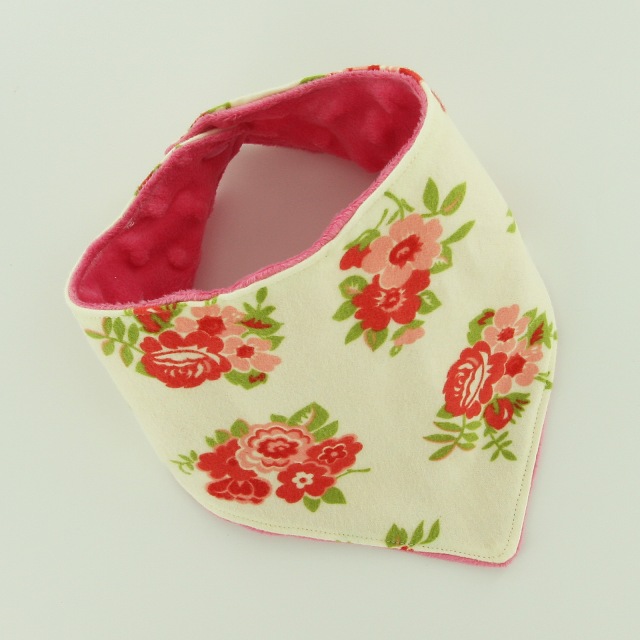
14. Totally cute, don't you think! ;) Happy Snapping!!!
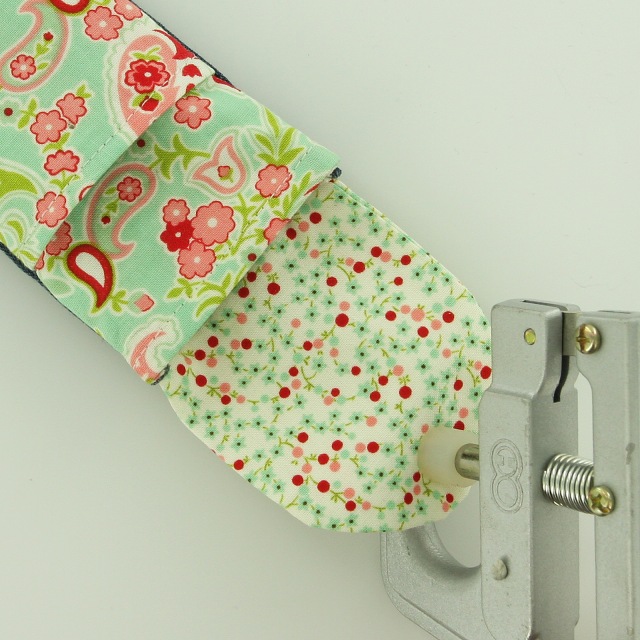
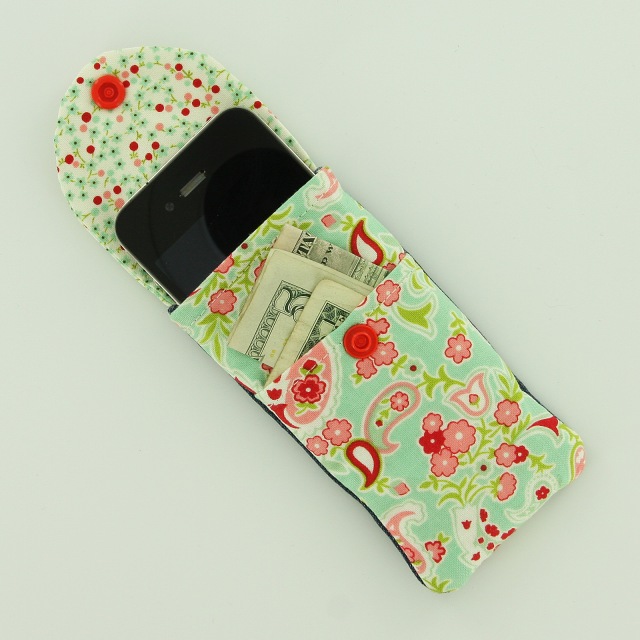
30 Days of Snaps!!! Day #27: How to make a Smart Phone Case and Wristlet with KAM Snaps and Key Fob Hardware July 11 2014
Day #27
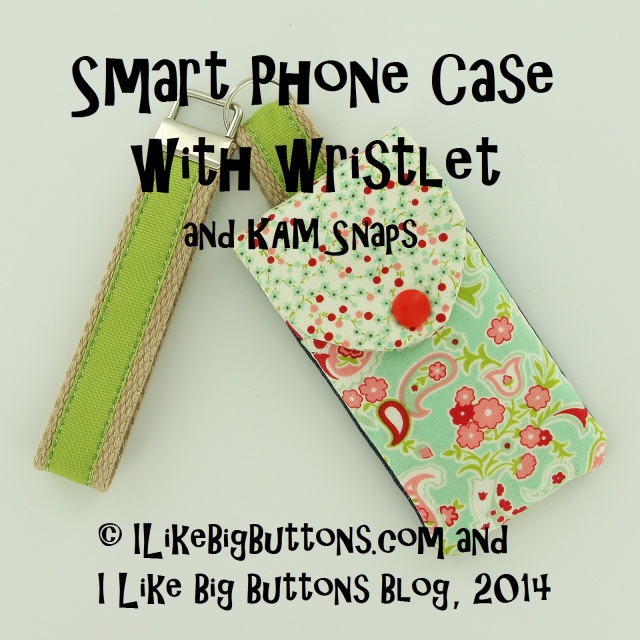
Making a Smart Phone Cover and Wristlet with KAM Snaps and Key Fob Hardware
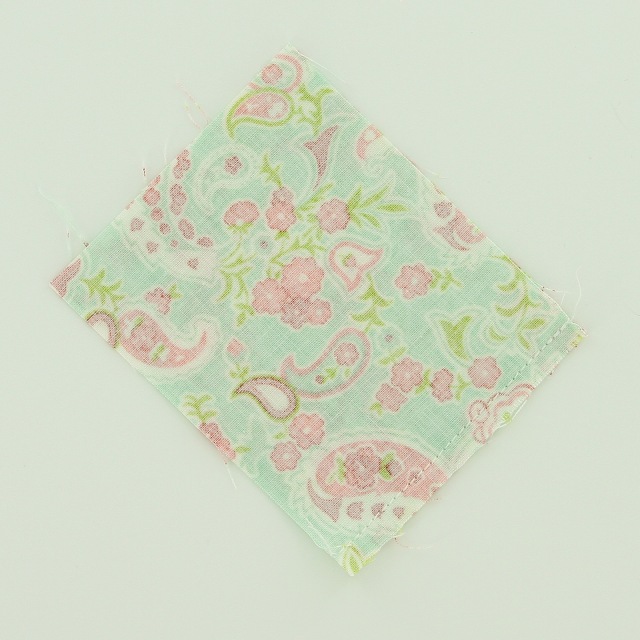
Today's inspiration came to me as I was packing the kids up for a walk down the road to the neighbors to check out their yard sale and visit. I thought I wish I had a case for my iPhone and a place to put a couple "just in case" dollars but instead I held my phone and tucked the money into my bra :P and headed out with all the kiddos in tow. When I got home, I whipped this up. I am prepared for next time :).
Supplies:
- Fabric or Fabrics of your choice
- Interfacing
- 2x 10" Piece of 1″ Cotton Webbing
- 2x 10″ Piece of Ribbon
- 1 KAM Snap Set
- KAM Snap Pliers and Awl
- 1 Key Fob Hardware and Split Ring
- Smart Phone Case PDF Pattern (works for iPhone 4s and iphone 5, may need to adjust pattern for other models of phones)
- Standard Sewing Machine and Iron

Instructions:
1. Download the Smart Phone Case PDF Pattern. Print out the pattern making sure the 1″ square in the corner measures 1″ square when printed that will indicate the pattern is the right size.
2. Cut out each Pattern piece as many times as instructed.

3. You will end up with:
2 pieces of Fabric/1 Interfacing (back)
2 pieces of Fabric/1 Interfacing (front)
2 piece of Fabric/1 Interfacing (pocket)
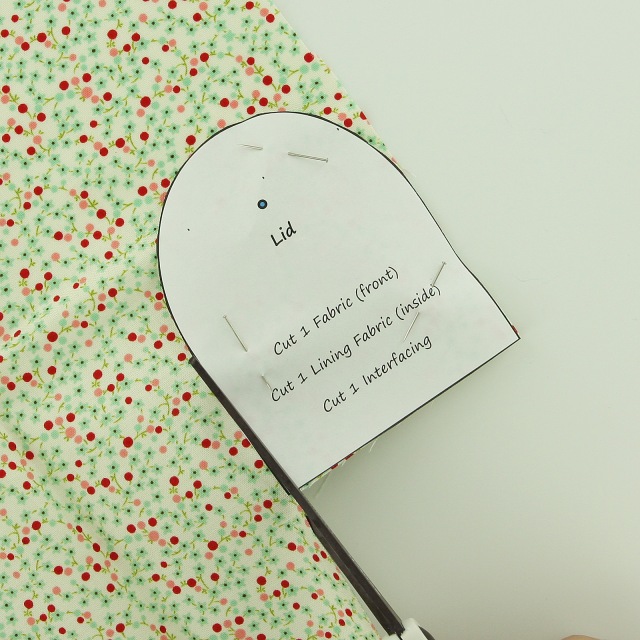
2 pieces of Fabric/1 Interfacing (lid)

4. Iron the Interfacing onto a piece of Fabric for matching side making sure to iron it to the wrong side of the Fabric.
5. Place right sides of Fabric for Pocket together and sew 1/4" seam along the top of the piece.
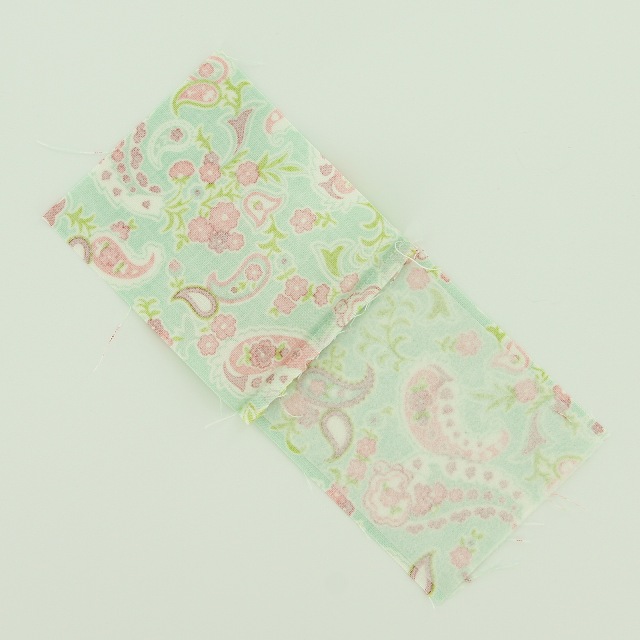

6. Iron Fabric for the Pocket open and then over wrong sides together forming the Pocket face.

7. Take 1 of the 10" pieces of Ribbon and 1" Cotton Webbing and sew them together. I stitched a straight line as close to the edge as possible on the Ribbon.

8. Take the 2 pieces of Fabric for the Lid/Lip of the case, put them right side together, and sew them with a 1/4" allowance.


9. Turn the Lid right side out and iron flat. Fold in the bottom edge and stitch it closed.

10. Then take the Fabric (right side up), I am using more of those recycled holey jeans :), that will be the Back and place the Cotton Webbing/Ribbon strip (right side up) centered across it with just a bit of it hanging off the top edge.

11. Place the internal Back Fabric wrong side up.
12. Pin them together.

13. Stitch a 1/4" seam along the piece, back stitching to reinforce Cotton Webbing/Ribbon strip. Cut away some of the excess Cotton Webbing/Ribbon if needed.


14. Iron back the Fabric and fold over, wrong sides together. Now stitch a 1/4" seam allowance across the top of the Back piece.

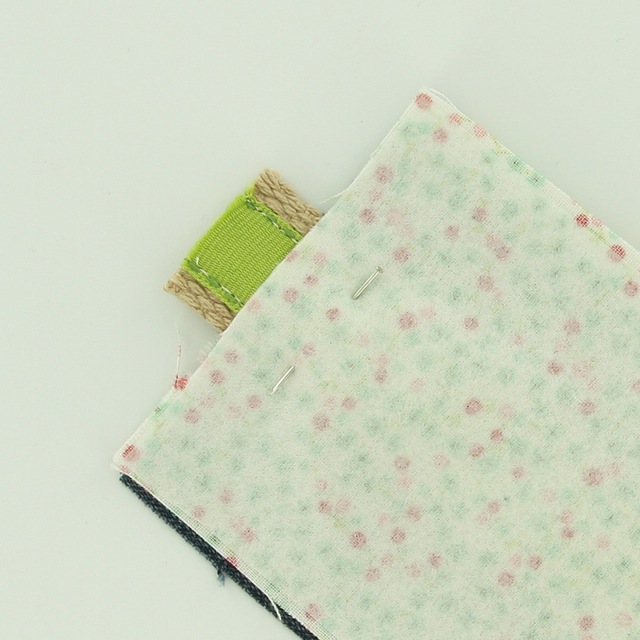
15. Now slide the Split Ring from the Key Fob Hardware on the Cotton Webbing/Ribbon Strip.


16. Now leave about 1" to 1 1/2" overlapped Cotton Webbing above the Back of the Case and pin the Cotton Webbing/Ribbon centered down the back of the Fabric.

17. Now stitch it in place down the back, with the internal Back out of the way, not as pictured, and I also stitched along the Cotton Webbing/Ribbon to gather the loop.
18. It will look like this.


19. Center the Lid along the back, pin and sew with a 1/4" seam allowance. This maybe should have been done a couple steps sooner so that I didn't have 2 stitch lines across the Back but I was when I got to it.

20. Place the finished Front down right side up, I added a 1/4" top stitch to the top of each piece (Front, Pocket and Back).

21. Add the Pocket right side up.

22. Place the Back wrong side up and pin it all together.


23. Sew a 1/4" seam allowance all the way around making sure to back stitch at the beginning and end.


24. Turn the whole thing right side out and push the corners out to get them as square as possible.

25. Install the KAM Snap Cap and Socket in the Pocket.
26. Install the KAM Snap Cap and Stud in the Lid.

27. What it looks like with KAM Snaps installed.
28. This pattern will work with iPhone 4 or iPhone 5, you may need to adjust the pattern somewhat if you have a different model.

29. Snapped closed.

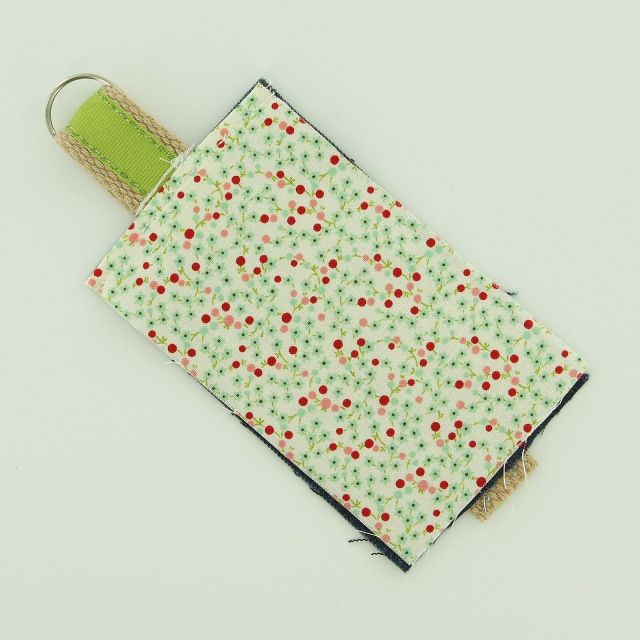
30. Add a Wristlet to complete your project. Check out our Key Fob Hardware Wristlet Tutorials to see how to make our Cotton Webbing and Ribbon Wristlets.
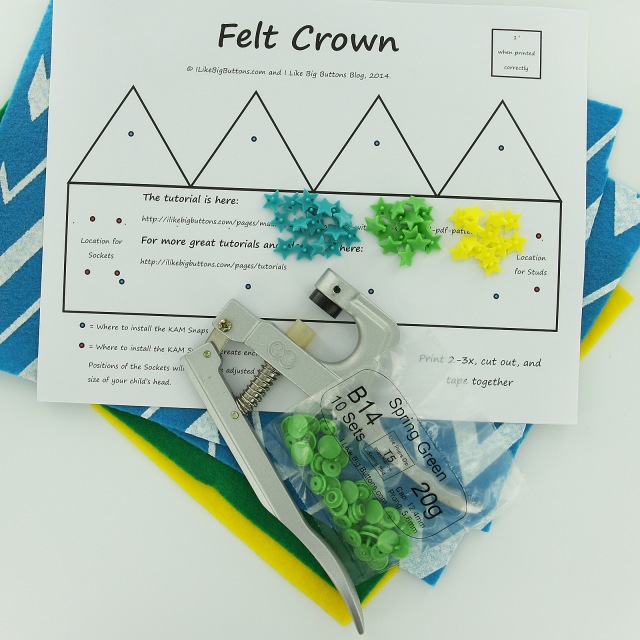
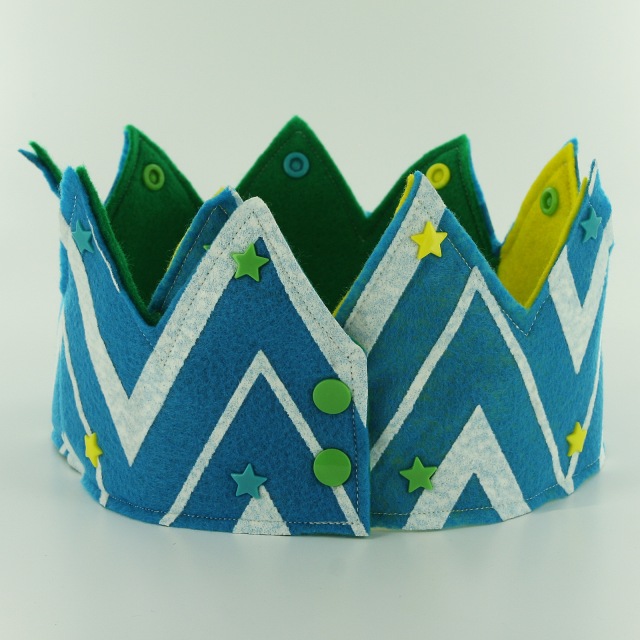
30 Days of Snaps!!! Day #24: How to make a Felt Crown with KAM Snaps and PDF Pattern July 03 2014
Day #24
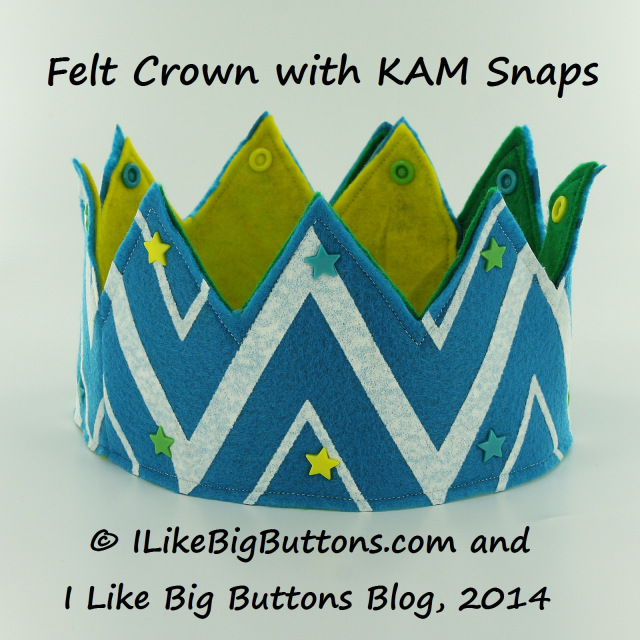
Making a Felt Crown with KAM Snaps and PDF Pattern
Today, I am making a Felt Crown for my Birthday Baby! With a few Sheets of Felt and some Star KAM Snaps, you can make a great accessory for your Birthday Baby, Prince or Princess, or just for everyday fun!
Supplies:
- 4 Sheets of Felt
- 3 KAM Snap Sets
- 10-20 Star KAM Snap Sets
- KAM Snap Pliers and Awl
- Crown PDF Pattern
- Standard Sewing Machine

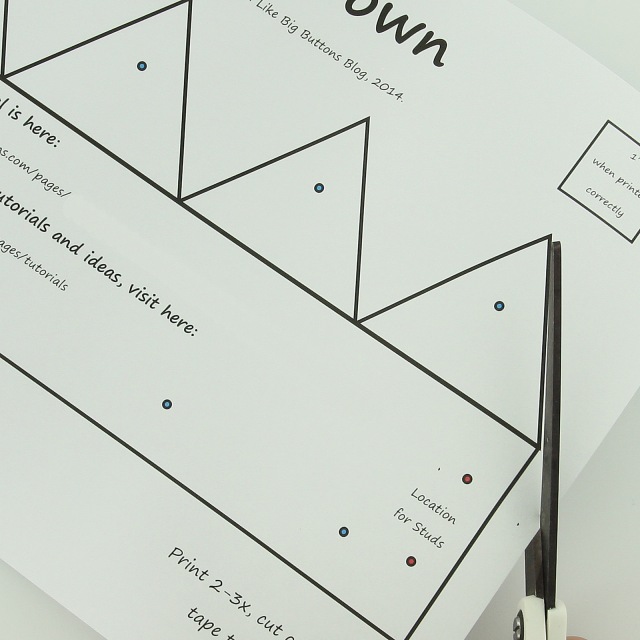
Instructions:
1. Print out our Free PDF Pattern for the Felt Crown. ***If you are using larger Sheet of Felt or Felt by the yard you may need 2-3 copies of it depending on the size of your child's head. Print out the pattern making sure the 1″ square in the corner measures 1″ square when printed that will indicate the pattern is the right size.
2. Cut your pattern out.


3. Pin your pattern to your felt sheet and cut the crown shape out as many times as needed (I needed 2.5 lengths for each side). If you are making out of Sheets of Felt you will need to add a 1/4" tab to each side of your felt cutout so that you can sew them together (I added to the PDF Pattern after I made the tutorial).

4. If using 8"x12" Sheets, put 2 sheets right sides together and line them up.
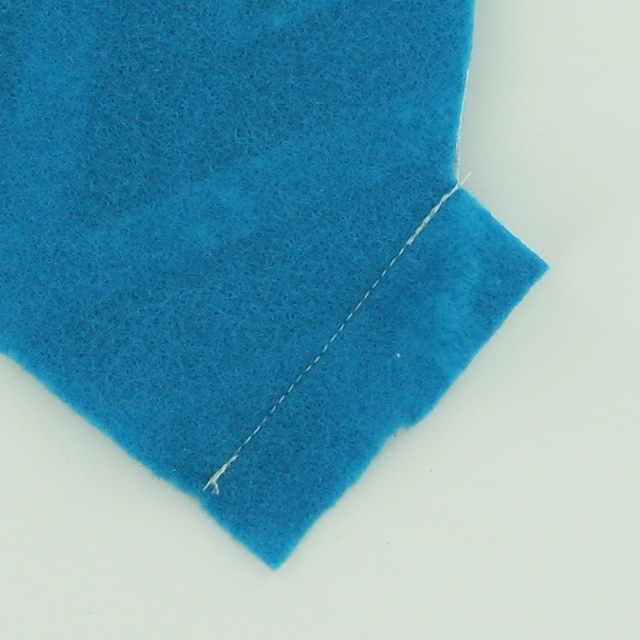
5. Sew them other, repeat to attach all 3 pieces together.

6. Cut off excess seam if necessary.

7. They should look like these.

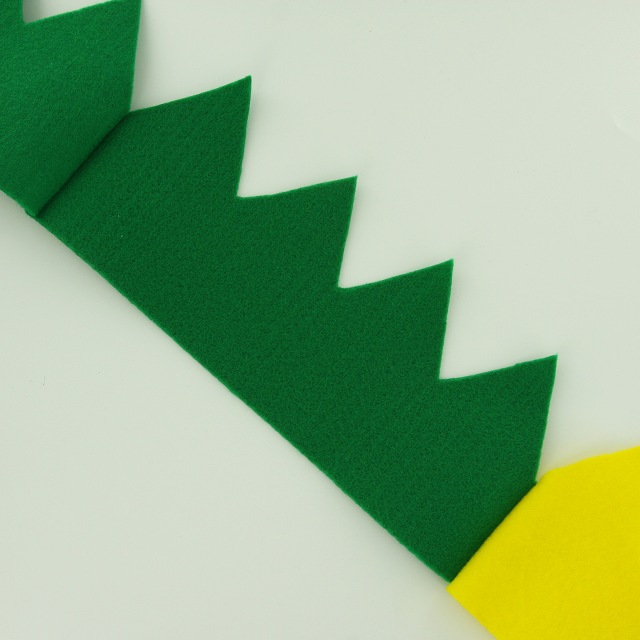
8. Line up and pin the front and back together, wrong sides together.

9. Stitch all the way around the Crown using a 1/4" seam allowance. Be sure to back stitch and the beginning and end of your piece.
10. Now my felt wasn't perfectly cut out so there was some peeking of the back around some of the edges. I actually liked the way it looked. It gave it a kind of cartoony look but for this tutorial I cleaned up the edges with a set of scissors after I sewed them together.
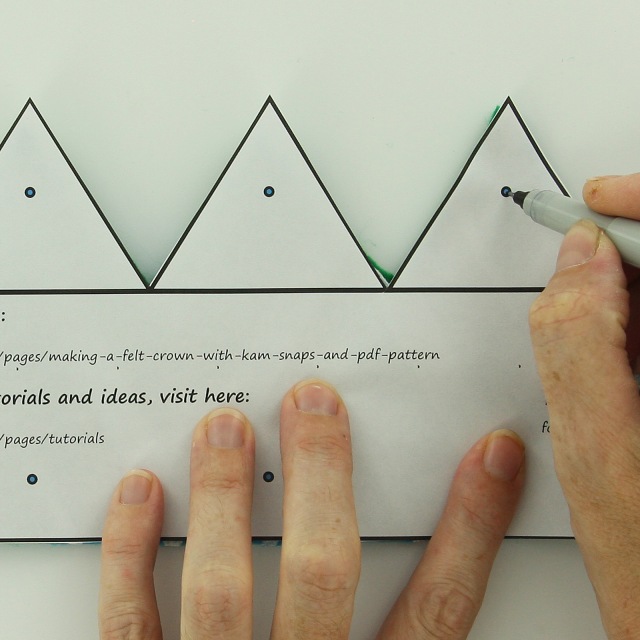
11. Use the pattern to mark the KAM Snap placement.
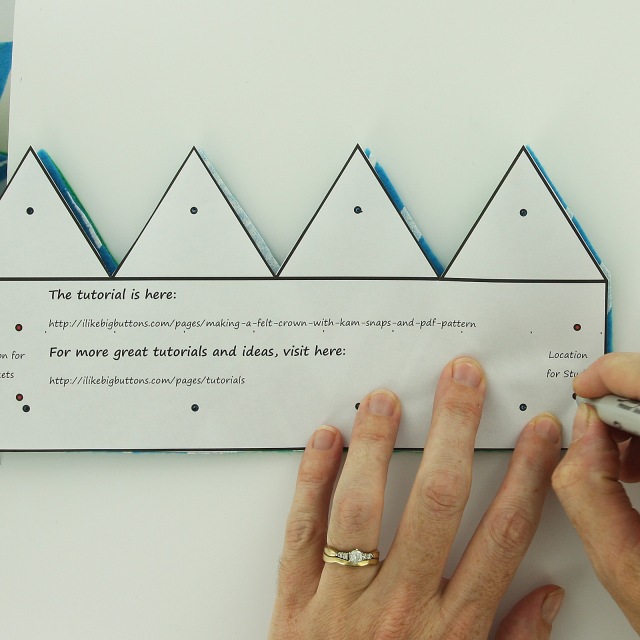
12. Also, mark the location for the Studs on the right side of the pattern. Don't mark the Socket locations yet, you will need to place the crown around your child's head to decide where to locate those snaps based on the size of their head.

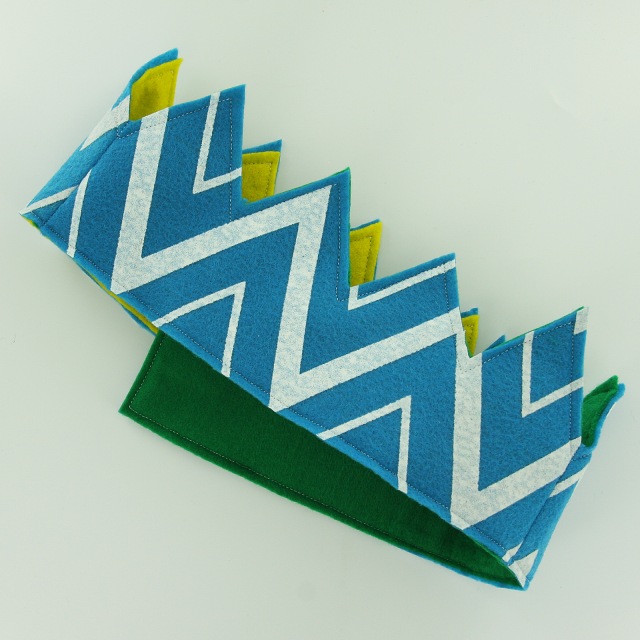
13. Now install Star KAM Snaps, one per each tip, I used 1 Star Cap and 1 Socket per each tip. You could use either the Sockets or Studs for the back, these are for decoration and are not functional. I liked the look of the Sockets for my finished product best. This part is up to creative expression. You can add more or different shapes, whatever your heart desires :).
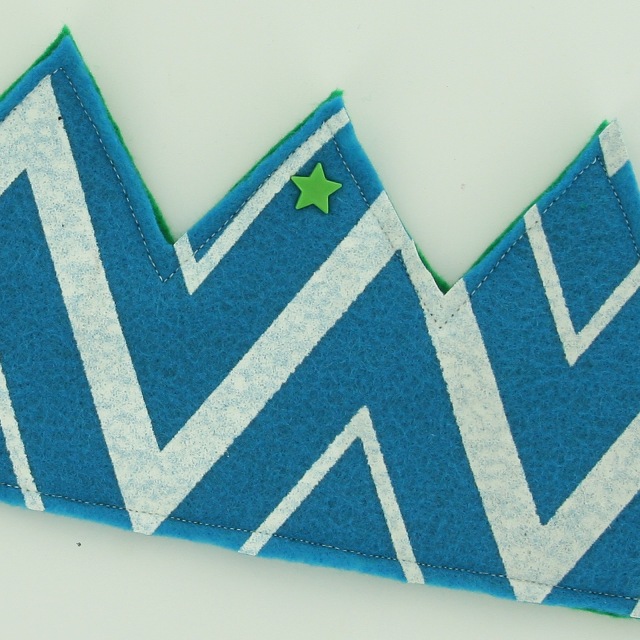
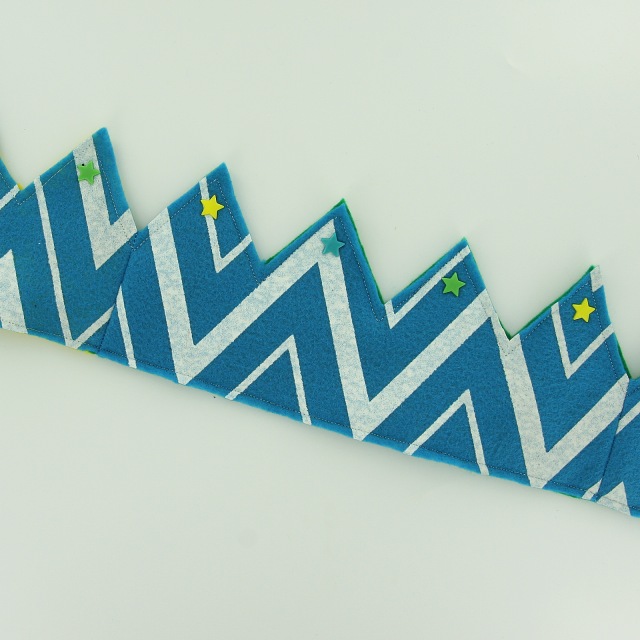
14. It will look like this.

15. Then install the bottom row of KAM snaps.


16. Install the KAM Snaps Caps and Studs on the right side at the marked locations.
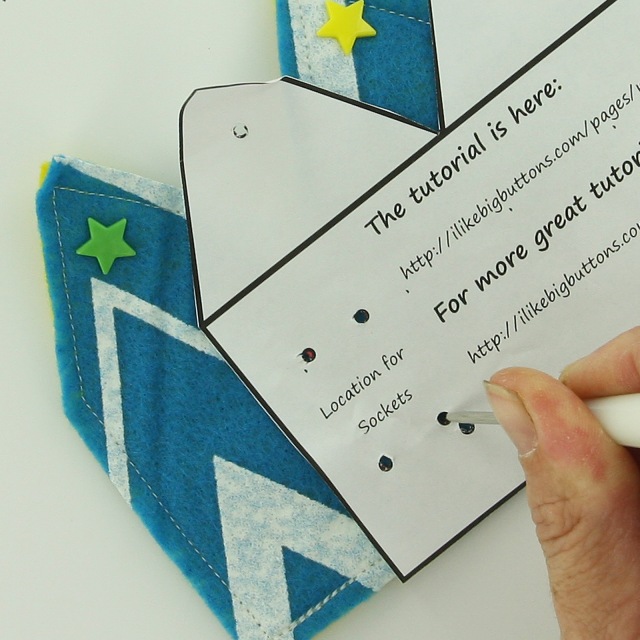
17. I wrapped the Crown around my child's head and then used the template to mark where the Sockets would go. I put in 2 sets of KAM snaps so that I can adjust it larger as his head grows. If I need to there is enough room to add more if needed. Felt is somewhat stretchy so it will allow for some growth also.

18. Install the 4 Caps and Sockets.
19. Tada! I think it turned out great! It was a hit with all the kids. Each asking where their Crown was :).

20. Happy Snapping!!!
30 Days of Snaps!!! Day #22: How to make a Felt Coin Purse with KAM Snaps and PDF Pattern July 01 2014
Day #22
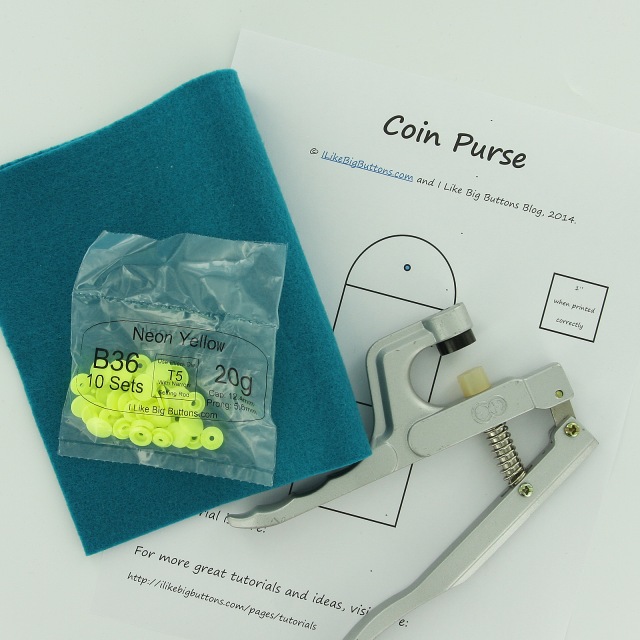
Making a Felt Coin Purse with KAM Snaps and PDF Pattern
- Sheet of Felt
- 1 KAM Snap Set
- KAM Snap Pliers and Awl
- Coin Purse PDF Pattern
- Standard Sewing Machine

Instructions:
1. Download our Free PDF Pattern for our Coin Purse. Print out the pattern making sure the 1" square in the corner measures 1" square when printed that will indicate the pattern is the right size.
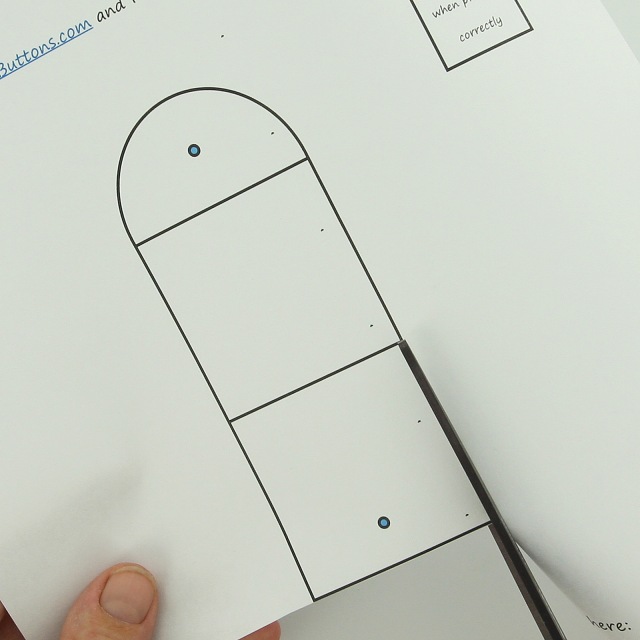
2. Cut your pattern out.
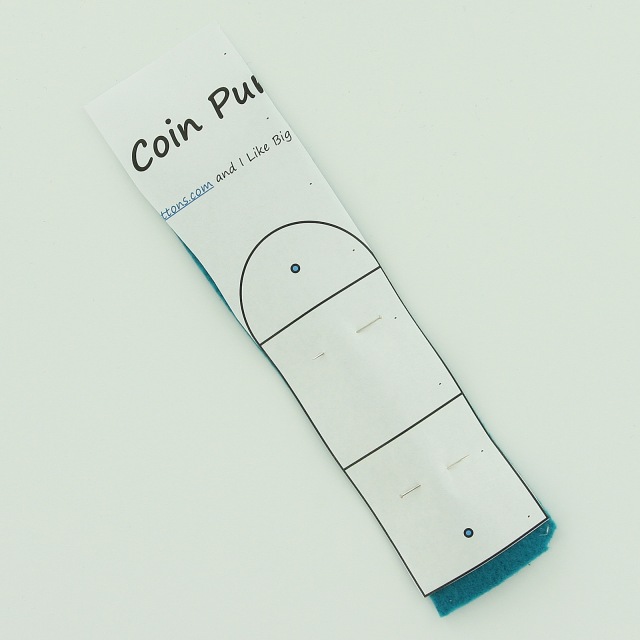
3. Pin your pattern to your felt sheet and cut the coin purse shape out.

4. Use the Awl to poke a hole through the pattern and felt where the snaps will be installed.

5. Choose the more finished side of the Felt, that will be the outside of your purse, place the Cap on the wrong side of the Felt.
6. Turn the Felt over and put the Socket on the right side of the Felt.

7. Install the KAM Snap. I used Size 20 snaps for this tutorial but either Size 20 or Size 16 will work great.

8. Now pin the Felt back on itself 2" and pin in place.
9. Use your Sewing Machine and stitch a 1/8" seam starting from the Right corner where the Felt meets all the way around. When you reach the curved flap make sure go slowly, lifting the foot every couple stitches so that you can turn the Felt a little to adjust the stitch around the curve. When you reach the starting stitch overlap a couple stitches and back stitch to set the seam.


10. Put the KAM Snap Cap through the right side of the Felt and the Stud on the other side.
11. Install the KAM Snap.

12. The back will look like this.

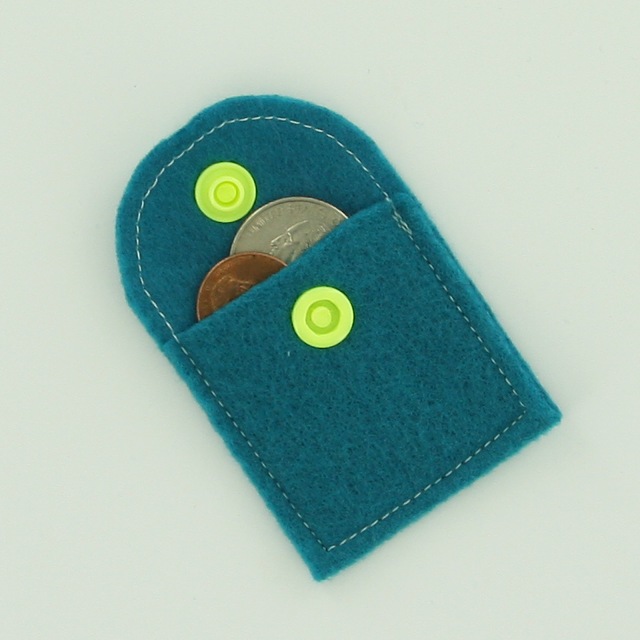

13. Tada! My crafty daughter/assistant :) loves this little coin purse and pointed out that this would be great for party favors if made in a larger size. I am sure you all can think of many great uses for this sweet little purse. Happy Snapping!!!