3. Press Earring Post into place and remove any extra Adhesive. On smaller sized Cover buttons center the post, as they increase in size adjust post towards top.
4. Let dry, add Earring Backing/Nut, and enjoy.
5. Tada!
You are done! Wear these adorable Earrings to match or accent your favorite outfit or dress up your favorite t-shirt and jeans for an afternoon outing. Enjoy!
One of our all-time favorite tutorials — and a customer favorite too! These Bandana Bibs are the perfect handmade gift for the little droolers, snackers, and stylish cuties in your life.
This easy-to-follow PDF pattern shows you how to sew and snap your way to adorable results. Plus, we used our new Heart-Shaped KAM Snaps for a little extra love.
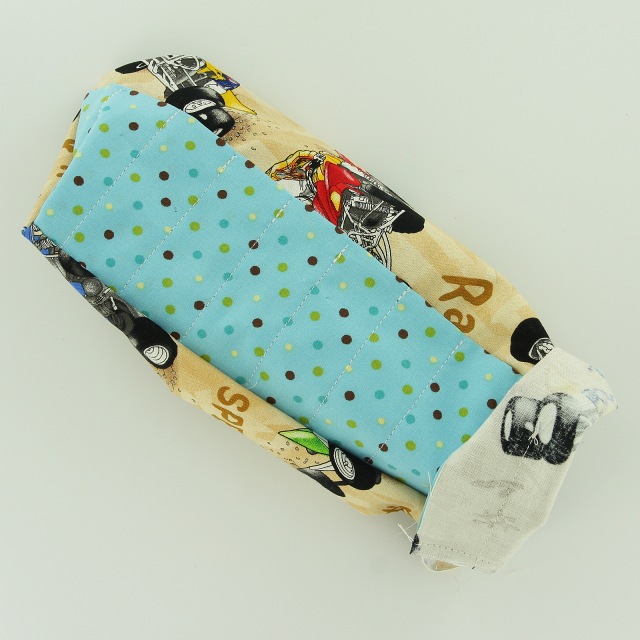
1. Cut 3 Pieces of 12"x6" and 1 Piece of Interfacing. This will make a Medium Sized Crayon Roll and will hold 9-10 Crayons. You can adjust your Fabric length up or down to hold more or less Crayons. About 2" when to edges, seams and Snap placement.
2. Iron the Interfacing on the wrong side of the fabric that will be the back of the Crayon Roll.
3. Iron the Piece of Fabric in half that will become the pocket to hold the Crayons and lay it on the Piece of Fabric that will be its backing.
4. Pin them together.
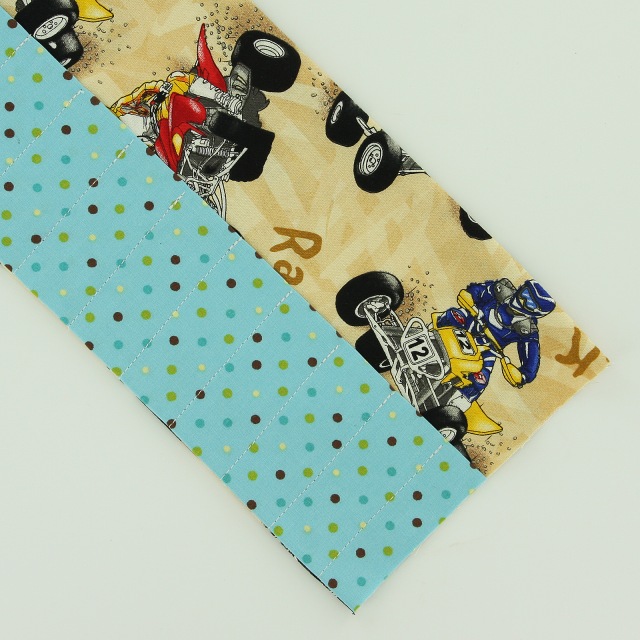
5. Every 1" sew a straight line down, back stitching at the beginning.
6. Take the back piece, Fabric and Interfacing, and the front piece, Fabric Pocket, place right sides together and sew a 1/4" seam on three sides. Set the stitch at both ends.
7. Turn the Fabric right side out and push out the corners.
8. Iron it flat.
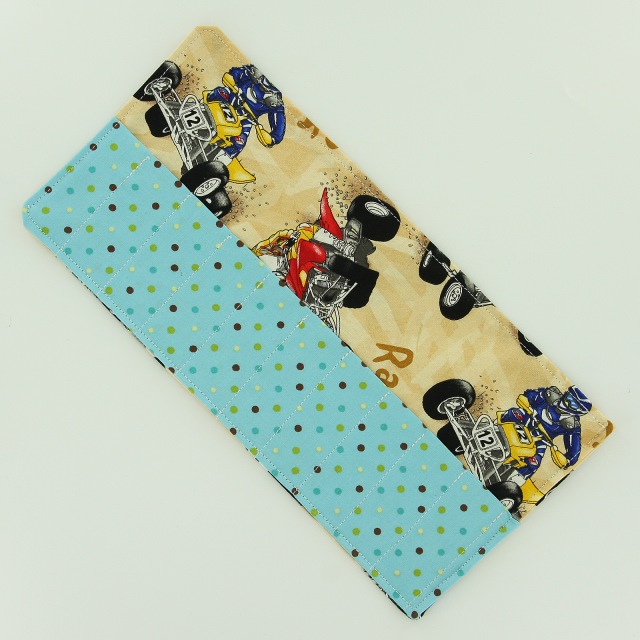
9. Fold in the unfinished edge about 1/4" and iron flat. Pin flat.
10. Sew all the way around the Crayon Roll with a 1/8" seam. Make sure to back-stitch at the beginning and end.
11. On the top right corner of the Crayon Roll, poke a hole for the KAM Snap Cap and Stud with your Awl, a 1/2" in and 1/2" down. Repeat on the bottom right corner a 1/2" in and 1/2" up.
12. Install theKAM Snap, I used G115 Turquoise for this project to match the fabrics my youngest son picked out. Repeat.
13. This is what it will look like.
14. To figure out the placement of theKAM SnapCap and Sockets, add Crayons and roll it up.
16. Now install theKAM SnapCaps and Sockets. The second round of snaps landed in the middle of one of the crayon spots. As this was my first attempt at a Crayon Roll, there is a learning curve. It could still hold a Crayon. It just wouldn't sit down in the pocket as well. I would adjust for the placement of the Snaps a little differently next time, maybe. :P
1 or 2 Standard Round Magnet (Approximately 3/4" Round)
E6000, Hot Glue, or comparable adhesive
I Like Big Buttons! - Picture Tutorial Below:
1. Cut your fabric scrap. You will want a circle that is about twice the diameter of your button blank. *TIP* OurAll-In-One Cover Button Templatemakes creating the right size circle of fabric a breeze.
2. Put your fabric piece in the larger assembly tool piece (RIGHT SIDE DOWN). When you look into the tool you want to see the back of the fabric.
3. Glue the magnet inside the back of theCover Buttonwith Hot Glue or E6000.
4. Place the button front (the domed piece) on top of the fabric. Leave the fabric edges hanging out.
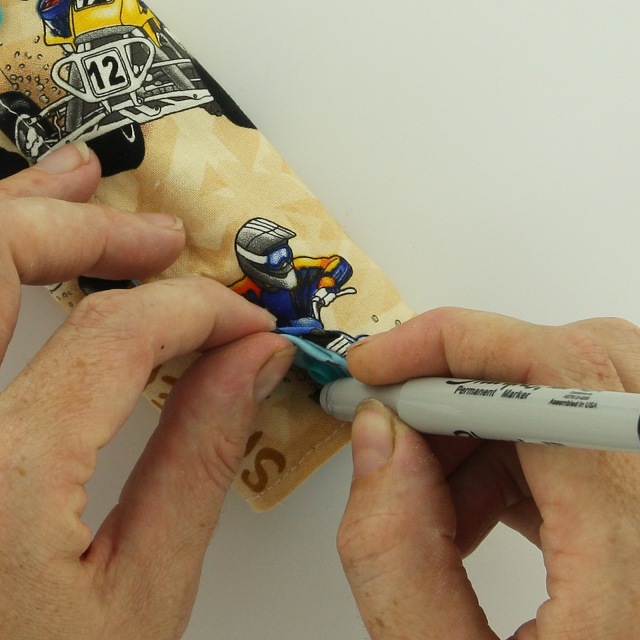
5. Press the cover button edges down into the tool. *TIP* To make it easier on my fingers, I use a sharpie marker to apply pressure.
6. Place the back cover button piece on top of your fabric and button front. *TIP* If the cover button will be subject to repeated tugging from the back, you may want to add a little e6000 adhesive before attaching the back.
7. Take the smaller piece of the assembly tool and with the open side down place it on the button back.
8. Press down. You may hear a pop when the last bit of the button back slips into place. If you take the tool out and the button is not completely secured, just put it back in and press down again. *TIP* I often use a flat piece of wood to apply pressure, again to save my fingers. It also helps to avoid the button back going in at an angle.
9. When you take the small assembly tool piece off, the fabric edges will be secured underneath the button back.
9. Remove the button from the larger assembly tool piece.
10. Tada! Now you have an attractive Pin Cushion/Needle Holder for your sewing room.
To see other great Fabric Cover Button ideas, visit our DIY Project sectionhere.
1. Cut an 11" section of Cotton Webbing and Fabric strip, create an 11"x2.25" strip of Fabric and an 11"x1" strip of Heat N Bond. If desired, you can make the wristlet longer, some crafters go as large as 12-14" but 11" is a nice universal size.
2. I made a template out of chipboard that was 12"x1.25" to help me achieve a consistent size and look. Fold in and iron the fabric to 1.25" wide.
3. Center and iron Heat N Bond to the underside of the Fabric strip.
4. Remove Heat N Bond backing, turn the finished Fabric Strip right side up, and iron to Cotton Webbing, making sure to center it.
5. Stitch along the edge of your Fabric strip, securing the edge onto the webbing. Work slowly, keeping close to the edge. Go the whole length on both sides.
6. Fold the Cotton Webbing in half, right sides facing out and match up the ends. Secure withSewing Clipsand stitch the ends together with a zigzag stitch. Trim any loose threads and lightly coat the end in Fray Stop or equivalent liquid to help resist fraying over time.
7. Tuck the sewn seam ends into theKey Fob Hardware, making sure that the Cotton Webbing is in there evenly and not hanging out one end or the other.
8. Using yourKey Fob Hardware pliers,squeeze theKey Fob Hardwareclosed a little at a time. I like to go back and forth a couple of times so that I don't over-crimp one side too much.
9. Add the Key Ring and Yay!!! You are done. Good Job!!!
* Instructions for 1.25" Key Fob Hardware (adjust accordingly if using 1" Hardware)
To see all our Key Fob Hardware Tutorials, visit our Projects sectionhere.
Unpaper towels make a great, attractive, and functional gift for your loved ones. We have 3 easy tutorials that show you how to make them. Standard Sewing Machine, Serger, or "No Sew" just pick your skill level and you can have these decorative and functional unpaper towels in your kitchen. Today, we are demonstrating how to make Unpaper Towels with a Serger.
See all our Unpaper Towel Tutorials and other great KAM Plastic Snap ideas here.
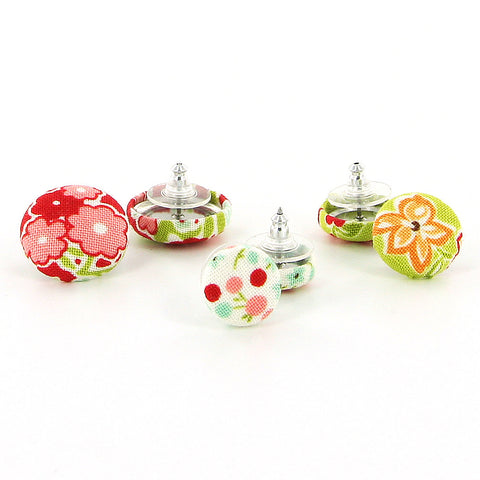
Today, I am working on some cute Christmas cards using Fabric Cover Buttons. They turned out lovely. You can also make the Cover Buttons into earrings with our Earring Supplies and it can double as a gift and Christmas Card.
Our buttons range from 1/2 inch to 1 7/8 inches in diameter. We also carry them in both flat back (glueable) and wire back (sewable).
😍 Sometimes, you just got to craft! I found this gorgeous fabric at the craft store. Last week, I asked for your help deciding what I should turn it into. I ended up going with Cover Button Earrings, and I love how they turned out!
Key Fob Hardware is simple to use and produces amazing results. Here are a few examples of what you can make. Just add your fabric, ribbon, or webbing for an instant, elegant wristlet.
We bought this cute swimsuit for my daughter a little while ago. The swimsuit is totally adorable, but both she and I felt it tended to slip a little too far down in the front as the day went along. KAM plastic snaps to the rescue! We turned her halter top swimsuit into a standard strapped swimsuit in just a few seconds with KAM plastic snaps.
First, we decided that we wanted the ends to crisscross and tuck into the back of the swimsuit, to give the illusion that the straps were sewn in place. We also wanted to leave to halter top feature in case she wanted to wear the straps tied up when sunbathing.
We used G100 - Marina (Blue) to coordinate with the swimsuit's warm sea blue color. Because we wanted the straps to tuck into the suit, we installed the KAM snap Cap and Socket on the back of the swimsuit with the Cap facing out. We, then, installed the KAM snap Cap and Stud on the swimsuit strap so that the Stud faced out.
Then we simply crisscrossed the straps and snapped them in place. It's a snap!
We are pleased with how it turned out. It looks like it was always meant to be a strapped swimsuit and it can easily be converted back into a halter top at a moments notice.
Tada! Time to go lounge at the swimming pool!
To see other great KAM Plastic Snap ideas, visit our DIY Project section here.
Throwback Thursday! Plastic snap removal video using cuticle cutters to remove a KAM plastic snap socket or stud. A great alternate way to remove misformed or broken snaps if you don't own KAM Plastic Snap Removal pliers.
1x Standard Round Magnet (Approximately 3/4" Round)
E6000, Hot Glue, or comparable adhesive
I Like Big Buttons! - Picture Tutorial Below:
1. Cut your fabric scrap. You will want a circle that is about twice the diameter of your button blank. *TIP* OurAll-In-One Cover Button Templatemakes creating the right size circle of fabric a breeze.
2. Put your fabric piece in the larger assembly tool piece (RIGHT SIDE DOWN). When you look into the tool you want to see the back of the fabric.
3. Glue the magnet inside the back of theCover Buttonwith Hot Glue or E6000.
4. Place the button front (the domed piece) on top of the fabric. Leave the fabric edges hanging out.
5. Press the cover button edges down into the tool. *TIP* To make it easier on my fingers, I use a sharpie marker to apply pressure.
6. Place the back cover button piece on top of your fabric and button front. *TIP* If the cover button will be subject to repeated tugging from the back, you may want to add a little e6000 adhesive before attaching the back.
7. Take the smaller piece of the assembly tool and with the open side down place it on the button back.
8. Press down. You may hear a pop when the last bit of the button back slips into place. If you take the tool out and the button is not completely secured, just put it back in and press down again. *TIP* I often use a flat piece of wood to apply pressure, again to save my fingers. It also helps to avoid the button back going in at an angle.
9. When you take the small assembly tool piece off, the fabric edges will be secured underneath the button back.
9. Remove the button from the larger assembly tool piece.
10. Tada! Now you have an attractive Pin Cushion/Needle Holder for your sewing room.
To see other great Fabric Cover Button ideas, visit our DIY Project sectionhere.
Here is what you will receive a DIY Cover Button Earring KIT from ILikeBigButtons.com. Just a few quick steps to make a fun accent for any outfit or gift for a loved one!
Do you own a set of KAM® Snap Removal Pliers yet? They may be my favorite KAM tool. They take the frustration out of removing broken or miss-set snaps. And they're a Snap to use!
If you need to remove a plastic snap, this is by far the easiest means for removing it and our KAM Snap Removal Pliers are on sale right now.
It's easy-peasy and a snap to do. We sell both Silver and Gunmetal finish in 5 mm, 7 mm, and 10 mm grommets/eyelets. Visit our KAM grommets and KAM tools --> Shop with Confidence!
Pronged studs or Double-sided Snaps enable snap stacking. They take the place of a cap and allow your item to be snapped from both sides. While typically used to make a double-sided snap, they can be daisy-chained.
Pacifier clips are great for making pacifier holders, bib clips, toy holders, and various other ribbon or sewing crafts. They have grabbing teeth that secure tightly.
We frequently get asked, "How do you open these clips?"
These clips have a "soft" locking mechanism in the back that makes it more difficult to release unintentionally.
Opening the clip is a 2-step process.
First, slightly lift the lever in the rear to unlock.
Then, pull the front lip and the rear lever up and towards each other at the same time.
Once you get the hang of it, they are easy to open, but difficult for little fingers or to be released on accident.
I am a sweatshirt girl! Nothing makes me happier than a comfy sweatshirt. So warm, cozy, and comfortable, I love them all. The only downside is my newest favorite sweatshirt has supersized pockets. I love the front pocket, it is where my phone and emergency chocolate go, but this sweatshirt, although all the things I love about sweatshirts, has pockets the size of the Grand Canyon. My phone has fallen out of it more times than I want to count.
KAM plastic snaps to the rescue. Today, I am adding 2 sets of KAM snaps to my hoody so that I can wear my cozy sweatshirt without the fear of dropping or losing my phone.
Assembling fabric covered buttons is easy and fun! ILikeBigButtons.com carries 7 sizes of fabric cover buttons. Our buttons range from 1/2 inch to 1 7/8 inches in diameter. We offer them in both flat back (glueable) and wire back (sewable).
With cords abounding in my life and house especially after Christmas, 🤪 we needed a better way to manage them all. Here are the results of my efforts. Cord keepers/organizers to simplify my life and corral the cords we can't live without.
Have you read our January I Like Big Buttons! newsletter and checked out our brand new cover button tutorial, exclusive newsletter giveaway, and other great I Like Big Buttons! news?
If you aren't a subscriber yet, here's the LINK to join in on the fun!
* 1 email per month with current sales and bi-monthly email with giveaway or flash sale notification ILikeBigButtons.com.
Simply click on any color, enter quantity, click add to cart, and repeat!
You can narrow down your search by Size/Shape, Color, Prong Length, and Finish, as always, to make ordering easier.
We added a new category for our bargain shoppers, there is now a SALE tab so you can search the * On Sale * items exclusively. All items in the SALE drop-down menu will show the discounted price you will receive when ordering.
Right now, a large selection of Size 16 KAM plastic snaps are on sale. Check them out in the SALE tab or by looking for the colors with the Size 16 * On Sale * labeled pink bubble.
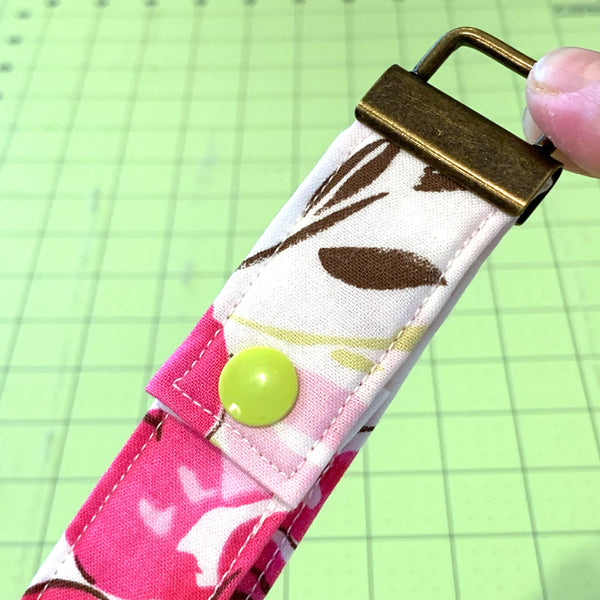
Thanks to my I Like Big Buttons! Facebook group for help deciding on which color KAM® snap to use on my latest project. I went with G90 - Bright Celery because I love the pop of color that it adds to the project.
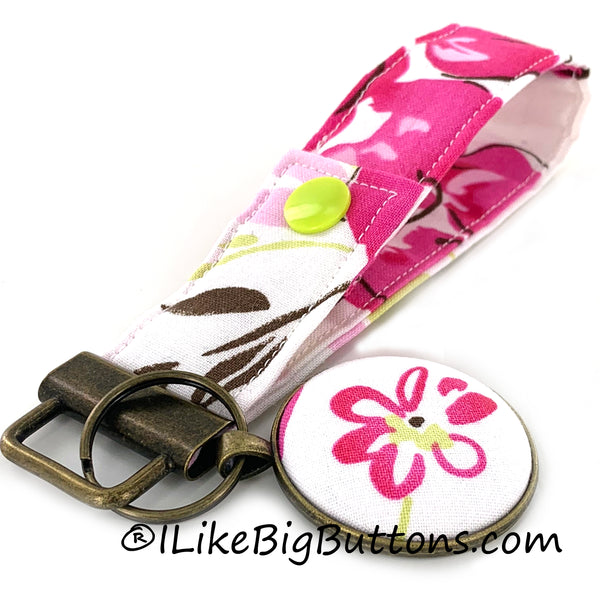
I have been wanting to make a Key Fob Wristlet for a while with a KAM®Plastic Snap accent. Not only does the KAM®Plastic Snapadd a bit of pizzazz to my project but it is also functional. I can wear the wristlet on my wrist or snap it to my purse strap for safekeeping. No more digging around in my purse to find my keys.
Supplies:
12" x 5" Fabric of your Choosing
12″ x 1" Piece of Fusible Fleece or 12" x 5" Fusible Interfacing
1. Cut a 12" x 5" section of Fabric of your choosing and 12" x 1" Fusible Fleece.
2. Fold and iron the Fabric in half with the wrong sides together.
3. Unfold and iron the Fabric in half again long sides to the center. Iron Fusible Fleece to the left or right center column of the fabric, depending on how you want to fold it.
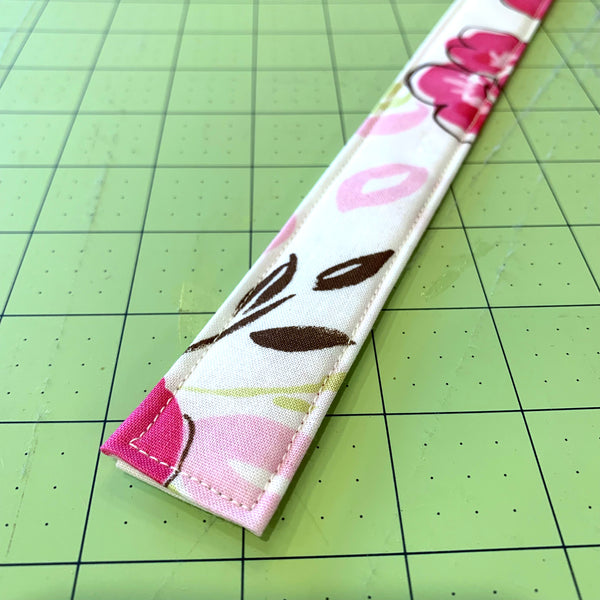
4. Fold over and iron about 1/2" of the fabric in on each of the ends so that when you sew your way around the strip you will create a finished edge at each end.
5. Use yourSewing Clipsto pin the Wristlet flat. It will look like this when you get done.
6. Stitch along the edge of your Fabric strip, I stitched 1/8" in. Remove theSewing Clipsas you go. Work slowly, keeping close to the edge and as straight of a line as possible.
7. Continue all the way around the band, stitching 1/8" from the edge.
8. Using the Awl, poke a hole through for the snap about 1/2" in from the edge. Do this at each end.
10. Snap KAM plastic snap together and decide where you want the snap on the wristlet. I decided I wanted it to be closer to the Key Fob Hardware than not.
11. Make sure that the Fabric Wristlet is centered. UsingKey Fob Hardware Plierssqueeze theKey Fob Hardwareclosed with gentle pressure. Sometimes, I go back and forth from left to right added a little bit of pressure to each side until it eases together. OurKey Fob Hardware Pliersmake this easy to do.
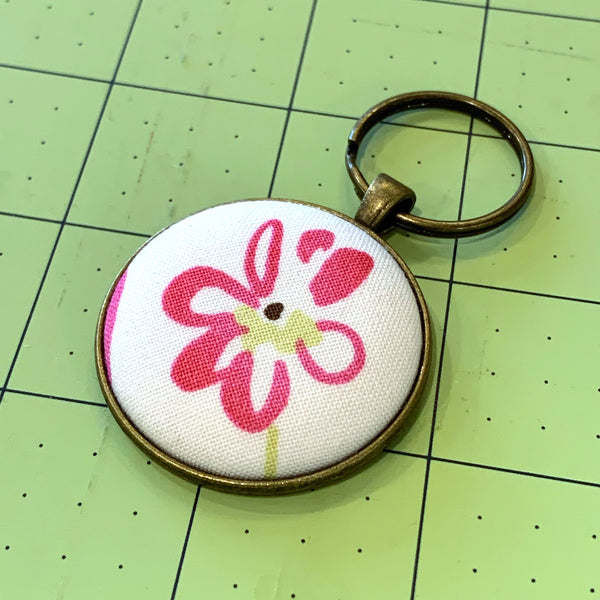
12. I wanted to add an extra bit of embellishment to my Key Fob Wristlet, so I made a quick Cover Button Pendant. Followthese instructionsto make Flat Back Fabric Covered Buttons.
13. Carefully apply E6000 to the inside edges of thePendant Bezel.
14. Press the assembled FabricCover Buttoninto place.
15. Let dry for the recommended time, add a necklace or cord as we did, and enjoy.
To see other great Crafty Inspiration ideas, visit our DIY Project sectionhere.