News
Homemade Donut Recipe from ILikeBigButtons.com Kitchen June 03 2022

🍮 I Like Big Buttons! Homemade Donuts 🍮
Ingredients for Bread Machine:
- 1 cup of Water
- 1 Egg
- 3 1/4 cup of Bread Flour (yellow bag usually)
- 1/4 cup of Granulated Sugar
- 3-4 Tablespoons of Butter
- 1 teaspoon of Salt
- 2 1/2 teaspoon of Rapid Rise Yeast (for bread machines)
Big Daddy Fryer or Medium, Heavy-Bottomed Pot on Stove:
- Crisco or Vegetable Oil (We use a fryer so I use Crisco because it sets back up and can be reused a few times before it needs to be replaced.)
Bread Machine Directions:
My bread machine has a quick dough option. It takes about 45 minutes to knead and mix and warm and knead it again or something like that. I usually walk away :). When it is done, I leave it in the bread machine for 15 more minutes and let it rise to make the yeast more relaxed and easy to roll.
***Alternative: 1 frozen loaf of Rhodes bread, thawed and rolled out will do the same thing. :)
Donuts:
- Plop the dough on a lightly dusted counter and roll it out to about 1/2" to 3/4". Using a donut cutter, or in a pinch, a large cup or the lid for a canning jar and a small cup about an inch in diameter to cut the center out. I often leave the center slightly attached. This helps it to hold more frosting when you are frosting them to eat. :)
- Place the cut out donut blanks on a cookie sheet lined with parchment paper. I also toss all the scraps on the sheet, my kiddos love the tidbits as much as the full donuts.
- Cover with plastic wrap and let sit for 45-60 minutes until they double in size.
- Heat up the Big Daddy Fryer or a medium, heavy-bottomed pan with about 2-3 inches of oil to 375 F.
- Carefully lower 2-3 donuts into the oil and cook on one side for 1-2 minutes, or until golden. Then cook on the other side for 1 minute or less, until golden.
- Drain fried donuts on a wire rack set over a large tray or on paper towels.
- Once they have cooled, you can embellish them however you like.
I Like Big Buttons! Kiddos Favorite Frosting Options:
- Granulated Sugar (Roll in)
- Chocolate Frosting
- Coconut Pecan Frosting (German Chocolate Cake Frosting)
- Cream Cheese Frosting with Sprinkles

Cinnamon Roll Recipe from ILikeBigButtons.com Kitchen May 17 2022

🍮 Cinnamon Rolls with Cream Cheese Frosting 🍮
Ingredients for Bread Machine:
- 1 cup of Water
- 1 Egg
- 3 1/4 cup of Bread Flour (yellow bag usually)
- 1/4 cup of Granulated Sugar
- 3-4 Tablespoons of Butter
- 1 teaspoon of Salt
- 2 1/2 teaspoon of Rapid Rise Yeast (for bread machines)
Bread Machine Directions:
My bread machine has a quick dough option it takes about 45 minutes to knead and mix and warm and knead it again or something like that, I usually walk away :). When it is done, I leave it in the bread machine for 15 more minutes and let it rise so that the yeast is more relaxed and easy to roll.
***Alternative: 1 frozen loaf of Rhodes bread, thawed and rolled out will do the same thing. :)
Cinnamon Filling Directions:
In a bowl mix:
- 1 cube softened butter
- 1/2 cup of brown sugar
- 1 Tablespoon cinnamon
Building the Cinnamon Rolls:
- Plop the dough on a lightly dusted counter and roll it out about 18-24 inches long and 10-12 high. Spread the sugar/butter/cinnamon mix on the dough and roll it up. It should still be 18-24 inches long.
- Then cut the dough into 1 1/2 to 2-inch rolls. I use a steak knife or dental floss. You should get approximately 12 rolls.
- Place them in a 9x13 greased pan. Cover with plastic wrap and let sit for 45-60 minutes until they double in size.
- Then bake them at 350 degrees for about 20 to 25 minutes. Watch them closely towards the 20 minutes, they start to brown fast.

Cream Cheese Frosting:
- 1 cube of softened Butter
- 1/2 cube of softened Cream Cheese (4 oz)
- 1 Tablespoon of Vanilla
- About 1/2 pound of Powdered Sugar (added in gradually while mixing)
- Whip it until smooth and fluffy. It will lighten in color as you whip it.
- Apply a generous dollop of Cream Cheese Frosting on each warm Cinnamon Roll and enjoy! Straight out of the oven is our favorite. :)
*Tip: These Cinnamon Rolls are AMAZING with my Zesty Homemade Chili.
Fixing A Instrument Carrying Case For My Musician With KAM Snaps April 21 2022
"Mom, all the zippers on my flute case are broken now." My musician held up his formerly zip-able case in one hand, his flute in his other.
KAM plastic snaps to the rescue. I went for the quick fix because there is only two months of school left. We will buy a replacement case next school year if he continued with band.
Supplies:
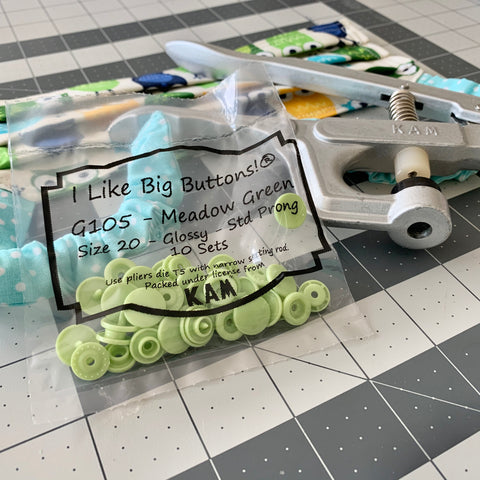
- Long Prong KAM Snaps (4 sets)
- KAM Pliers and Awl
- Marine Vinyl
- Standard Sewing Machine

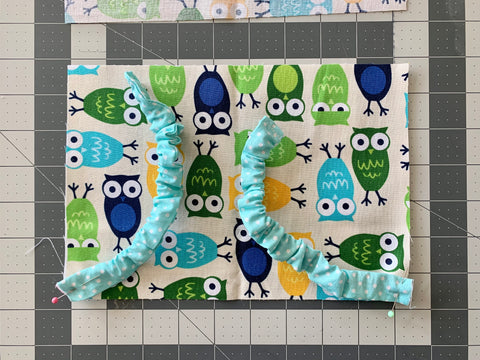
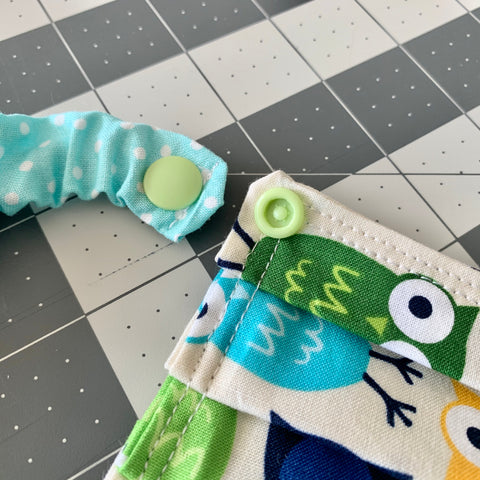
I sewed two tabs out of double-sided marine vinyl and zigzag stitched them to the top of the soft case. Then, with Long Prong Size 20 KAM plastic snaps, I attached a tab to each side of the case, so that my musician can snap and unsnap the case easily.

Because my musician is an active kiddo, a track team member and an all-round busy boy, I wanted a second layer of defense for his flute.


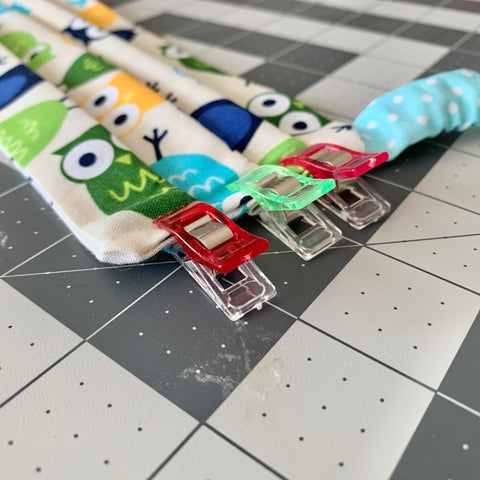
With the same marine vinyl, I made 4x 1" double-layered bands and zigzag stitched them to the bottom inside of the case in sets to meet across the top of the flute's hard case. Finally, I attached a Long Prong Size 20 KAM plastic snap set to each side and SNAP, his flute is secure.
Tada! Problem solved!
Preparing An ILikeBigButtons.com Order January 04 2022
I thought you might enjoy a glimpse inside the order preparation and shipping process at ILikeBigButtons.com -- This order was a fun one! 70 different color choices in a variety of shapes and sizes. You all like to keep me on my toes!
Shop with confidence!
Where to find us:
- Join our Facebook group!
- Like us on Facebook.
- Visit us on our YouTube Channel.
- Follow us on Pinterest.
- Follow us on Instagram.
- Follow us on Twitter.
Thank you for your interest! Have a great crafty week!
I Like Big Buttons and crew!
🤓 What are you working on today!?! 🤓 August 27 2021

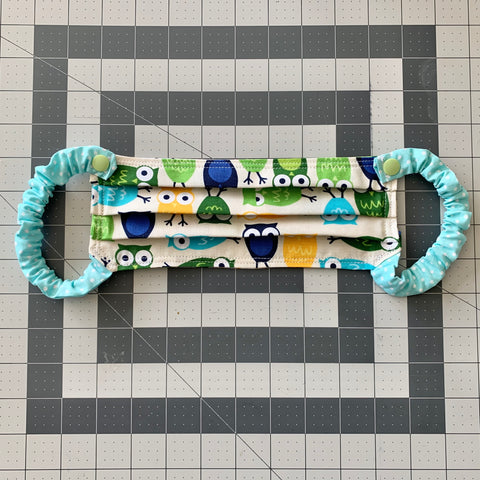
Face Mask with Scrunchy Earpieces Using KAM Plastic Snaps Tutorial by ILikeBigButton.com April 23 2020

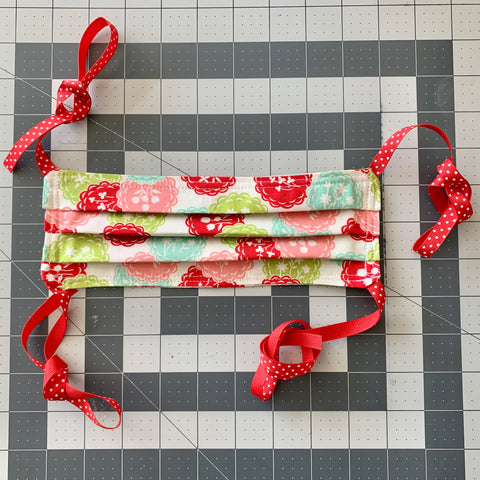
As a precaution, I have been making our family some face masks. Nothing fancy, I was limited to what supplies I had on hand. I made a mask with Elastic earlier, this one will be with ribbon ties.
So with some fabric scraps, ribbon (they mentioned you could use shoelaces as an option), sewing clips, and my trusting sewing machine, I found a set of instructions and struck out.
Here is the #1 version and #2 version I made:


Supplies:
- Face Mask Instructions (I used these as general guidelines)
- 2x 9.5" x 6.5" pieces of Fabric
- 2x 2" x 12" pieces of Fabric
- 2x 7" of Elastic (this is a good average size, but may need to be adjusted if you are a smaller person)
- KAM Plastic Snaps
- KAM Plastic Snap Pliers
- Sewing Clips
- Sewing Machine
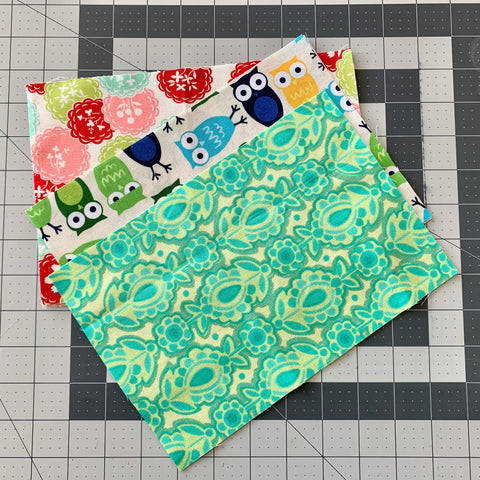
1. Cut out 2x 9.5" x 6.5" fabric rectangles and 2x 2" x 12" fabric rectangles.
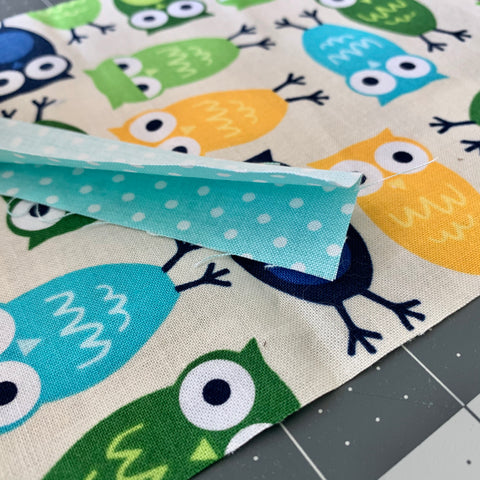
2. Iron the 2"x12" in half making a 1"x 12" fabric strip with right side facing in. Make 2.

3. Sew 1/4" seam along the long side (12" long seam) and turn then the tube right side out. Iron smooth.
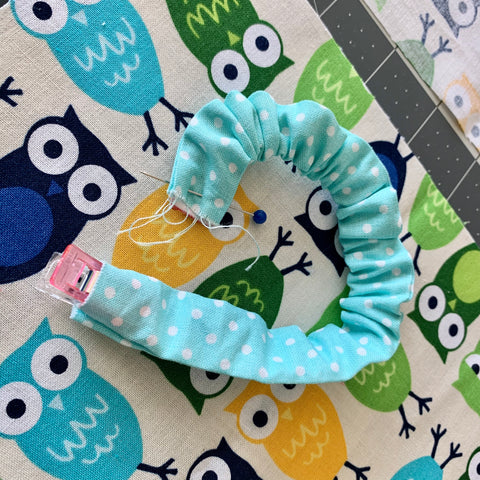
4. Fish a 7" piece of elastic through the tube, I used a sewing clip to keep the back end of the elastic from getting lost in the tube. Pin the elastic level with the end of the tube. It should start to scrunch up some. The tube is 12" long and the elastic is 7" long. Tuck the fabric into the tube without losing the elastic (use a second pin to keep in place) and sew the finished end of the earpiece that will be exposed. Make 2.
5. With the right side of 9.5" x 6.5" fabric facing up, pin the 2 fabric and elastic earpieces to the bottom corners. Like so.
6. Pin the second piece of 9.5" x 6.5" fabric facing down to the fabric with the earpieces tucked safely inside. Make sure the earpieces don't get caught in the edges while sewing.
7. Sew a 1/4" seam starting about 1/2 way on the long side. Go all the way around the perimeter, stopping when you have about 1.5" to 2" left. Make sure to go back and forth at each of the corners to anchor the ribbon. Leave that gap so that you can turn the face mask right side out.
8. Turn the mask right side out and iron it flat.
9. Make three pleats lengthwise, like you are folding a paper fan. I eyed it and used the sewing clip width as my pleat measurer, but if I was making more than a handful of these, I would make myself a template to make this part easier. The pleats help the mask form around the wearer’s face. Secure each pre-sewn pleat with a sewing clip as pictured above.
10. Now sew a 1/4" stitch around the outer perimeter of the mask face, going back and forward over the corners to add more stability to the ribbon.
11. Then, top stitch a second time around the outer edge about 1/4" in from the first round of stitching.

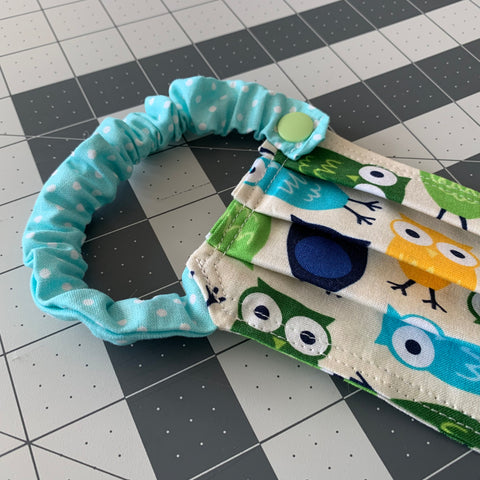
12. Using your KAM Plastic Snap Pliers and KAM Plastic Snaps add a snap to the upper edge of the mask and the end of the loose earpiece.
13. Tada! You have a finished face mask. This was my husband's favorite because the elastic didn't rub and pull at his ears. I added a second KAM Plastic Snap in pink to each side to make the mask work better with my face.
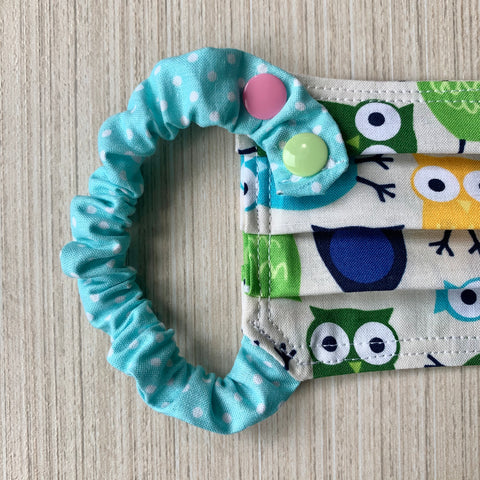
*Afterthoughts, this mask was the perfect size for my husband, but I added another KAM Plastic Snap an inch in for me on the scrunchy earpiece. This also worked for my teens, but I will need to adjust for my smaller kiddos. This mask seems best sized for teens to adults.
Tater Tot Casserole from ILikeBigButtons.com Kitchen April 14 2020

My favorite Go-To Dinner/Breakfast/Brunch dish, 🥔 Tater Tot Casserole 🥔. It is delicious, makes my husband grin from ear to ear when he realizes that IT is what is for dinner, and crazy easy to make.
🥔 Tater Tot Casserole 🥔 (Breakfast/Dinner)
From: I Like Big Buttons' Kitchen
Ingredients:
- 30 ounces of Tater Tots (frozen)
- 16 ounces of Sour Cream
- 2 cans of Cream of Potato soup
- 1 cup of Shredded Cheese
- 16 ounces of Cubed Ham
- 1/2 cup of Bacon Bits
(Optional) Add during the last 5 minutes of baking:
- 1/2 cup to 1 cup of Shredded Cheese (Cook for 5 additional minutes to melt.)*
Directions:
Mix soup and sour cream together in large bowl. Add tater tots until well mixed then add cubed ham, bacon bits, and shredded cheese. Place in greased 9x13 casserole dish and smooth out. Bake.
*Optional, sprinkle an additional 1/2 to 1 cup of shredded cheese on top in last 5 minutes of baking, if you like extra cheese. We do :).
Cook Time: Cook at 375 F until bubbly (about 40-50 minutes)
"No Sew" Key Fob for USB Memory Stick by ILikeBigButtons.com August 19 2019
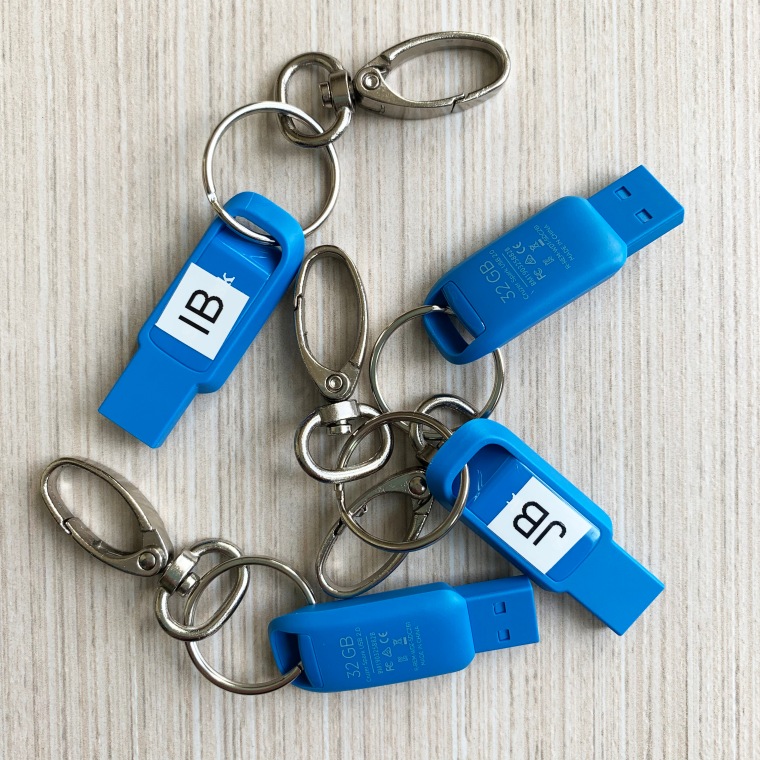
School supply time in the I Like Big Buttons! household. Almost all my kiddos need a USB memory stick these days, but they are SO small and prone to misplacement. I decided to make these simple "No Sew" Key Fobs to make them more challenging to lose, not that I don't have overachievers in losing things despite Mom's thoughtful planning. :P
Supplies:
- Split Rings
- Oval Lobster Clasps (Available in 1/2", 3/4", or 1" and Silver and Antique Brass)
- USB Memory Stick

Easy Peasy, twist a Split Ring onto an Oval Lobster Clasp. I used a Silver 1/2" Lobster Clasp, but we also offer them in 3/4" and carry them in 2 finishes: Silver and Antique Brass. Once the "No Sew" Key Fob is assembled simply twist the Split Ring onto the open ring at the top of the USB Memory stick. Tada!
To see other great Key Fob Hardware ideas, visit our DIY Project section here.
How To Make A KAM Plastic Snap Cord Keeper/Organizer by ILikeBigButtons.com February 05 2019
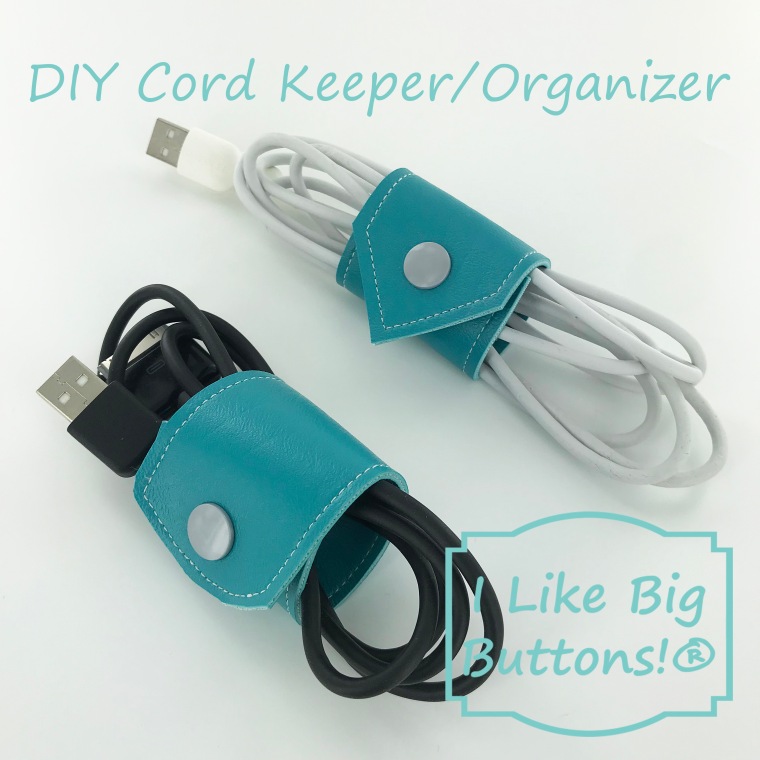
Cords, cords, cords!!! Despite my husband's best efforts to make our house wireless, there are cords everywhere. Part of the joy of being a mom of many, I suppose. 😜 Everyone has one or more somethings that need to be charged and my husband makes sure there are enough cords so that no one is left crying. Have I mentioned he is my resident computer wiz? A job he proudly takes on.
So with cords abounding in my life and house, I decided we needed a better way to manage them all. Here are the results of my efforts. Cord keepers/organizers to simplify my life and corral the cords we can't live without. 🤪
Supplies:
- Approximately 5.25" x 2" Marine Vinyl or material of your choice
- KAM Plastic Snaps (I used Long Prong KAM Plastic Snaps because I was working with 2 layers of Marine Vinyl)
- KAM Plastic Snap Pliers and Awl
- Sewing Clips
- Standard Sewing Machine
- Scissors
- Rotary Cutter

Instructions:
1. Cut out your material of choice, I used Marine Vinyl I had left over from a summer project. I cut each piece approximately 5.25" x 2" and gave them two different styles of finished ends. One is a pointed end, I used my quilting square to accomplish this, and the other has a rounded end, I used a small drinking cup to create the rounded tip. *The cords I was making these for were 6' cords, you may need to adjust the length of your cord keeper to accommodate a larger or smaller cord.


2. Place the two pieces of Marine Vinyl with wrong sides together and pin with Sewing Clips, if desired. Straight stitch with a 1/4" seam around the whole piece using a back stitch at the beginning and end to set the stitch.
3. Trim the edges down to 1/8" to remove the excess vinyl and any uneven edges. The Marine Vinyl can slip a little bit when you are sewing and I found this was the easiest way to get a clean edge.
4. Measure to the center at the top and bottom of each cord keeper/organizer and place a mark where you want your KAM Plastic Snap to sit. I don't like to eye it as I often find them off-center when I wing it.
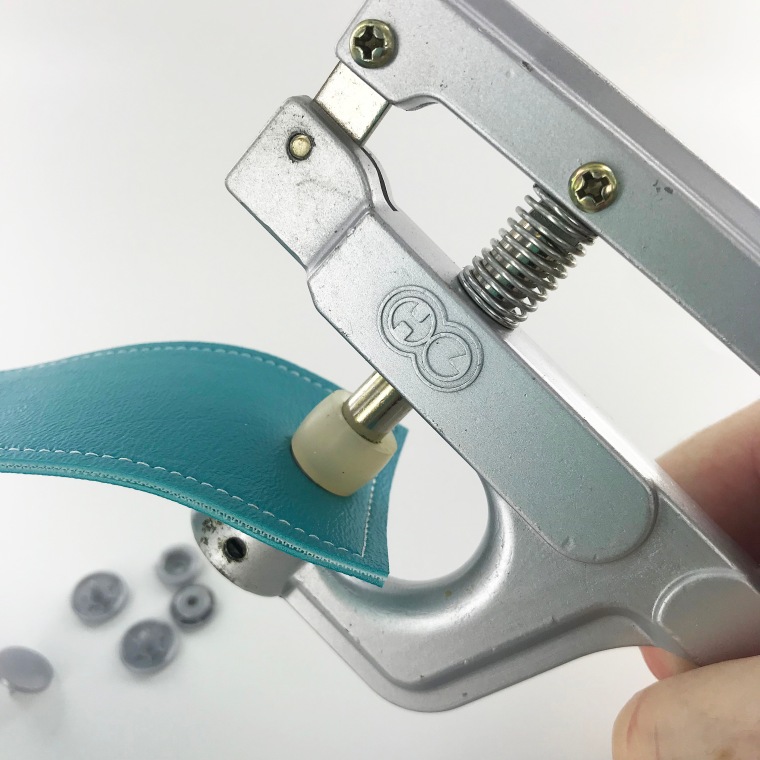
5. Poke a hole through the centered mark with your KAM Awl and insert the KAM Plastic Snap Cap prong through the hole. You will want the cap on the top side (the side that was up when sewing) of your cord keeper and the socket or stud on the bottom side.
6. Flip the cord keeper over and add the socket. Install the KAM Plastic Snap Cap and Socket on the edge that is rounded or pointed and a Cap and Stud on the square edge as pictured below.

7. Remember to install the snaps so that one half (Cap and Stud) are face up and one (Cap and Socket) are face down so that when you fold the cord keeper around the cord, the socket and stud meet.
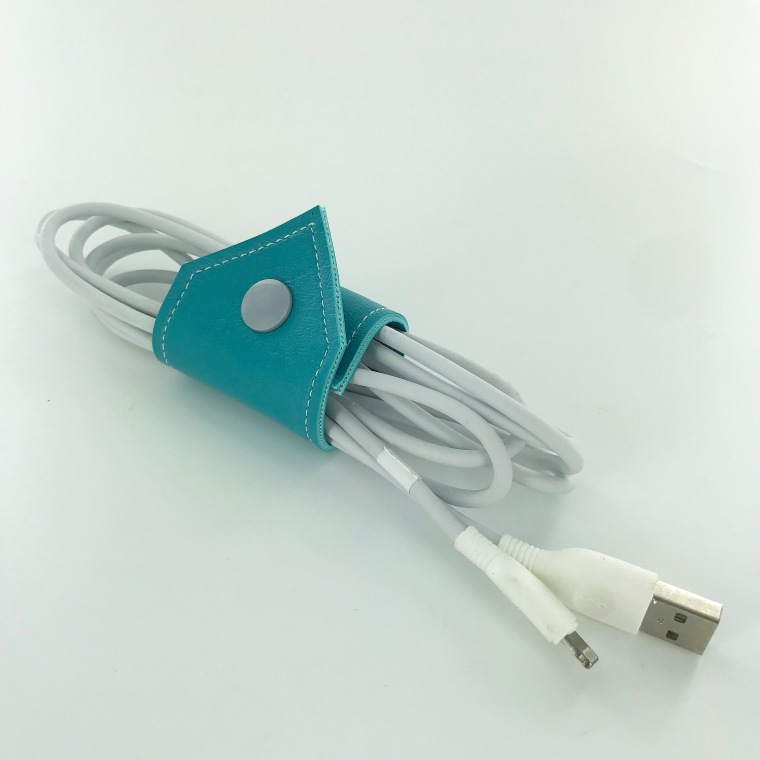

8. Tada! These cord keepers/organizers take only minutes to make with scraps of vinyl/fabric, a few KAM Plastic Snaps, and are already making my life feel less crazy. At least until they all get home from school. 😜
To see other great KAM Plastic Snap ideas, visit our DIY Project section here.
7 Of My Favorite Craft Quotes - I Like Big Buttons! June 28 2017
I love crafting quotes; they are so clever. Here are seven of my personal favorites. Each one makes me laugh out loud and holds at least for me, more than a grain of truth.


Friday Fun Facts - Who is ILikeBigButtons.com? June 09 2017

It has been a while since I have introduced myself. Hi! I am Gena, the CEO and MOM of I Like Big Buttons! :) ILikeBigButtons.com is a family run, small business located in beautiful Washington State. We have been serving our customers for over a decade via the internet.
When I am not busy growing our craft business, I am a busy momma of many. I grew up as many of you probably did, crafting with anything I could get my hands on, from twigs to the pansies in my momma's borders. Now I am raising my own children and watching them create little figurines out of twigs and weeds, and turn paper into shreds. If you walked through my house on any given day, you might mistake it for a confetti factory. Bits of paper and imagination are everywhere!!! Since I am up to my elbows in kiddos and crafts, I thought, why not sell crafty things?
Plastic snaps caught my eye first. My husband is the creator of the GotLux Professional Photographic Lighting Accessories, and he used these very snaps in his Pro and ProX models. The colors and usefulness of them drew me in. I discovered the many varied ways they can be used; I was hooked.
So here I am selling KAM plastic snaps and many other craft items that I love with the help of my amazing children and husband. I am sure you will find as much joy in crafting with them as I am. It is a privilege to get to help support my family, teach my children to have a solid work ethic, and be a full-time mom all because of I Like Big Buttons! and your support.
Thank you,
Gena (CEO of ILikeBigButtons.com)