News

How To Open KAM Suspender Clips @ ILikeBigButtons.com January 24 2022
Pacifier clips are great for making pacifier holders, bib clips, toy holders, and various other ribbon or sewing crafts. They have grabbing teeth that secure tightly.
We frequently get asked, "How do you open these clips?"
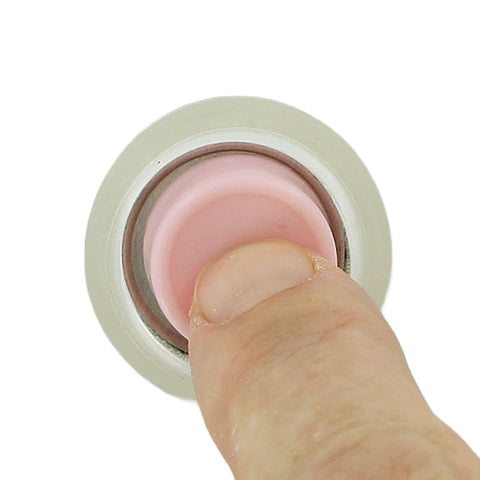
These clips have a "soft" locking mechanism in the back that makes it more difficult to release unintentionally.
Opening the clip is a 2-step process.
First, slightly lift the lever in the rear to unlock.
Then, pull the front lip and the rear lever up and towards each other at the same time.
Once you get the hang of it, they are easy to open, but difficult for little fingers or to be released on accident.

Shop with Confidence!
This feedback made my day!!! 😂🤣😂 @ ILikeBigButtons.com December 28 2021

Jean Pacifier Clip with Fabric Rosette November 16 2020


Supplies for a Recycled Jean Pacifier Clip with Fabric Rosette:
- 1 Pair of Holey Jeans
- 1 1/2" to 2" x 24" long strip of Fabric
- 1 KAM Plastic Pacifier Clip
- 1 KAM Snap Sets
- KAM Snap Pliers and Awl
- Sewing Clips
- Standard Sewing Machine
- Hot Glue Gun
- Fabri-Tac - Fabric Adhesive
Instructions:
- Using an old, holey pair of Jeans cut two 1 1/2" x 14" strips of material.
- Use Sewing Clips to hold the material, wrong sides together, right sides facing out.
- Stitch around the strip of fabric about a 1/4 to 3/8" in all the way around making sure to backstitch at the start and end.
- Pull on the edges to fray the jean material up to the stitch you made. I used a crafty child :) with a cutting board and a fork. It will also fray over time but I was going for this look.
- To make the Fabric Rosette, fold the fabric in half, wrong sides together, two times. You will end up with about 1/2" or less strip of fabric 24" long. I used an iron to fold it, not so much that it was completely flat, just enough that it held its shape. Start at one end and hot glue the first bit of it back against itself.
- Continue this ever so often so that the 'bud' stays together.
- Make the bud or center of the rose about 1/2" in diameter. Add one last drop of hot glue.
- Now twist the fabric 360 degrees, so that the bottom becomes the top. Tack it with a small bead of hot glue and repeat.
- Continue twisting and gluing until you run out of fabric or until you reach the desired size of your rosette.
- It will look like this when you are finished.
- Glue the last bit of fabric on the underside of the Rosette securely with hot glue.
- For a more finished look, I added a circle of felt to the bottom with Fabri-Tac.
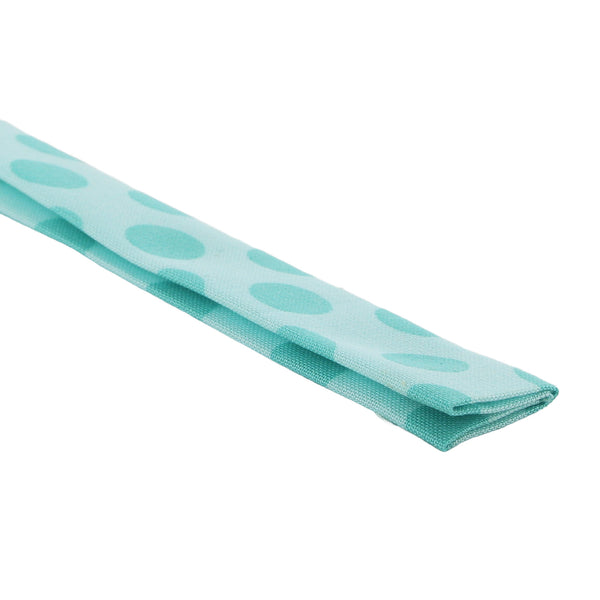
- Put the KAM Plastic Pacifier Clip on the Fabric strip about 1″ in.
- Fold back 1″ of the strip back onto itself.
- Straight stitch across the fabric strip just behind the KAM Plastic Pacifier Clip. Make sure to set the stitch.
- Make sure that the internal snap in a comfortable distance to accommodate the width of the handle, I spaced my KAM Snaps about 2″ apart using the Pacifier I have with the biggest handle.
- Now on the side where the Pacifier will be attached, I installed a Cap and Socket about 1/2″ from the edge. I used Size 20 snaps for this tutorial but either Size 20 or Size 16 will work great.
- Add Fabric Rosette with Fabri-Tac to the Pacifier Clip just above the clip.
- Now snap the Pacifier in place, attach to your child’s outfit and go.
- Tada! Okay, I think I am in love. Super cute! Happy Snapping!!! To see our other great Pacifier Clip Tutorial and KAM Plastic Snap Ideas and buy these supplies visit I Like Big Buttons.com.
Disclaimer: Keep in mind that although I have rough tested these I in no way recommend you leave your baby alone with these as there are small pieces and if not done properly they may come apart and become a choking hazard. I would recommend these clips under adult supervision only. The maker and/or parent assumes full responsibility when using these pacifier clips.
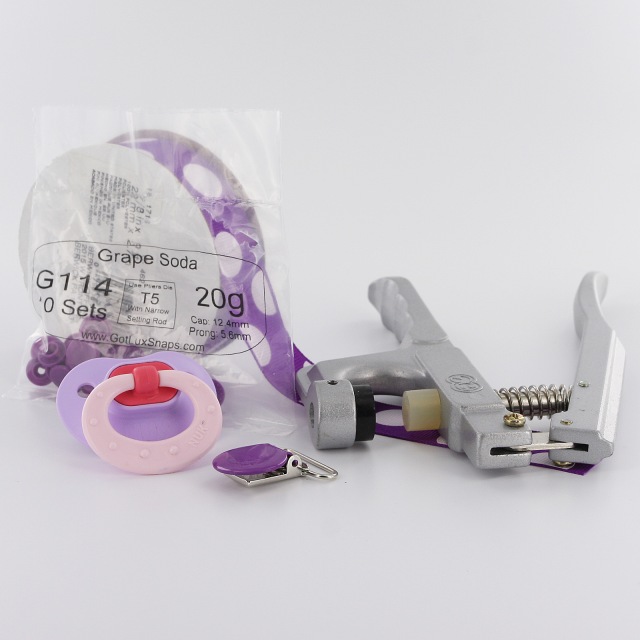
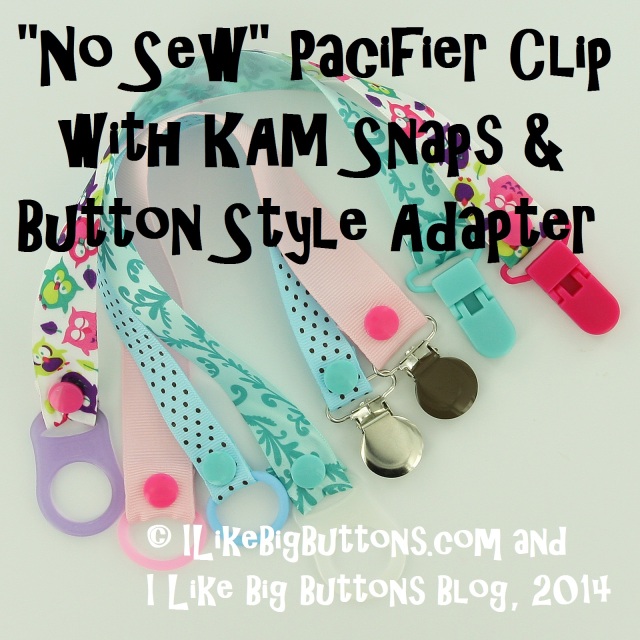
"No Sew" Pacifier Clip with KAM Snaps and Enamel Clip by ILikeBigButtons.com November 03 2020

Supplies for a "No Sew" Pacifier Clip:
- Pacifier with Hinged Handle
- 14-15" of 7/8" Grosgrain Ribbon
- 1 Enamel Clip or Plastic Clip
- 2 KAM Snap Sets
- KAM Snap Pliers and Awl
- Fabric Tac
- Lighter or Chef's Torch
Instructions:
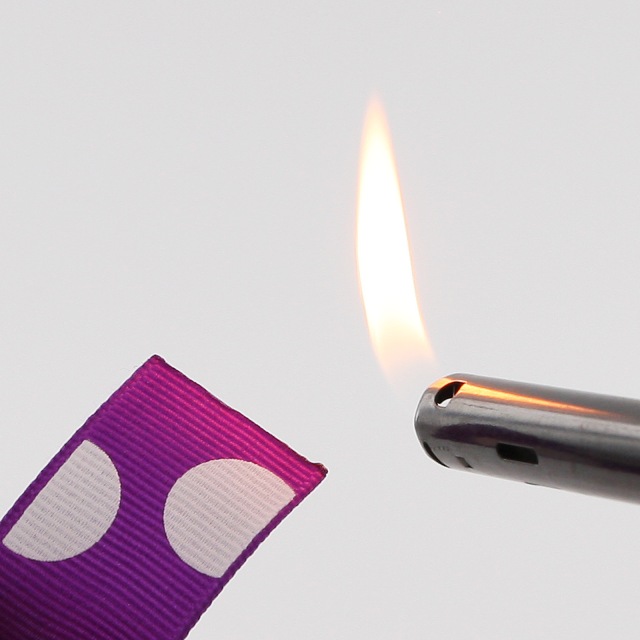
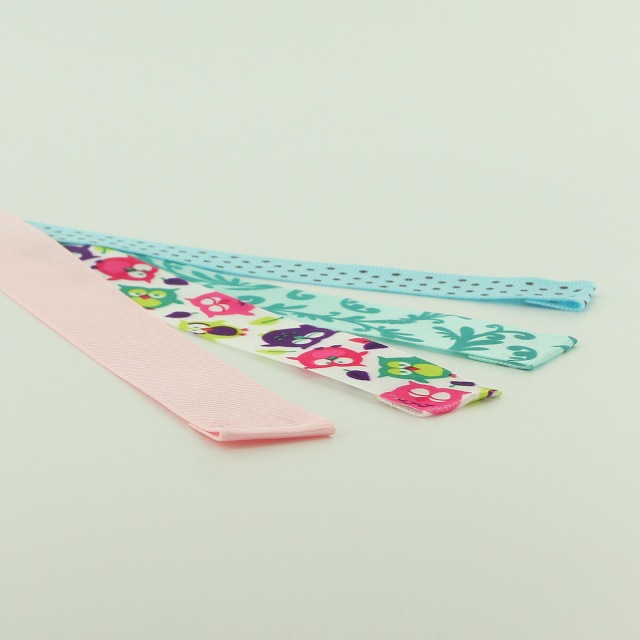
- Choose a 7/8" or 3/4" Grosgrain Ribbon, cut a 14" to 16" length of ribbon. I did 7/8" Grosgrain Ribbon and I cut it 16" long so when it was completed it was approximately 12" long.
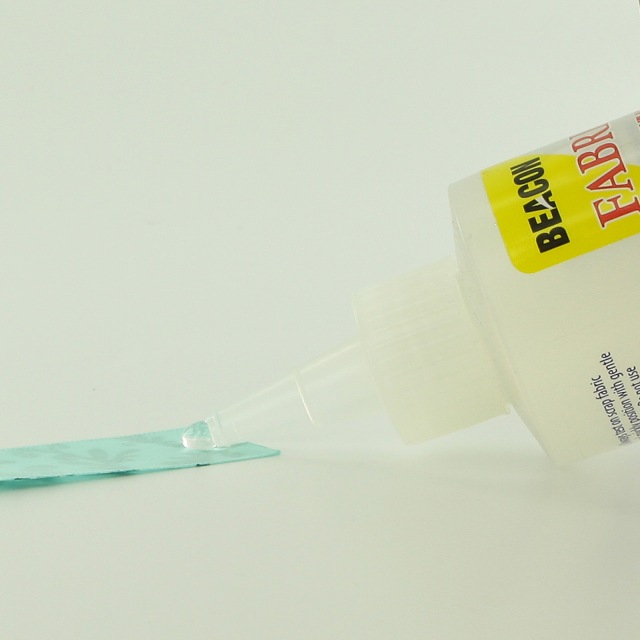
- The ribbon I was using was made of polyester so I used a lighter to seal the ends of the ribbon so it doesn't fray. (If you are unsure, you may want to practice on a scrap piece if this is your first time or you are unsure of what the material is made of.)
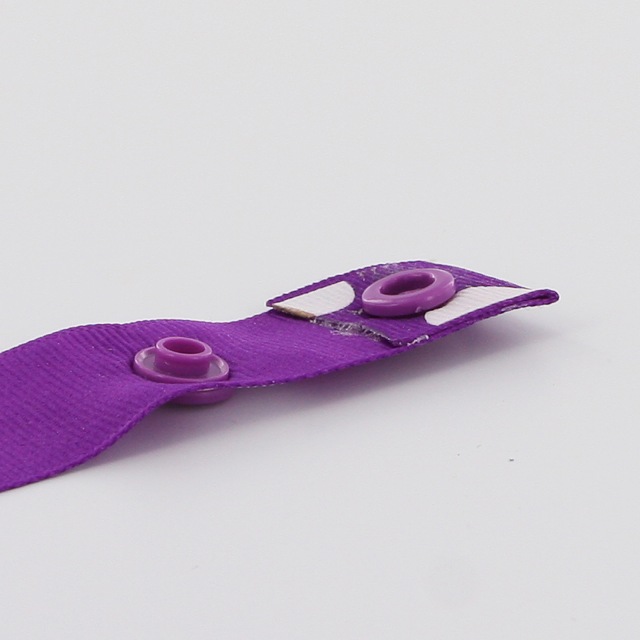
- Then I used a bit of Fabric Tac and folded over 1" of the ribbon back on itself to reinforce the ribbon and pressed it firmly and let it dry. Repeat on the opposite end.
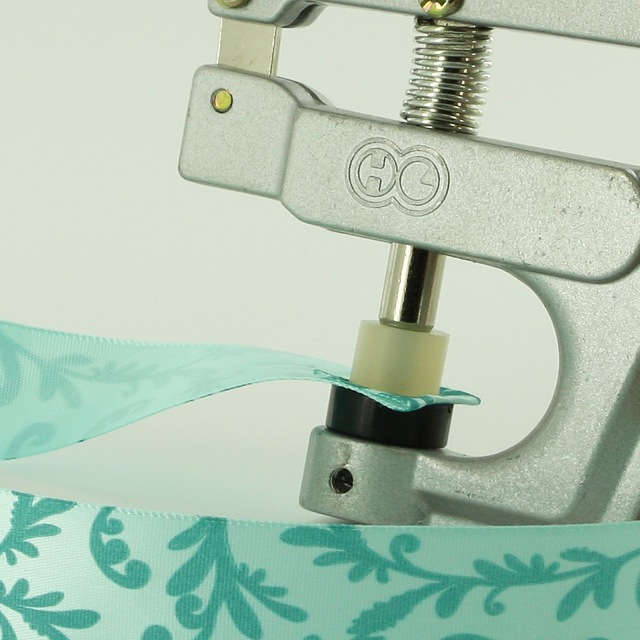
- Once dry, I installed a Cap and Socket in each end of the ribbon about 1/2" from the edge. I used Size 20 snaps for this tutorial but either Size 20 or Size 16 will work great.
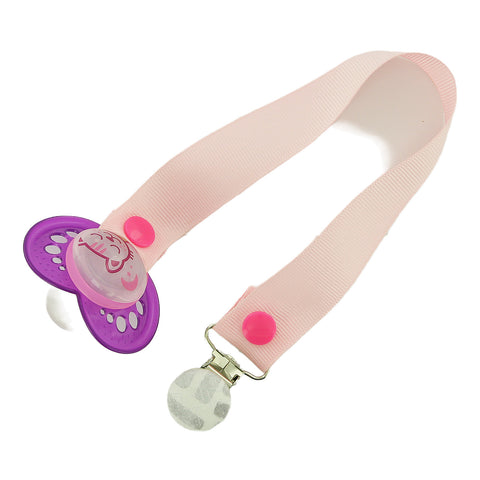
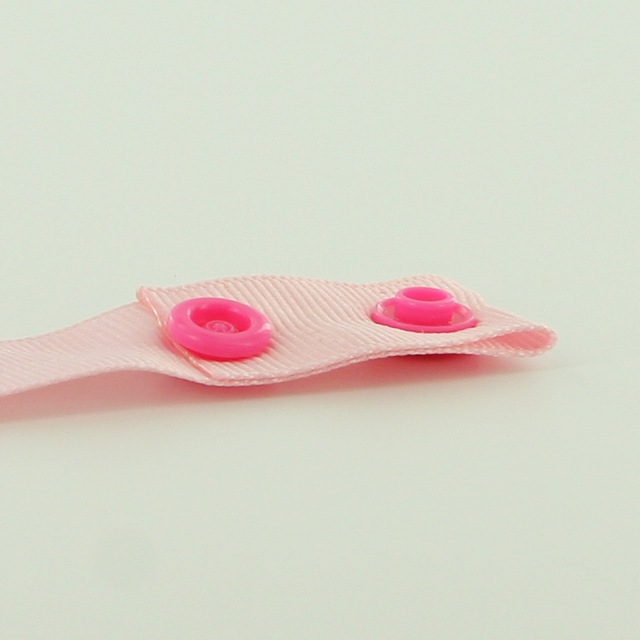
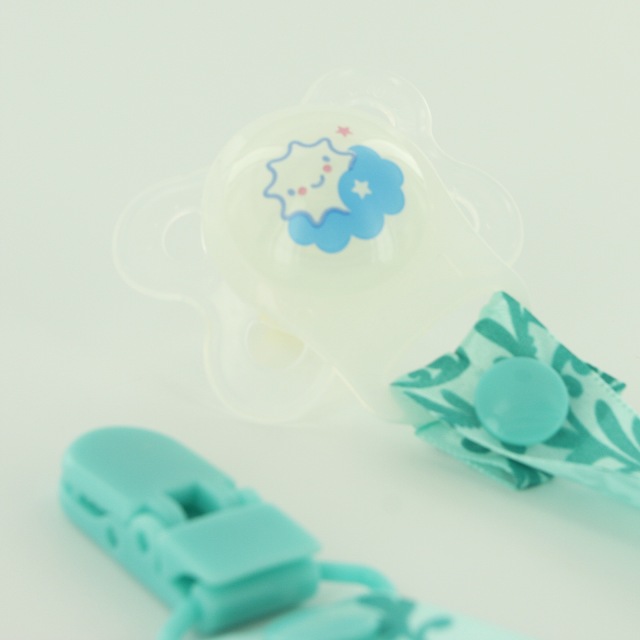
- On the side that will hold the Enamel Clip, I simply folded the ribbon over at the 1" mark and installed a Cap and Stud where it would meet. I, then, feed the Enamel Clip onto the ribbon and snapped it into place. It may have been easier to thread on the pacifier clip before installing any Snap parts but I was able to feed it through without much trouble.
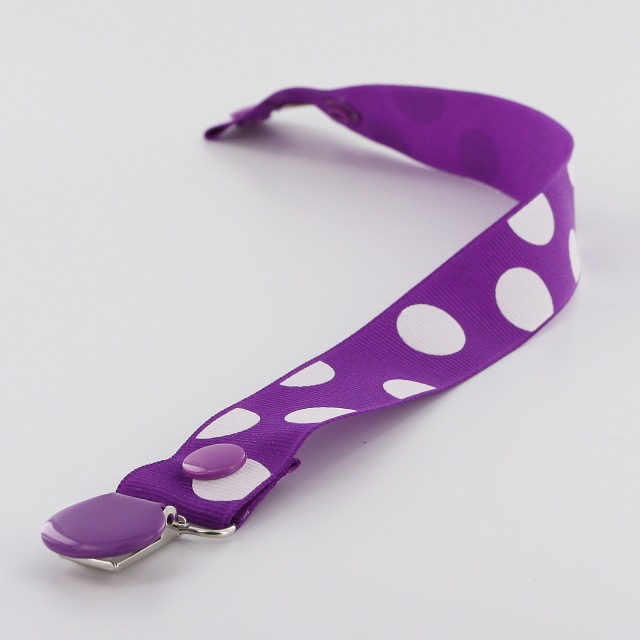
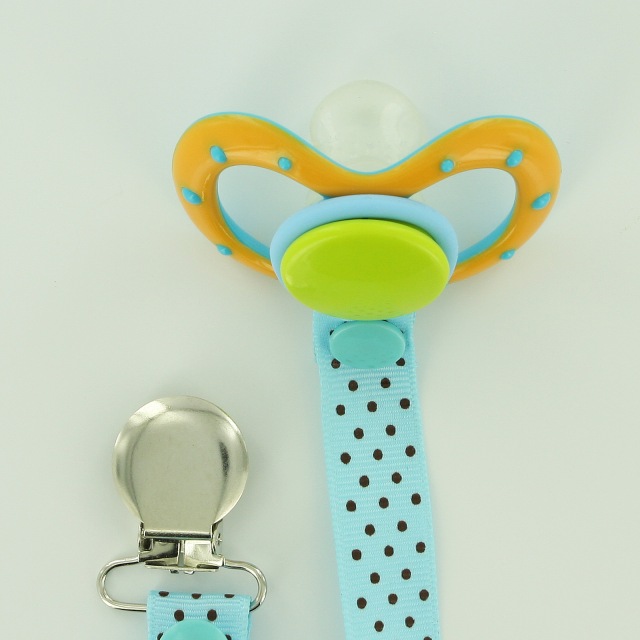
- Now on the side where the Pacifier will be attached, adjust the internal snap at a comfortable distance to accommodate the width of the handle. I went an additional 1/2" for the Pacifier, I used.
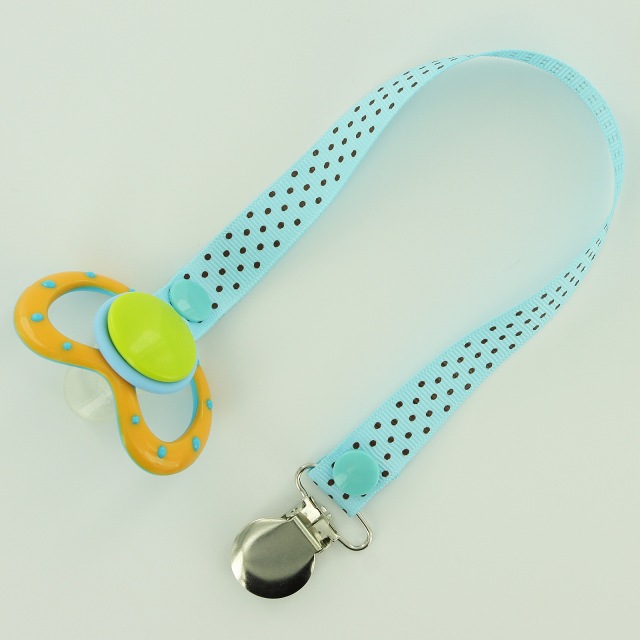
- Now snap the Pacifier in place, attach to your child's shirt and go.
- Tada! Happy Snapping!!!
Our 5 Most Popular Pacifier Clip Tutorials - I Like Big Buttons! August 15 2017

Pacifier Clips are easy to make, fun to embellish, and a great useful gift for a new mom and baby. Here are our top 5 Pacifier Clip Tutorials:
#1 - A Cover Button Metal Pacifier Clips with Cover Buttons, Round Faced Metal Suspender Clips, and KAM Snaps

#2 - Jean Pacifier Clip with Rosette using KAM Plastic Snaps and Clip

#3 - "No Sew" Pacifier Clip with KAM Snaps, MAM Ring or O-Ring and an KAM Plastic Pacifier Clip for Button Style Pacifiers

#4 - Fabric Pacifier Clip with KAM Snaps, MAM Ring or O-Ring and an KAM Plastic Pacifier Clip for Button Style Pacifiers

#5 - Recycling Jeans into a Pacifier Clip using KAM Snaps and a Pacifier Clip

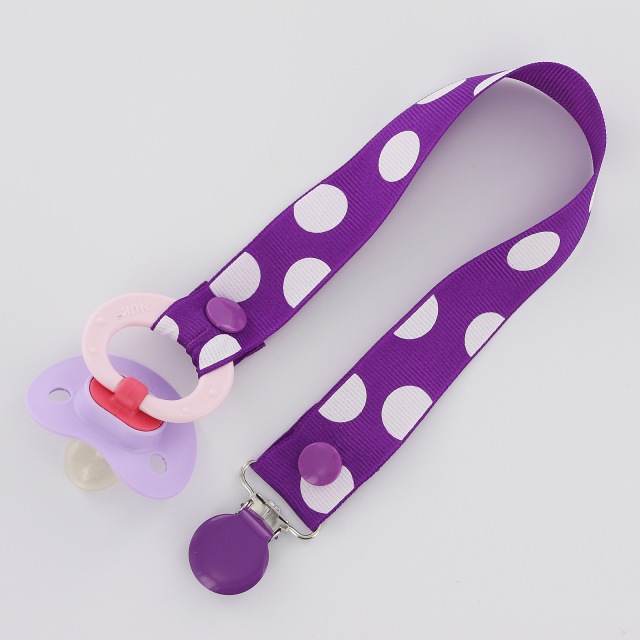
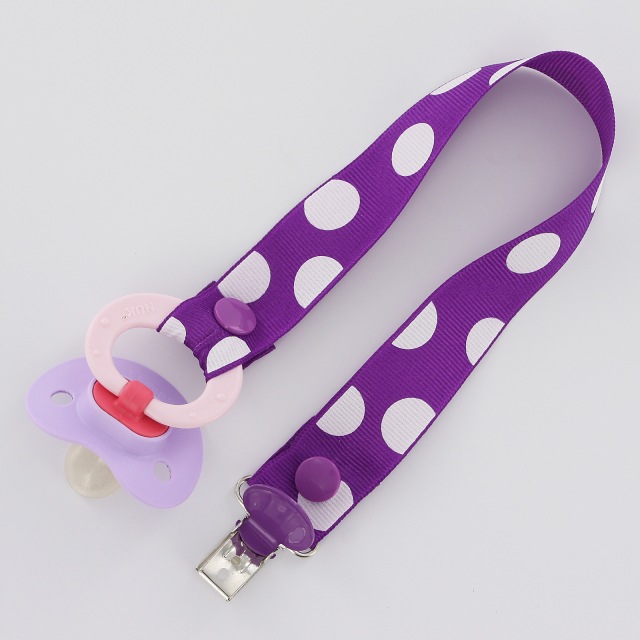
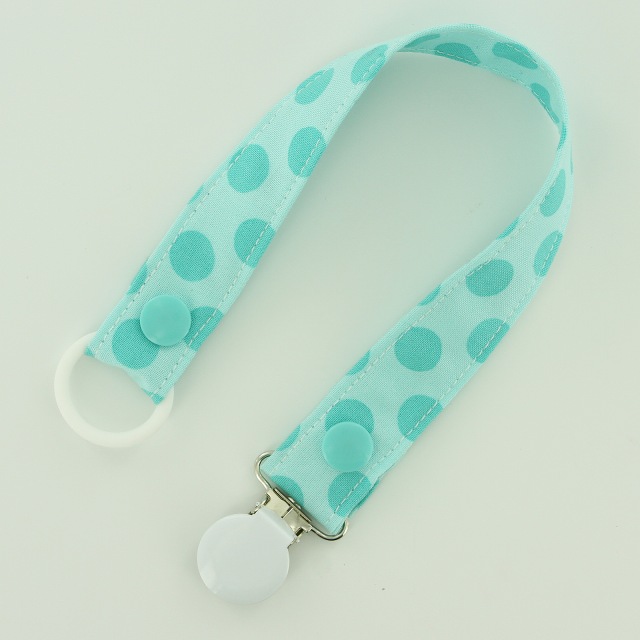
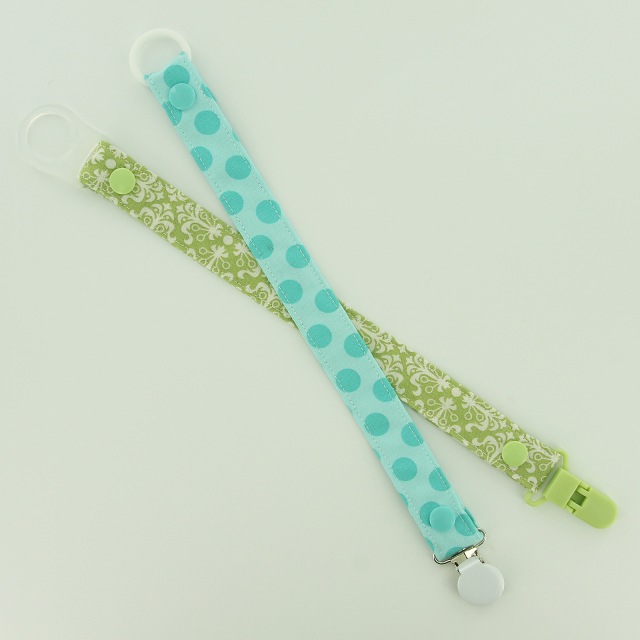
I Like Big Buttons! - How to make a Fabric Pacifier Clip with KAM Snaps, MAM Ring or O-Ring and an KAM Plastic Pacifier Clip for Button Style Pacifiers June 13 2017

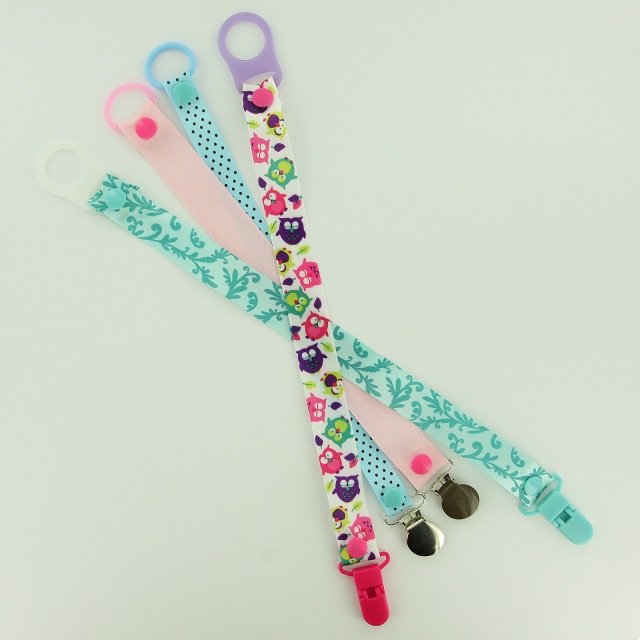
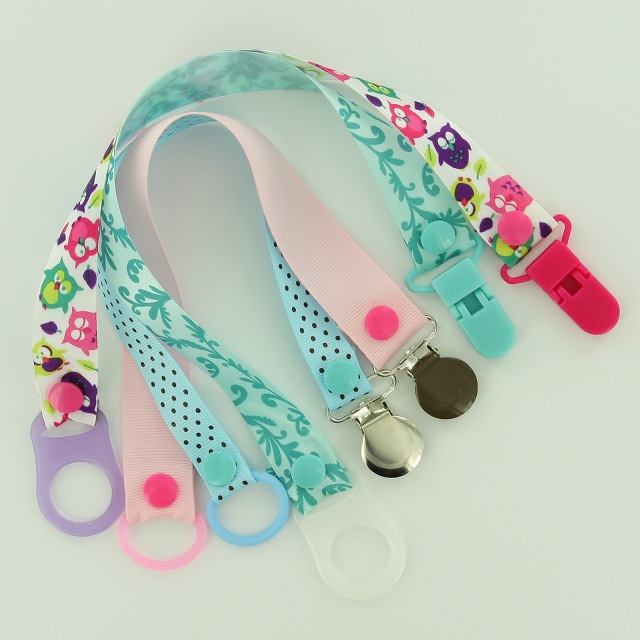
Today, I am making a pretty Fabric Pacifier Clip for Button Style Pacifiers using our silicone MAM rings and O-Rings. Pretty & functional! :)
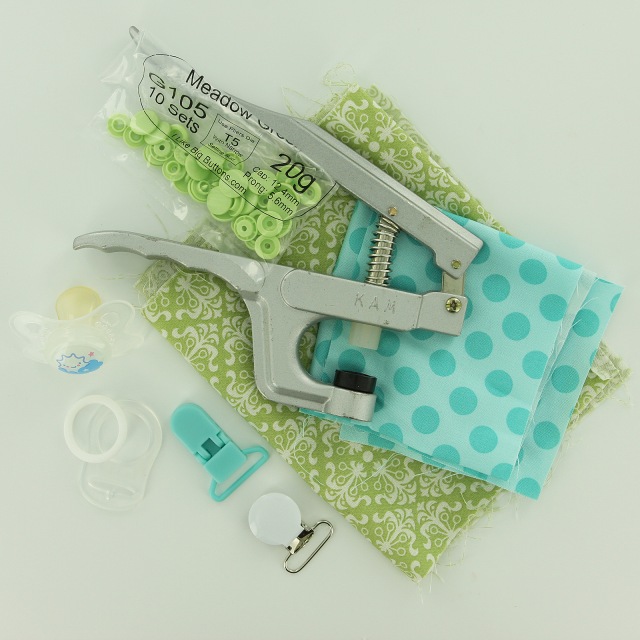
Supplies for a Fabric Pacifier Clip with Button Style Pacifier Adapters:
- Pacifier with Button Style Grip
- 14" x 3 1/2" Piece of Fabric
- 1 Pacifier Clip per Clip
- 2 KAM Snap Sets per Clip
- KAM Snap Pliers and Awl
- MAM Ring and O-Ring Button Style Adapters
- Standard Sewing Machine and Iron

Instructions:
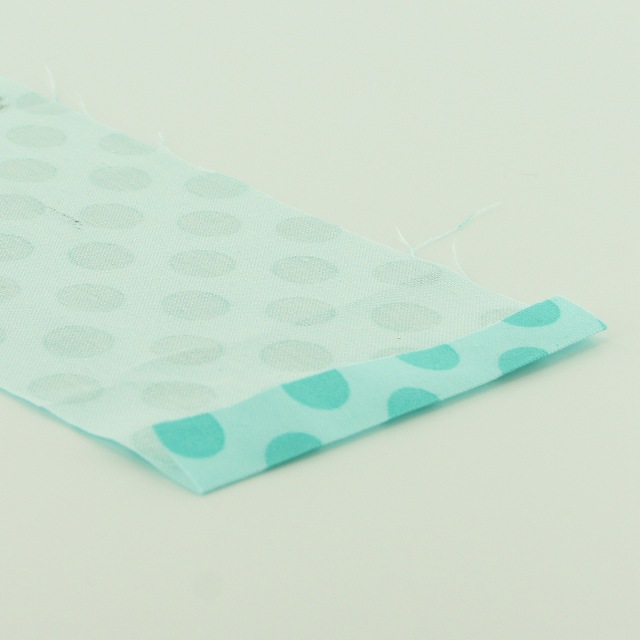
1. Choose a piece of Fabric, cut it to the dimensions: 14" x 3 1/2", the finished product once ironed, folded and sewn will be approximately 7/8" wide x 12" long.


2. Fold both 3 1/2" wide ends in 1/4" and iron flat.

3. Now fold and iron the fabric in half the long way (14" length).
4. Then fold and iron again, bringing the outer edges to the middle "iron line" and iron along those edges. Repeat on other side.
5. Re-iron the seam so that the Fabric is smooth and flat, it should now be 13 1/2" long x 7/8" wide.

6. Open the top of the Fabric strip and trim the excess internal fabric at an angle so that there is less chance of the ends peeking out when sewn together. Repeat on the other end.

7. Pin the Fabric strip in a couple places to keep it in place.

8. Sew a 1/8" seam all the way around the piece making sure to back stitch at the start and finish to set the seam.

9. Now installed a Cap and Stud about 1/2" from the edge and the mating Cap and Socket about 1 1/2" later so that the center of the two KAM Snap parts are about 1 1/2" or more apart. Any closer and I found I had trouble getting the MAM Ring or O-Ring Adapter to sit neatly inside. I used Size 20 snaps for this tutorial but either Size 20 or Size 16 will work great.

10. Repeat on the other side, that will hold the Pacifier Clip. I, then, feed the Pacifier Clip and MAM Ring Adapter onto the ribbon and snapped it into place. It may have been easier to thread on the pacifier clip before installing any Snap parts but I was able to feed it through without much trouble.


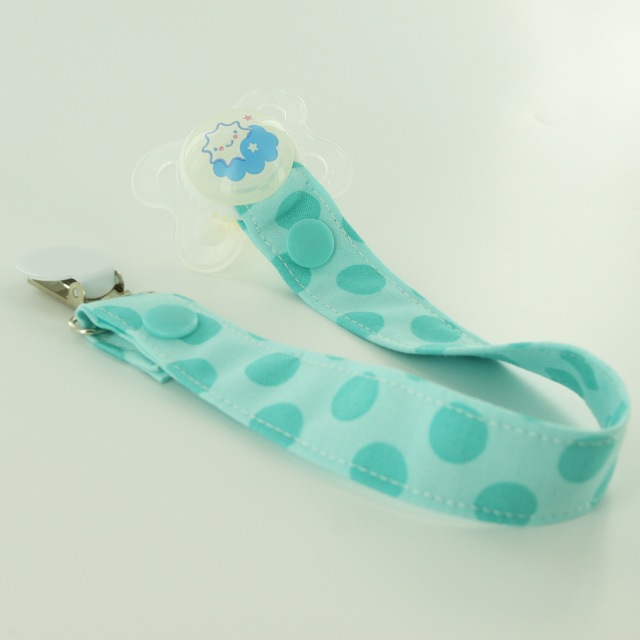
11. Tada! Now time to add the Pacifier.


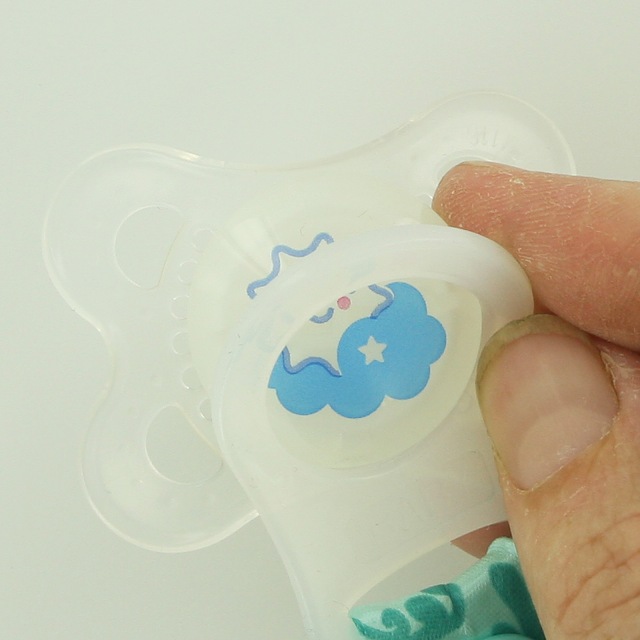
12. Simply stretch the MAM Ring or O-Ring around the Button Style Grip on the Pacifier and it will settle behind it and hold the Pacifier securely. Now snap the Pacifier in place, attach to your child's shirt and go.


13. As pictured, the MAM Rings hold the same way as the O-Rings only with a less subtle profile.
14. Tada! Happy Snapping!!!
Fabric Pacifier Clip with KAM Snaps, MAM Ring or O-Ring and an KAM Plastic Pacifier Clip for Button Style Pacifiers September 21 2016
Today, I am making a pretty Fabric Pacifier Clip for Button Style Pacifiers using our silicone MAM rings and O-Rings. Pretty functional :)!!!
Supplies for a Fabric Pacifier Clip with Button Style Pacifier Adapters:
- Pacifier with Button Style Grip
- 14" x 3 1/2" Piece of Fabric
- 1 Pacifier Clip per Clip
- 2 KAM Snap Sets per Clip
- KAM Snap Pliers and Awl
- MAM Ring and O-Ring Button Style Adapters
- Standard Sewing Machine and Iron
Instructions:
1. Choose a piece of Fabric, cut it to the dimensions: 14" x 3 1/2", the finished product once ironed, folded and sewn will be approximately 7/8" wide x 12" long.
2. Fold both 3 1/2" wide ends in 1/4" and iron flat.
3. Now fold and iron the fabric in half the long way (14" length).
4. Then fold and iron again, bringing the outer edges to the middle "iron line" and iron along those edges. Repeat on other side.
5. Re-iron the seam so that the Fabric is smooth and flat, it should now be 13 1/2" long x 7/8" wide.
6. Open the top of the Fabric strip and trim the excess internal fabric at an angle so that there is less chance of the ends peeking out when sewn together. Repeat on the other end.
7. Pin the Fabric strip in a couple places to keep it in place.
8. Sew a 1/8" seam all the way around the piece making sure to back stitch at the start and finish to set the seam.
9. Now installed a Cap and Stud about 1/2" from the edge and the mating Cap and Socket about 1 1/2" later so that the center of the two KAM Snap parts are about 1 1/2" or more apart. Any closer and I found I had trouble getting the MAM Ring or O-Ring Adapter to sit neatly inside. I used Size 20 snaps for this tutorial but either Size 20 or Size 16 will work great.
10. Repeat on the other side, that will hold the Pacifier Clip. I, then, feed the Pacifier Clip and MAM Ring Adapter onto the ribbon and snapped it into place. It may have been easier to thread on the pacifier clip before installing any Snap parts but I was able to feed it through without much trouble.
11. Tada! Now time to add the Pacifier.
12. Simply stretch the MAM Ring or O-Ring around the Button Style Grip on the Pacifier and it will settle behind it and hold the Pacifier securely. Now snap the Pacifier in place, attach to your child's shirt and go.
13. As pictured, the MAM Rings hold the same way as the O-Rings only with a less subtle profile.
14. Tada! Happy Snapping!!!
Jean Pacifier Clip with Fabric Rosette using KAM Plastic Snaps and a KAM Plastic Pacifier Clip September 19 2016
Every time I do a load of jeans in the laundry, I inevitable find ANOTHER pair of jeans with the knees split from seam to seam and, really, how many jean shorts can a boy use :P. They even wear though patches and re-enforced knees. I have active boys :). I have been trying to find creative ways to recycle holey jeans. Today I am recycling a pair of holey jeans into a Pacifier Clip.
Supplies for a Recycled Jean Pacifier Clip with Fabric Rosette:
- 1 Pair of Holey Jeans
- 1 1/2" to 2" x 24" long strip of Fabric
- 1 KAM Plastic Pacifier Clip
- 1 KAM Snap Sets
- KAM Snap Pliers and Awl
- Sewing Clips
- Standard Sewing Machine
- Hot Glue Gun
- Fabri-Tac - Fabric Adhesive


Instructions:
1. Using an old, holey pair of Jeans cut two 1 1/2" x 14" strips of material.

2. Use Sewing Clips to hold the material, wrong sides together, right sides facing out.

3. Stitch around the strip of fabric about a 1/4 to 3/8" in all the way round making sure to back stitch at the start and end.

4. Pull on the edges to fray the jean material up to the stitch you made. I used a crafty child :) with a cutting board and a fork. It will also fray over time but I was going for a this look.

5. To make the Fabric Rosette, fold the fabric in half, wrong sides together, two times. You will end up with about 1/2" or less strip of fabric 24" long. I used an iron to fold it, not so much that it was completely flat, just enough that it held its shape. Start at one end and hot glue the first bit of it back against itself.

6. Continue this ever so often so that the 'bud' stays together.

7. I made the bud or center of the rose about 1/2" in diameter. Add one last drop of hot glue.

8. Now twist the fabric 360 degrees, so that the bottom becomes the top. Tack it with a small bead of hot glue and repeat.

9. Continue twisting and gluing until you run out of fabric or until you reach the desired size of your rosette.

10. It will look like this when you are finished.

11. Glue the last bit of fabric on the underside of the Rosette securely with hot glue.


12. For a more finished look, I added a circle of felt to the bottom with Fabri-Tac.
13. Put the KAM Plastic Pacifier Clip on the Fabric strip about 1″ in.

14. Fold back 1″ of the strip back onto itself.
15. Straight stitch across the fabric strip just behind the KAM Plastic Pacifier Clip. Make sure to set the stitch.

16. Make sure that the internal snap in a comfortable distance to accommodate the width of the handle, I spaced my KAM Snaps about 2″ apart using the Pacifier I have with the biggest handle.
17. Now on the side where the Pacifier will be attached, I installed a Cap and Socket about 1/2″ from the edge. I used Size 20 snaps for this tutorial but either Size 20 or Size 16 will work great.

18. Add Fabric Rosette with Fabri-Tac to the Pacifier Clip just above the clip.


19. Now snap the Pacifier in place, attach to your child’s outfit and go.
20. Tada! Okay, I think I am in love. Super cute! Happy Snapping!!! To see our other great Pacifier Clip Tutorial and KAM Plastic Snap Ideas and buy these supplies visit I Like Big Buttons.com.
Disclaimer: Keep in mind that although I have rough tested these I in no way recommend you leave your baby alone with these as there are small pieces and if not done properly they may come apart and become a choking hazard. I would recommend these clips under adult supervision only. The maker and/or parent assumes full responsibility when using these pacifier clips.
Happy Customers Make Our Day!!! June 30 2016
Today, I was reading through our feedback and just wanted to share what a few of our happy customers had to say:
♥ Color choices were fantastic and was able to get a mix of colors. My order arrived very quickly and was exactly what I had special ordered. Will definitely order from this site again!
♥ I continue to buy all my snaps from this seller. 5 Star Seller!
♥ These look great on my diapers! I love the color and they came quickly!
♥ I big BUTTons and I can not lie; Fast shipping of just what I asked for. Thank you!
♥ Exactly what I was looking for to make pacifier clips. Love the colors and the shipping was very fast! Thanks!!!
♥ I've ordered from this seller multiple times and have always been very happy with my purchases. Huge selection of items and fast, fast shipping!
♥ All snaps are packaged in small bags with info on it (color name and number), to make it easier to re-order... Love that!!! Great product! SUPER customer service! ... quick answering of messages... Super nice!!!
♥ Great items, great prices and will be back for more, thanks for fast shipping
♥ Love this shop! I needed to make 75 key fobs in a hurry and they shipped on Saturday of Memorial Day weekend so I could make my deadline. Great customer service. The hardware was just what I needed and arrived super fast.
♥ LOVE these snaps! So many colors & great prices too! A+++
♥ Sent everything just as ordered! Awesomeness!
Thank you to all of you who take the time to post your positive experience, it makes our day to see how all our hard work is appreciated!!!
Thank you, I Like Big Buttons! and all our Little Buttons!

Cover Button Metal Pacifier Clips with Cover Buttons, Round Faced Metal Suspender Clips and KAM Snaps May 17 2016
How to make a Cover Button Metal Pacifier Clips with Cover Buttons, Round Faced Metal Suspender Clips and KAM Snaps
Today I am making Cover Button Pacifier Clips using Round Faced Metal Pacifier Clips (Metal Suspender Clips), Size 36 Cover Buttons, and KAM Snaps, of course ;). I have had a lot of questions in the last year about how to make these clips so I decided to take it on. Keep in mind that although I have rough tested these I in no way recommend you leave your baby alone with these as there are small pieces and if not done properly they may come apart and become a choking hazard. I would recommend these clips under adult supervision only. The maker and/or parent assumes full responsibility when using these pacifier clips.
That being said I did rough test these and was unable to break them apart after they had proper time to dry and cure. I didn't take a hammer to them :) but I did my best to undo my hard work and was not able to.
Supplies:
- 2 KAM Snap Sets
- KAM Snap Pliers and Awl
- Round Faced Metal Clips or Enamel Pacifier Clips
- 1 Size 36 Flat Back Cover Button
- Size 36 Assembly Tool
- Size 36 Template
- Fabric Scraps
- E6000 Adhesive
- Pre-made Pacifier Clips (see Pacifier Clip and Supply Tutorials)


Instructions:
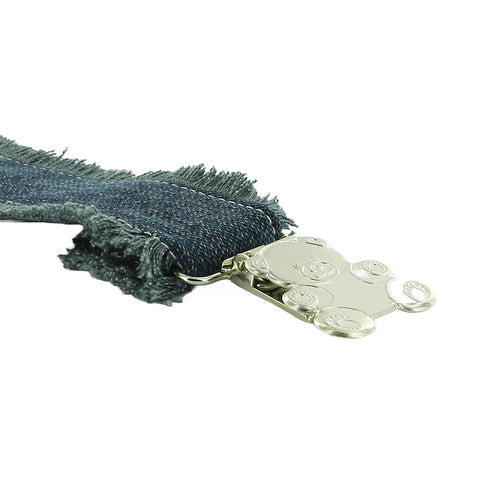
1. Using our Pacifier Clip and Supply Tutorials make either Ribbon or Fabric Pacifier Clips.

2. Cut your fabric scrap. You will want a circle that is about twice the diameter of your button blank. I cut out a Piece of Fabric using my Size 36 Template.

3. Put your fabric piece in the larger assembly tool piece (RIGHT SIDE DOWN). When you look into the tool you want to see the back of the fabric.


4. Place the button front (the domed piece) on top of the fabric. Leave the fabric edges hanging out. Double check the transparent underside to see if your print is how you would like it. Then press the cover button fabric edges down into the tool.

5. Add a dab of E6000 Adhesive to the middle of the cover button cap before installing the Flat Back.

6. Place the back cover button piece on top of your fabric and button front.

7. Take the smaller piece of the assembly tool and with the open side down place it on the button back.
8. Press down. You may hear a pop when the last bit of the button back slips into place. If you take the tool out and the button is not completely secured, just put it back in and press down again.

9. When you take the small assembly tool piece off, the fabric edges will be secured underneath the button back.

10. Remove the button from the larger assembly tool piece. Tada! My Cover Button is ready to be adhered to a Round Faced Metal Clip.

11. Here are the Cover Buttons I made in just a few minutes. Seriously easy, fun and so cute!

12. Now take the E6000 Adhesive and put a medium size dab of glue on the back of the Cover Button about 1/2 of what would fill the back area of the back. This glue is great to work with so don't overly worry about getting the amount just right. I was able to cleanly wipe of any excess off when I put on too much and I was also able to remove the button and add a little more when I under did it. This glue is very forgiving.

13. Now place the Cover Button over the Round Faced Metal Pacifier Clips and straighten and center your button.

14. Press firmly and let set to dry and cure 24-72 hours as recommended by the manufacturer (E6000).

15. These are my finished products. I love them and think they turned out beautifully. Below are my examples, completed and installed on Pacifier Clips.


16. Tada!!!
Disclaimer: Keep in mind that although I have rough tested these I in no way recommend you leave your baby alone with these as there are small pieces and if not done properly they may come apart and become a choking hazard. I would recommend these clips under adult supervision only. The maker and/or parent assumes full responsibility when using these pacifier clips.
Recycling Jeans into a Pacifier Clip using KAM Snaps and a Pacifier Clip May 12 2016
Recycling Jeans into a Pacifier Clip using KAM Snaps and a Pacifier Clip
Every time I do a load of jeans in the laundry, I inevitable find ANOTHER pair of jeans with the knees split from seam to seam and, really, how many jean shorts can a boy use :P. They even wear though patches and re-enforced knees. I have active boys :). I have been trying to find creative ways to recycle holey jeans. Today I am recycling a pair of holey jeans into a Pacifier Clip.
Supplies for a Recycled Jean Pacifier Clip:
- 1 Pair of Holey Jeans
- 1 Pacifier Clip
- 1 KAM Snap Sets
- KAM Snap Pliers and Awl
- Standard Sewing Machine


Instructions:
1. Using an old, holey pair of Jeans cut two 1 1/2" x 14" strips of material.

2. Pin the material, wrong sides together, right sides facing out.

3. Stitch around the strip of fabric about a 1/4 to 3/8" in all the way round making sure to back stitch at the start and end.

4. Pull on the edges to fray the jean material up to the stitch you made. I used a crafty child :) with a cutting board and a fork. It will also fray over time but I was going for a this look.

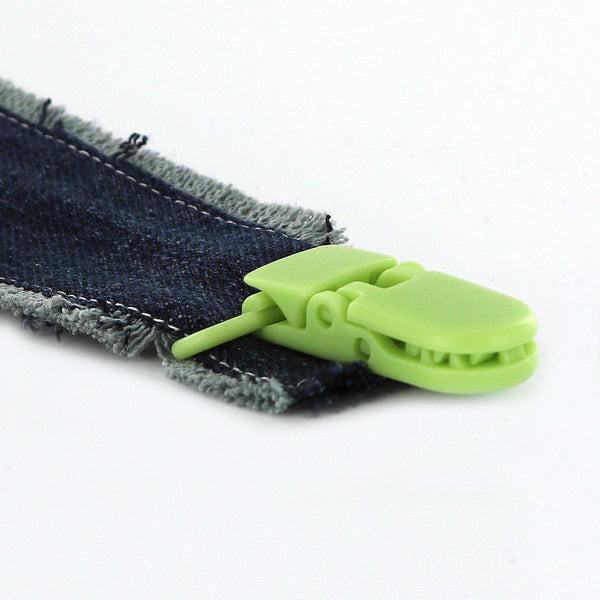
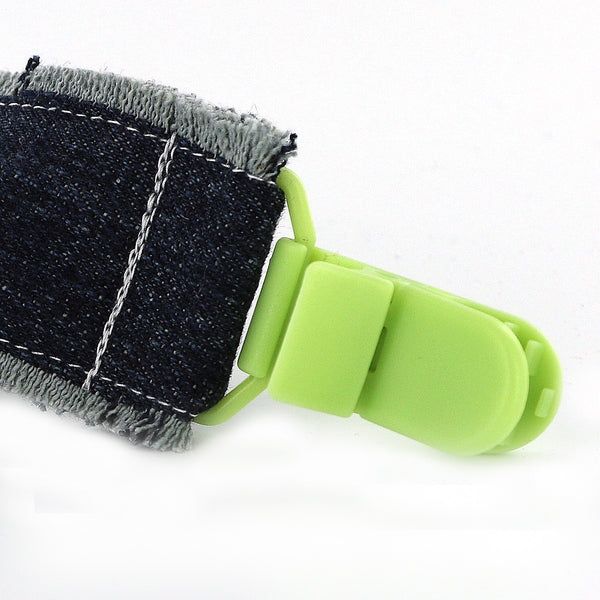
5. Put the Pacifier Clip on the Fabric strip about 1″ in.
6. Fold back 1″ of the strip back onto itself.

7. Straight stitch across the Fabric strip just behind the Pacifier Clip and again a 1/2″ later, I did a Zig-Zag Stitch for fun, just before the end of the doubled over Fabric strip. Make sure to set the stitch both times.

8. Make sure that the internal snap in a comfortable distance to accommodate the width of the handle, I spaced my KAM Snaps about 2″ apart using the Pacifier I have with the biggest handle.

9. Now on the side where the Pacifier will be attached, I installed a Cap and Socket about 1/2″ from the edge. I used Size 20 snaps for this tutorial but either Size 20 or Size 16 will work great.

10. Now snap the Pacifier in place, attach to your child’s outfit and go.

11. Tada! Okay, I think this may be my favorite so far. How cute! Happy Snapping!!!
How to make a "No Sew" Pacifier Clip with KAM Snaps and an Enamel Clip May 10 2016
Making a "No Sew" Pacifier Clip with KAM Snaps and Enamel Clip
Today, I am making a "No Sew" Pacifier Clip. All the usefulness, no sewing necessary!
Supplies for a "No Sew" Pacifier Clip:
- Pacifier with Hinged Handle
- 14-15" of 7/8" Grosgrain Ribbon
- 1 Enamel Clip or Plastic Clip
- 2 KAM Snap Sets
- KAM Snap Pliers and Awl
- Fabric Tac
- Lighter or Chef's Torch
Instructions:
1. Choose a 7/8" or 3/4" Grosgrain Ribbon, cut a 14" to 16" length of ribbon. I did 7/8" Grosgrain Ribbon and I cut it 16" long so when it was completed it was approximately 12" long.
2. The ribbon I was using was made of polyester so I used a lighter to seal the ends of the ribbon so it doesn't fray. (If you are unsure, you may want to practice on a scrap piece if this is your first time or you are unsure of the what the material is made of.)


3. Then I used a bit of Fabric Tac and folded over an 1" of the ribbon back on itself to reinforce the ribbon and pressed it firmly and let it dry. Repeat on the opposite end.

4. Once dry, I installed a Cap and Socket in each end of the ribbon about 1/2" from the edge. I used Size 20 snaps for this tutorial but either Size 20 or Size 16 will work great.

5. On the side that will hold the Enamel Clip I simply folded the ribbon over at the 1" mark and installed a Cap and Stud where it would meet. I, then, feed the Enamel Clip onto the ribbon and snapped it into place. It may have been easier to thread on the pacifier clip before installing any Snap parts but I was able to feed it through without much trouble.
6. Now on the side where the Pacifier will be attached, adjust the internal snap in a comfortable distance to accommodate the width of the handle. I went an additional 1/2" for the Pacifier, I used.
7. Now snap the Pacifier in place, attach to your child's shirt and go.
8. Tada! Happy Snapping!!!
Crafty Saturday! February 20 2016
Working on a project using ILikeBigButtons.com for a new sweet cousin. Can't wait to meet her!!!
#ilikebigbuttons #sootherblanket #pacifierclip #craftsupplies #lazysaturday #kamsnaps #plasticsnaps

An I Like Big Buttons Christmas! Idea #6: How to make a Sensory Ribbon Baby Tag Blanket with KAM Snaps & Pacifier Supplies December 16 2015
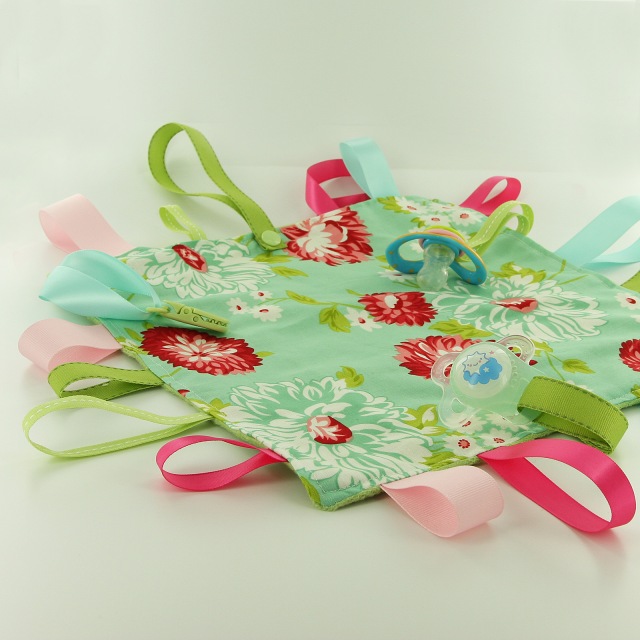
Gift Idea #6: Fun and functional, Sensory Ribbon Tag Blanket with BONUS accessories make a great gift for any sweet little person in your life. Use KAM Snaps or a KAM Pacifier Clip to make your blanket attachable or unthrowable :). Add KAM Snaps, MAM Pacifier Rings or Pacifier O-Rings to add a Pacifier holder to your tag blanket. I used them all :P to show you the different options.
Supplies:
- 2 12″x12″ Pieces of Fabric (1 Cotton and 1 Minky)
- 8x 5″ Piece of Ribbons (mix of Grosgrain and Satin)
- 7x 8" Piece of Ribbons (mix of Grosgrain and Satin)
- 1x 12" Piece of Ribbon
- 1 KAM Snap Set
- KAM Snap Pliers and Awl
- 1 KAM Pacifier Clip
- 1 MAM Pacifier Ring
- 1 Pacifier O-Ring
- Standard Sewing Machine
Instructions:
1. Cut the Fabric and Minky material to 12"x12" squares and cut your mix of ribbon 8 in 5" lengths, 7 in 8" lengths, and 1 in 12" length. See More
#ilikebigbuttons #kamsnaps #plasticsnaps #sootherblanket #christmasideas

Adorable Pacifier Clips from House Of Jars May 14 2015
Super cute, pacifier clips from House Of Jars! Thank you for sharing your adorable craftiness! Check out their Etsy shop for more cute options using I Like Big Buttons! supplies.

30 Days of KAM Snaps and Beyond!!! How to make Cover Button Metal Pacifier Clips with Cover Buttons, Round Faced Metal Suspender Clips and KAM Snaps September 24 2014
Day #35
How to make a Cover Button Metal Pacifier Clips with Cover Buttons, Round Faced Metal Suspender Clips and KAM Snaps
Today I am making Cover Button Pacifier Clips using Round Faced Metal Pacifier Clips (Metal Suspender Clips), Size 36 Cover Buttons, and KAM Snaps, of course ;). I have had a lot of questions in the last year about how to make these clips so I decided to take it on. Keep in mind that although I have rough tested these I in no way recommend you leave your baby alone with these as there are small pieces and if not done properly they may come apart and become a choking hazard. I would recommend these clips under adult supervision only. The maker and/or parent assumes full responsibility when using these pacifier clips.
That being said I did rough test these and was unable to break them apart after they had proper time to dry and cure. I didn't take a hammer to them :) but I did my best to undo my hard work and was not able to.
Supplies:
- 2 KAM Snap Sets
- KAM Snap Pliers and Awl
- Round Faced Metal Clips or Enamel Pacifier Clips
- 1 Size 36 Flat Back Cover Button
- Size 36 Assembly Tool
- Size 36 Template
- Fabric Scraps
- E6000 Adhesive
- Pre-made Pacifier Clips (see Pacifier Clip and Supply Tutorials)


Instructions:
1. Using our Pacifier Clip and Supply Tutorials make either Ribbon or Fabric Pacifier Clips.

2. Cut your fabric scrap. You will want a circle that is about twice the diameter of your button blank. I cut out a Piece of Fabric using my Size 36 Template.

3. Put your fabric piece in the larger assembly tool piece (RIGHT SIDE DOWN). When you look into the tool you want to see the back of the fabric.


4. Place the button front (the domed piece) on top of the fabric. Leave the fabric edges hanging out. Double check the transparent underside to see if your print is how you would like it. Then press the cover button fabric edges down into the tool.

5. Add a dab of E6000 Adhesive to the middle of the cover button cap before installing the Flat Back.

6. Place the back cover button piece on top of your fabric and button front.
7. Take the smaller piece of the assembly tool and with the open side down place it on the button back.
8. Press down. You may hear a pop when the last bit of the button back slips into place. If you take the tool out and the button is not completely secured, just put it back in and press down again.

9. When you take the small assembly tool piece off, the fabric edges will be secured underneath the button back.

10. Remove the button from the larger assembly tool piece. Tada! My Cover Button is ready to be adhered to a Round Faced Metal Clip.

11. Here a the Cover Buttons I made in just a few minutes. Seriously easy, fun and so cute!

12. Now take the E6000 Adhesive and put a medium size dab of glue on the back of the cover button about 1/2 of what would fill the back area of the back. This glue is great to work with so don't overly worry about getting the amount right. I was able to cleanly wipe of any excess off when I put on too much and I was also able to remove the button and add a little more when I under did it. This glue is very forgiving.

13. Now place the Cover Button over the Round Faced Metal Pacifier Clips and straighten and center your button.

14. Press firmly and let set to dry and cure 24-72 hours as recommended by the manufacturer (E6000).

15. These are my finished products. I love them and think they turned out beautifully. Below are my examples, completed and installed on Pacifier Clips.


16. Tada!!!
Disclaimer: Keep in mind that although I have rough tested these I in no way recommend you leave your baby alone with these as there are small pieces and if not done properly they may come apart and become a choking hazard. I would recommend these clips under adult supervision only. The maker and/or parent assumes full responsibility when using these pacifier clips.
30 Days of KAM Snaps and Beyond!!! How to make a "No Sew" Pacifier Clip with KAM Snaps, MAM Ring or O-Ring and an KAM Plastic Pacifier Clip for Button Style Pacifiers September 05 2014
Day #33
How to make a "No Sew" Pacifier Clip with KAM Snaps, MAM Ring or O-Ring and an KAM Plastic Pacifier Clip for Button Style Pacifiers
Today, I am making a "No Sew" Pacifier Clip for Button Style Pacifiers using our silicone MAM rings and O-Rings. No sewing necessary!
Supplies for a "No Sew" Pacifier Clip with Button Style Pacifier Adapters:
- Pacifier with Button Style Grip
- 16-18" of 1/2", 3/4" or 7/8" Grosgrain Ribbon
- 1 Enamel Clip or Plastic Clip per Clip
- 2 KAM Snap Sets per Clip
- KAM Snap Pliers and Awl
- MAM Ring and O-Ring Button Style Adapters
- Fabric Tac
- Lighter or Chef's Torch


Instructions:
1. Choose a 7/8" or 3/4" or 1/2" Grosgrain Ribbon, cut a 16" to 18" length of ribbon. I did some of each size of Grosgrain Ribbon and I cut them 16" long so when they were completed they was approximately 12" long.

2. The ribbon I was using was made of polyester so I used a lighter to seal the ends of the ribbon so it doesn't fray. (If you are unsure, you may want to practice on a scrap piece if this is your first time or you are unsure of the what the material is made of.)

3. Then I used a bit of Fabric Tac and folded over an 2" to 1 1/2" of the ribbon back on itself to reinforce the ribbon and pressed it firmly and let it dry. Repeat on the opposite end.
4. Once dry, I installed a Cap and Stud in each end of the ribbon about 1/2" from the edge. Then I installed the Cap and Socket about 1 1/2" apart so that the center of each KAM Snap is about 1 1/2" or more apart. Any closer and I found I had trouble getting the MAM Ring or O-Ring Adapter to sit neatly inside. I used Size 20 snaps for this tutorial but either Size 20 or Size 16 will work great.

5. Repeat on the other side, that will hold the Pacifier Clip. I, then, feed the Pacifier Clip and MAM Ring Adapter onto the ribbon and snapped it into place. It may have been easier to thread on the pacifier clip before installing any Snap parts but I was able to feed it through without much trouble.

6. Tada! Now time to add the Pacifier.


7. Simply stretch the MAM Ring or O-Ring around the Button Style Grip on the Pacifier and it will settle behind it and hold the Pacifier securely. Now snap the Pacifier in place, attach to your child's shirt and go.


8. As pictured, the O-Rings hold the same way as the MAM Rings only with a more subtle profile.


9. Tada! Happy Snapping!!!
30 Days of KAM Snaps and Beyond!!! How to make a Fabric Pacifier Clip with KAM Snaps, MAM Ring or O-Ring and an KAM Plastic Pacifier Clip for Button Style Pacifiers August 27 2014
Day #32
Making a Fabric Pacifier Clip with KAM Snaps, MAM Ring or O-Ring and an KAM Plastic Pacifier Clip for Button Style Pacifiers
Today, I am making a pretty Fabric Pacifier Clip for Button Style Pacifiers using our silicone MAM rings and O-Rings. Pretty functional :)!!!
Supplies for a Fabric Pacifier Clip with Button Style Pacifier Adapters:
- Pacifier with Button Style Grip
- 14" x 3 1/2" Piece of Fabric
- 1 Pacifier Clip per Clip
- 2 KAM Snap Sets per Clip
- KAM Snap Pliers and Awl
- MAM Ring and O-Ring Button Style Adapters
- Standard Sewing Machine and Iron

Instructions:
1. Choose a piece of Fabric, cut it to the dimensions: 14" x 3 1/2", the finished product once ironed, folded and sewn will be approximately 7/8" wide x 12" long.

2. Fold both 3 1/2" wide ends in 1/4" and iron flat.

3. Now fold and iron the fabric in half the long way (14" length).

4. Then fold and iron again, bringing the outer edges to the middle "iron line" and iron along those edges. Repeat on other side.
5. Re-iron the seam so that the Fabric is smooth and flat, it should now be 13 1/2" long x 7/8" wide.

6. Open the top of the Fabric strip and trim the excess internal fabric at an angle so that there is less chance of the ends peeking out when sewn together. Repeat on the other end.

7. Pin the Fabric strip in a couple places to keep it in place.

8. Sew a 1/8" seam all the way around the piece making sure to back stitch at the start and finish to set the seam.

9. Now installed a Cap and Stud about 1/2" from the edge and the mating Cap and Socket about 1 1/2" later so that the center of the two KAM Snap parts are about 1 1/2" or more apart. Any closer and I found I had trouble getting the MAM Ring or O-Ring Adapter to sit neatly inside. I used Size 20 snaps for this tutorial but either Size 20 or Size 16 will work great.

10. Repeat on the other side, that will hold the Pacifier Clip. I, then, feed the Pacifier Clip and MAM Ring Adapter onto the ribbon and snapped it into place. It may have been easier to thread on the pacifier clip before installing any Snap parts but I was able to feed it through without much trouble.

11. Tada! Now time to add the Pacifier.


12. Simply stretch the MAM Ring or O-Ring around the Button Style Grip on the Pacifier and it will settle behind it and hold the Pacifier securely. Now snap the Pacifier in place, attach to your child's shirt and go.


13. As pictured, the MAM Rings hold the same way as the O-Rings only with a less subtle profile.
14. Tada! Happy Snapping!!!