Making a "No Sew" Pacifier Clip with KAM Snaps, MAM Ring or O-Ring and an KAM Plastic Pacifier Clip for Button Style Pacifiers
 |
 |
 |
 |
 |
 |
 |
 |
 |
 |
 |
 |
 |
 |
 |
 |
 |
 |
 |
 |
 |
 |
 |
|
Supplies for a "No Sew" Pacifier Clip with Button Style Pacifier Adapters:
- Pacifier with Button Style Grip
- 16-18" of 1/2", 3/4" or 7/8" Grosgrain Ribbon
- 1 Enamel Clip or Plastic Clip per Clip
- 2 KAM Snap Sets per Clip
- KAM Snap Pliers and Awl
- MAM Ring and O-Ring Button Style Adapters
- Fabric Tac
- Lighter or Chef's Torch
Instructions:
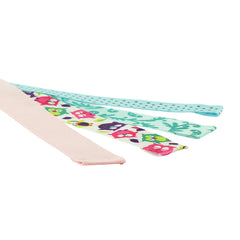
- Choose a 7/8" or 3/4" or 1/2" Grosgrain Ribbon, cut a 16" to 18" length of ribbon. I did some of each size of Grosgrain Ribbon and I cut them 16" long so when they were completed they was approximately 12" long.
- The ribbon I was using was made of polyester so I used a lighter to seal the ends of the ribbon so it doesn't fray. (If you are unsure, you may want to practice on a scrap piece if this is your first time or you are unsure of the what the material is made of.)
- Then I used a bit of Fabric Tac and folded over an 2" to 1 1/2" of the ribbon back on itself to reinforce the ribbon and pressed it firmly and let it dry. Repeat on the opposite end.
- Once dry, I installed a Cap and Stud in each end of the ribbon about 1/2" from the edge. Then I installed the Cap and Socket about 1 1/2" apart so that the center of each KAM Snap is about 1 1/2" or more apart. Any closer and I found I had trouble getting the MAM Ring or O-Ring Adapter to sit neatly inside. I used Size 20 snaps for this tutorial but either Size 20 or Size 16 will work great.
- Repeat on the other side, that will hold the Pacifier Clip. I, then, feed the Pacifier Clip and MAM Ring Adapter onto the ribbon and snapped it into place. It may have been easier to thread on the pacifier clip before installing any Snap parts but I was able to feed it through without much trouble.
- Tada! Now time to add the Pacifier.
- Simply stretch the MAM Ring or O-Ring around the Button Style Grip on the Pacifier and it will settle behind it and hold the Pacifier securely. Now snap the Pacifier in place, attach to your child's shirt and go.
- As pictured, the O-Rings hold the same way as the MAM Rings only with a more subtle profile.
- Tada! Happy Snapping!!!