News
How to Make a Key Fob Lip Balm Holder by I Like Big Buttons! October 21 2020

Supplies:
- 15.5" x 2.25" of Cotton Fabric
- 15.5" x 2.25" piece of Fusible Interfacing
- 1.25" Key Fob Hardware with Split Rings
- Key Fob Pliers
- Sewing Clips
- Standard Sewing Machine
- Iron and Ironing Board
- Scissors
Instructions:
- Cut a 15.5" x 2.25" piece of Cotton Fabric and Fusible Interfacing. These measurements will work for a standard Lip Balm Tube and a standard Blistex Tube. You may need to adjust measures for your favorite lip product.
- Iron the Fusible Interfacing to the wrong side of your fabric.
- Fold right sides together width-wise and sew both long sides with a 1/4" seam. Do not sew short sides.
- Turn the tube right side out through the open side, iron flat, and sew the open short side closed with a zig-zag stitch.
- Fold zig-zag side back on itself 1 1/4". Sew straight stitch 1/2" from the top, and again at 5/8" from the top. This is what it will look like from the back.
- Here is how the front turned out. This will be the front of the pocket on the Lip Balm Holder.
- Fold the tab that will be the front of the pocket at 2 3/4". Make sure the zig-zag stitch is hidden. Use Sewing Clips to hold the front pocket in place while sewing. Stitch at 1/4" seam around the whole holder. And again at 1/8". Start and finish at the top edge so that your start and finish stitches will be hidden.
- Center the 1.25" Key Fob Hardware on the top edge of the Lip Balm Holder.
- Using Key Fob Hardware Pliers squeeze the Key Fob Hardware closed with gentle pressure. Sometimes, I go back and forth from left to right added a little bit of pressure to each side until it eases together. Our Key Fob Hardware Pliers make this easy to do. Make sure the teeth in the Key Fob Hardware are sunk securely into the fabric.
- Tada! These little Lip Balm Holders were easy to make and are great as a quick thoughtful gift for a loved one who hates chapped lips.
- Hang them on your keychain, the outside of your purse, or anywhere you need for quick access.
Fabric and Cotton Webbing Key Fob Tutorial October 14 2020

How to make a Fabric Key Fob Wristlet:
You will need:
- Scissors
- Sewing Machine
- Iron
Supplies:
- 1.25" Cotton Webbing
- Ribbon (Narrower than the Cotton Webbing)
- Coordinating color thread
- Heat N Bond or Fusible Tape
- 1.25" (32 mm) Key Fob Hardware
- Key Fob Hardware Pliers
Instructions (adjust accordingly for 1" hardware):
- Cut a 10" section of Cotton Webbing and Fabric strip. Create a 10"x1.25" strip of Fabric and a 10"x0.75" strip of Heat N Bond.
- Center and Iron Heat N Bond to back side of Fabric strip.
- Remove backing and on each side fold 1/4" seam over and iron.
- Turn finished Fabric strip right side up and iron to Cotton Webbing, making sure to center it.
- Stitch along the edge of your Fabric strip, securing the edge onto the webbing. Work slowly, keeping close to the edge. Sew the whole length and around the ends of the fabric strip for added stability.
- Fold the Cotton Webbing in half, right sides facing out and match up the ends.
- Stitch the ends together with a 1/4" seam allowance.
- Trim any loose threads.
- Tuck the sewn seam ends into the Key Fob Hardware, making sure that the Cotton Webbing is centered.
- Using Key Fob Hardware Pliers with silicone tips to protect the metal from getting scratched, squeeze the Key Fob Hardware closed a little at a time. I like to go back and forth a couple times so that I don't over crimp one side.
- Add the Key Ring and Yay!!! You are done. Good Job!!!
"No Sew" Key Fob for USB Memory Stick by ILikeBigButtons.com August 19 2019
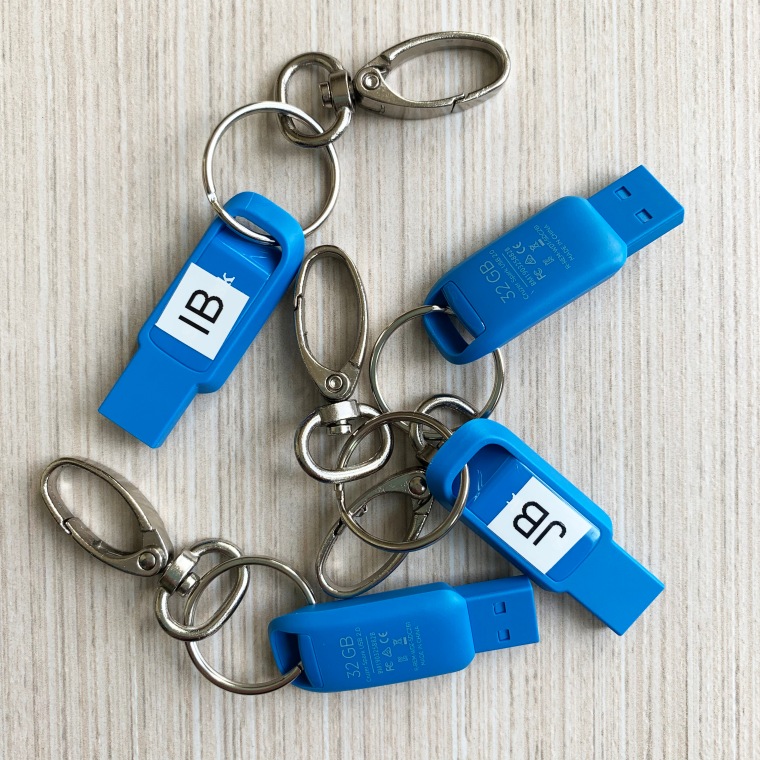
School supply time in the I Like Big Buttons! household. Almost all my kiddos need a USB memory stick these days, but they are SO small and prone to misplacement. I decided to make these simple "No Sew" Key Fobs to make them more challenging to lose, not that I don't have overachievers in losing things despite Mom's thoughtful planning. :P
Supplies:
- Split Rings
- Oval Lobster Clasps (Available in 1/2", 3/4", or 1" and Silver and Antique Brass)
- USB Memory Stick

Easy Peasy, twist a Split Ring onto an Oval Lobster Clasp. I used a Silver 1/2" Lobster Clasp, but we also offer them in 3/4" and carry them in 2 finishes: Silver and Antique Brass. Once the "No Sew" Key Fob is assembled simply twist the Split Ring onto the open ring at the top of the USB Memory stick. Tada!