News
How to make a Universal Cover Button Die for the DK-93 Press January 12 2026
If you are anything like me, arthritis or hand fatigue has started to creep up on you, especially when working on a big cover button project. My sweet husband was kind enough to create a universal cover button press die for my DK-93 tabletop press, so I can create buttons to my heart's content. I wanted to share this with you because this has been a game-changer for me and has made button forming a breeze.
It’s a little “McGyvered,” but this will give you an idea of how to do it.
Supplies
-
Bolt: M8–1.25 × 40mm (M8–1.25 = bolt size + thread pitch & 40mm = bolt length)
-
Nut: matches M8–1.25 threads
-
Washer: large enough to fit inside the Size 75 pink pusher
-
Size 75 pink pusher (or similar-sized/shaped item)
-
Epoxy (or similar strong adhesive)
-
Flat platform material (wood or metal) to cover the bottom die location
-
Your button tool (correct size for the button you’re making)
- KAM DK-93 Tabletop Press

Part 1: Make the threaded “top die” adapter
1. Assemble the bolt: Thread the washer onto the bolt. Thread the nut onto the bolt after the washer. (You’ll be embedding the washer/nut end into the pusher.)
2. Prep the pink pusher: Place the Size 75 pink pusher upside down (open side facing up).
3. Fill with epoxy: Fill the pusher about halfway with epoxy (or similar adhesive).
4. Insert the bolt assembly: Press the bolt/washer/nut into the epoxy-filled pusher. Center it carefully so it stays straight.
5. Let it cure: Allow the epoxy to dry/cure for the full recommended time (per the epoxy instructions).
6. Install the adapter: Once fully cured, thread the bolt/pusher assembly into the top die location of your press.

Part 2: Create a flat base at the bottom die location
1. Place a flat, sturdy platform (wood or metal) over the bottom die location. This base needs to be about 2"x2".
2. The goal is an even, level surface to set your button and button tool on.

Part 3: Press the button
1. Assemble your I Like Big Buttons! cover button normally: Fabric + cap + back, using your button tool like you normally would.
2. Add the pink pusher: Place the pink pusher on top, “sandwiching” the button together.
3. Center everything: Position the button under the threaded adapter so the button is centered, the back is level, and the pink pusher is straight on top.
4. Press gently first: Pull down on the press lever slowly and gently until you see the back settle into place. Stop, check alignment, and see if the back is popped into place.
5. Increase pressure only if needed: If the back isn't fully set, press again with slightly more pressure.
Tip: Too much force can flatten the button's dome, so start light until you get a feel for it.


To see other great Fabric Cover Button ideas, visit our DIY Project section here.
Have you ever looked at a fabric cover button and thought, "What else can I do with this little guy?" July 21 2025

Have you ever looked at a fabric cover button and thought, "What else can I do with this little guy?" Well, you're in luck because these tiny wonders have more uses than you might think! Let's dive into the world of fabric button covers and explore their many versatile applications.
Button Up Your Fashion Game
First and foremost, fabric cover buttons are a fantastic way to add a touch of flair to your wardrobe. Whether you're sprucing up a plain blouse or giving new life to an old jacket, these little buttons can take your outfit from drab to fab in no time. Plus, you can easily switch them out to match different looks - talk about versatility!

Get Crafty with DIY Projects
Looking for a fun and easy DIY project? Fabric cover buttons are here to save the day! You can use them to create custom hair accessories, jewelry, or even decorative accents for your home. The possibilities are endless, and the only limit is your imagination (and maybe the number of button covers you have on hand).
Organize in Style
Who says organization has to be boring? With fabric cover buttons, you can add a pop of color and personality to your storage solutions. Use them to label jars, boxes, or folders in a creative way that will make you smile every time you reach for them. Who knew staying organized could be so much fun?

Gifts That Button Up Nicely
Looking for a unique and thoughtful gift idea? Fabric cover buttons are the answer! You can create personalized gifts for friends and family by incorporating these cute buttons into handmade items like bookmarks, keychains, or even custom clothing. It's a small touch that shows you care (and have a knack for crafting).
So, the next time you come across a fabric cover button, don't just see it as a simple button. Get creative, think outside the box, and discover the endless possibilities that these little gems have to offer. Who knew something so small could have such a big impact?

Are you tired of the same old boring buttons on your clothes? April 21 2025

Looking to add a little pizzazz to your wardrobe? Well, look no further because I Like Big Buttons!® fabric cover buttons are here to save the day! These aren't your grandma's buttons, that's for sure.
Why Choose I Like Big Buttons!® Self-cover Buttons?
Let's face it, regular buttons can be so blah. But with I Like Big Buttons!® Self-cover buttons, you can customize your buttons to match any fabric or style. Say goodbye to boring buttons and hello to endless possibilities!

Not Your Grandma's Buttons
These self-cover buttons are anything but ordinary. They are like the cool kids of the button world, always standing out in a crowd. With I Like Big Buttons!® Self-cover buttons, you can show off your unique style and creativity with every stitch.
Get Your DIY On
Are you a crafty individual who loves to add a personal touch to everything you do? Then I Like Big Buttons!® fabric cover buttons are perfect for you! Get your DIY on and create one-of-a-kind buttons that will make your projects pop.

Make a Statement
Why blend in when you were born to stand out? With I Like Big Buttons!® Self-cover buttons, you can make a statement without saying a word. Let your buttons do the talking and show the world your fabulous sense of style.
Final Thoughts
So, why settle for boring buttons when you can have I Like Big Buttons!® fabric cover buttons? Step up your button game and add a touch of flair to your wardrobe. Trust us, once you go self-cover, you'll never go back!

I Like Big Buttons!® Fabric Cover Buttons - Easy To Make, Great Impact! December 07 2023
Buy with Confidence
These aren't your grandma's Cover Buttons!!! Well, actually they are 😉 only better, with so many, many great uses for them.
We carry 7 sizes. From 1/2", which is about as small as your pinky nail, all the way up to 1 7/8" in diameter, about the size of the round side of a kiwi fruit.
Watch all our How-To Videos for inspiration.
Cover Button Earrings with I Like Big Buttons! Self-Cover Buttons June 13 2023

⭐️⭐️⭐️⭐️⭐️ -- Stacey
Shop with Confidence
#customerlove #customershare #customerreview #letbecrafty #ilikebigbuttons #coverbuttons #coverbuttonearrings #fabriccoverbuttons #selfcoverbuttons #diykits #craftstore
How-To Video: Making Magnetic Needle Holder/Pin Cushion May 08 2023
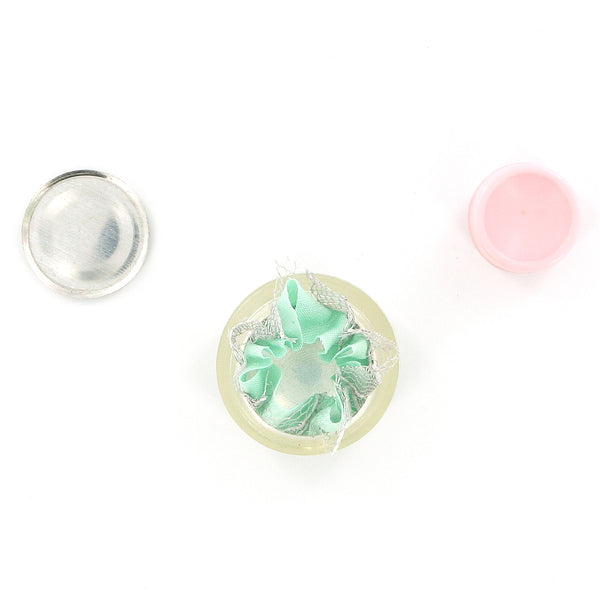
A handy sewing accessory: Fabric Cover Button Pin Cushion/Needle Holder. You will love the usefulness and the splash of color they add to you or a friend's sewing station!
Supplies:
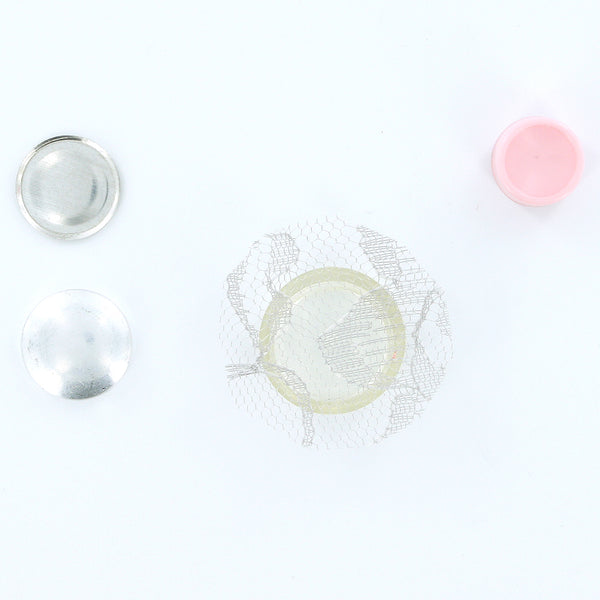
* Size 75 Flat Back I Like Big Buttons!® Cover Button Set
* Size 75 Cover Button Tool
* Size 75 Cover Button Template
* Fabric Scrap (A circle that is about twice the diameter of your button blank.)
* Ceramic Hobby Magnet
* E6000 or equivalent adhesive
Our buttons range from 1/2 inch to 1 7/8 inches in diameter. We also carry them in both flat back (glueable) and wire back (sewable).
Check out I Like Big Buttons! for more Cover Button tutorials, tips and crafty ideas: Inspiration Boards
❤️ I Like Big Buttons!® - A US-Based Company ❤️

Other Places To Find Us!
Thank you again for visiting our I Like Big Buttons!® storefront.


Sometimes, you just got to craft! December 28 2022
Sometimes, you just have to craft! December 21 2022

😍 Sometimes, you just got to craft! Last-minute Christmas craftiness! What should I turn it into???
A. Key Fob Wristlets
B. Cover Buttons
C. Something KAM Snappy
#craftstore #ilikebigbuttons #craftsupplies #allthefabric #letsbecrafty #itstheseasonforcraftiness #keyfobs #coverbuttons #kamsnaps #pendantbezels #earrings #paperclips #pacifierclips #pineapple
Sometimes, you just have to craft! December 07 2022

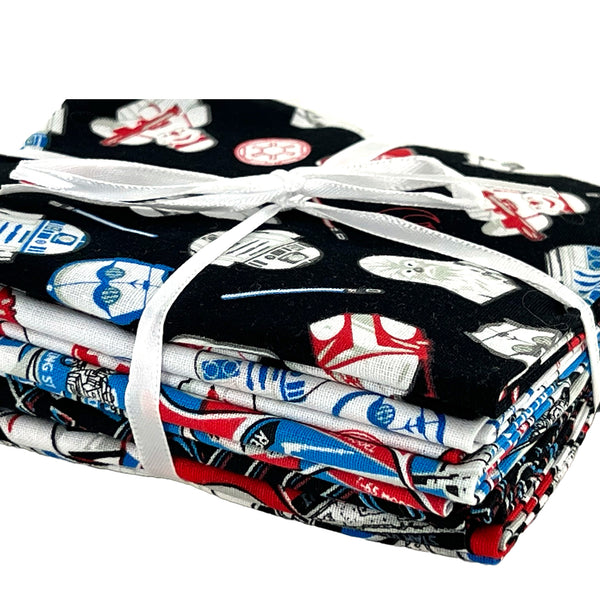
😍 Sometimes, you just got to craft! A little fabric for the Marvel fans in my house! What should I turn it into???
A. Key Fob Wristlets
B. Cover Buttons
C. Something KAM Snappy
#craftstore #ilikebigbuttons #craftsupplies #allthefabric #letsbecrafty #itstheseasonforcraftiness #keyfobs #coverbuttons #kamsnaps #pendantbezels #earrings #paperclips #pacifierclips
Sometimes, you just have to craft! November 30 2022

😍 Sometimes, you just got to craft! I found this gorgeous clearance fabric at Walmart the other day! What should I turn it into???
A. Key Fob Wristlets
B. Cover Buttons
C. Something KAM Snappy
#craftstore #ilikebigbuttons #craftsupplies #allthefabric #letsbecrafty #itstheseasonforcraftiness #keyfobs #coverbuttons #kamsnaps #pendantbezels #earrings #paperclips #pacifierclips
A Very Merry I Like Big Buttons! Christmas Gift Idea #3 - Pin Cushion/Needle Minder November 23 2022
A handy sewing accessory: Fabric Cover Button Pin Cushion/Needle Holder. You will love the splash of color they add to your loved one's sewing station and their usefulness!
Our buttons range from 1/2 inch to 1 7/8 inches in diameter. We also carry them in both flat back (glueable) and wire back (sewable).
Check out I Like Big Buttons! for more Cover Button tutorials, tips and crafty ideas.
A Very Merry I Like Big Buttons! Christmas Gift Idea #1 - Christmas Cards November 17 2022
Fabric Cover Button Christmas Cards
Today, I am working on some cute Christmas cards using Fabric Cover Buttons. They turned out lovely. You can also make the Cover Buttons into earrings with our Earring Supplies and it can double as a gift and Christmas Card.
Our buttons range from 1/2 inch to 1 7/8 inches in diameter. We also carry them in both flat back (glueable) and wire back (sewable).
Check out I Like Big Buttons! for more Cover Button tutorials, tips and crafty ideas.
Sometimes, you just got to craft! November 16 2022

Sometimes, you just got to craft! November 09 2022
Sometimes, you just got to craft! November 02 2022

Sometimes You Just Got To Craft! @ ILikeBigButtons.com October 05 2022

 Sometimes, you just got to craft! A great gift for the favorite teachers in your life on World Teacher's Day!
#craftstore #ilikebigbuttons #craftsupplies #allthefabric #letsbecrafty #itstheseasonforcraftiness #jumbopaperclips #paperclips #bookmarks #bookmarker #coverbuttons #fabriccoverbuttons
How-To: Magnetic Pin Cushion/Needle Holder July 13 2022

Supplies:
- 1 Completed Size 75 (1 7/8 inch / 48 mm) Fabric Cover Button
- Fabric Of Your Choice
- 1x Standard Round Magnet (Approximately 3/4" Round)
- E6000, Hot Glue, or comparable adhesive
I Like Big Buttons! - Picture Tutorial Below:

1. Cut your fabric scrap. You will want a circle that is about twice the diameter of your button blank. *TIP* Our All-In-One Cover Button Template makes creating the right size circle of fabric a breeze.
2. Put your fabric piece in the larger assembly tool piece (RIGHT SIDE DOWN). When you look into the tool you want to see the back of the fabric.

3. Glue the magnet inside the back of the Cover Button with Hot Glue or E6000.

4. Place the button front (the domed piece) on top of the fabric. Leave the fabric edges hanging out.
5. Press the cover button edges down into the tool. *TIP* To make it easier on my fingers, I use a sharpie marker to apply pressure.
6. Place the back cover button piece on top of your fabric and button front. *TIP* If the cover button will be subject to repeated tugging from the back, you may want to add a little e6000 adhesive before attaching the back.
7. Take the smaller piece of the assembly tool and with the open side down place it on the button back.
8. Press down. You may hear a pop when the last bit of the button back slips into place. If you take the tool out and the button is not completely secured, just put it back in and press down again. *TIP* I often use a flat piece of wood to apply pressure, again to save my fingers. It also helps to avoid the button back going in at an angle.

9. When you take the small assembly tool piece off, the fabric edges will be secured underneath the button back.
9. Remove the button from the larger assembly tool piece.
10. Tada! Now you have an attractive Pin Cushion/Needle Holder for your sewing room.


To see other great Fabric Cover Button ideas, visit our DIY Project section here.
How to make Cover Button Earrings with I Like Big Buttons! DIY Kit April 27 2022
How to make Cover Button Paper Clips/Bookmarks with I Like Big Buttons! DIY Kit March 21 2022
Here is what you will receive a DIY Cover Button Jumbo Paper Clip KIT from ILikeBigButtons.com. Just a few quick steps to make a gift for the booklover in your life!
How to make Cover Button Bookmarks here.
How to make Cover Button Barrettes with I Like Big Buttons! DIY Kit March 15 2022
How to make Cover Button Barrettes with I Like Big Buttons! DIY Kit
Here is what you will receive a DIY Cover Button Barrette KIT from ILikeBigButtons.com. Just a few quick steps to make a fun accent for any outfit or gift for a loved one!
How to make Cover Button Badge Reels with I Like Big Buttons! DIY Kit March 10 2022
Here is what you will receive a DIY Cover Button Badge Reel KIT from ILikeBigButtons.com. Just a few quick steps to make a fun accent for any nurse, teacher, or work ID or gift for a loved one!
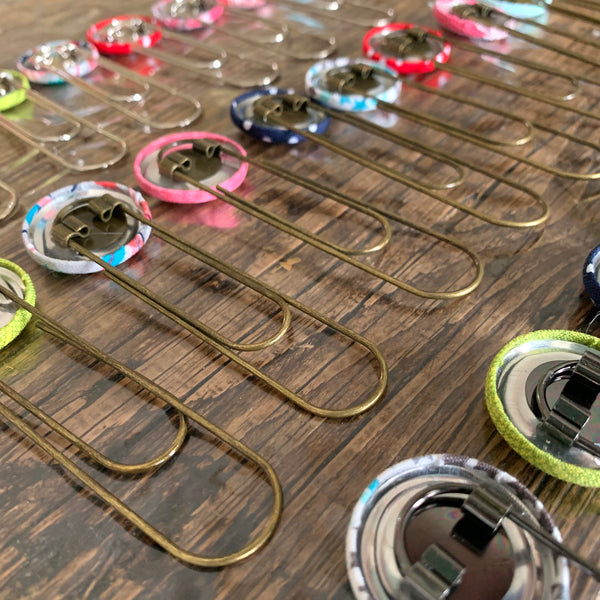
Pack An Order With Us @ ILikeBigButtons.com January 31 2022
I thought you might enjoy a glimpse inside the order preparation and shipping process at ILikeBigButtons.com -- This order was a fun one! 50+ crafty items in a variety of finishes and sizes. Cover Button DIY Kits, Badge Reels, Flat Back Cover Buttons, Template & Tools, Key Fob Hardware, Barrettes & Bobby Pins, & Wire Back Cover Buttons! Oh My! You all like to keep me on my toes!
Shop with confidence!
Where to find us:
- Join our Facebook group!
- Like us on Facebook.
- Visit us on our YouTube Channel.
- Follow us on Pinterest.
- Follow us on Instagram.
- Follow us on Twitter.
Thank you for your interest! Have a great crafty week!
I Like Big Buttons and crew!
How-To Videos for Cover Buttons @ ILikeBigButtons.com January 26 2022

Christmas Gift Idea #1: Fabric Cover Button Earrings @ ILikeBigButtons.com November 30 2021
Gift idea #1: Cute and super easy to make, these Fabric Cover Button Earrings have great impact and use Fabric Cover Buttons. I made these as gifts for some of my trendy cousins a few Christmases ago and they loved them. Easy to embellish, monogram or personalize and add extra pizzazz to your loved one's attire!
Supplies:
- 2 Completed Flat Back Fabric Cover Button (Choose your size, Size 20 through Size 75 all work great, size depends on the statement you want to make)
- 1 set of Earring Post & Backs
- E6000 or comparable adhesive
Steps:
- Follow these instructions to make Flat Back Fabric Covered Buttons. See More
Pin for Later:

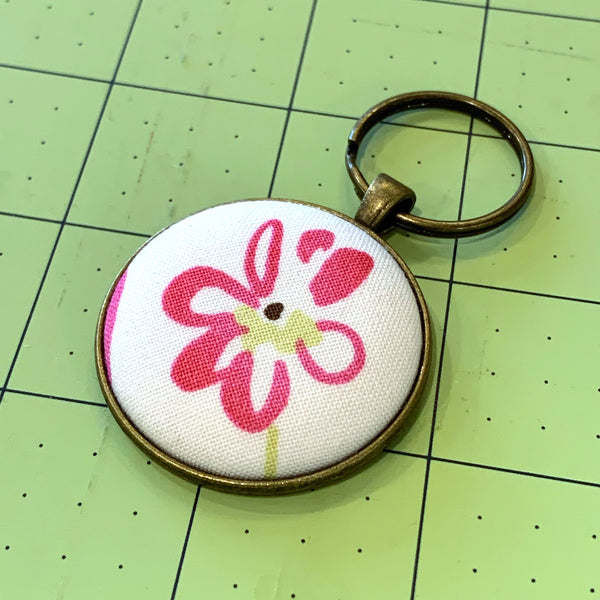
Crafty Wednesday - Fall-Themed Key Fob Wristlet @ ILikeBigButtons.com November 04 2021

😍 Friend Request! I had a friend request some Fall-themed Key Fob Wristlets. I love how they turned out! 😍
ILikeBigButtons.com Supply List:
- Key Fob Hardware
- Pendant Bezels (Size 36 and Size 60)
- Cover Buttons (Size 36 and Size 60)
- Lobster Clasps
For more Crafty Inspiration, visit our Key Fob Hardware Inspiration Boards.
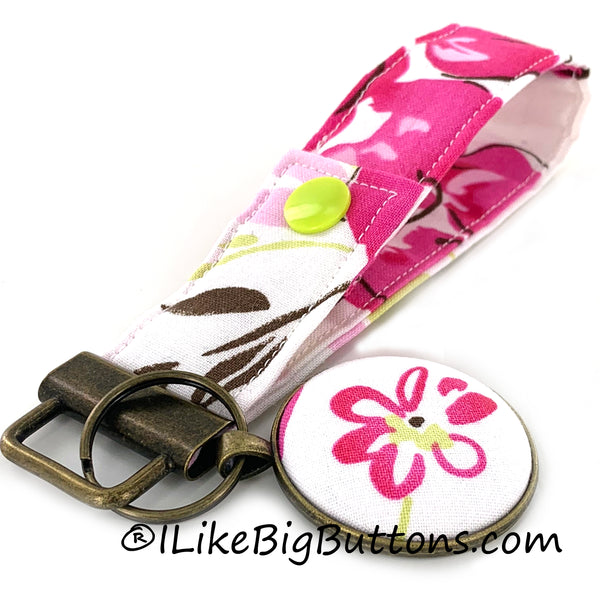
Key Fob Wristlet with KAM® Plastic Snaps Tutorial @ ILikeBigButtons.com October 18 2021

Thanks to my I Like Big Buttons! Facebook group for help deciding on which color KAM® snap to use on my latest project. I went with G90 - Bright Celery because I love the pop of color that it adds to the project.
I have been wanting to make a Key Fob Wristlet for a while with a KAM® Plastic Snap accent. Not only does the KAM® Plastic Snap add a bit of pizzazz to my project but it is also functional. I can wear the wristlet on my wrist or snap it to my purse strap for safekeeping. No more digging around in my purse to find my keys.
Supplies:
- 12" x 5" Fabric of your Choosing
- 12″ x 1" Piece of Fusible Fleece or 12" x 5" Fusible Interfacing
- 1 Key Fob Hardware and Split Ring
- Key Fob Hardware Pliers
- Sewing Clips
- Standard Sewing Machine
- Fray Check
- KAM® Plastic Snap
- KAM® Hand Pliers & Awl
- Pendant Bezel Trays in 23 mm (Size 36) or 38 mm (Size 60)
- 1 Completed Flat Back Fabric Cover Button (Attach size 36 (7/8" - 23 mm) or size 60 (1 1/2" - 38 mm) flat back cover buttons.)
- E6000 or comparable adhesive

1. Cut a 12" x 5" section of Fabric of your choosing and 12" x 1" Fusible Fleece.
2. Fold and iron the Fabric in half with the wrong sides together.
3. Unfold and iron the Fabric in half again long sides to the center. Iron Fusible Fleece to the left or right center column of the fabric, depending on how you want to fold it.
4. Fold over and iron about 1/2" of the fabric in on each of the ends so that when you sew your way around the strip you will create a finished edge at each end.
5. Use your Sewing Clips to pin the Wristlet flat. It will look like this when you get done.
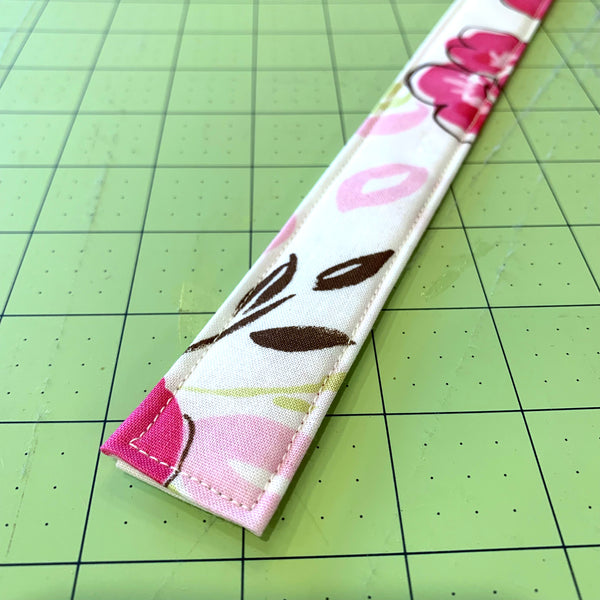
6. Stitch along the edge of your Fabric strip, I stitched 1/8" in. Remove the Sewing Clips as you go. Work slowly, keeping close to the edge and as straight of a line as possible.
7. Continue all the way around the band, stitching 1/8" from the edge.

8. Using the Awl, poke a hole through for the snap about 1/2" in from the edge. Do this at each end.


9. Install the KAM plastic snap cap and socket on one end and the other KAM plastic snap cap and stud at the other end. One will be facing up, and one will be facing down so that when they snap together they look like the above picture.

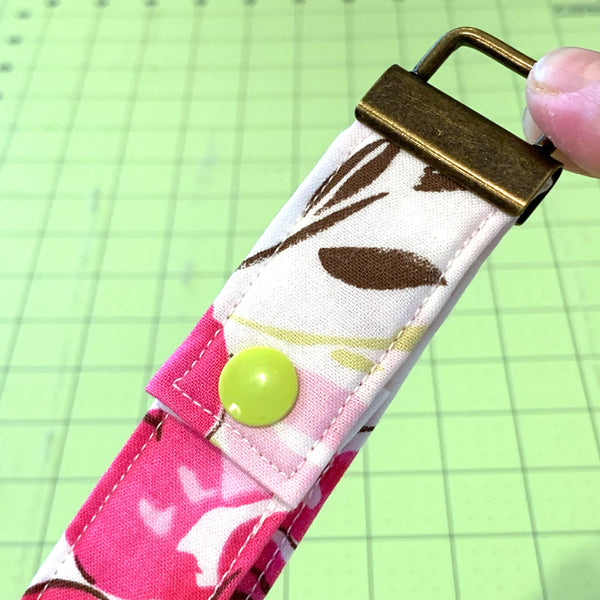
10. Snap KAM plastic snap together and decide where you want the snap on the wristlet. I decided I wanted it to be closer to the Key Fob Hardware than not.
11. Make sure that the Fabric Wristlet is centered. Using Key Fob Hardware Pliers squeeze the Key Fob Hardware closed with gentle pressure. Sometimes, I go back and forth from left to right added a little bit of pressure to each side until it eases together. Our Key Fob Hardware Pliers make this easy to do.
12. I wanted to add an extra bit of embellishment to my Key Fob Wristlet, so I made a quick Cover Button Pendant. Follow these instructions to make Flat Back Fabric Covered Buttons.
13. Carefully apply E6000 to the inside edges of the Pendant Bezel.
14. Press the assembled Fabric Cover Button into place.
15. Let dry for the recommended time, add a necklace or cord as we did, and enjoy.

To see other great Crafty Inspiration ideas, visit our DIY Project section here.
Quick and Easy Gift Idea @ ILikeBigButtons.com October 07 2021
Make these adorable Snap Barrettes to match or accent your loved ones favorite outfit or dress up their favorite t-shirt and jeans for an afternoon outing. Enjoy!
Supplies:
- 1-2 Completed Flat Back Fabric Cover Button (Choose your size, Size 20 through Size 36 all work great, size depends on the statement you want to make)
- 2 Snap Barrettes
- E6000 or comparable adhesive


Steps:
1. Follow these instructions to make Flat Back Fabric Covered Buttons.

2. Lightly scuff the back of the Cover Button so the glue will adhere better (not essential but recommended).
3. Clean both surfaces of dust.
4. Apply E6000 to back of Cover Button.

5. Press Snap Barrette into place and remove any extra Adhesive. On smaller sized Cover buttons center on the glue pad, as they increase in size adjust glue pad accordingly.

6. Let dry and enjoy.
7. Tada!

To see other great Cover Button ideas, visit our DIY Project section here.
Fabric Cover Button Pendant Bezel Necklaces @ ILikeBigButtons.com September 17 2021

I am in 💕 with these Cover Button pendants!!! Aren't they the cutest!?! They add a pop of style and originality to any outfit!
We carry them in handy Cover Button Pendant Bezel Kits with everything you need to get started.
To see other great Pendant Bezel and Cover Button ideas, visit our DIY Project section here.
So many 😍 Key Fob Wristlets @ ILikeBigButtons.com September 01 2021

So many 😍 Key Fob Wristlets.
ILikeBigButtons.com Supply List:
To see other great Key Fob Hardware, Pendant Bezel, and Cover Button ideas, visit our DIY Project section here.
School Must-Haves @ ILikeBigButtons.com August 24 2021

With the school year starting back up, I couldn't resist. 😄
Shop Cover Buttons @ ILikeBigButtons.com
Shop Jumbo Paper Clips @ ILikeBigButtons.com
To see other great Cover Button and Jumbo Paper Clip ideas, visit our DIY Project section here.
Fabric Cover Buttons - Easy Peasy, Beautiful Impact! @ ILikeBigButtons.com August 19 2021

These aren't your grandma's Cover Buttons!!! Well, actually they are 😉 only better, with so many, many great uses for them.
💜 Flat Backs are used for crafts where you would like to glue a cover button: jewelry, bracelets, rings, earrings, necklaces, bobby pins and barrettes, scrapbooking, and much more.
💙 Wire Backs are used for fabric cover buttons in sewing, shoes, clothing, ponytail holders and much, much more.
Here are the 7 sizes we carry. From 1/2", which is about as small as your pinky nail, all the way up to 1 7/8" in diameter, about the size of the round side of a kiwi fruit.
We carry them in both flat back (glueable) and wire back (sewable).
• Size 20 (1/2 inch / 12 mm)
• Size 24 (5/8 inch / 15 mm)
• Size 30 (3/4 inch / 19 mm)
• Size 36 (7/8 inch / 23 mm)
• Size 45 (1 1/8 inch / 28 mm)
• Size 60 (1 1/2 inch / 38 mm)
• Size 75 (1 7/8 inch / 48 mm)
Assembling fabric Cover Buttons is fast and simple. In just seconds, you will have a button ready for your latest craft project.
Inspiration Board: Fabric Cover Buttons
Fabric Cover Button Jumbo Paper Clips @ ILikeBigButtons.com July 13 2021
 I'm in
  with Jumbo Paper Clips and Cover Buttons.
Quick & easy craft with stunning results!

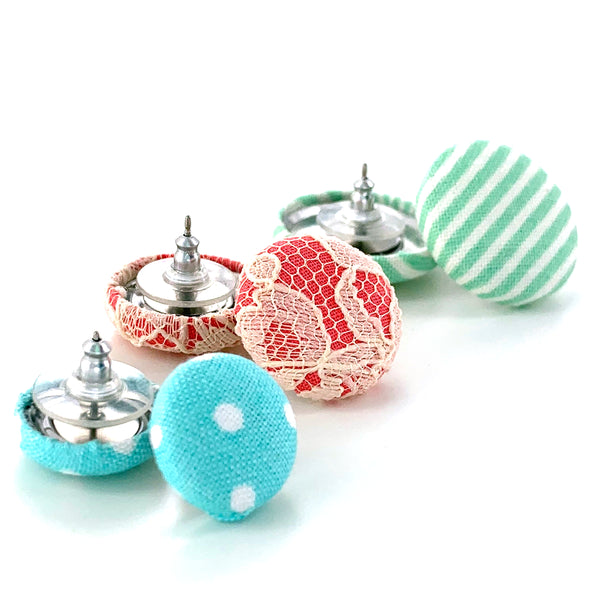
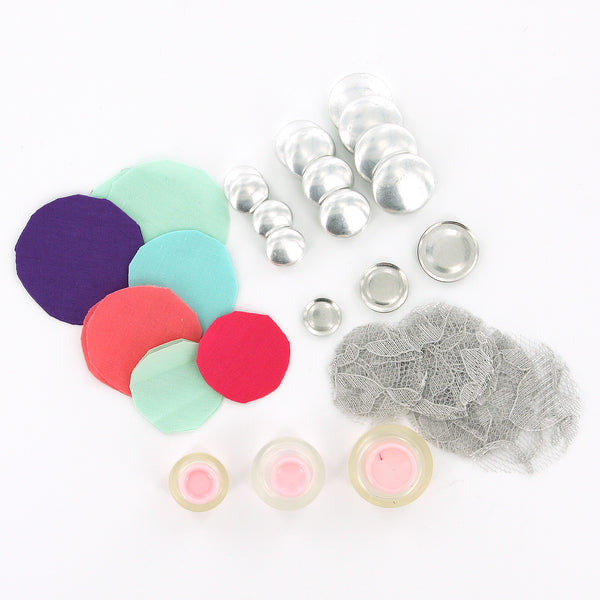
Making Lace & Fabric Cover Button Earrings @ ILikeBigButtons.com June 09 2021
Supplies:
- Flat Back Cover Buttons (I used Size 24, Size 30, and Size 36 Cover Buttons)
- Cover Button Assembly Tools
- Cover Button Templates
- Fabric Scraps
- Lace Scraps
- E6000 Adhesive or Hot Glue
- Sharpie Permanent Marker
- Surgical Stainless Steel Earring Posts and Backs


Instructions:
1. Cut your fabric scrap. You will want a circle that is about twice the diameter of your button blank or use one of our handy Plastic Cover Button Templates.


2. Put your lace piece in the larger assembly tool piece (RIGHT SIDE DOWN). Then, put your fabric piece in the larger assembly tool piece (RIGHT SIDE DOWN). When you look into the tool you want to see the back of the fabric.

3. Place the button front (the domed piece) on top of the fabric. Leave the fabric edges hanging out.


4. Press the Cover Button edges down into the tool.

5. Place the back cover button piece on top of your fabric and button front. If the cover button will be subject to repeated tugging from the back, you may want to add a little e6000 adhesive before attaching the back.

6. Take the smaller piece of the assembly tool and with the open side down place it on the button back.
7. Press down. You may hear a pop when the last bit of the button back slips into place. If you take the tool out and the button is not completely secured, just put it back in and press down again.

8. When you take the small assembly tool piece off, the fabric edges will be secured underneath the button back.


9. Remove the button from the larger assembly tool piece.

10. Tada! First step complete.


11. Lightly scuff the back of the Cover Button so the glue will adhere better (not essential but recommended).

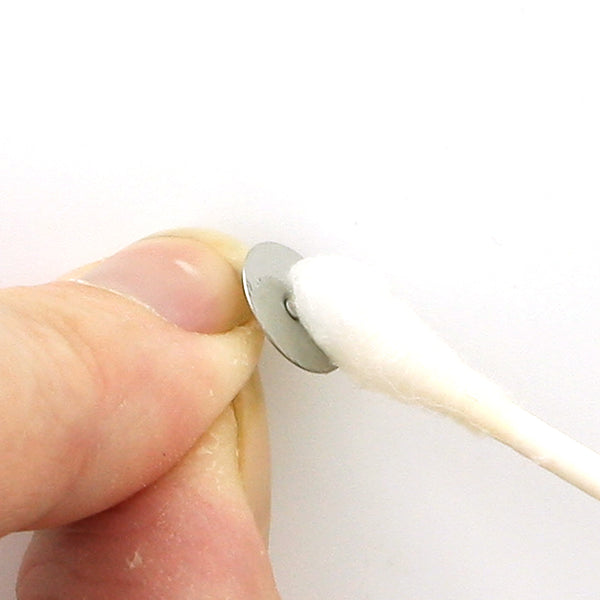
12. Clean both surfaces of dust. I used rubbing alcohol and a cotton swab.

13. Apply E6000 to back of Cover Button or Earring Post.

14. Press Earring Post into place and remove any extra Adhesive. On smaller sized Cover Buttons center the post, as they increase in size adjust post towards top.

15. Let dry, add Earring Backing/Nut, and enjoy.

16. Tada! Lace and Fabric Cover Button Earrings are great a gifts or as products for your shop.
How To Make A Needle Minder/Magnetic Pin Cushion @ ILikeBigButtons.com May 19 2021
I have been working on a lot of crafty projects recently and I needed a few new handy sewing accessories: Fabric Cover Button Needle Minder/Pin Cushion. I love the splash of color they add to my sewing station and their usefulness!
Supplies:
- 1 Completed Size 75 (1 7/8 inch / 48 mm) Fabric Cover Button
- Fabric Of Your Choice
- 1x Standard Round Magnet (Approximately 3/4" Round)
- E6000, Hot Glue, or comparable adhesive
I Like Big Buttons! - Picture Tutorial Below:
1. Cut your fabric scrap. You will want a circle that is about twice the diameter of your button blank. *TIP* Our All-In-One Cover Button Template makes creating the right size circle of fabric a breeze.
2. Put your fabric piece in the larger assembly tool piece (RIGHT SIDE DOWN). When you look into the tool you want to see the back of the fabric.
3. Glue the magnet inside the back of the Cover Button with Hot Glue or E6000.
4. Place the button front (the domed piece) on top of the fabric. Leave the fabric edges hanging out.
5. Press the cover button edges down into the tool. *TIP* To make it easier on my fingers, I use a sharpie marker to apply pressure.
6. Place the back cover button piece on top of your fabric and button front. *TIP* If the cover button will be subject to repeated tugging from the back, you may want to add a little e6000 adhesive before attaching the back.
7. Take the smaller piece of the assembly tool and with the open side down place it on the button back.
8. Press down. You may hear a pop when the last bit of the button back slips into place. If you take the tool out and the button is not completely secured, just put it back in and press down again. *TIP* I often use a flat piece of wood to apply pressure, again to save my fingers. It also helps to avoid the button back going in at an angle.
9. When you take the small assembly tool piece off, the fabric edges will be secured underneath the button back.
9. Remove the button from the larger assembly tool piece.
10. Tada! Now you have an attractive Pin Cushion/Needle Holder for your sewing room.
To see other great Fabric Cover Button ideas, visit our DIY Project section here.
- Page 1 of 3
- Next