Key Fob Wristlet with KAM® Plastic Snaps Tutorial @ ILikeBigButtons.com October 18 2021

Thanks to my I Like Big Buttons! Facebook group for help deciding on which color KAM® snap to use on my latest project. I went with G90 - Bright Celery because I love the pop of color that it adds to the project.
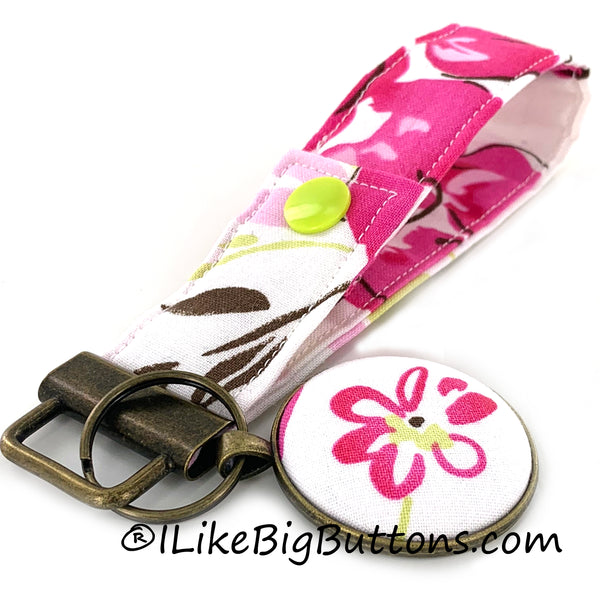
I have been wanting to make a Key Fob Wristlet for a while with a KAM® Plastic Snap accent. Not only does the KAM® Plastic Snap add a bit of pizzazz to my project but it is also functional. I can wear the wristlet on my wrist or snap it to my purse strap for safekeeping. No more digging around in my purse to find my keys.
Supplies:
- 12" x 5" Fabric of your Choosing
- 12″ x 1" Piece of Fusible Fleece or 12" x 5" Fusible Interfacing
- 1 Key Fob Hardware and Split Ring
- Key Fob Hardware Pliers
- Sewing Clips
- Standard Sewing Machine
- Fray Check
- KAM® Plastic Snap
- KAM® Hand Pliers & Awl
- Pendant Bezel Trays in 23 mm (Size 36) or 38 mm (Size 60)
- 1 Completed Flat Back Fabric Cover Button (Attach size 36 (7/8" - 23 mm) or size 60 (1 1/2" - 38 mm) flat back cover buttons.)
- E6000 or comparable adhesive

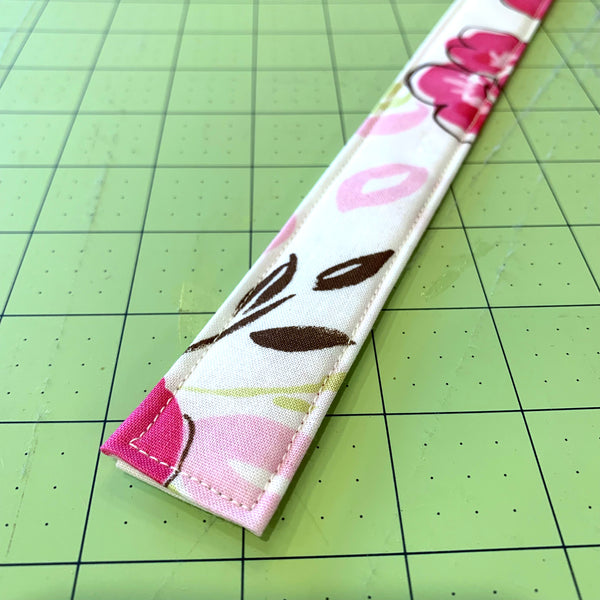
1. Cut a 12" x 5" section of Fabric of your choosing and 12" x 1" Fusible Fleece.
2. Fold and iron the Fabric in half with the wrong sides together.
3. Unfold and iron the Fabric in half again long sides to the center. Iron Fusible Fleece to the left or right center column of the fabric, depending on how you want to fold it.
4. Fold over and iron about 1/2" of the fabric in on each of the ends so that when you sew your way around the strip you will create a finished edge at each end.
5. Use your Sewing Clips to pin the Wristlet flat. It will look like this when you get done.
6. Stitch along the edge of your Fabric strip, I stitched 1/8" in. Remove the Sewing Clips as you go. Work slowly, keeping close to the edge and as straight of a line as possible.
7. Continue all the way around the band, stitching 1/8" from the edge.

8. Using the Awl, poke a hole through for the snap about 1/2" in from the edge. Do this at each end.


9. Install the KAM plastic snap cap and socket on one end and the other KAM plastic snap cap and stud at the other end. One will be facing up, and one will be facing down so that when they snap together they look like the above picture.

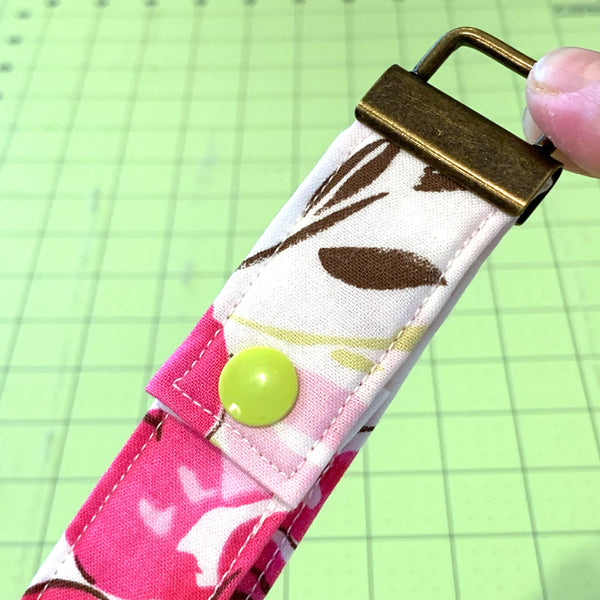
10. Snap KAM plastic snap together and decide where you want the snap on the wristlet. I decided I wanted it to be closer to the Key Fob Hardware than not.
11. Make sure that the Fabric Wristlet is centered. Using Key Fob Hardware Pliers squeeze the Key Fob Hardware closed with gentle pressure. Sometimes, I go back and forth from left to right added a little bit of pressure to each side until it eases together. Our Key Fob Hardware Pliers make this easy to do.
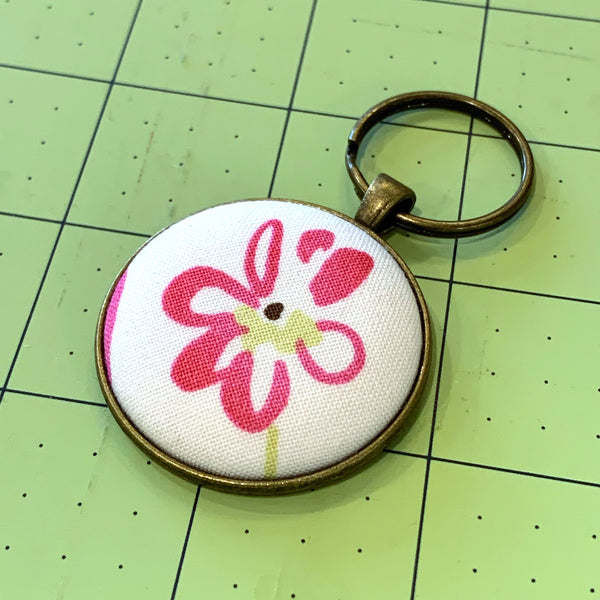
12. I wanted to add an extra bit of embellishment to my Key Fob Wristlet, so I made a quick Cover Button Pendant. Follow these instructions to make Flat Back Fabric Covered Buttons.
13. Carefully apply E6000 to the inside edges of the Pendant Bezel.
14. Press the assembled Fabric Cover Button into place.
15. Let dry for the recommended time, add a necklace or cord as we did, and enjoy.