
News
I Like Big Buttons! Friday Fun Facts: How We Prepare Our Plastic Snaps And Why June 30 2017

For all our new friends and followers of I Like Big Buttons!, it seemed like a great time to introduce you to our amazing Plastic Snaps!!! For those of you who have been with us for a long time, here is a refresher.
We carry a variety of package deals for our snaps from 10 sets, 25 sets, 100 sets up to thousands of KAM snaps with and without pliers or professional press all at a great price. We have a listing for just about everyone at the price range and quantity you desire.
Unlike other vendors, our KAM plastic snaps are optically counted. This means every cap, socket, and stud is counted, and the amount purchase is assured to be at or above the purchased quantity (we allow overcounts, but not undercounts). Plastic snap batches can vary by 5% or more in weight (even between batches of the same color), so if your vendor is weighing them, you may not be getting what you paid for.
25 packs sets came to be largely for cloth diapers. Most customers that replace Velcro on cloth diapers with snaps have numerous diapers in varying colors. Many found purchasing 100 of each color wasteful, as they ended up with 75% of their snaps left over.
We provide the best of both worlds, smaller packs to those that want greater variety and larger packs for those looking to use snaps in bulk.

Some of these reasons we offer these great options include:
*A large demand from customers for just 25 snaps to convert or complete a single diaper.
*An equally large demand for “just a sampling of every color”, which gave birth to our sets of 10 and Starter Packs.
* More compact, informational packaging that includes the name, quantity, prong length, and instructions about which Die and Rod to use.
* We also offer individual parts in quantities of 100 and 1000 in all of KAM Plastic Snaps 130+ colors.
If you aren't sure how to jump into plastic snaps, we also carry starter packs including multi-packs of 10 or 25 sets of snaps. If you are new to snapping, we have starter packs with plastic snap pliers, awl, and an instructional DVD. These Starter Packs are a great way to get addicted :). We have 18 preset themes including Rainbow Spectrum, Pastel Spectrum, Vibrant Boy, Vibrant Girl, Patriotic, Military, and many others.
Check out our convenient Starter Packs:

We also offer an option to choose your own colors. You can pick from any of KAM Plastic Snaps 130+ fun colors. Have you taken a moment to check out our new easy to navigate KAM Snap Visual Ordering Chart with new lower pricing!?!

Here is our chart of available colors, we carry over 130+ great KAM Plastic Snap colors.

7 Of My Favorite Craft Quotes - I Like Big Buttons! June 28 2017
I love crafting quotes; they are so clever. Here are seven of my personal favorites. Each one makes me laugh out loud and holds at least for me, more than a grain of truth.


I Like Big Buttons! - How To Make A Fabric Cover Button Brooch Pin June 27 2017
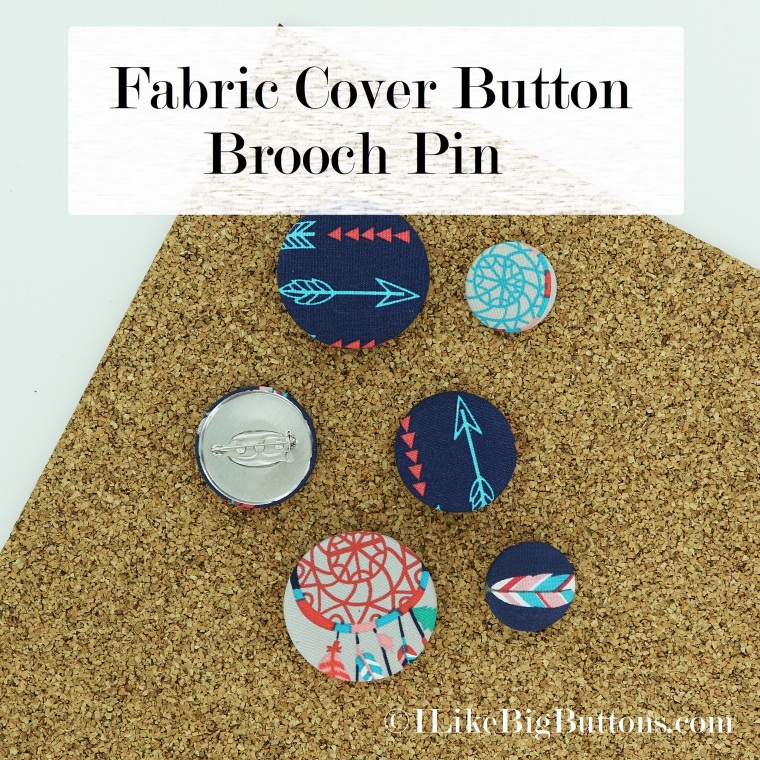
Today I would make a Fabric Cover Button Brooch Pin. I have gotten a number of questions about how to turn Cover Buttons into Brooch Pins. This adorable fabric inspired me to make some cute embellishments for myself.
Supplies:
- 1 Completed Flat Back Fabric Cover Button (Attach either a Size 45 (1 1/8 inch / 28 mm), Size 60 (1 1/2 inch / 38 mm), Size 75 (1 7/8 inch / 48 mm) flat back cover buttons.)
- 1x 1" Brooch Pin
- E6000, Hot Glue, or comparable adhesive

1. Cut your fabric scrap. You will want a circle that is about twice the diameter of your button blank. *TIP* Our All-In-One Cover Button Template makes creating the right size circle of fabric a breeze.

2. Put your fabric piece in the larger assembly tool piece (RIGHT SIDE DOWN). When you look into the tool you want to see the back of the fabric.

3. Place the button front (the domed piece) on top of the fabric. Leave the fabric edges hanging out.

4. Press the cover button edges down into the tool. *TIP* To make it easier on my fingers, I use a sharpie marker to apply pressure.

5. Place the back cover button piece on top of your fabric and button front. *TIP* If the cover button will be subject to repeated tugging from the back, you may want to add a little e6000 adhesive before attaching the back.
6. Take the smaller piece of the assembly tool and with the open side down place it on the button back.
7. Press down. You may hear a pop when the last bit of the button back slips into place. If you take the tool out and the button is not completely secured, just put it back in and press down again. *TIP* I often use a flat piece of wood to apply pressure, again to save my fingers. It also helps to avoid the button back going in at an angle.

8. When you take the small assembly tool piece off, the fabric edges will be secured underneath the button back.

9. Remove the button from the larger assembly tool piece.
10. Tada! Now to attach it to the Brooch Pin and make a Fabric Cover Button Brooch Pin.

11. Apply E6000 to back of Cover Button.

12. Center and press Brooch Pin into place and remove any extra Adhesive.

13. Let dry and enjoy. Ready to Embellish and Go!!!
To see other great Fabric Cover Button ideas, visit our DIY Project section here.
Friday Fun Facts - What is your Shipping and Handling turn around? June 23 2017
We often get questions from our customers about our shipping and handling time. We have it posted on our site, but here it is for your convenience.
"Orders purchased before 3pm Pacific time are typically prepared for shipment the following business day in our 9am pickup."
Here are some reviews of our shipping from our happy customers:
★★★★★ Super fast shipping as always!! I can't stop making these buttons!!
★★★★★ Perfect, super sonic shipping, A+++ seller!
★★★★★ Great customer service, expedient delivery, excellent communication. Product exactly as described. Will use this shop again for sure.
★★★★★ aS ADVERTISED AND VERY FAST SERVICE!
★★★★★ Wow Super Fast Shipping!! Totally impressed and will definitely order again!! Great product!
★★★★★ Super fast shipping! Thanks!!
★★★★★ Excellent Lightning Fast Shipping I totally appreciate that and product is terrific I highly recommend this shop!!
★★★★★ thank you for super quick shipping Thank you.
★★★★★ Once again I am very happy with these snaps! You absolutely can't beat the price or the color options here and the shipping is so fast!
★★★★★ Perfect item. Fast shipping. Smooth Sailing.
★★★★★ I love using the KAM snaps. The really prompt shipping from "I like big buttons" was surprising. I ordered one day and shipped the same day. Got them the next day. I will be shopping with them again soon.
★★★★★ lightning fast shipment, above quality snaps
★★★★★ Great Items....can't wait to use them. Thanks for the fast delivery.
★★★★★ AMAZING service. Shipped out the next day. Had in 2 days! Will definitely be doing business with this company again! Thank you so much!
★★★★★ great merchandise and fast shipping makes buying easy
★★★★★ Everything was great. Shipped faster than expected and packaging was more than expected.
★★★★★ Perfect and super fast shipping!
★★★★★ They got here days before estimated arrival time.
★★★★★ This is a repeat buy. I reordered because they have the products I want at a good price. Quick delivery!
★★★★★ Quick shipping and an excellent price.
★★★★★ QUICK DELIVERY...EXACTLY WHAT I WANTED..THANK YOU
As always, there are exceptions to these customers reviews. We, just like our customers, are at the mercy of the US Postal Service, but on a whole, more than 99% of the time, they serve us well. We love our local US Postal workers who make shipping your packages a delight. If your purchase is taking longer than you had hoped, please feel free to contact us.
Thank you,
Gena (CEO of ILikeBigButtons.com)
I Like Big Buttons! Product Video: What We Carry June 22 2017
Check out ILikeBigButtons.com - A family-run craft supply shop with a large variety of plastic KAM Snaps & accessories, Key Fob Hardware, Cover Buttons, Pacifier Supplies, Metal Findings and more! We are constantly expanding our selection of crafting supplies for you.
I Like Big Buttons! - How To Make A Fabric Cover Button Full-Size Clothespin June 20 2017
Today, I made an adorable office or home accent: Fabric Cover Button Mini Clothespins. I am absolutely in love with their bright colors and tininess!
Supplies:
- 1 Completed Flat Back Fabric Cover Button (Attach Size 30 (3/4 inch / 19 mm), Size 36 (7/8 inch / 23 mm), or Size 45 (1 1/8 inch / 28 mm) flat back cover buttons.)
- 1x Full-Size Wooden Clothespin
- 1x Medium Plain Button
- E6000, Hot Glue, or comparable adhesive
I Like Big Buttons! - Picture Tutorial Below:

1. Cut your fabric scrap. You will want a circle that is about twice the diameter of your button blank. *TIP* Our All-In-One Cover Button Template makes creating the right size circle of fabric a breeze.

2. Put your fabric piece in the larger assembly tool piece (RIGHT SIDE DOWN). When you look into the tool you want to see the back of the fabric.
3. Place the button front (the domed piece) on top of the fabric. Leave the fabric edges hanging out.

4. Press the cover button edges down into the tool. *TIP* To make it easier on my fingers, I use a sharpie marker to apply pressure.

5. Place the back cover button piece on top of your fabric and button front. *TIP* If the cover button will be subject to repeated tugging from the back, you may want to add a little e6000 adhesive before attaching the back.
6. Take the smaller piece of the assembly tool and with the open side down place it on the button back.
7. Press down. You may hear a pop when the last bit of the button back slips into place. If you take the tool out and the button is not completely secured, just put it back in and press down again. *TIP* I often use a flat piece of wood to apply pressure, again to save my fingers. It also helps to avoid the button back going in at an angle.

8. When you take the small assembly tool piece off, the fabric edges will be secured underneath the button back.
9. Remove the button from the larger assembly tool piece.
10. Tada! Now to attach it to the Clothespin.


11. Use Hot Glue or E6000 to adhere a small plain button to the underside of the Cover Button. This is to fill the space between the back and the edges. You can also use felt or some other small object. You just need it to be sturdy enough to offer support. A small plastic button works great for this. You will see that the button is now flush across the bottom. I cut off the little nubs of glue that leaked through the button holes.


12. Now adhere the finished Cover Button to the Clothespin. Press into place and center it until you are pleased with the alignment. Set aside to dry.
13. Tada! Additional uses:
- Add a thin magnet to the back and use on your magnetic board.
- Add a push pin to the back and use on your cork board.
To see other great Fabric Cover Button ideas, visit our DIY Project section here.
I Like Big Buttons! - How to make a Fabric Pacifier Clip with KAM Snaps, MAM Ring or O-Ring and an KAM Plastic Pacifier Clip for Button Style Pacifiers June 13 2017

Today, I am making a pretty Fabric Pacifier Clip for Button Style Pacifiers using our silicone MAM rings and O-Rings. Pretty & functional! :)
Supplies for a Fabric Pacifier Clip with Button Style Pacifier Adapters:
- Pacifier with Button Style Grip
- 14" x 3 1/2" Piece of Fabric
- 1 Pacifier Clip per Clip
- 2 KAM Snap Sets per Clip
- KAM Snap Pliers and Awl
- MAM Ring and O-Ring Button Style Adapters
- Standard Sewing Machine and Iron

Instructions:
1. Choose a piece of Fabric, cut it to the dimensions: 14" x 3 1/2", the finished product once ironed, folded and sewn will be approximately 7/8" wide x 12" long.


2. Fold both 3 1/2" wide ends in 1/4" and iron flat.

3. Now fold and iron the fabric in half the long way (14" length).
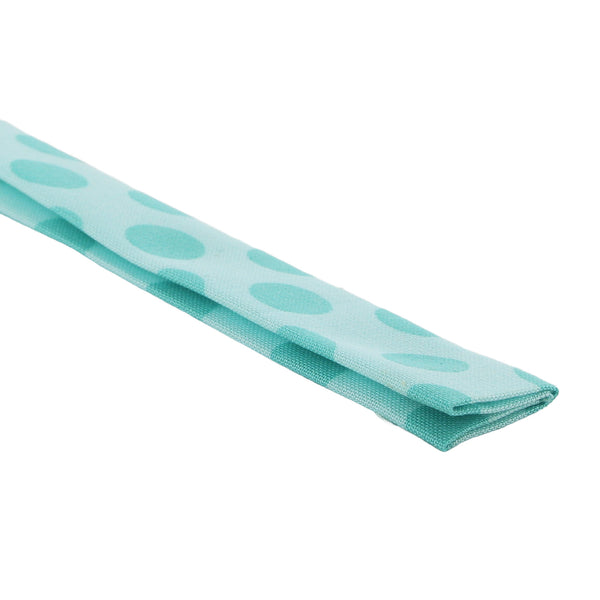
4. Then fold and iron again, bringing the outer edges to the middle "iron line" and iron along those edges. Repeat on other side.
5. Re-iron the seam so that the Fabric is smooth and flat, it should now be 13 1/2" long x 7/8" wide.

6. Open the top of the Fabric strip and trim the excess internal fabric at an angle so that there is less chance of the ends peeking out when sewn together. Repeat on the other end.

7. Pin the Fabric strip in a couple places to keep it in place.

8. Sew a 1/8" seam all the way around the piece making sure to back stitch at the start and finish to set the seam.

9. Now installed a Cap and Stud about 1/2" from the edge and the mating Cap and Socket about 1 1/2" later so that the center of the two KAM Snap parts are about 1 1/2" or more apart. Any closer and I found I had trouble getting the MAM Ring or O-Ring Adapter to sit neatly inside. I used Size 20 snaps for this tutorial but either Size 20 or Size 16 will work great.

10. Repeat on the other side, that will hold the Pacifier Clip. I, then, feed the Pacifier Clip and MAM Ring Adapter onto the ribbon and snapped it into place. It may have been easier to thread on the pacifier clip before installing any Snap parts but I was able to feed it through without much trouble.


11. Tada! Now time to add the Pacifier.


12. Simply stretch the MAM Ring or O-Ring around the Button Style Grip on the Pacifier and it will settle behind it and hold the Pacifier securely. Now snap the Pacifier in place, attach to your child's shirt and go.


13. As pictured, the MAM Rings hold the same way as the O-Rings only with a less subtle profile.

14. Tada! Happy Snapping!!!
Friday Fun Facts - Who is ILikeBigButtons.com? June 09 2017
It has been a while since I have introduced myself. Hi! I am Gena, the CEO and MOM of I Like Big Buttons! :) ILikeBigButtons.com is a family run, small business located in beautiful Washington State. We have been serving our customers for over a decade via the internet.
When I am not busy growing our craft business, I am a busy momma of many. I grew up as many of you probably did, crafting with anything I could get my hands on, from twigs to the pansies in my momma's borders. Now I am raising my own children and watching them create little figurines out of twigs and weeds, and turn paper into shreds. If you walked through my house on any given day, you might mistake it for a confetti factory. Bits of paper and imagination are everywhere!!! Since I am up to my elbows in kiddos and crafts, I thought, why not sell crafty things?
Plastic snaps caught my eye first. My husband is the creator of the GotLux Professional Photographic Lighting Accessories, and he used these very snaps in his Pro and ProX models. The colors and usefulness of them drew me in. I discovered the many varied ways they can be used; I was hooked.
So here I am selling KAM plastic snaps and many other craft items that I love with the help of my amazing children and husband. I am sure you will find as much joy in crafting with them as I am. It is a privilege to get to help support my family, teach my children to have a solid work ethic, and be a full-time mom all because of I Like Big Buttons! and your support.
Thank you,
Gena (CEO of ILikeBigButtons.com)
I Like Big Buttons! - How To Make A Magnetic Pin Cushion/Needle Holder June 06 2017
Today, I made an handy sewing accessory: Fabric Cover Button Pin Cushion/Needle Holder. I love the splash of color they add to my sewing station and their usefulness!
Supplies:
- 1 Completed Size 75 (1 7/8 inch / 48 mm) Fabric Cover Button
- Fabric Of Your Choice
- 1x Standard Round Magnet (Approximately 3/4" Round)
- E6000, Hot Glue, or comparable adhesive
I Like Big Buttons! - Picture Tutorial Below:

1. Cut your fabric scrap. You will want a circle that is about twice the diameter of your button blank. *TIP* Our All-In-One Cover Button Template makes creating the right size circle of fabric a breeze.

2. Put your fabric piece in the larger assembly tool piece (RIGHT SIDE DOWN). When you look into the tool you want to see the back of the fabric.

3. Glue the magnet inside the back of the Cover Button with Hot Glue or E6000.

4. Place the button front (the domed piece) on top of the fabric. Leave the fabric edges hanging out.

5. Press the cover button edges down into the tool. *TIP* To make it easier on my fingers, I use a sharpie marker to apply pressure.

6. Place the back cover button piece on top of your fabric and button front. *TIP* If the cover button will be subject to repeated tugging from the back, you may want to add a little e6000 adhesive before attaching the back.
7. Take the smaller piece of the assembly tool and with the open side down place it on the button back.
8. Press down. You may hear a pop when the last bit of the button back slips into place. If you take the tool out and the button is not completely secured, just put it back in and press down again. *TIP* I often use a flat piece of wood to apply pressure, again to save my fingers. It also helps to avoid the button back going in at an angle.
9. When you take the small assembly tool piece off, the fabric edges will be secured underneath the button back.

9. Remove the button from the larger assembly tool piece.
10. Tada! Now you have an attractive Pin Cushion/Needle Holder for your sewing room.
To see other great Fabric Cover Button ideas, visit our DIY Project section here.
Cover Button Embellished Pacifier Clips by I Like Big Buttons! May 30 2017
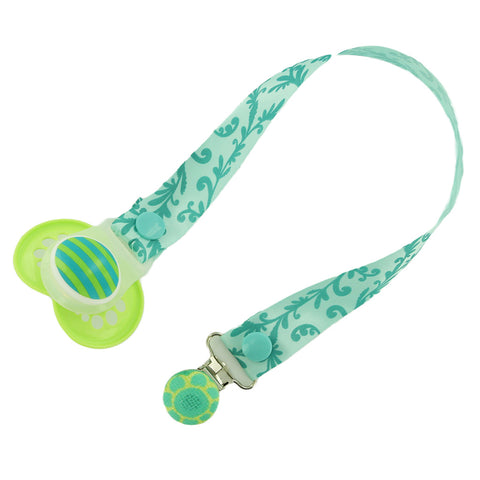
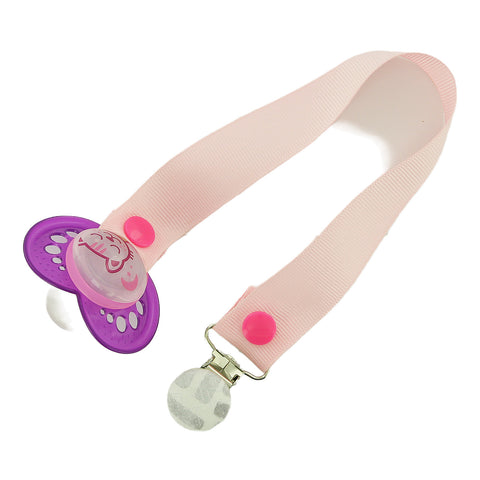
I have had a lot of questions in the last couple years about how to make these clips so I decided to take it on. A Pacifier Clip made extra adorable with the added Cover Button accent, they are a great accessory to add to your baby's wardrobe for any special occasion or just because.
Supplies:
- 2 KAM Snap Sets
- KAM Snap Pliers and Awl
- Round Faced Metal Clips or Enamel Pacifier Clips
- 1 Size 36 Flat Back Cover Button
- Size 36 Assembly Tool
- Size 36 Template
- Fabric Scraps
- E6000 Adhesive
- Pre-made Pacifier Clips (see Pacifier Clip and Supply Tutorials)


Instructions:
1. Using our Pacifier Clip and Supply Tutorials make either Ribbon or Fabric Pacifier Clips.

2. Cut your fabric scrap. You will want a circle that is about twice the diameter of your button blank. I cut out a Piece of Fabric using my Size 36 Template.

3. Put your fabric piece in the larger assembly tool piece (RIGHT SIDE DOWN). When you look into the tool you want to see the back of the fabric.


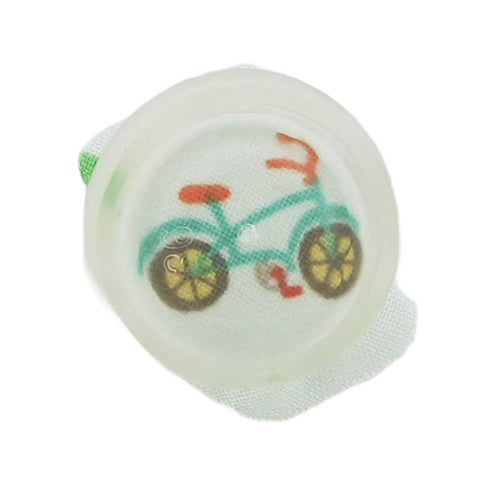
4. Place the button front (the domed piece) on top of the fabric. Leave the fabric edges hanging out. Double check the transparent underside to see if your print is how you would like it. Then press the cover button fabric edges down into the tool.

5. Add a dab of E6000 Adhesive to the middle of the cover button cap before installing the Flat Back.

6. Place the back cover button piece on top of your fabric and button front.
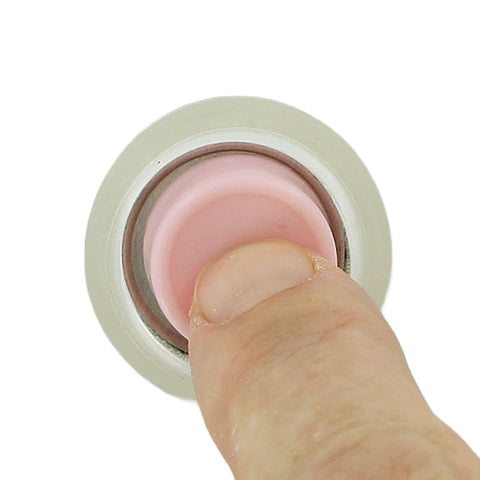
7. Take the smaller piece of the assembly tool and with the open side down place it on the button back.
8. Press down. You may hear a pop when the last bit of the button back slips into place. If you take the tool out and the button is not completely secured, just put it back in and press down again.

9. When you take the small assembly tool piece off, the fabric edges will be secured underneath the button back.

10. Remove the button from the larger assembly tool piece. Tada! My Cover Button is ready to be adhered to a Round Faced Metal Clip.

11. Here a the Cover Buttons I made in just a few minutes. Seriously easy, fun and so cute!

12. Now take the E6000 Adhesive and put a medium size dab of glue on the back of the Cover Button about 1/2 of what would fill the back area of the back. This glue is great to work with so don't overly worry about getting the amount just right. I was able to cleanly wipe of any excess off when I put on too much and I was also able to remove the button and add a little more when I under did it. This glue is very forgiving.

13. Now place the Cover Button over the Round Faced Metal Pacifier Clips and straighten and center your button.

14. Press firmly and let set to dry and cure 24-72 hours as recommended by the manufacturer (E6000).

15. These are my finished products. I love them and think they turned out beautifully. Below are my examples, completed and installed on Pacifier Clips.




16. Tada!!!
Disclaimer: Keep in mind that although I have rough tested these I in no way recommend you leave your baby alone with these as there are small pieces and if not done properly they may come apart and become a choking hazard. I would recommend these clips under adult supervision only. The maker and/or parent assumes full responsibility when using these pacifier clips.
I Like Big Buttons! - Fabric Cover Buttons - Easy To Make, Great Impact! May 22 2017
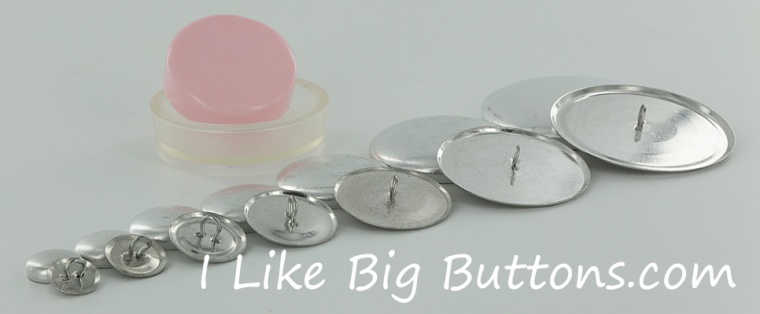
These aren't your grandma's Cover Buttons!!! Well actually they are ;) only better, with so many many great uses for them.
Flat Backs are used for crafts were you would like to glue a cover button: jewelry, bracelets, rings, earrings, necklaces, bobby pins and barrettes, scrap booking, and much more.
Wire Backs are used for fabric cover buttons in sewing, shoes, clothing, pony tail holders and much, much more.
Here are the 7 sizes we carry. From 1/2", which is about as small as your pinky nail, all the way up to 1 7/8" in diameter, about the size of the round side of a kiwi fruit. We carry them in both flat back (glueable) and wire back (sewable).
- Size 20 (1/2 inch / 12 mm)
- Size 24 (5/8 inch / 15 mm)
- Size 30 (3/4 inch / 19 mm)
- Size 36 (7/8 inch / 23 mm)
- Size 45 (1 1/8 inch / 28 mm)
- Size 60 (1 1/2 inch / 38 mm)
- Size 75 (1 7/8 inch / 48 mm)
Assembling fabric Cover Buttons is fast and simple. In just seconds, you will have a button ready for your latest craft project.
See our pictorial below:

How to Make Fabric Cover Buttons:
Cover Buttons are easy to assemble:
- Cut your fabric scrap. You will want a circle that is about twice the diameter of your button blank.
- Put your fabric piece in the larger assembly tool piece (RIGHT SIDE DOWN). When you look into the tool you want to see the back of the fabric.
- Place the button front (the domed piece) on top of the fabric. Leave the fabric edges hanging out.
- Press the cover button edges down into the tool.
- Place the back cover button piece on top of your fabric and button front. If the cover button will be subject to repeated tugging from the back, you may want to add a little e6000 adhesive before attaching the back.
- Take the smaller piece of the assembly tool and with the open side down place it on the button back.
- Press down. You may hear a pop when the last bit of the button back slips into place. If you take the tool out and the button is not completely secured, just put it back in and press down again.
- When you take the small assembly tool piece off, the fabric edges will be secured underneath the button back.
- Remove the button from the larger assembly tool piece.
- Tada!
To see other great Fabric Cover Button ideas, visit our DIY Project section here.
Bandana Bib with KAM Snaps and a PDF Pattern by I Like Big Buttons! May 18 2017

One of our most popular tutorials, Bandana Bibs are a great gift for those little droolers and mess makers in your life or as an outfit accessory. So cute! I, also, used our Heart Shaped KAM Snaps for added pizazz, check it out!
Supplies:
- Fabrics of your choice
- 1 Heart Shaped KAM Snap Set
- KAM Snap Pliers and Awl
- Bandana Bib PDF Pattern (may need to adjust for your child's size or add more KAM Snaps settings)
- Standard Sewing Machine

Instructions:
1. Download the Bandana Bib PDF Pattern. Print out the pattern making sure the 1″ square in the corner measures 1″ square when printed that will indicate the pattern is the right size.

2. Cut out the pattern.

3. Place your pattern, with long straight side on fabric folded in half, and pin in place.

4. Cut the 2 pieces of Fabric you will use.

5. Place Fabrics' right sides together.

6. Pin together.

7. Sew pieces together with a 1/4" seam allowance, backstitching at the start and finish of sewing, make sure to leave a 3-4" gap so that you can pull the piece right side out.

8. Pull piece right side out and make sure to push all the round and square corners out until they lay flat.

9. Fold in the opening's seams and pin in place.

10. Stitch a finish stitch 1/8" to 1/4" all the way around the bib, making sure to ease your way around the left and right tabs. I do a couple of stitches, stop, then lift the foot, turn the fabric slightly, put the foot down, and do a couple more stitches and repeat. Make sure the backstitch at the beginning and end of your sewing.

11. Use the template to mark the KAM Snap placement, you may want to check the measurement of your child's neck and adjust the pattern or snap placement accordingly. This bib worked for a toddler but with an extra set of snaps can work for more sizes.

12. I decided as I was getting ready to install the KAM Snaps to go with our new Heart Shaped snaps. Install the Heart Shaped KAM Snap Cap and Stud in the left and a Cap and Socket on the right tab.

13. Interested in Heart Shaped KAM Snaps, check out our great colors, in smaller package quantities for more great variety!

14. Totally cute, don't you think! ;) Happy Snapping!!!
Fabric Key Fob Hardware Wristlet Tutorial by I Like Big Buttons! May 10 2017
Key Fob Hardware are some of our most popular craft supplies. Key Fob Hardware is simple to use and produces amazing results. Just add your fabric, ribbon, or webbing for an instant, elegant wristlet.
Fabric Key Fob Hardware Wristlet Tutorial by I Like Big Buttons!
Supplies:
- 10" x 5" Fabric of your Choosing
- 10″ x 2.5" Piece of Fusible Fleece or 10" x 5" Fusible Interfacing
- 1 Key Fob Hardware and Split Ring
- Key Fob Hardware Pliers
- Sewing Clips
- Standard Sewing Machine
- Fray Check

Instructions:
1. Cut a 10" x 5" section of Fabric of your choosing and 10" x 2.5" Fusible Fleece.

2. Iron Fusible Fleece to the center of the fabric. Fold and iron the Fabric in half with the wrong sides together.

3. Unfold and iron the Fabric in half again long sides to the center.
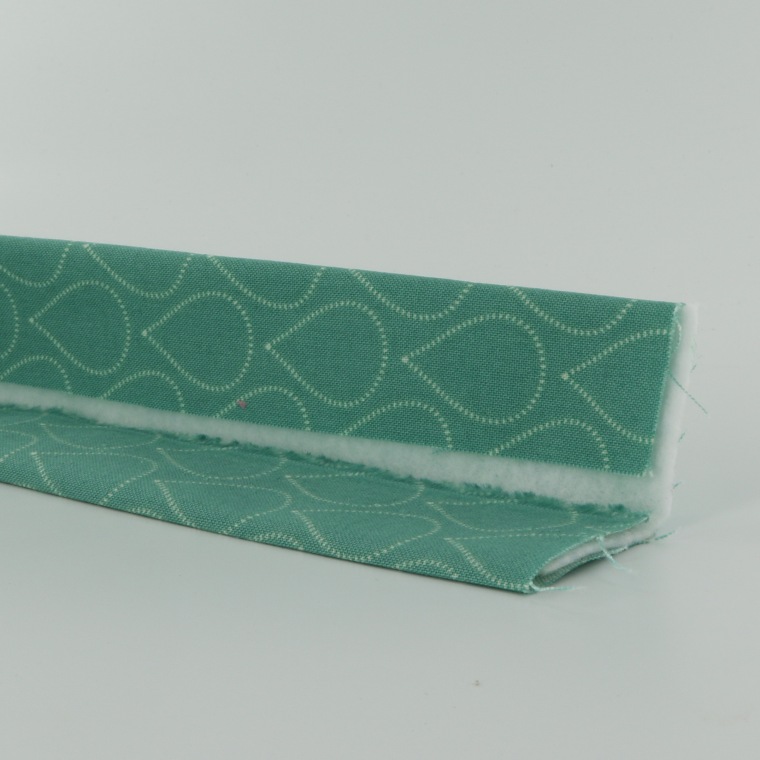
4. It will look like this when you get done.

5. Use your Sewing Clips to pin the Wristlet flat.

6. Stitch along the edge of your Fabric strip, I stitched 1/4" in. Remove the Sewing Clips as you go. Work slowly, keeping close to the edge and as straight of a line as possible.

7. Repeat 1/4" stitching along the opposing edge.
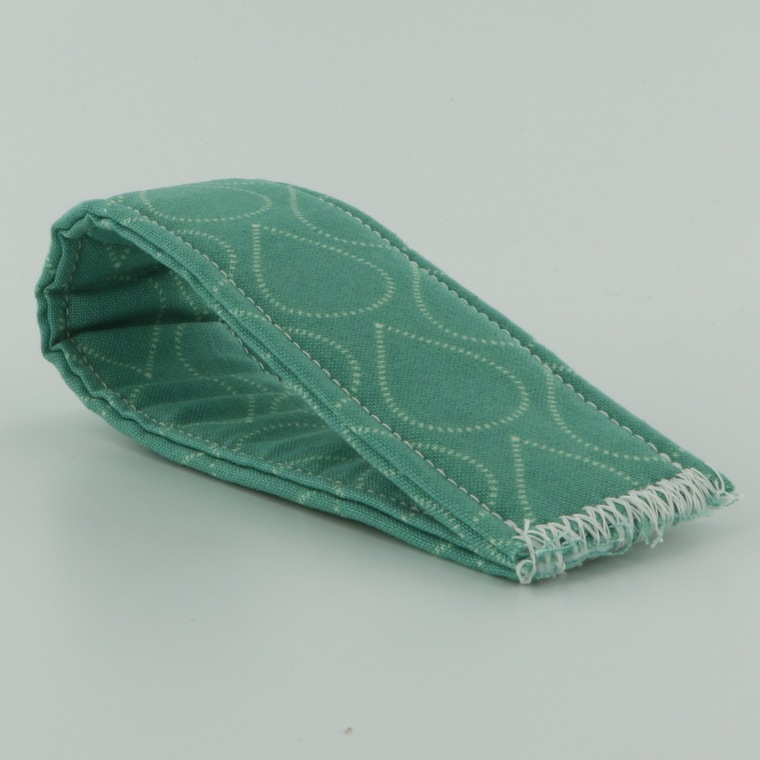
8. Fold the Fabric Wristlet Strip in half, right sides facing out and match up the ends.
9. Stitch the ends together with a zig zag stitch. I went back and forth a few times to insure it held.
10. Trim any loose threads. Use Fray Check to seal the end of the exposed Fabric edge.

11. Tuck the sewn seam ends into the Key Fob Hardware, making sure that the Fabric Wristlet is centered.

12. Using Key Fob Hardware Pliers squeeze the Key Fob Hardware closed with gentle pressure. Sometimes, I go back and forth from left to right added a little bit of pressure to each side until it eases together. Our Key Fob Hardware Pliers make this easy to do.
13. Note the adjustable screw set to the distance I want the pliers to go to.

14. Add the Split Ring and Yay!!!

15. I love them and now I have a few sets to share!!!
To see all our Key Fob Hardware Tutorials, visit our Projects section here.
I Like Big Buttons! - How To Make A Fabric Cover Button Mini Clothespin May 03 2017

Today, I made an adorable office or home accent: Fabric Cover Button Mini Clothespins. I am absolutely in love with their bright colors and tininess!
Supplies:
- 1 Completed Flat Back Fabric Cover Button (Attach size 20 (1/2" / 12 mm), size 24 (5/8" / 15 mm), or size 30 (3/4" / 19 mm) flat back cover buttons.)
- 1x Mini Wooden Clothespin (Approximately 1 3/8" x 1/4" in size)
- 1x Small Plain Button
- E6000, Hot Glue, or comparable adhesive
I Like Big Buttons! - How To Make Fabric Cover Button Mini Clothespins Video
I Like Big Buttons! - Picture Tutorial Below:


1. Cut your fabric scrap. You will want a circle that is about twice the diameter of your button blank. *TIP* Our All-In-One Cover Button Template makes creating the right size circle of fabric a breeze.

2. Put your fabric piece in the larger assembly tool piece (RIGHT SIDE DOWN). When you look into the tool you want to see the back of the fabric.

3. Place the button front (the domed piece) on top of the fabric. Leave the fabric edges hanging out.

4. Press the cover button edges down into the tool. *TIP* To make it easier on my fingers, I use a sharpie marker to apply pressure.

5. Place the back cover button piece on top of your fabric and button front. *TIP* If the cover button will be subject to repeated tugging from the back, you may want to add a little e6000 adhesive before attaching the back.
6. Take the smaller piece of the assembly tool and with the open side down place it on the button back.
7. Press down. You may hear a pop when the last bit of the button back slips into place. If you take the tool out and the button is not completely secured, just put it back in and press down again. *TIP* I often use a flat piece of wood to apply pressure, again to save my fingers. It also helps to avoid the button back going in at an angle.

8. When you take the small assembly tool piece off, the fabric edges will be secured underneath the button back.

9. Remove the button from the larger assembly tool piece.
10. Tada! Now to attach it to the Clothespin.

11. Use Hot Glue or E6000 to adhere a small plain button to the underside of the Cover Button. This is to fill the space between the back and the edges. You can also use felt or some other small object. You just need it to be sturdy enough to offer support. A small plastic button works great for this. You will see that the button is now flush across the bottom. I cut off the little nubs of glue that leaked through the button holes.

12. Now adhere the finished Cover Button to the Clothespin. Press into place and center it until you are pleased with the alignment. Set aside to dry.
13. Tada! Additional uses:
- Add a thin magnet to the back and use on your magnetic board.
- Add a push pin to the back and use on your cork board.
To see other great Fabric Cover Button ideas, visit our DIY Project section here.
I Like Big Buttons! How To Repair a Bra with KAM Plastic Snaps March 28 2017
Today, I tackled a problem for us moms out there. Or at least ;) those of us too busy to fish our bras out of the washer before they go in the dryer. In all fairness to my mom, she has told me a number of times, they will last longer and work better if I air dry them. The fact remains that if I remember to get the laundry from the washer to the dryer in the same day, I consider it a miracle :).
Besides wearing them out quicker, I have found that front loading machines like to grab the bra hooks and mangle them. I have grown tired of the hooks poking me in the back or not hooking at all anymore.
I have now modified all my bras, I find the KAM Snap closures easier to snap and release. Quicker to put on, quicker to get off with a good strong hold.
KAM Plastic Snaps to the rescue with a seam ripper and just a couple snaps... See the picture tutorial below.
Supplies:


1. Use a Seam Ripper to remove the stitches holding the Bra hooks in place.
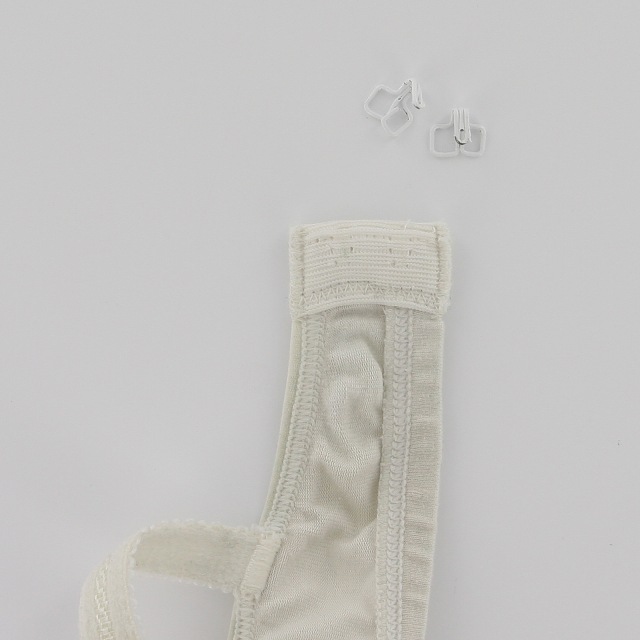
2. Once the hooks are removed, use the Awl to poke a hole where you want to install the snap. I used a KAM Snap Cap and Socket on this side.
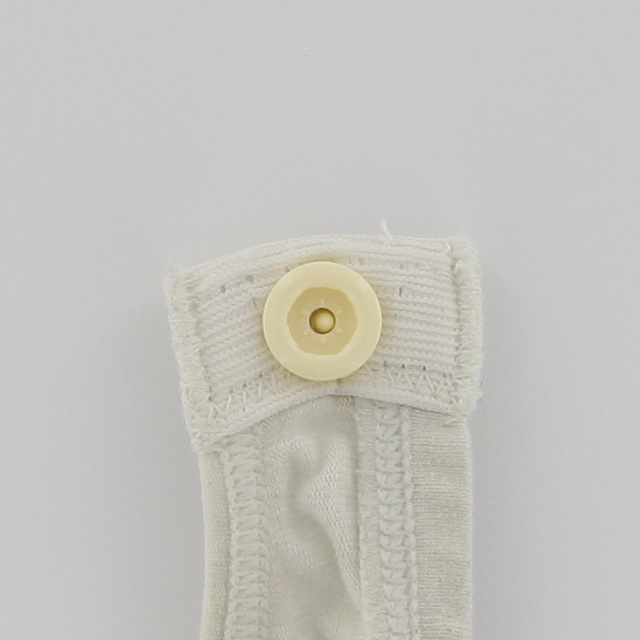
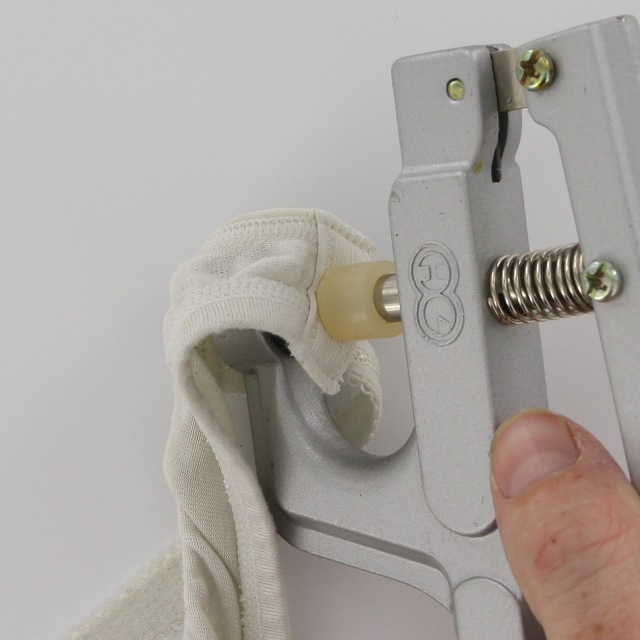
3. Install the snap.


4. I put 2 sets on the back strap for size adjustment, you could do 3 if you wanted. I used a 2 KAM Snap Caps and 2 Studs on this side, and spaced them evenly.
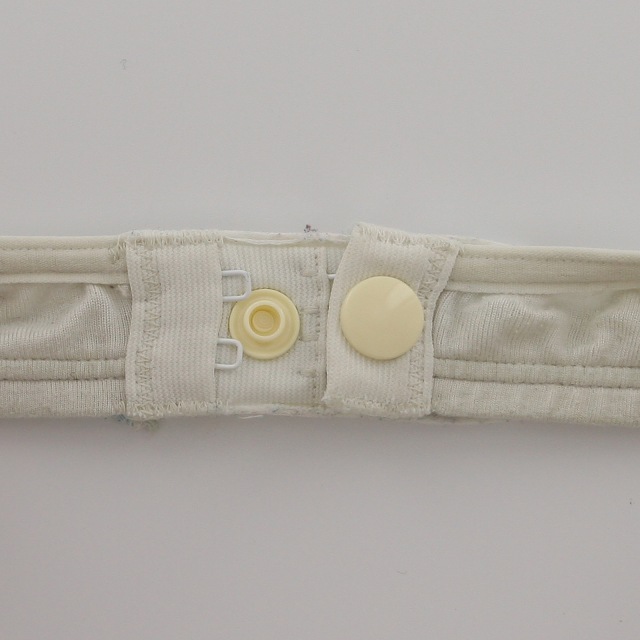
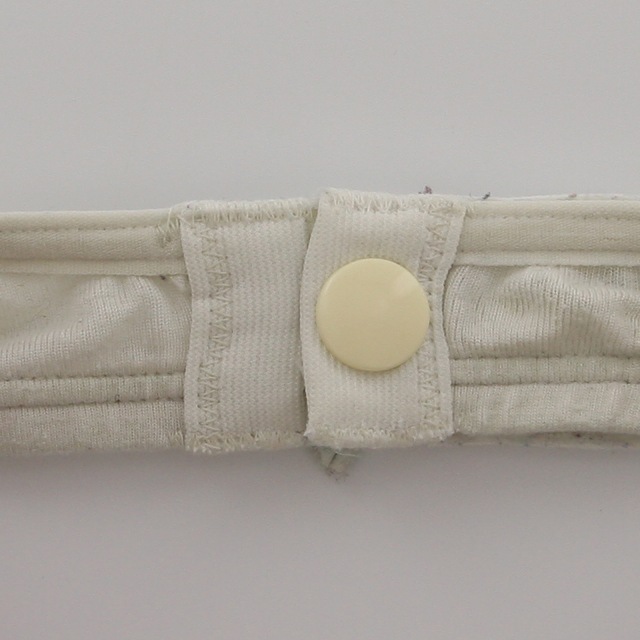
5. Tada! Success, I am wearing it as I type. It is much more comfortable and it was easy to snap, I was concerned considering I had to do it by feel, but it was simple to do.
I Like Big Buttons.com - KAM Plastic Snap Quick Ordering Chart makes ordering a Snap!!! March 03 2017
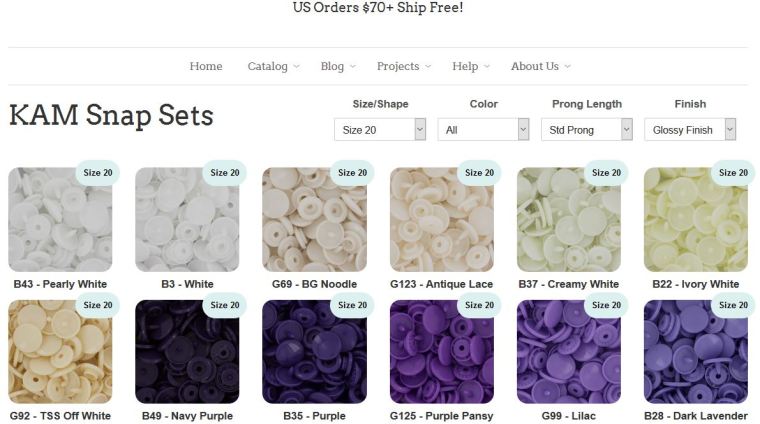
Have you taken a moment to check out our new easy to navigate KAM Snap Quick Ordering Chart !?!
Take a moment to check it out. Simply click on any color, enter quantity, click add to cart, and repeat!

You can narrow down your search by Size/Shape, Color, Prong Length, and Finish to make ordering easier.
I Like Big Buttons! Cuff Bracelet with Upcycled Jeans and KAM Snaps February 21 2017
A continuing problem in my house is holey jeans. I keep thinking they might grow out of this particular feature, but just yesterday my middle son walked up to me and turned around. He laughed as he relayed how he fell, but caught himself on a cabinet. Which as he wiggled his fingers through the seat of his pants, had snagged his pants in the seat leaving a gaping hole. Oh bother! When he twisted back around, I couldn't help, but note that it wasn't these pair of jeans first or second hole. The knees were completely split out.
I gave him permission to make his stuffed animals outfits out of the jeans, one of his favorite past times. Another great project for unsalvageable jeans is a cute Upcycled Cuff Bracelet, see the details below.
Upcycled Jean Cuff Bracelet with KAM Snaps

Supplies for a Upcycled Jean Cuff Bracelet:
- 1 Pair of Holey Jeans
- 2 KAM Snap Sets
- KAM Snap Pliers and Awl
- Standard Sewing Machine ... See Full Tutorial
Upcycled Jean Cuff Bracelet with Embroidery and KAM Snaps
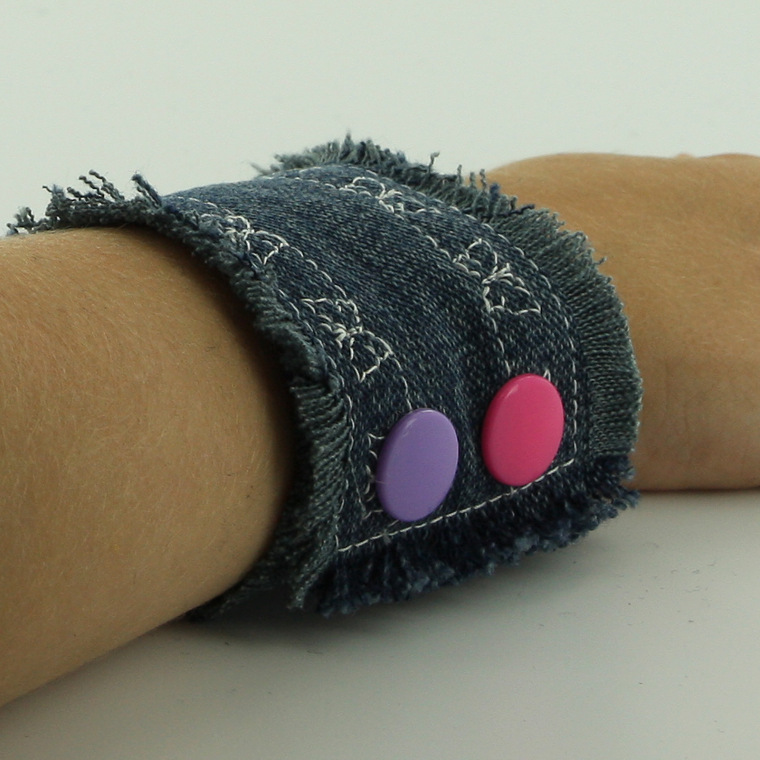
Supplies for a Upcycled Jean Embroidered Cuff Bracelet:
- 1 Pair of Holey Jeans
- 2 KAM Snap Sets
- KAM Snap Pliers and Awl
- Standard Sewing Machine ... See Full Tutorial
I Like Big Buttons! "No Sew" Valentine's Day Craft Ideas February 03 2017



As we approach Valentine's Day, lets look at some fun and easy "No Sew" Cover Button crafts we can make for those we love!
Take 10% Off on any Cover Button order on our website through 1/10/17 with Coupon Code: NOSEWVALENTINE
Valentine's Day Fabric Cover Button Barrettes
Wear these adorable Snap Barrettes to match or accent your favorite outfit for Valentine's Day or dress up your favorite t-shirt and jeans for an afternoon outing. Enjoy!
Supplies:
- 1-2 Completed Flat Back Fabric Cover Button (Choose your size, Size 20 through Size 36 all work great, size depends on the statement you want to make)
- 2 Snap Barrettes
- E6000 or comparable adhesive ... See More

Valentine's Day Fabric Cover Button Jumbo Paper Clip Bookmarks
Use these adorable Paper Clip Bookmarks to accent a Valentine for your special loved one or hold your place in your favorite book or cook book. Enjoy!
Supplies:
- 1 Completed Flat Back Fabric Cover Button (Attach size 36 (7/8" - 23 mm), size 45 (1 1/8" - 28 mm), or size 60 (1 1/2" - 38 mm) flat back cover buttons.)
- 1 Jumbo Paper Clip
- 1 6" Piece of Ribbon
- E6000 or comparable adhesive ... See More

Valentine's Day Fabric Cover Button Badge Reels
Use these adorable Valentine's Day Badge Reels to hold your ID for work, school, or play. Enjoy!
Supplies:
- 1 Completed Flat Back Fabric Cover Button (Size 45 sits on top of Badge Reel, Size 60 rest over Badge Reel)
- 1 Badge Reel
- E6000 or comparable adhesive ... See More

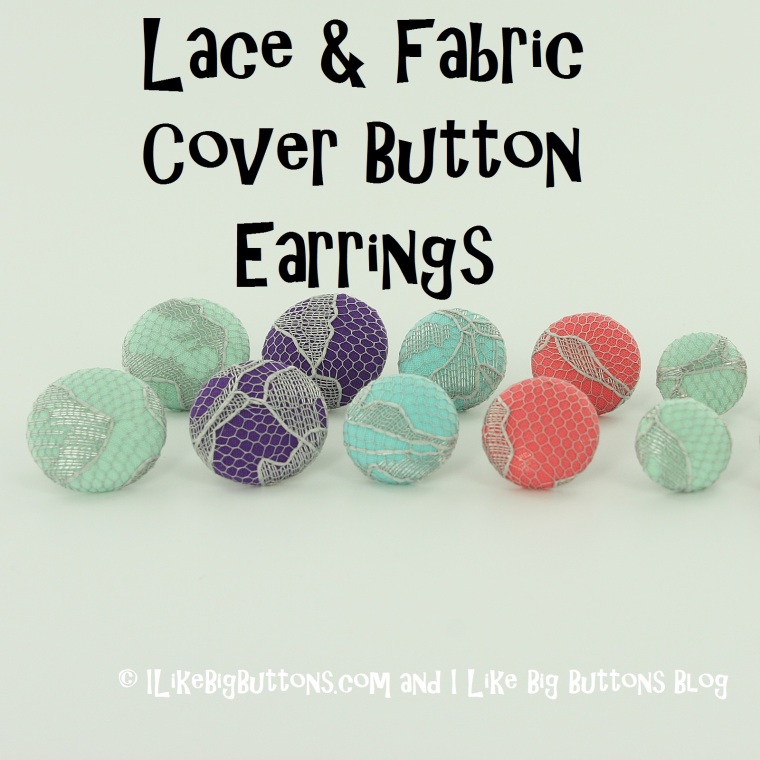
Lace & Fabric Cover Button Earrings
Give these cute Lace & Fabric Cover Button Earrings as Valentine gift for your best friend or loved ones. Enjoy!
Supplies:
- Flat Back Cover Buttons (I used Size 24, Size 30, and Size 36 Cover Buttons)
- Cover Button Assembly Tools
- Cover Button Templates
- Fabric Scraps
- Lace Scraps
- E6000 Adhesive or Hot Glue
- Sharpie Permanent Marker
- Surgical Stainless Steel Earring Posts and Backs ... See More
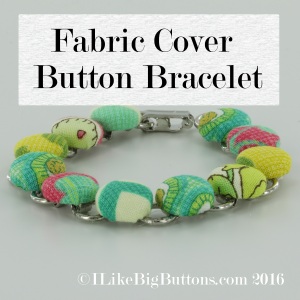
Fabric Cover Button Bracelet Tutorial
Give this charming Cover Button Bracelet as Valentine gift for your best friend or loved ones. Enjoy!
Supplies:
- 11 to 13 - Completed Size 20 Flat Back Fabric Cover Buttons
- 1 Disk and Loop Bracelet (We have two sizes available 7.2" or 8.25")
- 11 to 13 - 1/2" x 1/2" Felt squares
- E6000 or comparable adhesive ... See More

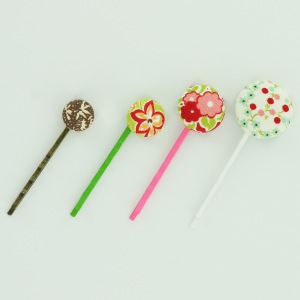
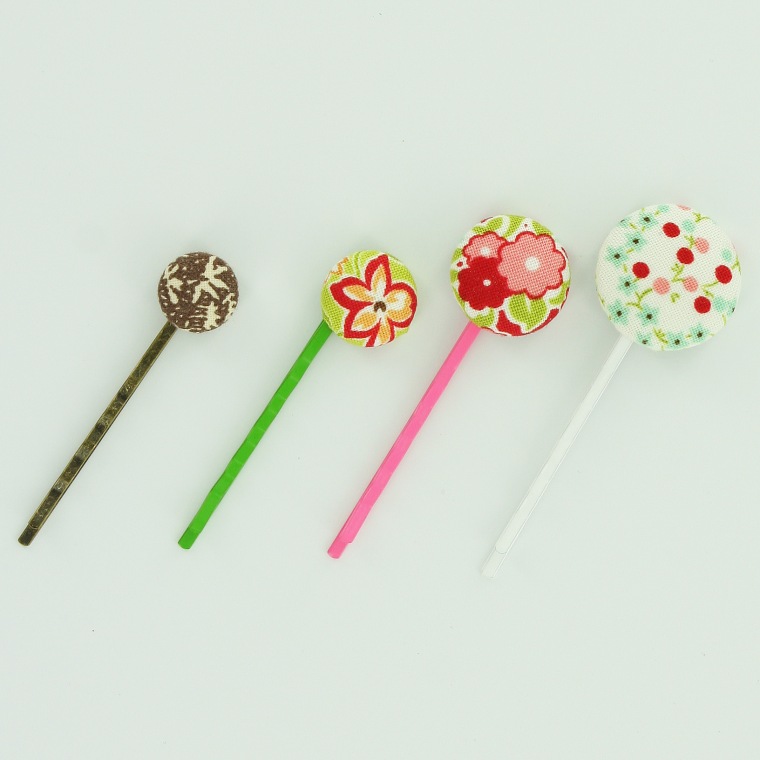
Give these adorable Cover Button Bobby Pins as Valentine gifts for your best friend or loved ones. Enjoy!
Supplies:
- 1 Completed Flat Back Fabric Cover Button (Choose your size, Size 20 through Size 45 all work great, size depends on the statement you want to make)
- 1 Bobby Pin
- E6000 or comparable adhesive ... See More
I Like Big Buttons! Lacy Fabric Cover Button Earrings and Cover Button Bracelet November 12 2016
Today I worked alongside my daughter to make her dear friend a special and one of a kind birthday gift. I think they turned out great and it was wonderful to get to work with one of my kiddos. :)
Take 10% off our Cover Buttons on our website (Good through 11/14): BUTTONLOVE
Lacy Fabric Cover Button Earring Supplies:
- Flat Back Cover Buttons (I used Size 30, but you can also use Size 24 and Size 36 Cover Buttons)
- Cover Button Assembly Tools
- Cover Button Templates
- Fabric Scraps
- Lace Scraps
- E6000 Adhesive or Hot Glue
- Sharpie Permanent Marker
- Clip On Earring Backs or Surgical Stainless Steel Earring Posts and Backs
Lacy Fabric Cover Button Bracelet Supplies:
- Size 20 Flat Back Cover Buttons
- Cover Button Assembly Tools
- Cover Button Templates
- Fabric Scraps
- Lace Scraps
- 11 to 13 - Completed Size 20 Flat Back Fabric Cover Buttons
- 1 Disk and Loop Bracelet (We have two sizes available 7.2" or 8.25")
- 11 to 13 - 1/2" x 1/2" Felt squares
- E6000 or comparable adhesive
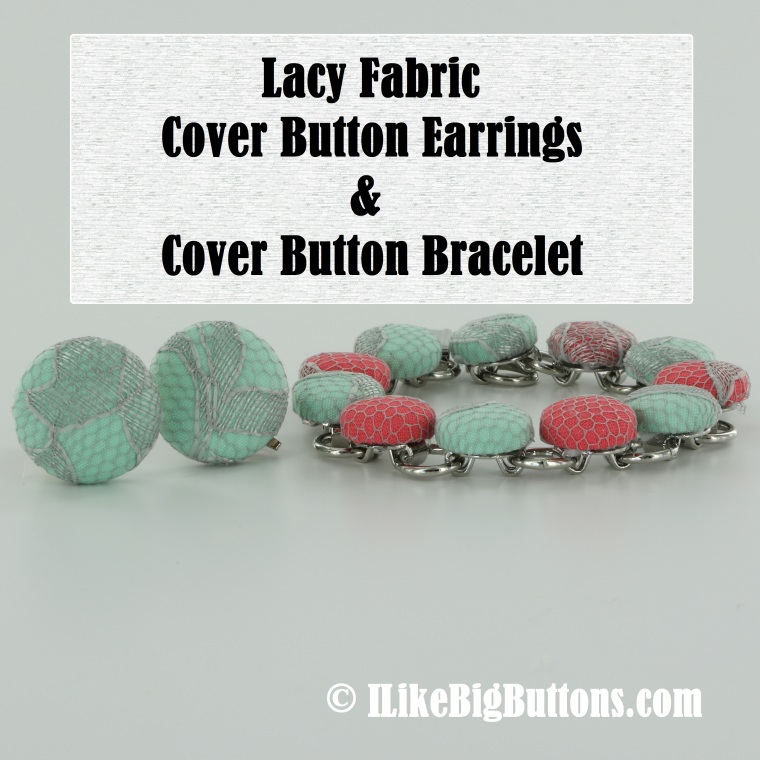
Check out our Tutorials below.
Lacy Fabric Cover Button Earring Tutorial here.
Fabric Cover Button Bracelet Tutorial here.
To see our other great Fabric Cover button ideas, visit our DIY Project section here.
I Like Big Buttons! Barrette and Bobby Pin Findings November 11 2016
I thought I would attempt a stop animation video with our Barrette and Bobby Pin Findings this morning. Not bad for my first attempt, I think! :)
♥♥♥♥♥♥♥♥♥♥♥♥♥♥♥♥♥♥♥♥♥♥♥♥♥♥♥♥♥♥♥♥♥♥♥♥♥♥♥♥♥♥♥♥♥♥♥♥♥♥♥♥
To see other great Fabric Cover Button ideas, visit our DIY Project section here.
How to make Fabric Key Fob Hardware Wristlets by I Like Big Buttons! October 28 2016

Today, I am making a Fabric Key Fob Hardware Wristlets. While we wait for our Key Fob Starter Kit Giveaway to end (Monday, 10/31/16), I decided to make a few adorable Key Fob Wristlets to show just how easy and fun they are to make.
Supplies:
- 11" x 5" Fabric of your Choosing
- 11″ x 2.5" Piece of Fusible Fleece or 10" x 5" Fusible Interfacing
- 1 Key Fob Hardware and Split Ring
- Key Fob Hardware Pliers
- Sewing Clips
- Standard Sewing Machine
- Fray Check
♥♥♥♥♥♥♥♥♥♥♥♥♥♥♥♥♥♥♥♥♥♥♥♥♥♥♥♥♥♥♥♥♥♥♥♥♥♥♥♥♥♥♥♥♥♥♥♥♥♥♥♥
Instructions:
1. Cut a 11" x 5" section of Fabric of your choosing and 11" x 2.5" Fusible Fleece.
2. Iron Fusible Fleece to the center of the fabric. Fold and iron the Fabric in half with the wrong sides together.
3. Unfold and iron the Fabric in half again long sides to the center.
4. It will look like this when you get done.
5. Use your Sewing Clips to pin the Wristlet flat.
6. Stitch along the edge of your Fabric strip, I stitched 1/4" in. Remove the Sewing Clips as you go. Work slowly, keeping close to the edge and as straight of a line as possible.
7. Repeat 1/4" stitching along the opposing edge.
8. Fold the Fabric Wristlet Strip in half, right sides facing out and match up the ends.
9. Stitch the ends together with a zig zag stitch. I went back and forth a few times to insure it held.
10. Trim any loose threads. Use Fray Check to seal the end of the exposed Fabric edge.
11. Tuck the sewn seam ends into the Key Fob Hardware, making sure that the Fabric Wristlet is centered.
12. Using Key Fob Hardware Pliers squeeze the Key Fob Hardware closed with gentle pressure. Sometimes, I go back and forth from left to right added a little bit of pressure to each side until it eases together. Our Key Fob Hardware Pliers make this easy to do.
13. Note the adjustable screw set to the distance I want the pliers to go to.
14. Add the Split Ring and Yay!!!
15. I love them and now I have a few new sets to share!!!
I Like Big Buttons! - 7 Fabric Cover Button Sizes October 18 2016
Assembling fabric Cover Buttons is easy and fun, here are the 7 sizes we carry. Our buttons range from 1/2" to 1 7/8" in diameter. We also carry them in both flat back (glueable) and wire back (sewable). Check out our website for more Cover Button tutorials, tips and crafty ideas.
- Size 20 (1/2 inch / 12 mm)
- Size 24 (5/8 inch / 15 mm)
- Size 30 (3/4 inch / 19 mm)
- Size 36 (7/8 inch / 23 mm)
- Size 45 (1 1/8 inch / 28 mm)
- Size 60 (1 1/2 inch / 38 mm)
- Size 75 (1 7/8 inch / 48 mm)
Try our Cover Buttons today using Coupon Code (10% off Cover Buttons on our site until 10/23/16): BUTTONLOVE
30 Days of KAM Snaps and Beyond!!! Other Great KAM Plastic Snap Craft Ideas! October 17 2016
Two great KAM Plastic Snap ideas I received recently from a fellow KAM Plastic Snap lover, Carrie M.!!!
Carseat or Stroller Strap Covers Using KAM Snaps:

Easy to make and functional, no carseat or stroller should be without them!!!
Onesie With Removeable/Interchangeable Bowtie Using KAM Snaps:

Just think of the possibilities! I love it! Thank you for sharing, Carrie!!! We love seeing your creativity and ingenious uses for our KAM Plastic Snaps.
To see our other KAM Plastic Snap tutorials and ideas visit our Projects section on our website.
Unpaper Towels with KAM Snaps and a Serger October 12 2016
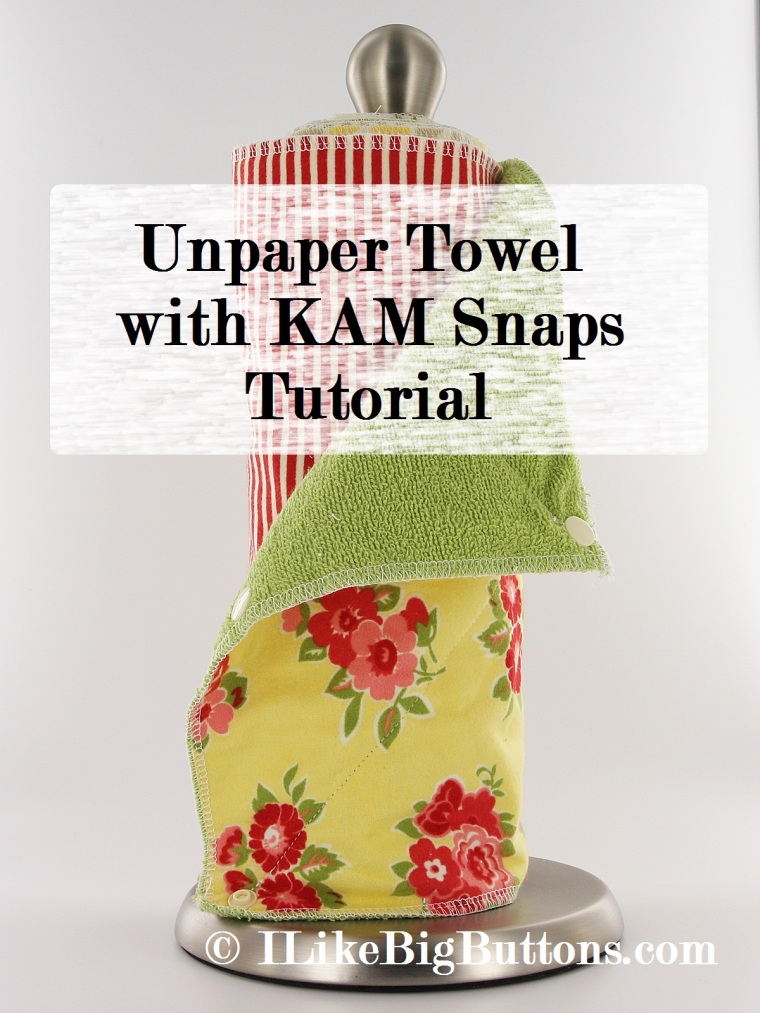
I love unpaper towels!!! Great for cleaning, beautiful to look at and wonderful to give as housewarming or Christmas gifts. Here is our tutorial for them.
Supplies:
- 12 11"x11" Flannel squares
- 12 11"x11" Terry Cloth or Micro Fiber squares
- 72 KAM Snap Sets
- Rotary Cutter or Scissors
- Cutting Mat
- Serger
- KAM Snap Pliers and Awl

Instructions:
1. Choose your flannel, I went to Etsy, of course, and found almost too many choices :). I finally settled on Moda's Marmalade collection.
2. Choose your Terry Cloth, I went with a mix of White, Butter, and Celery colored Terry Cloth that matched my flannel. Some peopel use towels and cut them into pieces, I also have used Micro Fiber clothes from Walmart they are bigger than 11"x11" and work great. I also find them on clearance pretty often too which makes them reasonable.

3. Cut 12 11"x11" Flannel squares and 12 11"x11" Terry Cloth squares. Make sure to make cut them as square as possible.

4. Pick a square of Flannel and a square of Terry Cloth, place the wrong sides together and serge the pieces together. There are some great Youtube videos on how to turn corners when sergering and how to end stitch.
5. Repeat 12 times.
6. I straight stitched a diagonal line from one corner to the adjacent corner and repeat on the opposite side. This insures they will not bunch up when you wash them or are using them.
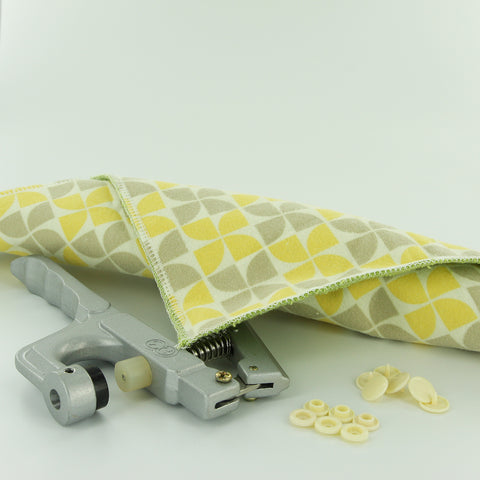
7. I then made a template with clear plastic. It was 1"x 11" and I punched 3 holes: 1 at 1/2" down and 1/2" in, 2 at the other end same 1/2" up and 1/2" in, and the 3rd exactly in the middle of the 2 holes 1/2" in. You can do 2 holes but the 3rd hole keeps the Unpaper Towels from sagging in the middle.
8. Then I marked with a super fine tipped permanent marker where to place the snaps holes.


9. Using the Awl, I punched holes for all the snaps 3 on each side, 6 per towel.
10. Now install the KAM Snaps, in each hole, I recommend doing all the ones on the left first and then all the ones on the right. I found that I get mixed up otherwise and have to undo my hard work. So I did KAM Snap Caps down (Terry Cloth) on the left with the studs face up (Flannel side). Then I did the right side, I did KAM Snap Caps up (Flannel) with sockets down on (Terry Cloth).


11. Now snap all your towels together, roll them up, and place them on your paper towel holder.

I Like Big Buttons! Fabric Cover Button Bracelet Tutorial October 06 2016
Today I am making a Fabric Cover Button Bracelet. I have been eyeing these for a while. I love the mix of metal and fabric. Mix and match fabrics or go for a solid theme. There are so many possibilities. Layer more than one bracelet to make a statement.
Supplies:
- 11 to 13 - Completed Size 20 Flat Back Fabric Cover Buttons
- 1 Disk and Loop Bracelet
- 11 to 13 - 1/2" x 1/2" Felt squares
- E6000 or comparable adhesive
Steps:
1. Follow these instructions to make Flat Back Fabric Covered Buttons.

2. Lightly scuff the tops of the gluepads so the glue will adhere better (not essential but recommended).
3. Lightly scuff the back of the Cover Button so the glue will adhere better (not essential but recommended).
4. Clean both surfaces of dust.

5. Apply E6000 to back of Cover Button.
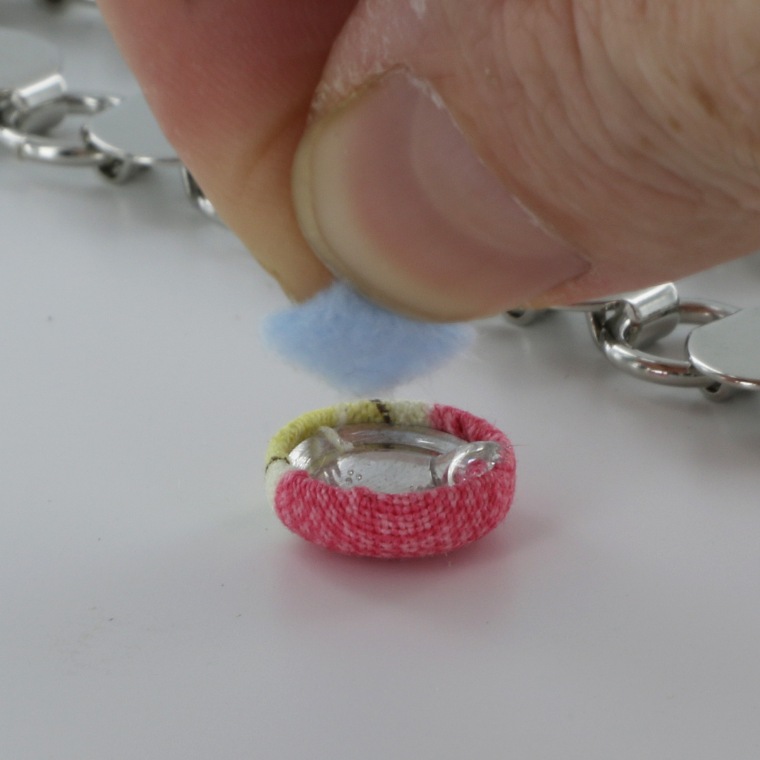
6. Press Felt square into E6000 firmly. This is to fill the gap between the back and the surface of the disk (gluepad).


7. Apply another dab of E6000 to the Felt square.

8. Press the Size 20 Cover Button firmly onto the disk (gluepad) and center it.
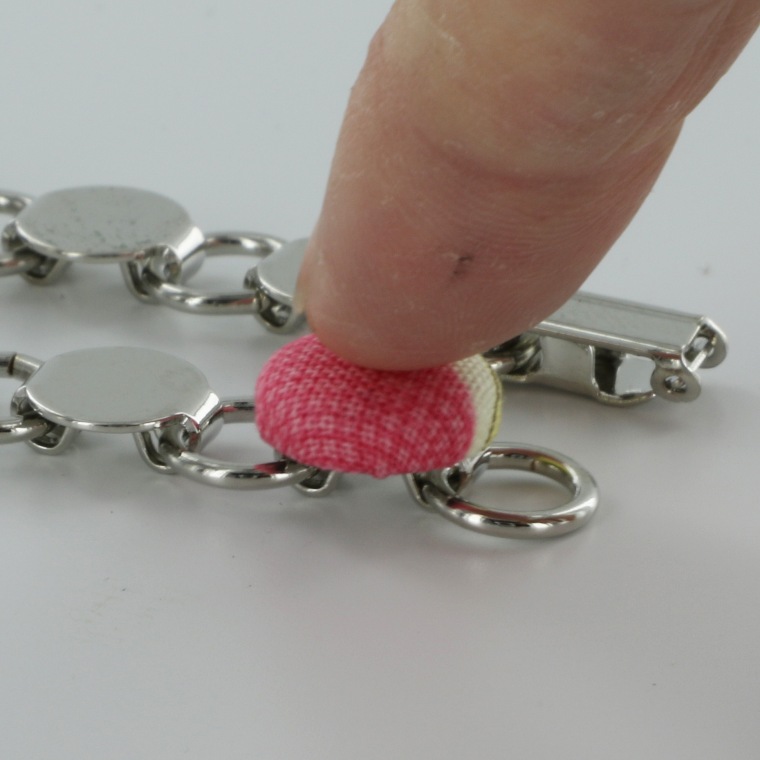
9. Repeat 10 more times.

10. Let dry and enjoy!
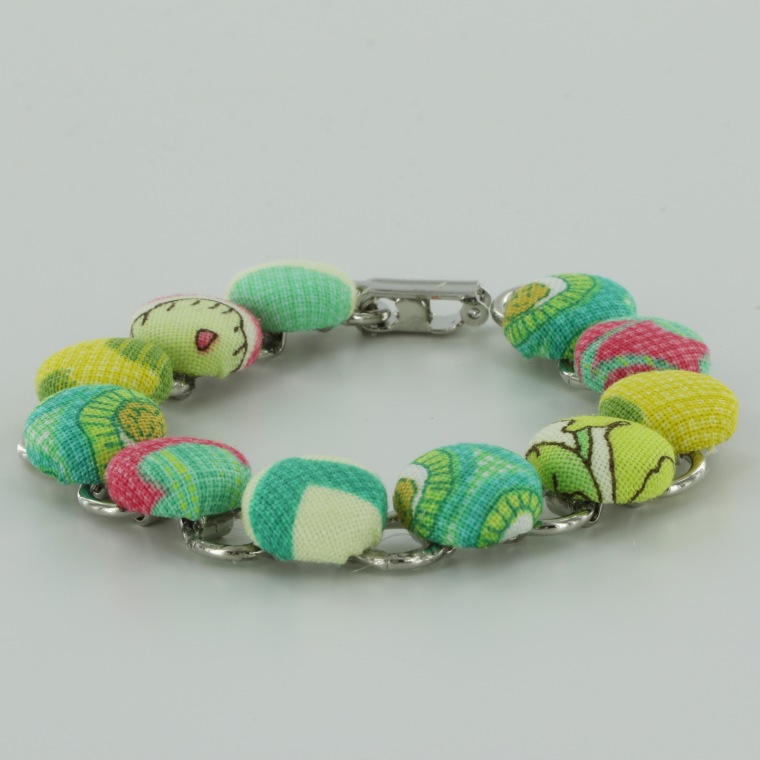
11. Tada!
You are done! Make this bracelet to accent your favorite outfit or to make a statement. Enjoy!
To see our other great Cover Button Tutorials here.
Fabric Pacifier Clip with KAM Snaps, MAM Ring or O-Ring and an KAM Plastic Pacifier Clip for Button Style Pacifiers September 21 2016
Today, I am making a pretty Fabric Pacifier Clip for Button Style Pacifiers using our silicone MAM rings and O-Rings. Pretty functional :)!!!
Supplies for a Fabric Pacifier Clip with Button Style Pacifier Adapters:
- Pacifier with Button Style Grip
- 14" x 3 1/2" Piece of Fabric
- 1 Pacifier Clip per Clip
- 2 KAM Snap Sets per Clip
- KAM Snap Pliers and Awl
- MAM Ring and O-Ring Button Style Adapters
- Standard Sewing Machine and Iron
Instructions:
1. Choose a piece of Fabric, cut it to the dimensions: 14" x 3 1/2", the finished product once ironed, folded and sewn will be approximately 7/8" wide x 12" long.
2. Fold both 3 1/2" wide ends in 1/4" and iron flat.
3. Now fold and iron the fabric in half the long way (14" length).
4. Then fold and iron again, bringing the outer edges to the middle "iron line" and iron along those edges. Repeat on other side.
5. Re-iron the seam so that the Fabric is smooth and flat, it should now be 13 1/2" long x 7/8" wide.
6. Open the top of the Fabric strip and trim the excess internal fabric at an angle so that there is less chance of the ends peeking out when sewn together. Repeat on the other end.
7. Pin the Fabric strip in a couple places to keep it in place.
8. Sew a 1/8" seam all the way around the piece making sure to back stitch at the start and finish to set the seam.
9. Now installed a Cap and Stud about 1/2" from the edge and the mating Cap and Socket about 1 1/2" later so that the center of the two KAM Snap parts are about 1 1/2" or more apart. Any closer and I found I had trouble getting the MAM Ring or O-Ring Adapter to sit neatly inside. I used Size 20 snaps for this tutorial but either Size 20 or Size 16 will work great.
10. Repeat on the other side, that will hold the Pacifier Clip. I, then, feed the Pacifier Clip and MAM Ring Adapter onto the ribbon and snapped it into place. It may have been easier to thread on the pacifier clip before installing any Snap parts but I was able to feed it through without much trouble.
11. Tada! Now time to add the Pacifier.
12. Simply stretch the MAM Ring or O-Ring around the Button Style Grip on the Pacifier and it will settle behind it and hold the Pacifier securely. Now snap the Pacifier in place, attach to your child's shirt and go.
13. As pictured, the MAM Rings hold the same way as the O-Rings only with a less subtle profile.
14. Tada! Happy Snapping!!!
Jean Pacifier Clip with Fabric Rosette using KAM Plastic Snaps and a KAM Plastic Pacifier Clip September 19 2016
Every time I do a load of jeans in the laundry, I inevitable find ANOTHER pair of jeans with the knees split from seam to seam and, really, how many jean shorts can a boy use :P. They even wear though patches and re-enforced knees. I have active boys :). I have been trying to find creative ways to recycle holey jeans. Today I am recycling a pair of holey jeans into a Pacifier Clip.
Supplies for a Recycled Jean Pacifier Clip with Fabric Rosette:
- 1 Pair of Holey Jeans
- 1 1/2" to 2" x 24" long strip of Fabric
- 1 KAM Plastic Pacifier Clip
- 1 KAM Snap Sets
- KAM Snap Pliers and Awl
- Sewing Clips
- Standard Sewing Machine
- Hot Glue Gun
- Fabri-Tac - Fabric Adhesive


Instructions:
1. Using an old, holey pair of Jeans cut two 1 1/2" x 14" strips of material.

2. Use Sewing Clips to hold the material, wrong sides together, right sides facing out.

3. Stitch around the strip of fabric about a 1/4 to 3/8" in all the way round making sure to back stitch at the start and end.

4. Pull on the edges to fray the jean material up to the stitch you made. I used a crafty child :) with a cutting board and a fork. It will also fray over time but I was going for a this look.

5. To make the Fabric Rosette, fold the fabric in half, wrong sides together, two times. You will end up with about 1/2" or less strip of fabric 24" long. I used an iron to fold it, not so much that it was completely flat, just enough that it held its shape. Start at one end and hot glue the first bit of it back against itself.

6. Continue this ever so often so that the 'bud' stays together.

7. I made the bud or center of the rose about 1/2" in diameter. Add one last drop of hot glue.

8. Now twist the fabric 360 degrees, so that the bottom becomes the top. Tack it with a small bead of hot glue and repeat.

9. Continue twisting and gluing until you run out of fabric or until you reach the desired size of your rosette.

10. It will look like this when you are finished.

11. Glue the last bit of fabric on the underside of the Rosette securely with hot glue.


12. For a more finished look, I added a circle of felt to the bottom with Fabri-Tac.
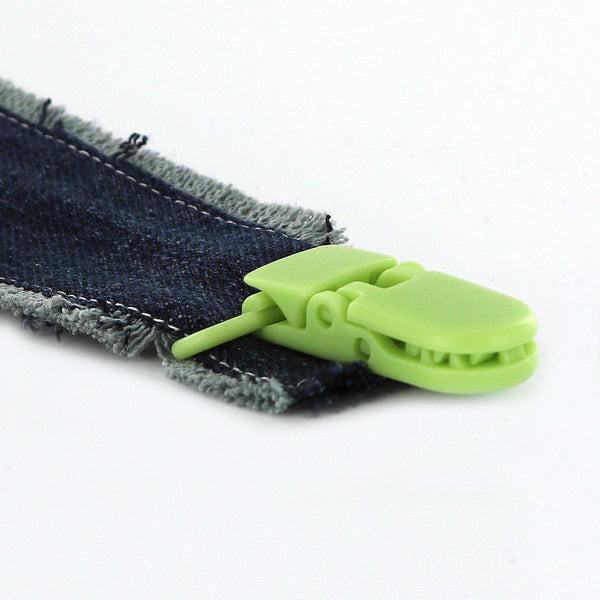
13. Put the KAM Plastic Pacifier Clip on the Fabric strip about 1″ in.

14. Fold back 1″ of the strip back onto itself.
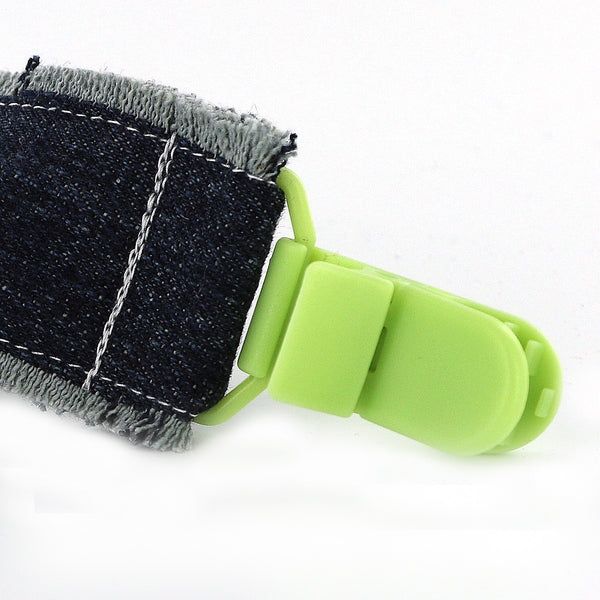
15. Straight stitch across the fabric strip just behind the KAM Plastic Pacifier Clip. Make sure to set the stitch.

16. Make sure that the internal snap in a comfortable distance to accommodate the width of the handle, I spaced my KAM Snaps about 2″ apart using the Pacifier I have with the biggest handle.
17. Now on the side where the Pacifier will be attached, I installed a Cap and Socket about 1/2″ from the edge. I used Size 20 snaps for this tutorial but either Size 20 or Size 16 will work great.

18. Add Fabric Rosette with Fabri-Tac to the Pacifier Clip just above the clip.


19. Now snap the Pacifier in place, attach to your child’s outfit and go.

20. Tada! Okay, I think I am in love. Super cute! Happy Snapping!!! To see our other great Pacifier Clip Tutorial and KAM Plastic Snap Ideas and buy these supplies visit I Like Big Buttons.com.
Disclaimer: Keep in mind that although I have rough tested these I in no way recommend you leave your baby alone with these as there are small pieces and if not done properly they may come apart and become a choking hazard. I would recommend these clips under adult supervision only. The maker and/or parent assumes full responsibility when using these pacifier clips.
Cover Button FAQs: Wire Back vs Flat Back September 13 2016
- Assembling fabric covered buttons is easy and fun but did you know there are two distinct kinds?
- Wire Back or Shank Back, as they are sometimes called, are sew able and meant to be attached with a thread and needle to your sewing project.
- Flat Back are glue able and meant to be attached to your craft project with glue to a flat surface or glue pad.
I Like Big Buttons! - Wire Back vs Flat Back
To see other great Fabric Cover Button ideas, visit our DIY Project section here.
I Like Big Buttons! Colorful Enamel Snap Barrettes September 12 2016
Fun & Colorful Snap Clip Barrettes, Embellish Your Hair, Embellish Your World!!!
FLASH SALE! Take 10% off Snap Barrette purchase today only using Coupon Code (9/12/2016): BARRETTE10
2 Inch (50 mm) Barrette Snap Clips with Glue Pads (0.31" - 8mm pad diameter)
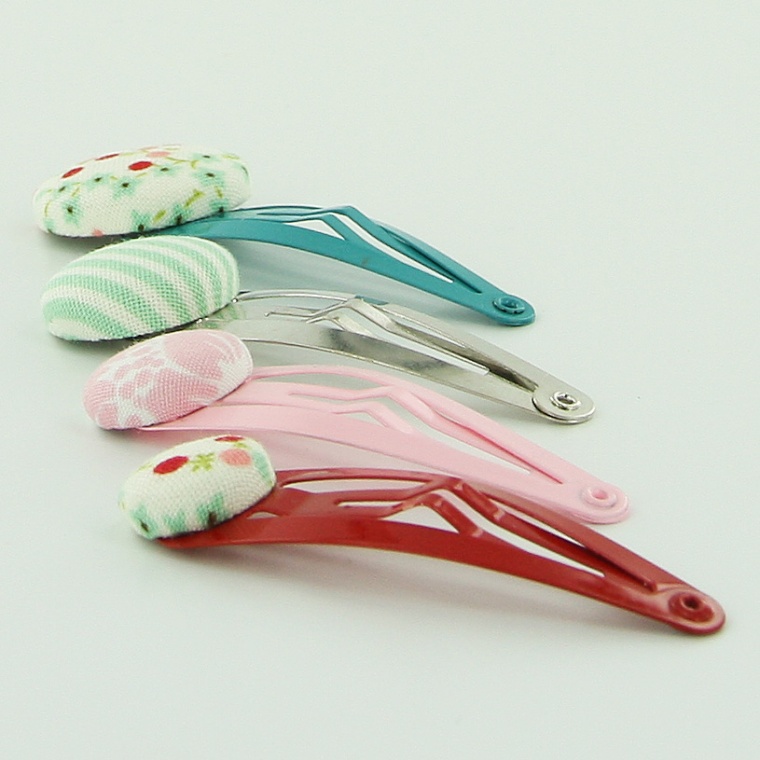
Embellish your hair with these adorable Barrettes! Use them as they are or attach cover buttons (size 30 (3/4" - 19 mm) and size 36 (7/8" - 23 mm) work great), bottle caps, or stickers. An adhesive such as E-6000 works great for attaching your crafty items.
Use your imagination, there are so many possibilities!
These Barrettes are available in the following colors and finishes:
- Copper
- Gold
- Silver
- Gunmetal (Dark Gray)
- Black
- Antique Brass
- Milk Chocolate
- Purple
- Lavender
- Blue
- Turquoise
- Light Blue
- Green
- Bright Yellow
- Lemon Drop (Light Yellow)
- Orange
- Red
- Hot Pink
- Light Pink
- White

Cover Button Barrette Tutorial:
I Like Big Buttons! Creation Share August 25 2016

Water Bottle Marker/Charm Tutorial using MAM and O-Ring Pacifier Adapters August 24 2016
These adapter rings also can be used as water bottle markers or so you can easily attach your bottle to a clip. Simply stretch the ring over the neck of a standard sized water bottle (~1”) to easily recognize your drink. We carry 13 great ring colors to choose from.
*Take 10% our MAM and O-Ring Adapters with coupon code (thru Monday 8/29): RINGLOVE
Supplies:
- Standard Water Bottle (~1" mouth)
- MAM Ring Adapter or O-Ring Adapter

1. Stretch Colored Ring Adapter of your choosing over the mouth of the bottle, just past the lip.

2. So many uses. Simply:
- Leave as a water bottle marker.
- Attach a carabiner clip and hang from your backpack, bag, belt loop or other.
- Hang from your lanyard for hands free carrying.


3. Super easy and useful! To see our Pacifier Clip Tutorials using MAM or O-Rings check them out here.
Free Romper Pattern {0-12 months} - Courtesy of Nap-Time Creations and I Like Big Buttons! KAM Plastic Snaps August 11 2016
A while back, Emily of Nap-Time Creations made this sweet Romper and shared how she did it with us. I thought you all would enjoy seeing it.
Supplies:
- Fabric of your choice for the outside
- 6 KAM Snap Set
- KAM Snap Pliers and Awl
- 1/4" Elastic
- Standard Sewing Machine
- Romper Pattern & Full Tutorial


Pattern NOTES {READ FIRST!}
1. I made the 6-9 month romper and it wasn’t very long. {new pattern has updated length included… you can always add length at dotted line on pattern.
2. You will need 3/4 of a yard fabric, 1/4″ Elastic and 6 snaps. I used KAM snaps...
To read the rest of the Tutorial, go here.

Perfect Bow and Baby Proof Sash Tutorial - Courtesy of Pattern Revolution and I Like Big Buttons! KAM Plastic Snaps August 02 2016
A while back, Robin of Pattern Revolution made this super cute Perfect Bow and Baby Proof Sash and shared how she did it with us. I thought this would be a great time to revisit the tutorial as fall approaches.
Supplies:
- Sash and Bow Fabric
- Thread
- Sewing Machine
- Scissors or Rotary Cutter
- Needle
- KAM Snaps
- KAM Snap Pliers and Awl
- Perfect Bow and Baby Proof Sash - Full Tutorial
Every morning it is a struggle to dress my feisty 2 year old. All her pretty sashes hang untouched in the closet, while the dresses they go with get worn over and over. I love the look of a pretty bow, but my baby wont hold still long enough to tie it nicely, and in the miraculous event that she does, she unties it and removes the sash a few minutes later. GRRRR!!! Tell me I'm not the only one with this problem???
Decisions, decisions....
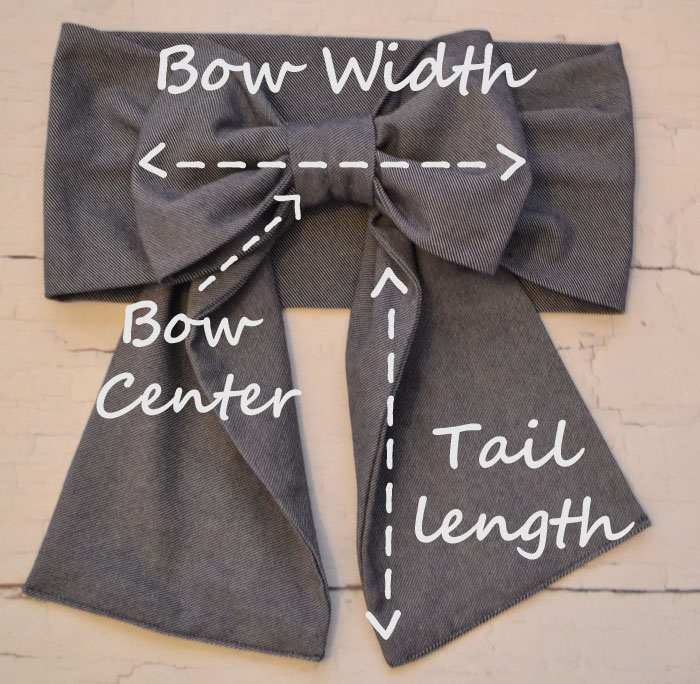
First, you need to determine your sash length and width. Measure your child's waist while wearing the garment, add 2" for sash length. Decide how wide you want the sash, double that and add 1/2". Cut your sash.
Then, you need to determine the bow width and tail length that you like...
Glimpses of the Perfect Bow and Sash Tutorial, to see it in full.


How to change the dies in the KAM Snap Removal Pliers July 12 2016
How to change the dies in the KAM Snap Removal Pliers.
Supplies:
- KAM Snap Removal Pliers
- Stud Die or Socket Die (included in kit)
- Screwdriver (included in kit)
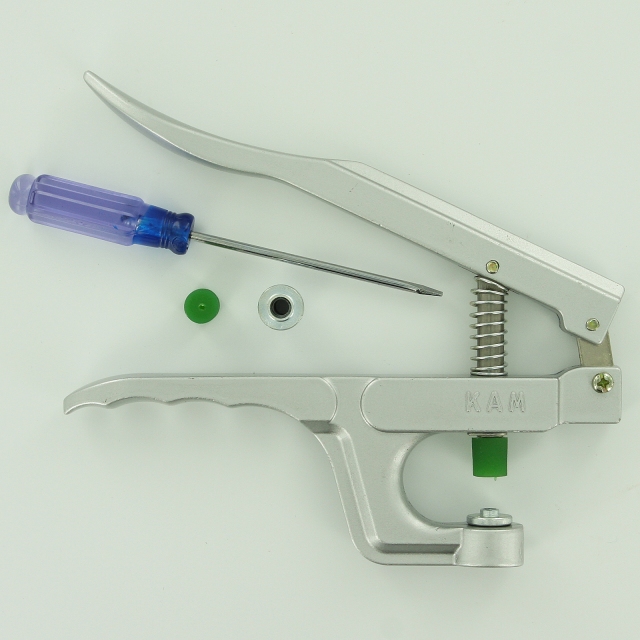
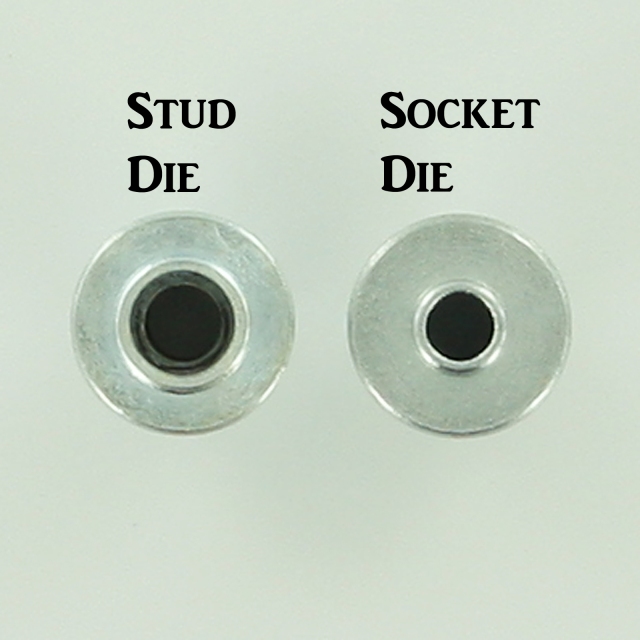
Instructions:
1. The KAM Snap Removal Pliers will come with one of the dies installed.

2. Use the screwdriver, included in kit, to loosen the set screw on the base of the pliers.
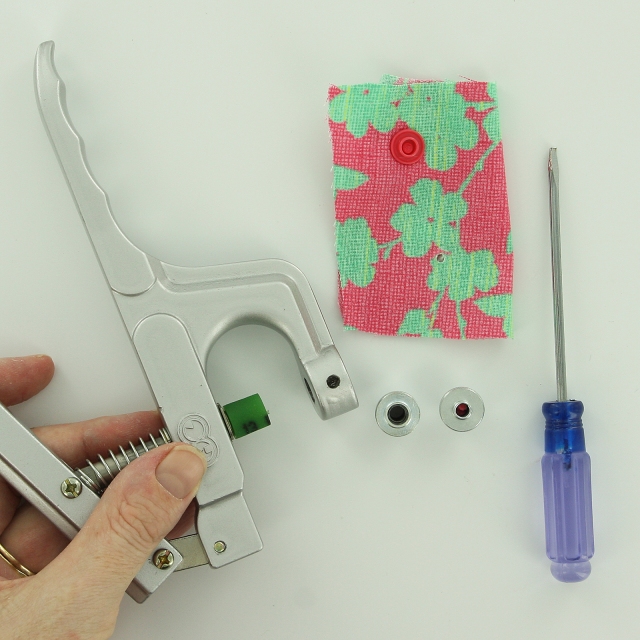
3. Remove the die from the base.
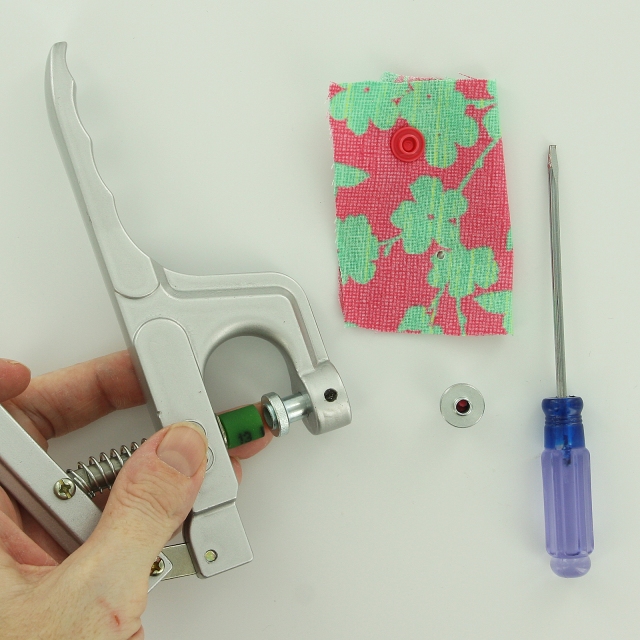
4. Insert the desired die into the base of the pliers.
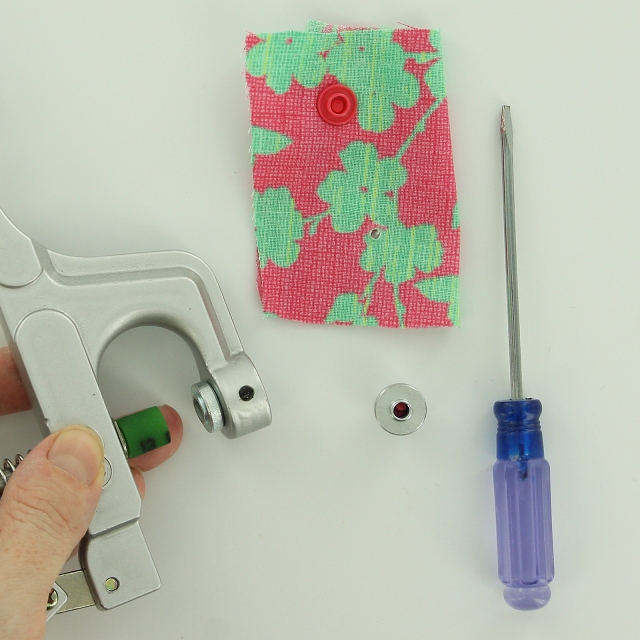
5. Push it flush with base.

6. Re-tighten the set screw with the screwdriver.
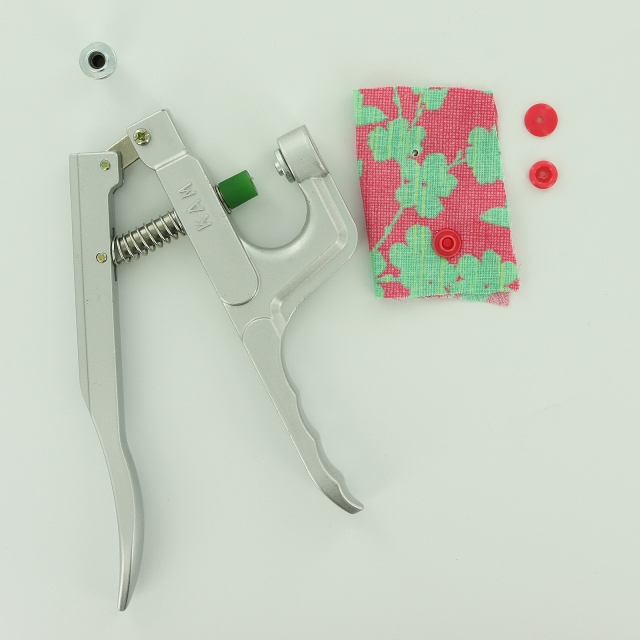
7. Tada! It is ready to use.
Happy Customers Make Our Day!!! June 30 2016
Today, I was reading through our feedback and just wanted to share what a few of our happy customers had to say:
♥ Color choices were fantastic and was able to get a mix of colors. My order arrived very quickly and was exactly what I had special ordered. Will definitely order from this site again!
♥ I continue to buy all my snaps from this seller. 5 Star Seller!
♥ These look great on my diapers! I love the color and they came quickly!
♥ I big BUTTons and I can not lie; Fast shipping of just what I asked for. Thank you!
♥ Exactly what I was looking for to make pacifier clips. Love the colors and the shipping was very fast! Thanks!!!
♥ I've ordered from this seller multiple times and have always been very happy with my purchases. Huge selection of items and fast, fast shipping!
♥ All snaps are packaged in small bags with info on it (color name and number), to make it easier to re-order... Love that!!! Great product! SUPER customer service! ... quick answering of messages... Super nice!!!
♥ Great items, great prices and will be back for more, thanks for fast shipping
♥ Love this shop! I needed to make 75 key fobs in a hurry and they shipped on Saturday of Memorial Day weekend so I could make my deadline. Great customer service. The hardware was just what I needed and arrived super fast.
♥ LOVE these snaps! So many colors & great prices too! A+++
♥ Sent everything just as ordered! Awesomeness!
Thank you to all of you who take the time to post your positive experience, it makes our day to see how all our hard work is appreciated!!!
Thank you, I Like Big Buttons! and all our Little Buttons!
Adjustable Elastic Headband With Interchangeable Shabby Flowers June 23 2016
Today, I am making a Adjustable Elastic Headband with Interchangeable Shabby Flowers. It is super easy to do and adorable on both babies and big ;) kids alike.
Supplies for Adjustable Headband:
- 1 set of headband ring and slider
- 24" length of 5/8" Elastic for headbands
- Glue of your choice: Fabric Tac or Hot Glue
- Lighter or Chef's Torch
Supplies for Shabby Flower Embellishment:
- 2" Shabby Flowers of your choosing
- 1/2" x 1" square of Coordinating Felt
- 1 1/2" Circles of Coordinating Felt
- Glue of your choice: Fabric Tac or Hot Glue
- Coordinating Size 20 KAM Snaps


Instructions:
1. Cut your Elastic to 24" length and heat seal the ends with the Lighter. Be careful to just seal the ends, not start them on fire :). (You may want to practice on a scrap piece if this is your first time.)


2. Take your 24" length of Elastic and feed the decorative/shiny side of the Elastic up through the first loop in the Slider over the bar and back down through the second loop in the Slider.


3. Pull the Elastic until it is about 3/4" sticking out the bottom of the second loop of the Slider.
4. Flip the Slider over so that the wrong sides of the Elastic is face up, this is the bottom of the Slider. Put a dab of glue on the Elastic and press the 3/4" of Elastic to it firmly. Wiping away any excess glue.


5. From the opposite side, slide the single Slider Loop about half way on to the Elastic.


10. You now have an adjustable headband. Tada! But wait there is more ;)!
Interchangeable Shabby Flower Embellishment:


1. Glue the 1 1/2" circle of Felt to each of the Shabby Flowers.


2. Once it has had some time to dry, install a Size 20 KAM Snap Cap and stud in the center of each Shabby Flower. The stud should be facing down on the underside of the Shabby Flower in the Felt. Repeat for each flower. (In the pictures, I used Size 16 but found that it did not hold well and had to replace them with Size 20.)

3. Glue the 1/2"x1" square of Felt to the underside of the Elastic where you want to locate the Shabby Flower.

4. Once it has had some time to dry, install a KAM Snap Cap and socket through it. The socket facing up on decorative side of the Elastic.


5. Snap the flower in place and go! Tada!