Happy Memorial Day!!! In Memory of my Grandfather and his brave service of our country and the continuing family tradition of servicing our country bravely. All our LOVE to my sweet brother, cousins and other family members who are currently serving!!! In honor of them, we are running a 10% coupon code for Memorial Day!
Use coupon code: TROOPLOVE
Good on our website today and tomorrow only!
Shop here:
http://ilikebigbuttons.com/

Day #9
Recycling a Milk Jug into a Storage Container with KAM Snaps
Today I am recycling one of the most common items in our house. With so many kids, we are constantly going through milk and I have collected quite the stack of Milk Jugs. What to do with them all!!!
Supplies:
1 Milk Jug
Scissors
Marker
1 Set of KAM Snaps
1 KAM Snaps Plier and Awl
Instructions
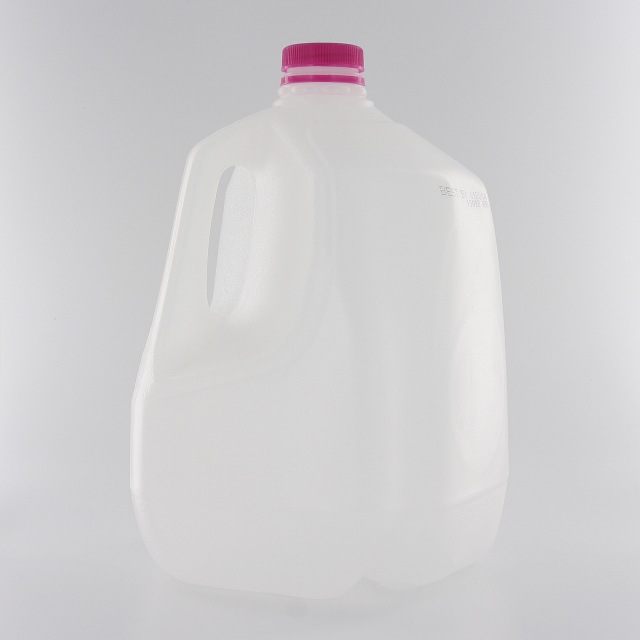
1. Take a clean, rinsed, dried Milk Jug and remove all the labels and date stamps.
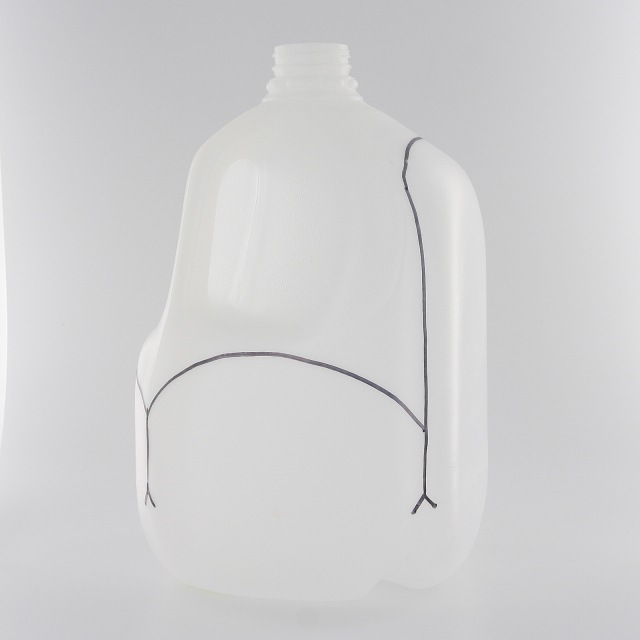
2. Trace the outline of the shape you want to cut. You will have one tall, full length flap and 3 half size flaps. Stay about an 1 to 1 1/2 above the bottom of the container.

3. Cut the Milk Jug on the lines. The Milk Jug will fold inward about were the dashes are, the dashes are just a visual, no extra cutting is needed.
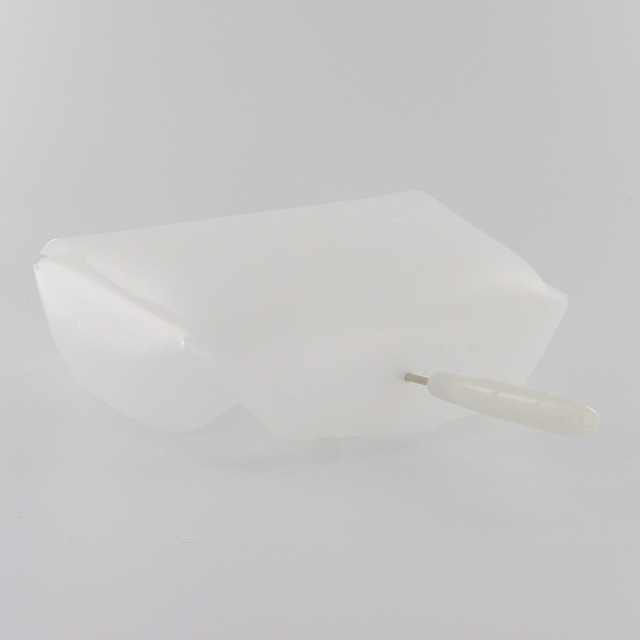
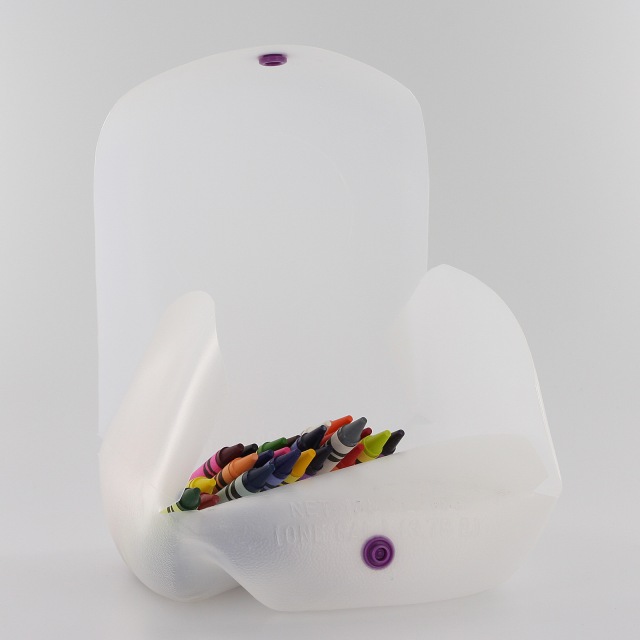
4. Fold the front flap in, then the 2 side flaps and finally the tall flap over and down. Use your Awl to decide on the position of the snap and poke it through both the flap and the body of the jug.
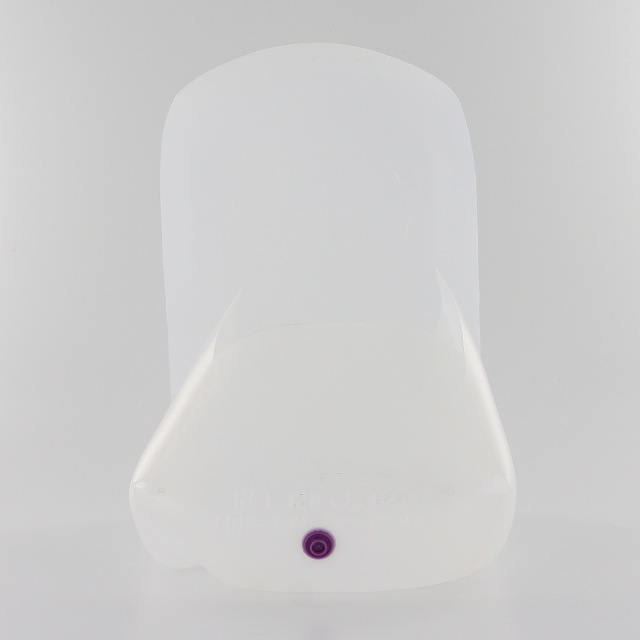
5. Attach the inside KAM Snap to the body of the Milk Jug, Stud facing out. This may require a KAM tabletop Press, if you only have pliers, you may need to adjust the length of the front flap.
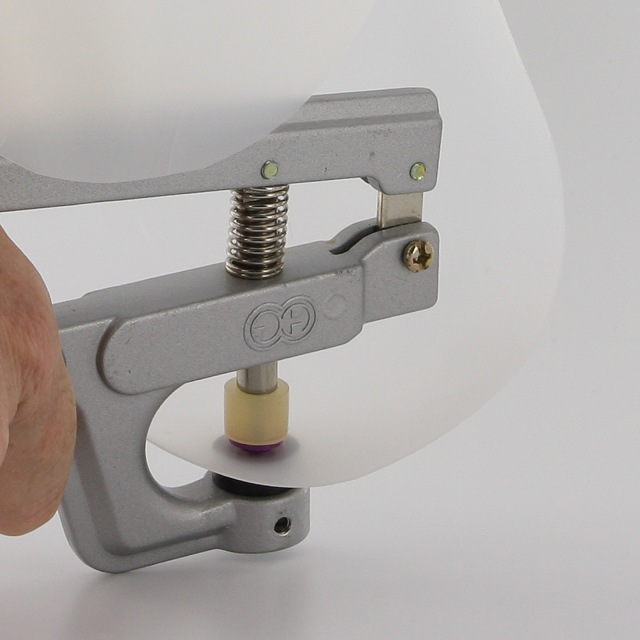
6. Now attach the KAM Snap to the tall flap, Socket inward, Cap on top.
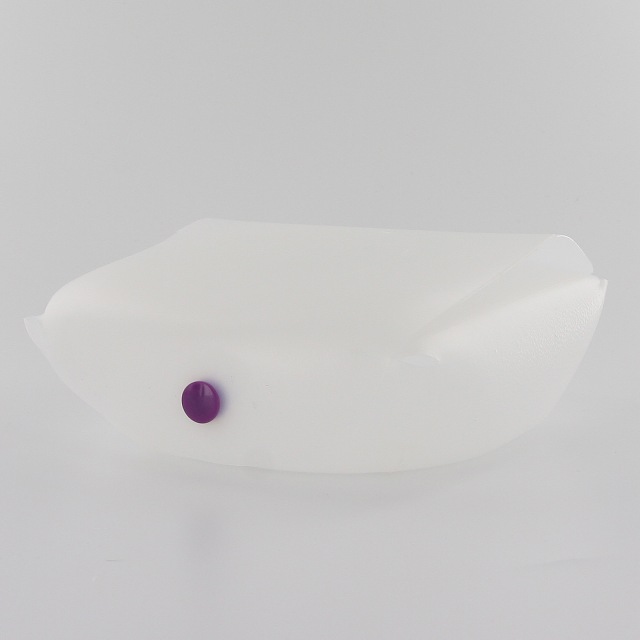
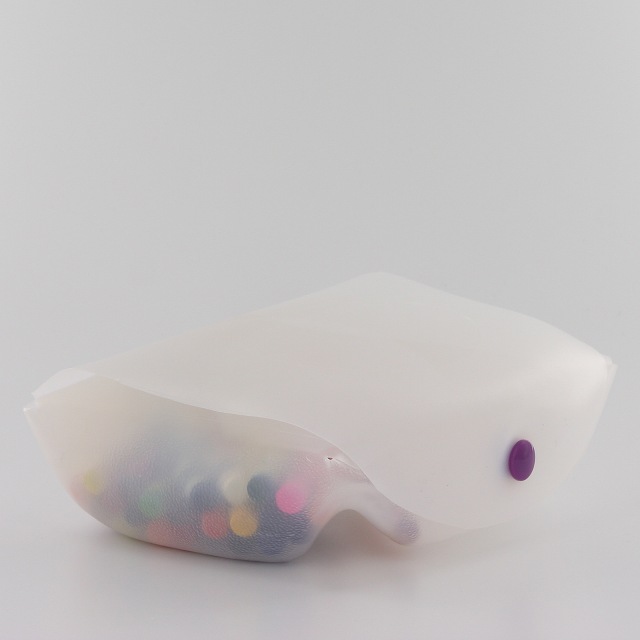
7. Snap and Go!!! You can use this container to store sandwiches, snacks, toys or as I plan, crayons for each kid. I making a different one for each kid with their "color" of KAM Snaps.
Day #8
Repairing A Pair Of Jeans
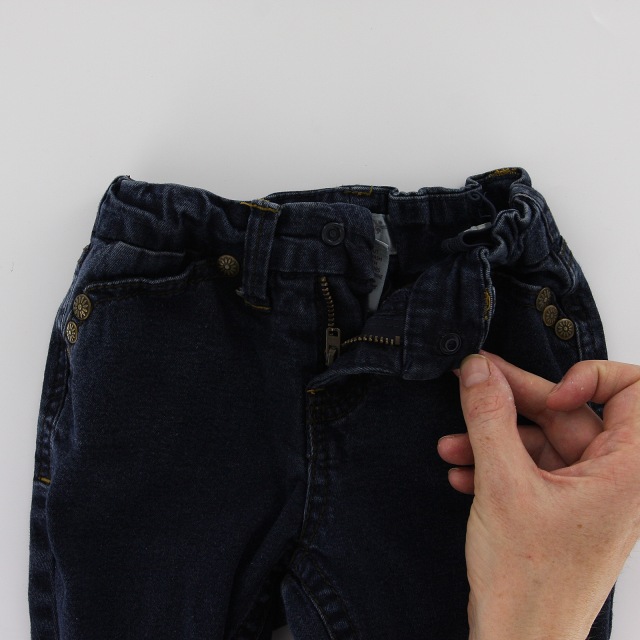
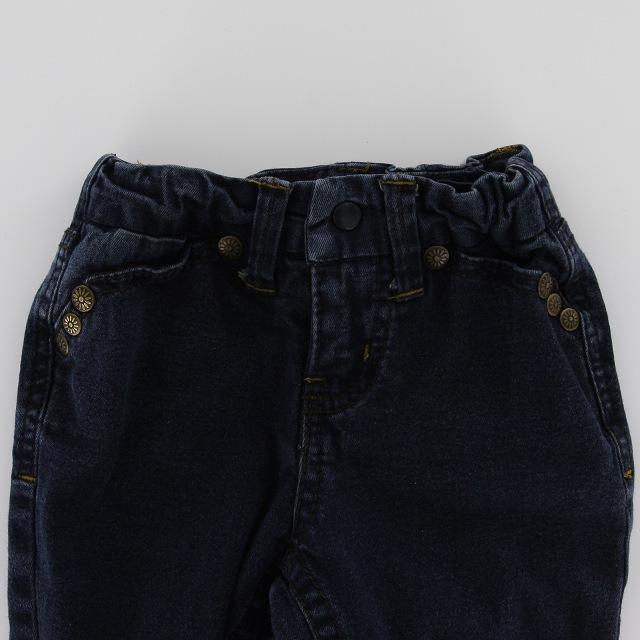
I love hand-me-downs but sometimes a flaw in an otherwise cute outfit gets overlooked. I received a very sweet pair of dark jeans. No stains, no holes in knees, no wear and tear visible but Ugh! the metal button had pulled through. What to do!?!
KAM Snaps to the rescue!!! With a set of needle nose pliers, I simply squished and removed the remnants of the metal button. Then I picked the perfect shade of dark blue, I do have 130 colors to choose from :) so this part was easy and fun. In just a couple seconds, the jeans were as good as new, only better.

Day #7
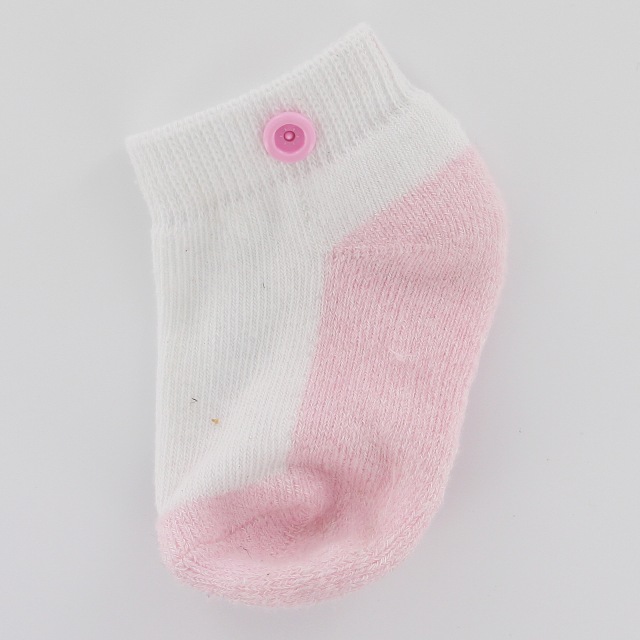
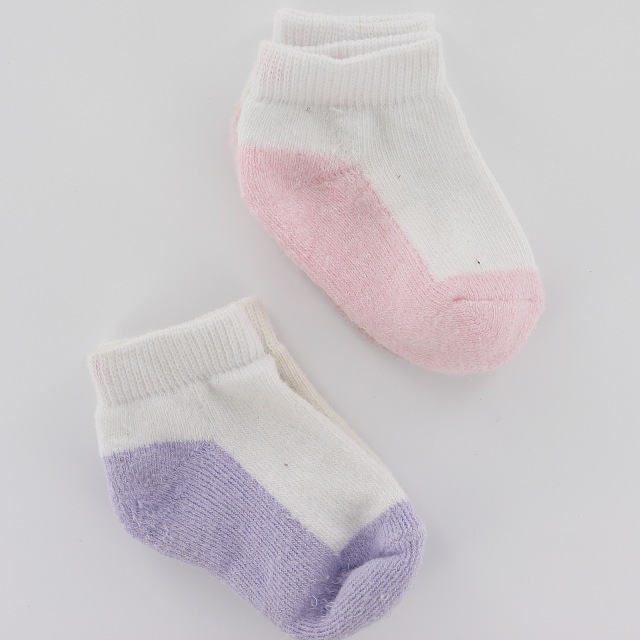
Today I am tackling the age old problem of sock loss. Most recently, I received a number of those super cute baby socks that look like shoes. Such a great invention, by the way! Being a good mom, I threw all those tiny socks into the wash for a rinse before my sweet little one wore them. What do you know, of the 8 socks I placed in the washer ONLY 7 emerged! So frustrating, I never did find the runaway sock back either.
I wish I had done this sooner.
Socks With KAM Snaps
Supplies:
2 pairs of socks
2 sets KAM Snaps
KAM Snap Pliers and Awl

Instructions:
1. In the center of the top of the sock, place a single snap, Cap to the side and Socket on the outside.


2. Install the snap and repeat with other sock using a Stud.
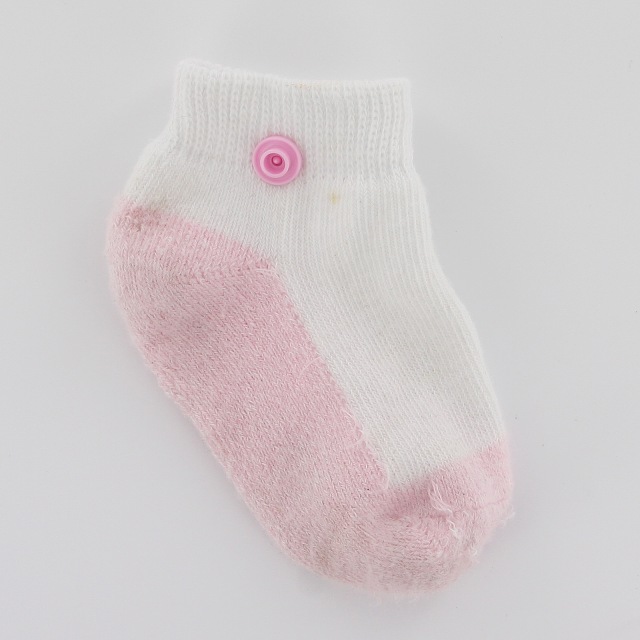
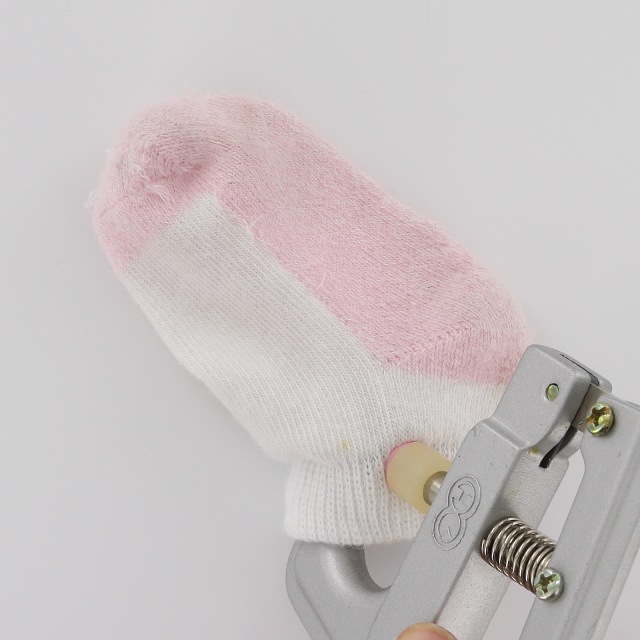

3. It's that simple!
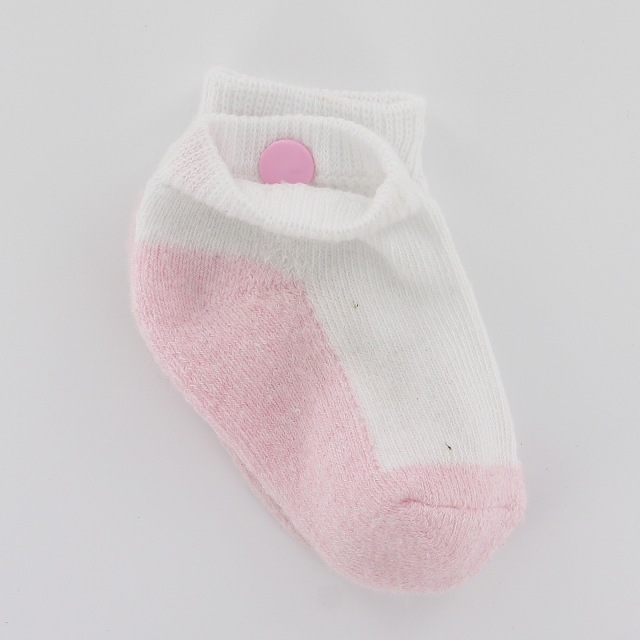

4. Then simply snap them together before washing them and to store them in the sock drawer. Here's to less sock loss! Happy Snapping!!!
Today I cleaned my house in preparation for Summer, its been amazing and sunny outside and is making me itch for lazy summer days.
Every summer I put the kids indoor toys up for the summer and we play outside. This year I added downsizing their clothing to 3-5 pairs of shorts, 5 shirts, 2 pants, and a church outfit.
What do you do to prepare for summer or make summer more fun and less work? I would love to hear your ideas.

How to make Interchangeable Shabby Flowers
Day #6
Supplies for Shabby Flower Embellishment:
- 2" Shabby Flowers
- 1/2" x 1" square of Coordinating Felt
- 1 1/2" Circles of Coordinating Felt
- Glue of your choice: Fabric Tac or Hot Glue
- Coordinating Size 20 KAM Snaps (Sold in 10 sets by us here)


Instructions:
1. Glue the 1 1/2" circle of Felt to each of the Shabby Flowers.


2. Once it has had some time to dry, install a Size 20 KAM Snap Cap and stud in the center of each Shabby Flower. The stud should be facing down on the underside of the Shabby Flower in the Felt. Repeat for each flower. (In the pictures, I used Size 16 but found that it did not hold well and had to replace them with Size 20.)

3. Glue the 1/2"x1" square of Felt to the underside of the Elastic where you want to locate the Shabby Flower.

4. Once it has had some time to dry, install a KAM Snap Cap and socket through it. The socket facing up on decorative side of the Elastic.


5. Snap the flower in place and go! Tada!
If you missed our Tutorial for the Adjustable Headband, check it out here.
Save
Supplies for Adjustable Headband:
- 1 set of headband ring and slider
- 24″ length of 5/8" Elastic for headbands
- Glue of your choice: Fabric Tac or Hot Glue
- Lighter or Chef’s Torch

Instructions:
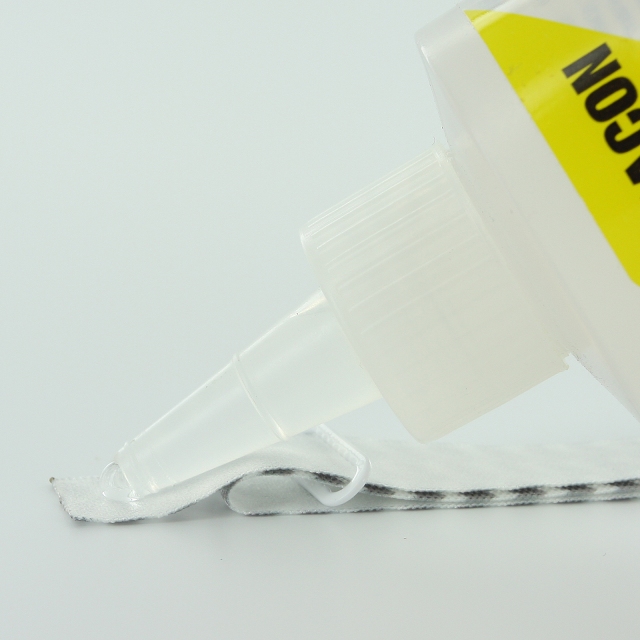
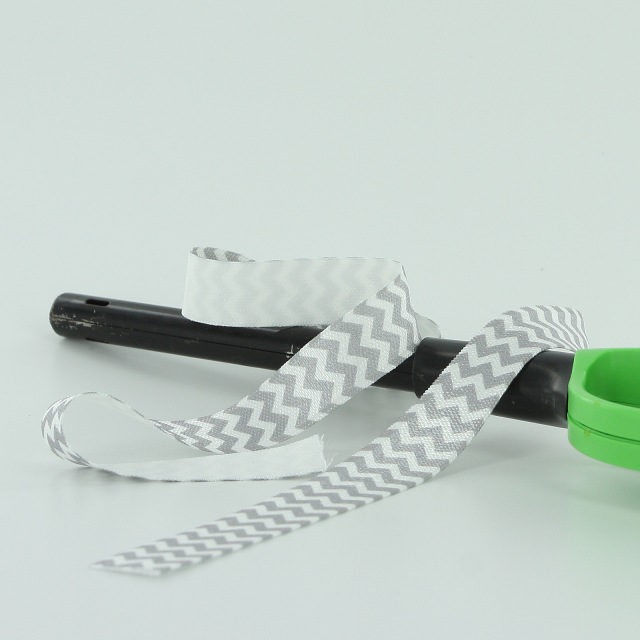
1. Cut your Elastic to 24″ length and heat seal the ends with the Lighter. Be careful to just seal the ends, not start them on fire :). (You may want to practice on a scrap piece if this is your first time.)
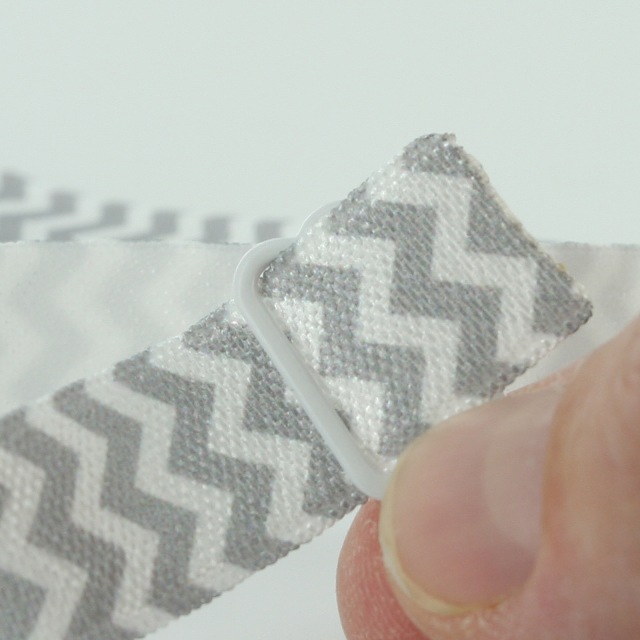
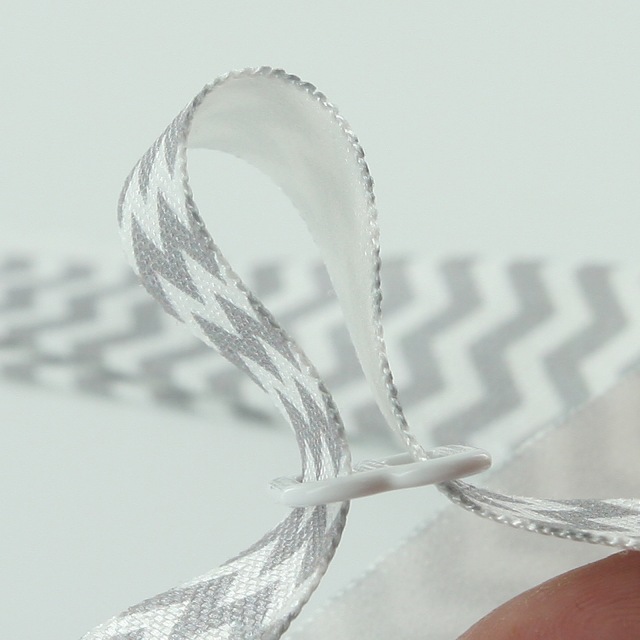

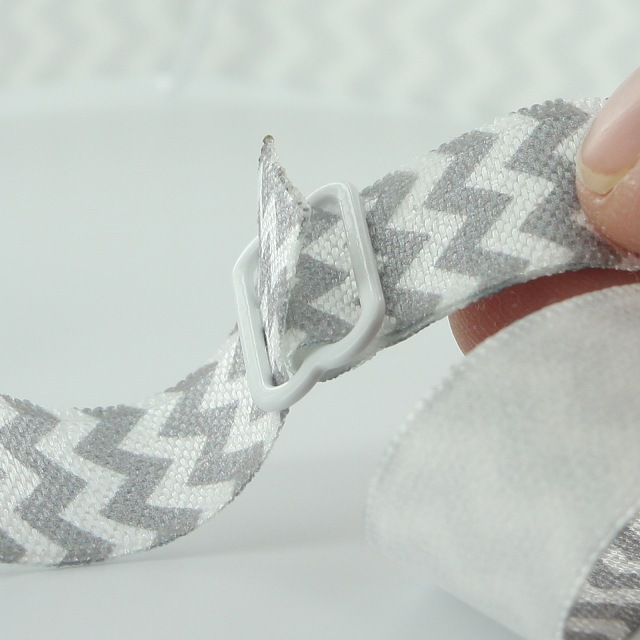
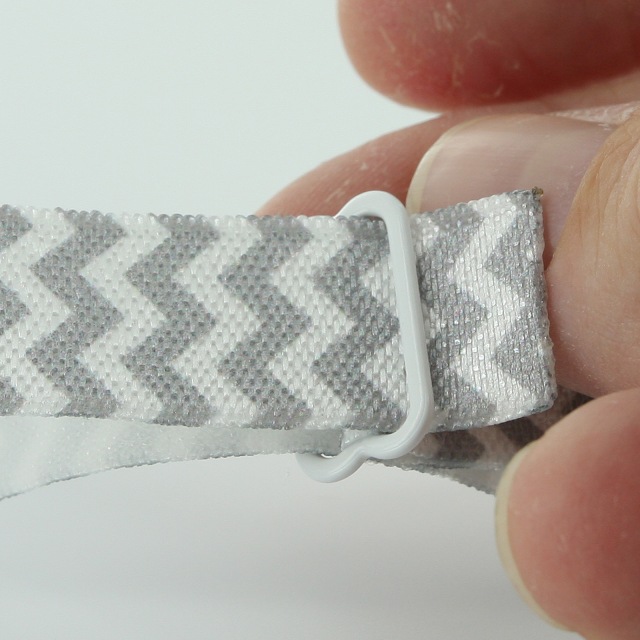
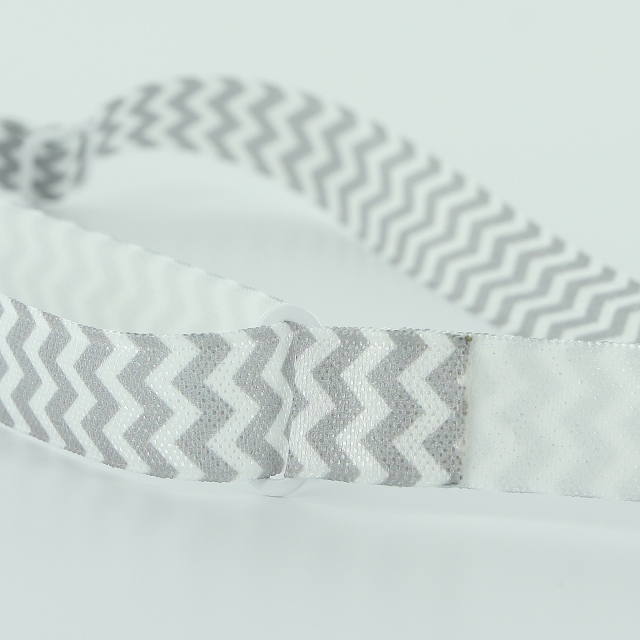
2. Take your 24″ length of Elastic and feed the decorative/shiny side of the Elastic up through the first loop in the Slider over the bar and back down through the second loop in the Slider.

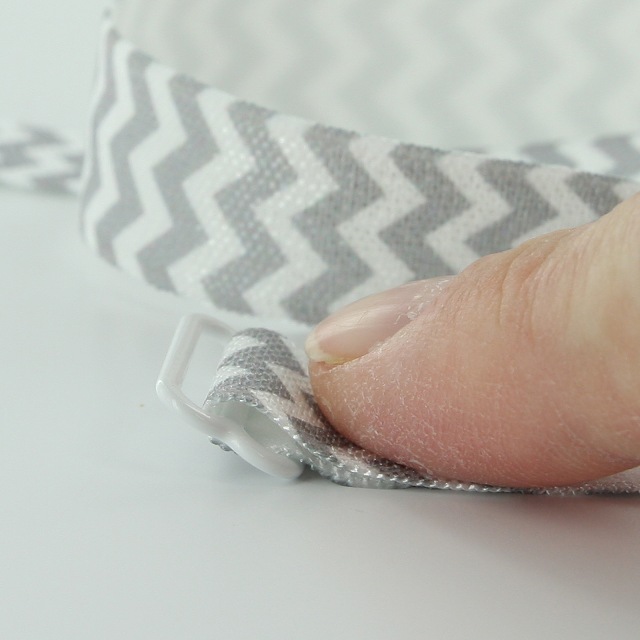
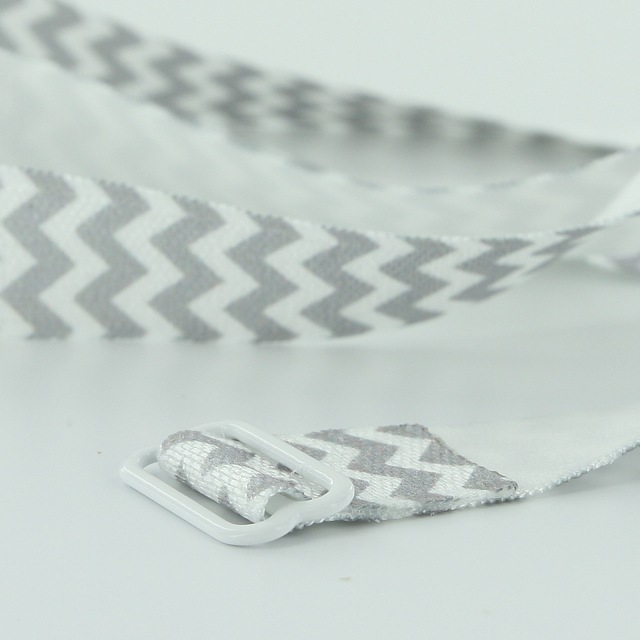
3. Pull the Elastic until it is about 3/4″ sticking out the bottom of the second loop of the Slider.
4. Flip the Slider over so that the wrong sides of the Elastic is face up, this is the bottom of the Slider. Put a dab of glue on the Elastic and press the 3/4″ of Elastic to it firmly. Wiping away any excess glue.
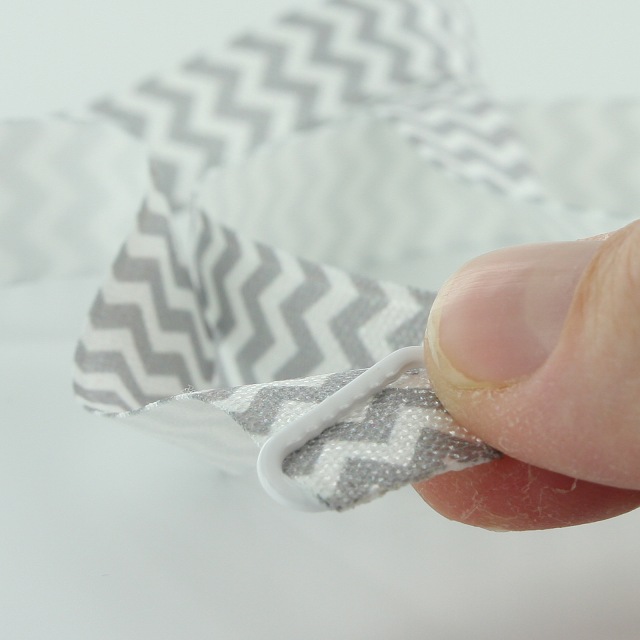

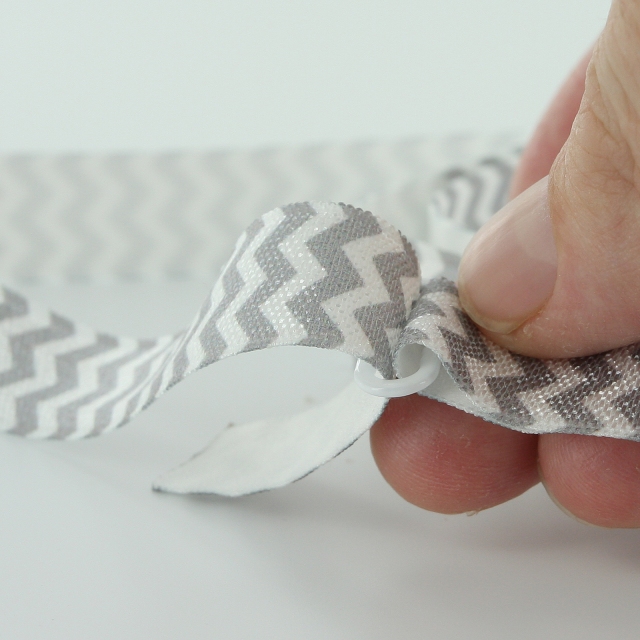
5. From the opposite side, slide the single Slider Loop about half way on to the Elastic.
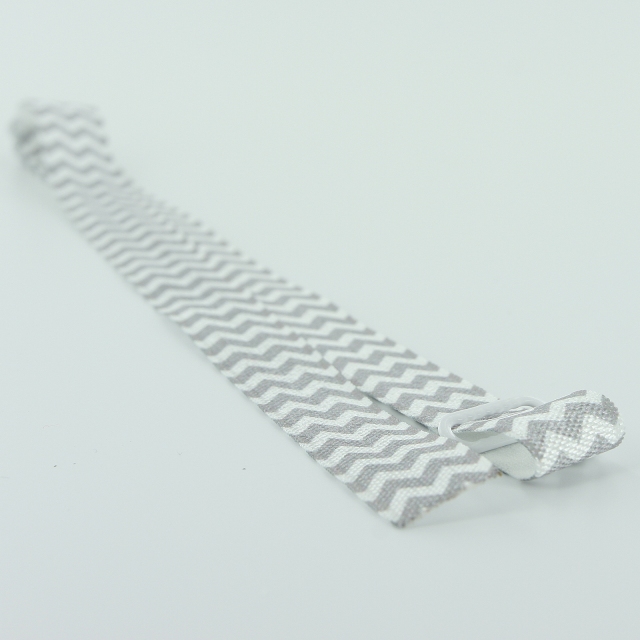
6. You now have the single Slider Loop in the center of your elastic and the slider attached to one end.
7. Take the other end of Elastic decorative side up and feed it through the double Loop Slider the same way as before. Up through the first Loop over the bar and down through the second Loop.
8. Now pull the elastic through the Slider until you reach the single Slider.
9. Feed the end of your Elastic through the single ring and overlap it about 3/4″ and glue down.
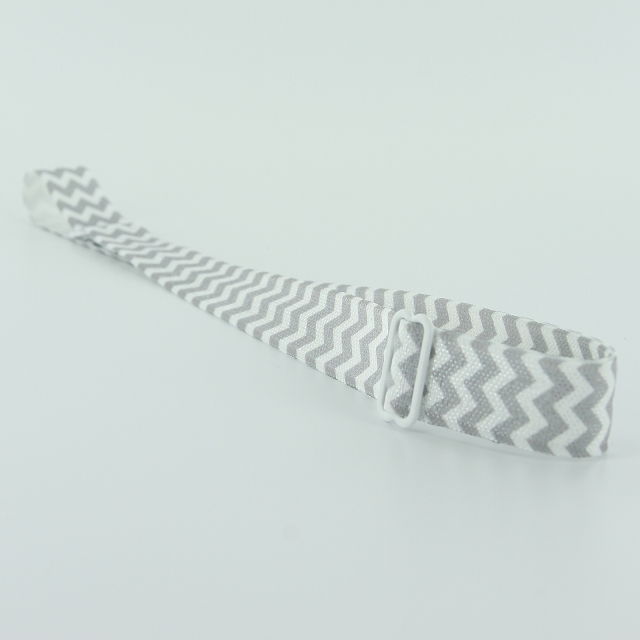
10. You now have an adjustable headband. Tada! But wait there is more ;)!
I want this headband to be an interchangeable headband for a collection of Shabby Flowers to match my daughter’s many outfits. Check back tomorrow for a Tutorial on how to attach a Shabby Flower with KAM Snaps.
SaveSave
Day #4
Today, I tackled a problem for us moms out there. Or at least ;) those of us too busy to fish our bras out of the washer before they go in the dryer. In all fairness to my mom, she has told me a number of times, they will last longer and work better if I air dry them. The fact remains that if I remember to get the laundry from the washer to the dryer in the same day, I consider it a miracle :).
Besides wearing them out quicker, I have found that front loading machines like to grab the bra hooks and mangle them. I have grown tired of the hooks poking me in the back or not hooking at all anymore.
KAM Snaps to the rescue with a seam ripper and just a couple snaps... See the full picture tutorial here.


Day #3
My daughter has a cute little pram for her dolls. She loves it for many reasons but especially because its pink and it can hold a lot of babies :). Unfortunately, it was designed by someone who has never had a toddler. The sun bonnet and foot cover on the pram Velcro on, which means they never stay on and a constantly being brought back to MOM! to be reattached.
KAM Snaps to the rescue again! I was able to pick just the right color of snaps from our 130+ colors, which was B47 Neon Pink, it works for so many pink things :).
And Tada!!! In under 10 minutes and with 6 sets of snaps, the pram was rolling along. And as a bonus, Mom is no longer her personal handy-woman, well, for this toy anyway :P.
Visit Our Store here.


Day #2
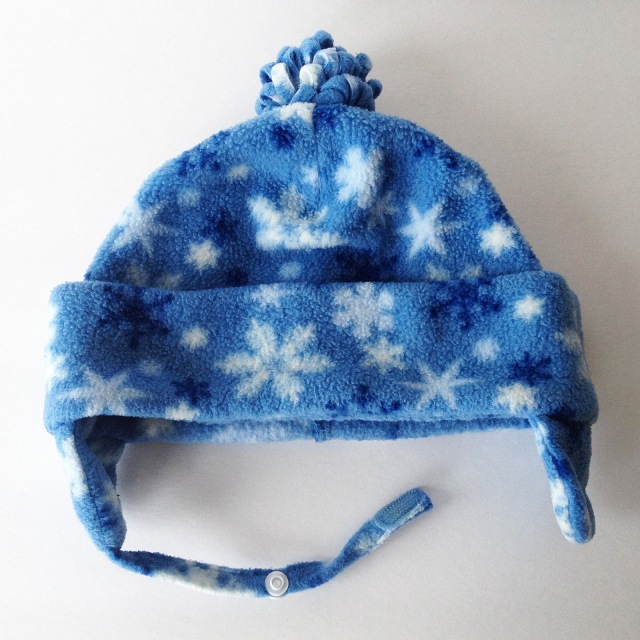
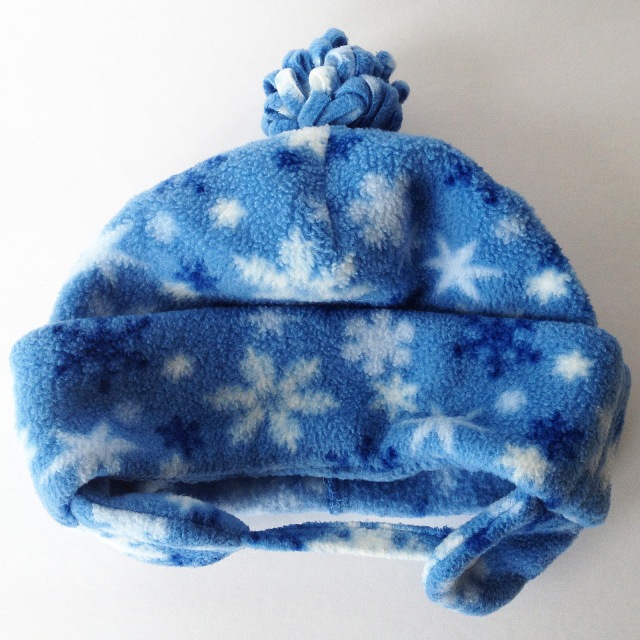
This is a simple one. I have this nice little snow hat that we bought for our first baby. Each one of our kids wore it as a toddler and as all toddlers will do, each one has ripped it off their head despite the chin strap.
KAM Snaps to the rescue!!! I was able to customize the chin strap and make it comfortably smaller, I have big headed kids but none as big as that hat was planned for :), and I replaced the Velcro (do you see a theme here :P) with one snap set.
And Tada!!! And as a bonus, it stays on her head until she is ready to come inside.
We sell convenient 10 packs of every one of our 130+ colors for just such a project here:
http://ilikebigbuttons.com/collections/kam-snaps/size-20-0-5-12-4-mm
Pictures below:
Day #1
My next mission is to find 30 great ways to use KAM Plastic Snaps in my own home. Please keep in mind this will not happen daily, :) my life is wonderfully full of crazy kids and happy chaos but please keep checking back as I snap my way through my house. :P Here is the start of my adventure:
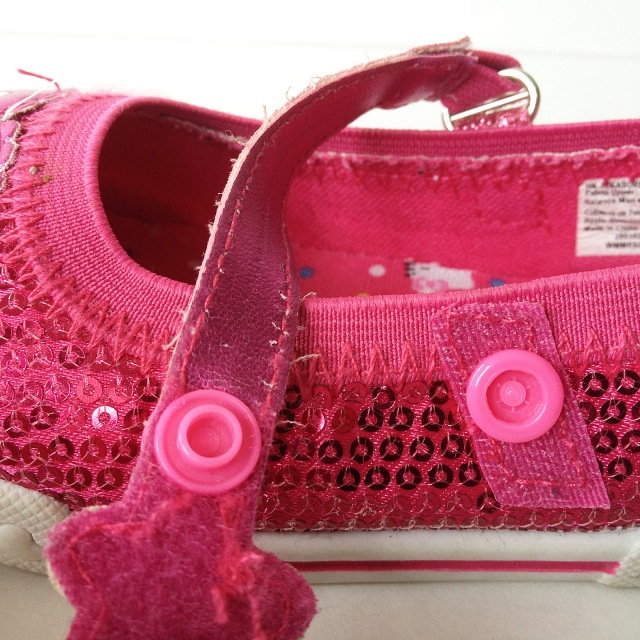
My middle daughter had to have these amazing pink, sparkly, Hello Kitty shoes. The problem with the shoes is that they came with the tiniest little bit of Velcro to hold them in place. While I love Velcro on shoes especially because it means I don’t have to tie shoes all day. It wasn’t enough to keep them on her feet for more than a few minutes.
Solution: 2 sets of B47 Neon Pink KAM Snaps
If you are in need of just a few replacement KAM plastic snaps or just a few snaps to finish a project, see our listings for 10 or 25 sets of plastic snaps in any of our 130 colors:
http://ilikebigbuttons.com/collections/kam-snaps
Like us on Facebook to see all 30 Days of Snaps:
http://www.facebook.com/ILoveBigButtons
Here is a couple pictures of how they turned out. They stay on her feet now and she proudly wears them all over the place.


Monday Mix-Up Madness !! FREE Kam Snaps/Plastic Snaps - Spring 2014 Colors with purchase of $30 or more.
90 sets (10 sets of 9 colors) of our NEW Exclusive, I Like Big Buttons Spring 2014 Colors
10 sets of the following in size 20: G122 - Fuchsia, G123 - Antique Lace, G124 - Robin's Egg Blue, G125 - Purple Pansy, G126 - Daffodil, G127 - Orchid, G128 - Daylily, G129 - Wisteria, G130 - Pineapple Chiffon
Simply purchase $30 of our great line of products, place the below linked item in your cart and use Coupon Code --- SPRING2014 --- to receive them FREE ($6.25 Value)
Link to FREE Snaps:
http://ilikebigbuttons.com/products/monday-mix-up-madness-free-kam-snaps-plastic-snaps-spring-2014-colors

“Baby Got Snaps”
Okay...while we are counting down to the announcement of the winner of our Giveaway with Peek-a-Boo Pattern Shop, make sure you have Entered to Win! It’s time for us to work on our theme song again and we need your help.
I’ll started and added a great verse we received from Libby B., please go to our Facebook Page comment to add your ideas and share this post to help us to complete our song!
Baby Got Snaps
I like big buttons and I cannot lie
You other mothers can’t deny
That when a baby crawls in with an itty bitty face
and those round things on her lace
You get smitten…
I like big buttons and I cannot lie
You other mothers can’t deny
When a baby crawls in with her sweet sweet face
and a tutu round her waist
you're in love... (2nd verse - Courtesy of Libby B.)
I like big buttons and I cannot lie
You other mothers can’t deny
That when your baby stomps through with mud on his shoe
and chocolate on his face
I am besotten... (3rd verse - me again :))
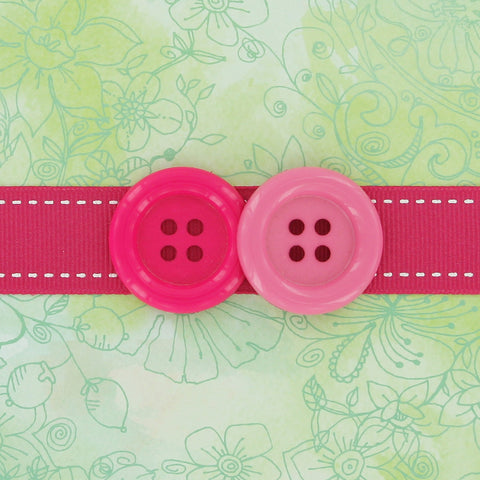
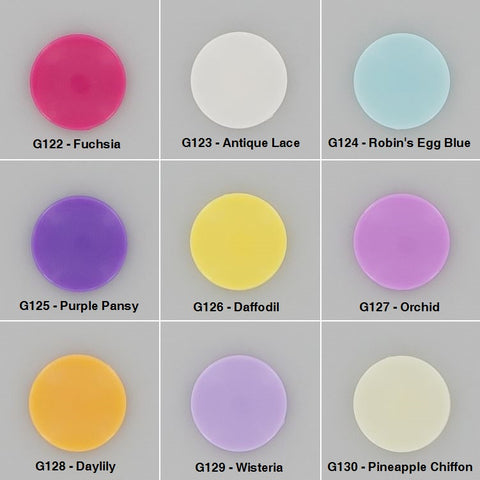
Time to unveil our all new Exclusive I Like Big Buttons! KAM Snaps Spring 2014 Colors!!!
We have added 9 great colors to our KAM Snaps selection, we now carry 130+ KAM Snap colors!!!
Our New Colors are:
G122 - Fuchsia (a vibrant deep pink)
G123 - Antique Lace (creamy off-white)
G124 - Robin's Egg Blue (pale blue with a tint of green)
G125 - Purple Pansy (medium purple)
G126 - Daffodil (happy, bright yellow)
G127 - Orchid (beautiful purple/pink)
G128 - Daylily (light vibrant orange)
G129 - Wisteria (pale purple)
G130 - Pineapple Chiffon (pale yellow/white)
We hope you love our new Spring colors as much as we do! We are delighted with them and are excited to share them with you.
See our list in color order at:
http://apps.ilikebigbuttons.com/ILBB_Snap_Colors.php
See our list in number order at:
http://apps.ilikebigbuttons.com/ILBB_Snap_Colors.php?Mode=Number
See picture below for our New Colors below (G122 through G130)
Thank you,
ILikeBigButtons.com
How to Make Cover Button Bobby Pins:
Supplies:
- 1 Completed Flat Back Fabric Cover Button (Choose your size, Size 20 through Size 45 all work great, size depends on the statement you want to make)
- 1 Bobby Pin
- E6000 or comparable adhesive
Steps:
1. Follow these instructions to make Flat Back Fabric Covered Buttons.

2. Apply E6000 to back of Cover Button.

3. Press Bobby Pin into place and remove any extra Adhesive. On smaller sized Cover buttons center the glue pad, as they increase in size adjust accordingly.
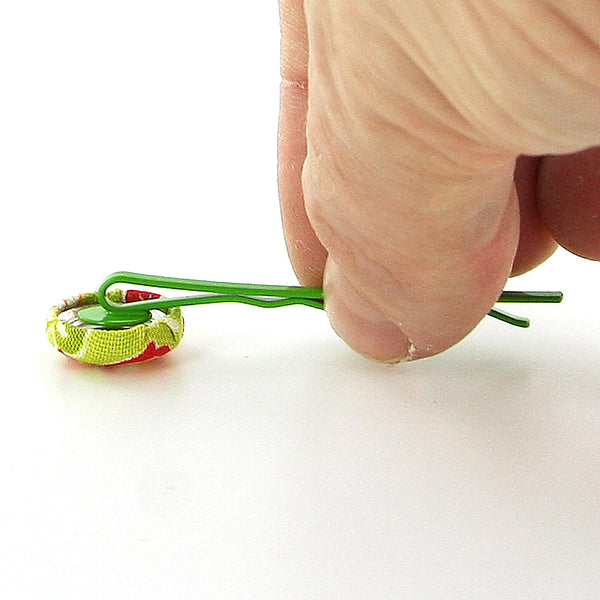
4. Let dry and enjoy.
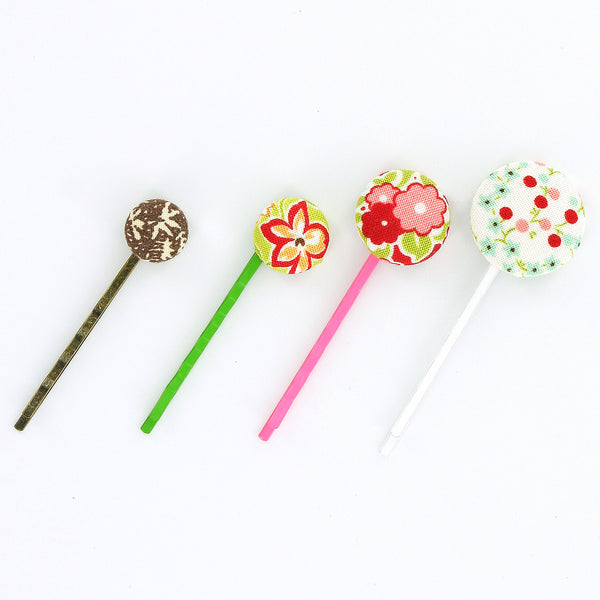
5. Tada!
You are done! Wear these adorable Bobby Pins to match or accent your favorite outfit or dress up your favorite t-shirt and jeans for an afternoon outing. Enjoy!
How to Make Cover Button Snap Barrettes:
Supplies:
- 2 Completed Flat Back Fabric Cover Button (Choose your size, Size 20 through Size 36 all work great, size depends on the statement you want to make)
- 2 Snap Barrettes
- E6000 or comparable adhesive
Steps:
1. Follow these instructions to make Flat Back Fabric Covered Buttons.

2. Apply E6000 to back of Cover Button.

3. Press Snap Barrette into place and remove any extra Adhesive. On smaller sized Cover buttons center on the glue pad, as they increase in size adjust glue pad accordingly.

4. Let dry and enjoy.


5. Tada!
You are done! Wear these adorable Snap Barrettes to match or accent your favorite outfit or dress up your favorite t-shirt and jeans for an afternoon outing. Enjoy!
How to Make Cover Button Push Pins:
Supplies:
- 1 Completed Flat Back Fabric Cover Button (Size 20 through Size 30 all work great)
- 1 Thumb Tack
- E6000 or comparable adhesive
Steps:
1. Follow these instructions to make Flat Back Fabric Covered Buttons.

2. Apply E6000 to back of Cover Button.

3. Center and press Thumb Tack into place and remove any extra Adhesive.

4. Let dry and enjoy.

5. Tada!
You are done! Use to add style to your message or cork board. Enjoy!
How to Make Cover Button Cufflinks:
Supplies:
- 2 Completed Flat Back Fabric Cover Button (Choose your size, size depends on the statement you want to make)
- 1 set of Cufflinks
- E6000 or comparable adhesive
Steps:
1. Follow these instructions to make Flat Back Fabric Covered Buttons.

2. Apply E6000 to back of Cover Button.

3. Center and press Cufflink into place and remove any extra Adhesive.

4. Let dry and enjoy.

5. Tada!
You are done! Wear these adorable Cufflinks to match or accent your favorite button up outfit for an afternoon outing. Enjoy!
Okay...it’s time for us to have a theme song, but we need your help.
I’ll start, please go to our Facebook Page comment to add your ideas and share this post to help us to complete our song!
Baby Got Snaps
I like big buttons and I cannot lie
You other mothers can’t deny
That when a baby crawls in with an itty bitty face
and those round things on her lace
You get smitten…

How to Make Cover Button Earrings:
Supplies:
- 2 Completed Flat Back Fabric Cover Button (Choose your size, Size 20 through Size 60 all work great, size depends on the statement you want to make)
- 1 set of Earring Post & Backs
- E6000 or comparable adhesive
Steps:
1. Follow these instructions to make Flat Back Fabric Covered Buttons.
2. Apply E6000 to back of Cover Button.

3. Press Earring Post into place and remove any extra Adhesive. On smaller sized Cover buttons center the post, as they increase in size adjust post towards top.

4. Let dry, add Earring Backing/Nut, and enjoy.


5. Tada!

You are done! Wear these adorable Earrings to match or accent your favorite outfit or dress up your favorite t-shirt and jeans for an afternoon outing. Enjoy!
How To Make Fabric Cover Button Jumbo Paper Clip Bookmarks:
Supplies:
Steps:
1. Follow these instructions to make Flat Back Fabric Covered Buttons.

2. Make sure the surfaces of the Cover Button back and Paper Clip gluepad are clean and free of oil.
3. Apply E6000 to back of Cover Button.

4. Press into place over the glue pad on the Paper clip at desired height and remove any extra Adhesive. The bigger the Cover Button the higher you will want to center the cover button.

5. Let dry and enjoy.
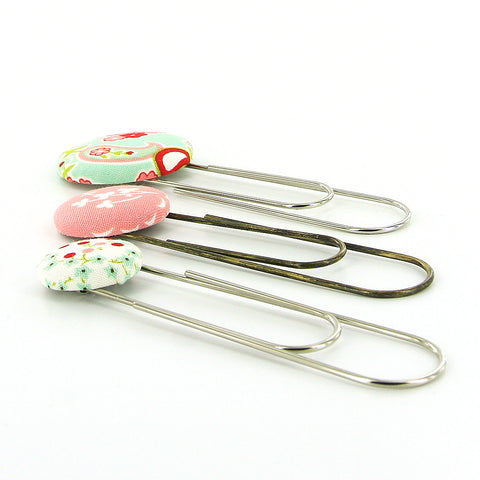
6. Tada!

You are done! Use these adorable Paper Clips to hold your place in your favorite book or cook book. Enjoy!
View Full Tutorial, plus many other great Fabric Cover Button ideas here.
How to Make Cover Button Badge Reels:
Supplies:
Steps:
1. Follow these instructions to make Flat Back Fabric Covered Buttons.

2. Lightly scuff the top of the Badge Reel so glue will adhere better (not essential but recommended).

3. Lightly scuff the back of the Cover Button so glue will adhere better (not essential but recommended).

4. Clean both surfaces of dust.
5. Apply E6000 to back of Cover Button.

6. Press into place over the face of the Badge Reel and remove any extra Adhesive.

7. Let dry and enjoy.

8. Tada!

You are done! Use these adorable Badge Reels to hold your ID for work, school, or play. Enjoy!
View Full Tutorial, plus many other great Fabric Cover Button ideas here.
Who needs some more Antique Brass craft items? Well, I do. Brand New! Antique Brass Key Fob Hardware with Split Rings are now available here in 1" and 1.25".
Check them out! I hope you love them as much as I do!
Key Fob Hardware is simple to use and produces amazing results. Just add your fabric, ribbon, or webbing for an instant, elegant wristlet.
Rubber tipped glass pliers or welding lock grip pliers work great for attaching this hardware. Make sure they are padded or covered with tape to prevent scratching.
You can do it! See how easy it is with one of our step by step tutorials:
Where to buy:
http://ilikebigbuttons.com/collections/key-fob-hardware

Fun & Colorful Snap Clip Barrettes, Embellish Your Hair, Embellish Your World!!!
Check out our Snap Barrette Clips:
2 Inch (50 mm) Barrette Snap Clips with Glue Pads (0.31" - 8mm pad diameter)
Embellish your hair with these adorable Barrettes! Use them as they are or attach cover buttons (size 30 (3/4" - 19 mm) and size 36 (7/8" - 23 mm) work great), bottle caps, or stickers. An adhesive such as E-6000 works great for attaching your crafty items.
These Barrettes are available in the following colors and finishes:
- Silver
- Antique Brass
- Black
- Blue
- Green
- Hot Pink
- Lavender
- Light Blue
- Light Pink
- Orange
- Purple
- Red
- Turquoise
- White
- Yellow
Use your imagination, there are so many possibilities!

One of the most hilarious feedback we have ever received for our KAM Snaps:
"You are seriously the fastest shipper on Etsy. SO AWESOME :) Thank you! I received the Kam pliers and some more snaps today. I'm loving all of it. I want to put snaps on everything - bibs, paci-clips, bags, the dog, the cats lol.
Again, THANK YOU so much for the quick and awesome service!
SuzAnne"
LOL! No problem, it is our pleasure! We love our buyers!!! And we love our snaps too. So many wonderful things to do with them and so many fun colors to choose from, they make us happy too. :)
Happy Snapping!!!
I Like Big Buttons.com
Some of these reasons include:
*A large demand from customers for just 25 snaps to convert or complete a single diaper.
*An equally large demand for "just a sampling of every color", which gave birth to our sets of 10 and Starter Packs.
* More compact, informational packaging that includes instructions about which Die and Rod to use.
25 packs sets came to be largely for cloth diapers. Most customers that replace Velcro on cloth diapers with snaps have numerous diapers in varying colors. Many found purchasing 100 of each color wasteful, as they ended up with 75% of their snaps left over.
We provide the best of both worlds, smaller packs to those that want greater variety and larger packs for those looking to use snaps in bulk.
We carry a variety of package deals for our snaps from 10 sets, 25 sets, 100 sets up to thousands of KAM snaps with and without pliers all at a great price. We have a listing for just about everyone at the price range and quantity you desire.
As always, if you don't see a listing that fits your needs, we are delighted to put a package together that suits you.
Check out our
KAM Snaps selection.
Here is our
chart of available colors, we carry over 120 great colors.
Have a great day!
I Like Big Buttons!
We are constantly expanding our business. If you are wondering where to find us here is our most current list:
Websites:
Store Fronts:
Social Media:
Like us on Facebook and Follow us on Twitter to get our up-to-date news on our latest products and weekly deals.
Thank you for looking!!! Have a great day!
I Like Big Buttons! KAM Snap Color Chart
We carry the largest variety of Size 20 KAM Snap colors in the world with over 120 color choices. We have added more than 60 custom colors to the standard 60 color KAM Snap pallet (B1-B60). We carry snaps to match diapers from bumGenius, Fabrite PUL, gDiapers, and more. Our custom colors fill in the standard color chart gaps with softer yellows, neons, and new metallics!
Here are our Size 20 color charts:
- For a full size color chart, please click here (or save a copy: JPG or PDF).
- For a compact color chart, please click here (or save a copy: JPG or PDF).
We also carry a large selection of KAM Snaps in Size 16 (B1-B60).
Size 16 snaps are commonly used for baby and toddler clothing,
pacifier clips, ribbon, mama pads, and small crafts.
Here are our Size 16 color charts:
- For a full size color chart, please click here (or save a copy: JPG or PDF).
- For a compact color chart, please click here (or save a copy: JPG or PDF).
We carry Size 14, Size 19, and Size 22 snaps in B3 (White) and B5 (Black).
A while back we expanded our inventory to carry Cover Buttons and Cover Button Kits. They drew my eye because of their versatility. These aren't your grandma's fabric covered buttons!
Cover Buttons can still be used to for clothing, but the creative uses are endless:
Cover Buttons are simple to make. Check out our step by step tutorials.
We carry cover buttons in both Flat Back and Wire Back in the following sizes:
As I said before the first crafty thing that caught my eye were KAM snaps. They are so versatile. They can be used anywhere a small button or bit of Velcro would otherwise be placed. They are most commonly used for cloth diapers, bibs, mama pads, and pacifier clips, but why stop there? Use them for interchangeable head bands, fashion bracelets, dog and cat accessories, buttons for kids outfits, unpaper towels. The possibilities are endless!
As the vision for our business expands, so does our product list. We have a variety of package deals for our snaps from 10 sets to thousands of KAM snaps with and without pliers. We have a listing for just about everyone at the price range and quantity you desire.
As always, if you don't see a listing that fits your needs, we are delighted to put a package together that suits you.
Check out our KAM Snaps selection.
Here is our chart of available colors, we carry over 120 great colors.
Have a great day!
I Like Big Buttons!
We are a family run, small business located in beautiful Washington State. We have been serving our customers for over a decade via the internet. Over the years we have carried a range of items: small electronics parts, photography accessories (created by us) and now our latest endeavor, plastic KAM Snaps and crafting supplies. We pride ourselves on providing swift and effective help.
No question is too small! Please feel free to ask any question you have before or after your purchase. We are happy to help. We have several YouTube videos showing how to use our products. The links can be found in our listings.
Please contact us with any questions you have.
Thank you again for visiting our new store front www.ilikebigbuttons.com! Come again!
A letter from the CEO ;)
"I am a busy momma of many. I grew up as many of you probably did, crafting with anything I could get my hands on, from twigs to the pansies in my momma's borders. Now I am raising my own children and watching them create little figurines out of twigs and weeds, and turn paper in to shreds. If you walked through my house on any given day, you might mistake it for a confetti factory. Bits of paper and imagination are everywhere!!! Since I am up to my elbows in diapers and crafts, I thought, why not sell crafty things?
Plastic snaps caught my eye first. My husband is the creator of the GotLux Professional Photographic Lighting Accessories and he uses these very snaps in the upcoming Pro and ProX models. The colors and usefulness of them drew me in. I discovered the many varied ways they can be used; I was hooked.
So here I am selling snaps and many other craft items that I love with the help of my amazing children and husband. I am sure you will find as much joy in crafting with them as I am. Thank you for warmly welcoming us and we hope for a long and joy filled run with you.
Follow us on Twitter as: @ilovebigbuttons
Like us on Facebook at: www.facebook.com/ilovebigbuttons
Visit us at our blog at: ilikebigbuttons.blogspot.com
Follow us on Pinterest at: www.pinterest.com/ilovebigbuttons
Thank you for your interest! Have a great day!
Gena
I Like Big Buttons!"


