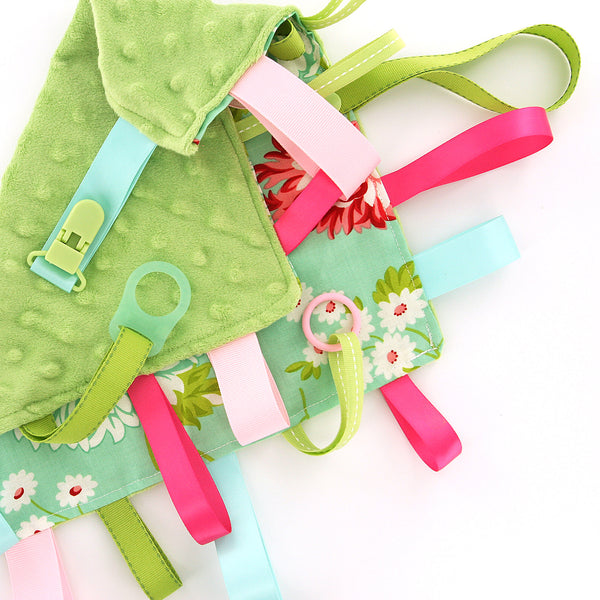
30 Days of Snaps!!! Day #26: How to make a Sensory Ribbon Baby Tag Blanket with KAM Snaps & Pacifier Supplies July 10 2014
Day #26
Making a Sensory Ribbon Baby Tag Blanket with KAM Snaps and Pacifier Supplies
Today I am making a Sensory Ribbon Tag Blanket with BONUS accessories. Use KAM Snaps or a KAM Pacifier Clip to make your blanket attachable or unthrowable :). Add KAM Snaps, MAM Pacifier Rings or Pacifier O-Rings to add a Pacifier holder to your tag blanket. Fun and Functional!!! I used them all :P to show you the different options.
Supplies:
- 2 12″x12″ Pieces of Fabric (1 Cotton and 1 Minky)
- 8x 5″ Piece of Ribbons (mix of Grosgrain and Satin)
- 7x 8" Piece of Ribbons (mix of Grosgrain and Satin)
- 1x 12" Piece of Ribbon
- 1 KAM Snap Set
- KAM Snap Pliers and Awl
- 1 KAM Pacifier Clip
- 1 MAM Pacifier Ring
- 1 Pacifier O-Ring
- Standard Sewing Machine
Instructions:
1. Cut the Fabric and Minky material to 12"x12" squares and cut your mix of ribbon 8 in 5" lengths, 7 in 8" lengths, and 1 in 12" length.
2. Lay out your ribbons in a random pattern, 5 pieces on each side, and some of each length on each side.
3. When you are happy with how it will look, pin each ribbon good sides out, wrong sides together on the the right side of Minky. At this point add the Pacifier Supplies of your choosing, I put 1 of each kind as an example, you can do as many or as few as you like. Also, I left one side of the 12" long ribbon hanging (I pinned it in the middle out of the way) as it will later be attached with a KAM Snap so that it can be opened and closed around a car seat handle or other.
4. Lay the Cotton Fabric right side down on top of the Minky and ribbons.
5. Pin the pieces together.
6. Sew a 1/4" seam around the piece, back stitch at the start, stop sewing about 3-5" or so from completing the square and back stitch again. Leaving a hole so that you can turn the Tag Blanket right side out.
7. Turn the Tag Blanket right side out.
8. The opening will have a couple unattached ribbons.
9. Make sure to push the corners out well so that they are as square as possible.
10. Carefully, fold over and pin the opening closed and the last 2 ribbons in place like so.

11. Stitch all the way around the Tag Blanket with a 1/4" seam allowance, remembering to back stitch at the beginning and end. When I reached the ribbons that hadn't been sewn in earlier, I back stitched over them to give them extra strength.
12. Seal the end of the loose 12" ribbon with a lighter or Chef's Torch. Then use some Fabric Tac to fold the ribbon over and reinforce it where the KAM Snap will be placed.
13. Install the KAM Snap Cap and Stud in the ribbon end.
14. Install the KAM Snap Cap and Socket in the base where the ribbon and blanket overlap.
15. It will look like this and can be snapped to your car seat handle, stroller or other so that your little one won't throw it away. The KAM Pacifier Clip in Meadow Green is another alternative that I added for attaching to your child's clothing or car seat cover for the same benefit.
16. I have added this Tag Blanket to my list of favorite things to make. It is fun, functional, easy to make, and very attractive.


