News
How to make Cover Button Badge Reels with I Like Big Buttons! DIY Kit March 10 2022
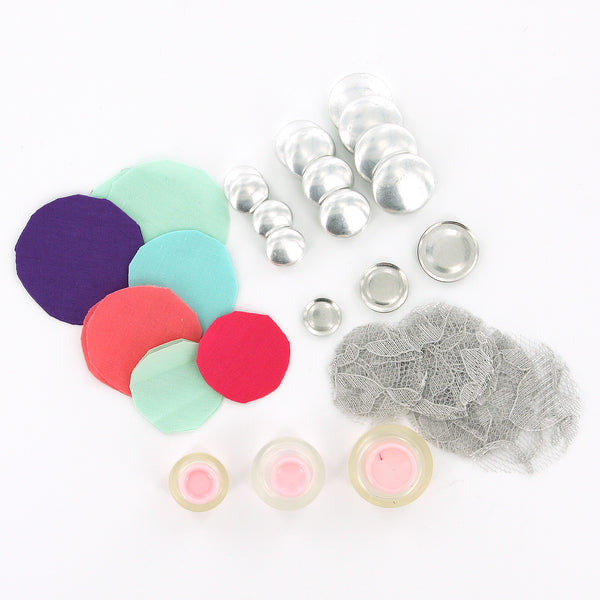
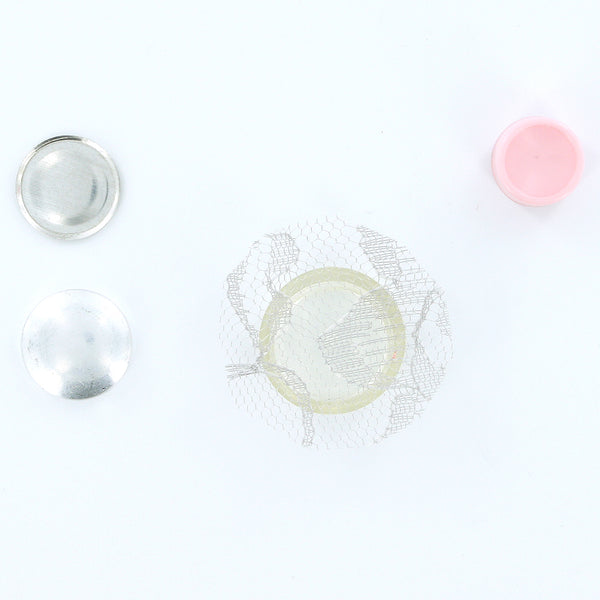
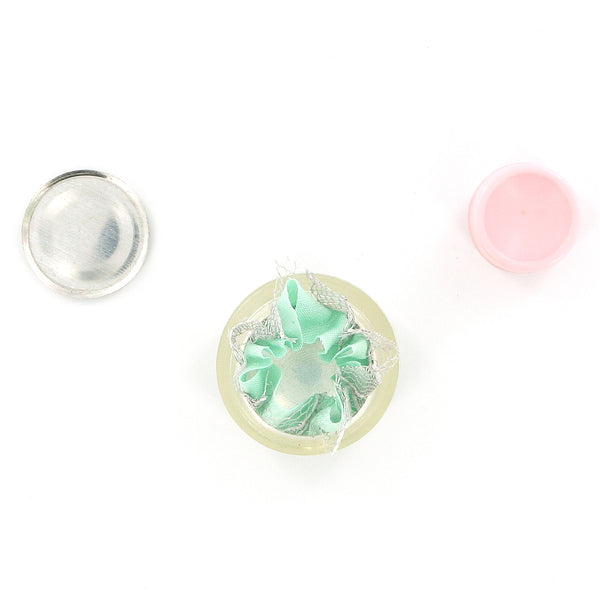
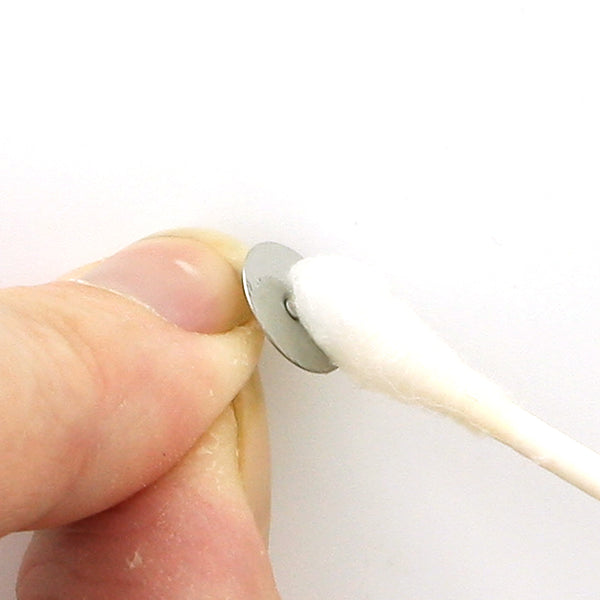
Here is what you will receive a DIY Cover Button Badge Reel KIT from ILikeBigButtons.com. Just a few quick steps to make a fun accent for any nurse, teacher, or work ID or gift for a loved one!
Pack An Order With Us @ ILikeBigButtons.com January 31 2022
I thought you might enjoy a glimpse inside the order preparation and shipping process at ILikeBigButtons.com -- This order was a fun one! 50+ crafty items in a variety of finishes and sizes. Cover Button DIY Kits, Badge Reels, Flat Back Cover Buttons, Template & Tools, Key Fob Hardware, Barrettes & Bobby Pins, & Wire Back Cover Buttons! Oh My! You all like to keep me on my toes!
Shop with confidence!
Where to find us:
- Join our Facebook group!
- Like us on Facebook.
- Visit us on our YouTube Channel.
- Follow us on Pinterest.
- Follow us on Instagram.
- Follow us on Twitter.
Thank you for your interest! Have a great crafty week!
I Like Big Buttons and crew!
How-To Videos for Cover Buttons @ ILikeBigButtons.com January 26 2022
Cover Button Pendant Key Chains @ ILikeBigButtons.com January 20 2022

😍 Cover Button Pendant Key Chains with some of my new fabric. I love how they turned out! 😍
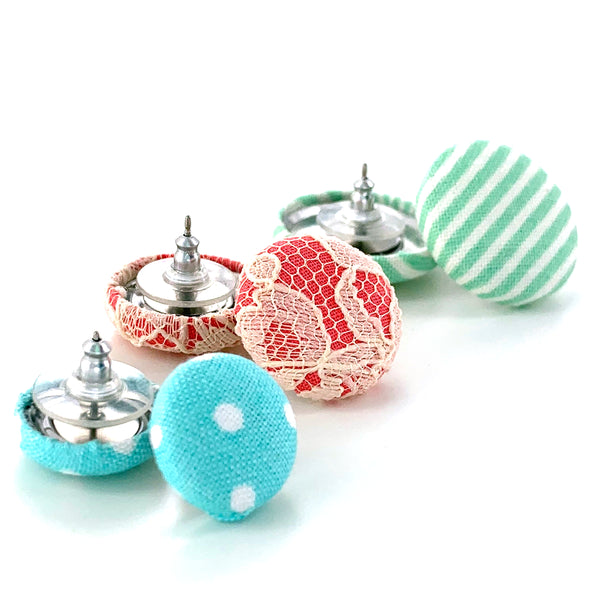
How To Make Fabric Cover Button Earrings @ ILikeBigButtons.com January 10 2022
Assembling fabric covered buttons is easy and fun! ILikeBigButtons.com carries 7 sizes of fabric cover buttons. Our buttons range from 1/2 inch to 1 7/8 inches in diameter. We offer them in both flat back (glueable) and wire back (sewable).
Visit our Cover Button page to see our full selections of Fabric Cover Buttons and tools.
Visit our Earring Supplies page to see our full selection of Earring Posts and Backs.
Check out our Inspiration Board to find a plethora of Tutorials and Ideas for how to use Cover Buttons and Earring Supplies in your crafty projects.
Have a great crafty day,
ILikeBigButtons.com
Have you subscribed to the I Like Big Buttons! newsletter? January 03 2022
Have you read our January I Like Big Buttons! newsletter and checked out our brand new cover button tutorial, exclusive newsletter giveaway, and other great I Like Big Buttons! news?
If you aren't a subscriber yet, here's the LINK to join in on the fun!
* 1 email per month with current sales and bi-monthly email with giveaway or flash sale notification ILikeBigButtons.com.
Christmas Gift Idea #1: Fabric Cover Button Earrings @ ILikeBigButtons.com November 30 2021
Gift idea #1: Cute and super easy to make, these Fabric Cover Button Earrings have great impact and use Fabric Cover Buttons. I made these as gifts for some of my trendy cousins a few Christmases ago and they loved them. Easy to embellish, monogram or personalize and add extra pizzazz to your loved one's attire!
Supplies:
- 2 Completed Flat Back Fabric Cover Button (Choose your size, Size 20 through Size 75 all work great, size depends on the statement you want to make)
- 1 set of Earring Post & Backs
- E6000 or comparable adhesive
Steps:
- Follow these instructions to make Flat Back Fabric Covered Buttons. See More
Pin for Later:
Keeping In Touch With Us @ ILikeBigButtons.com November 17 2021
Make sure you are a member of our Facebook Group !!!
At least once a week, we have a specific item or general sale going on. They will be posted in our --> I Like Big Buttons! Facebook Group <-- when they go live. You can always check our Pinned post in our Group where we list the sales currently going on. Don't forget to turn ON your notifications so you don't miss our latest news and deals.
Missing posts or sales?
Make sure you stay active in the group! Facebook is so huge that often even having your notifications 'on' doesn't always work.
Ways to stay active in I Like Big Buttons Facebook Group:
1) Simply Like or react to the posts in our group
2) Post your relevant I Like Big Buttons! craft projects for us all to enjoy
3) Comment and show support to other members posts in our group
Show Facebook's algorithm you want to see more from I Like Big Buttons! group. The more active you are, the more you will see.
You can also sign up for our I Like Big Buttons! Newsletter to be notified by email of our current sales and latest news.
Sign up TODAY!
Have a great crafty week! I Like Big Buttons and crew!
Crafty Wednesday - Fall-Themed Key Fob Wristlet @ ILikeBigButtons.com November 04 2021
😍 Friend Request! I had a friend request some Fall-themed Key Fob Wristlets. I love how they turned out! 😍
ILikeBigButtons.com Supply List:
- Key Fob Hardware
- Pendant Bezels (Size 36 and Size 60)
- Cover Buttons (Size 36 and Size 60)
- Lobster Clasps
For more Crafty Inspiration, visit our Key Fob Hardware Inspiration Boards.
Key Fob Wristlet with KAM® Plastic Snaps Tutorial @ ILikeBigButtons.com October 18 2021
Thanks to my I Like Big Buttons! Facebook group for help deciding on which color KAM® snap to use on my latest project. I went with G90 - Bright Celery because I love the pop of color that it adds to the project.
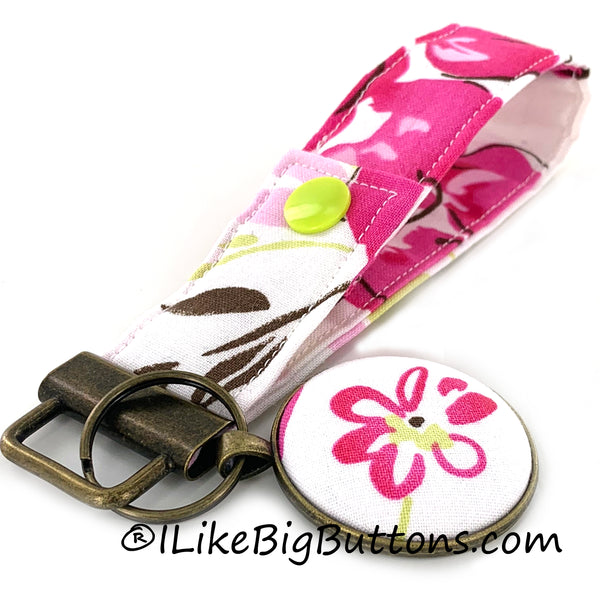
I have been wanting to make a Key Fob Wristlet for a while with a KAM® Plastic Snap accent. Not only does the KAM® Plastic Snap add a bit of pizzazz to my project but it is also functional. I can wear the wristlet on my wrist or snap it to my purse strap for safekeeping. No more digging around in my purse to find my keys.
Supplies:
- 12" x 5" Fabric of your Choosing
- 12″ x 1" Piece of Fusible Fleece or 12" x 5" Fusible Interfacing
- 1 Key Fob Hardware and Split Ring
- Key Fob Hardware Pliers
- Sewing Clips
- Standard Sewing Machine
- Fray Check
- KAM® Plastic Snap
- KAM® Hand Pliers & Awl
- Pendant Bezel Trays in 23 mm (Size 36) or 38 mm (Size 60)
- 1 Completed Flat Back Fabric Cover Button (Attach size 36 (7/8" - 23 mm) or size 60 (1 1/2" - 38 mm) flat back cover buttons.)
- E6000 or comparable adhesive
1. Cut a 12" x 5" section of Fabric of your choosing and 12" x 1" Fusible Fleece.
2. Fold and iron the Fabric in half with the wrong sides together.
3. Unfold and iron the Fabric in half again long sides to the center. Iron Fusible Fleece to the left or right center column of the fabric, depending on how you want to fold it.
4. Fold over and iron about 1/2" of the fabric in on each of the ends so that when you sew your way around the strip you will create a finished edge at each end.
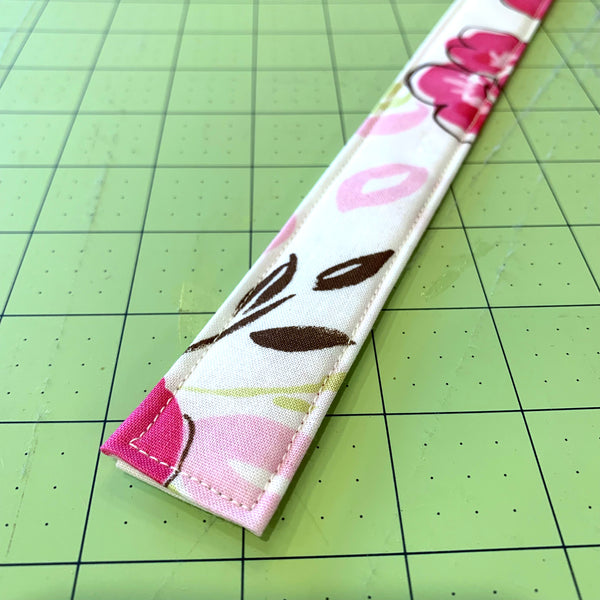
5. Use your Sewing Clips to pin the Wristlet flat. It will look like this when you get done.
6. Stitch along the edge of your Fabric strip, I stitched 1/8" in. Remove the Sewing Clips as you go. Work slowly, keeping close to the edge and as straight of a line as possible.
7. Continue all the way around the band, stitching 1/8" from the edge.

8. Using the Awl, poke a hole through for the snap about 1/2" in from the edge. Do this at each end.
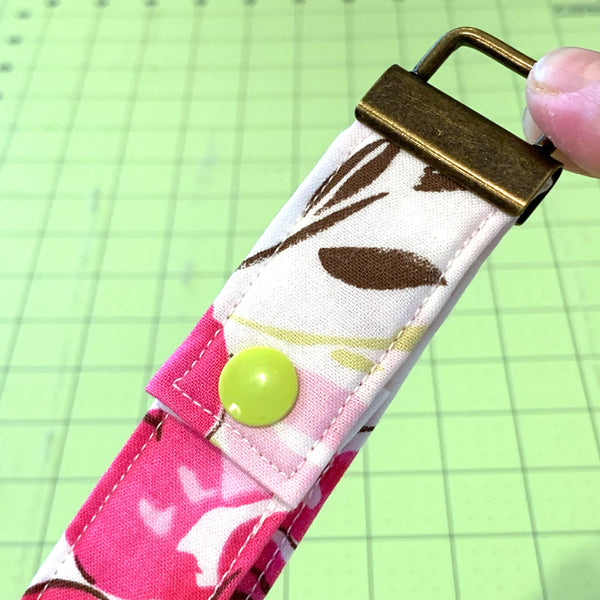
9. Install the KAM plastic snap cap and socket on one end and the other KAM plastic snap cap and stud at the other end. One will be facing up, and one will be facing down so that when they snap together they look like the above picture.
10. Snap KAM plastic snap together and decide where you want the snap on the wristlet. I decided I wanted it to be closer to the Key Fob Hardware than not.
11. Make sure that the Fabric Wristlet is centered. Using Key Fob Hardware Pliers squeeze the Key Fob Hardware closed with gentle pressure. Sometimes, I go back and forth from left to right added a little bit of pressure to each side until it eases together. Our Key Fob Hardware Pliers make this easy to do.
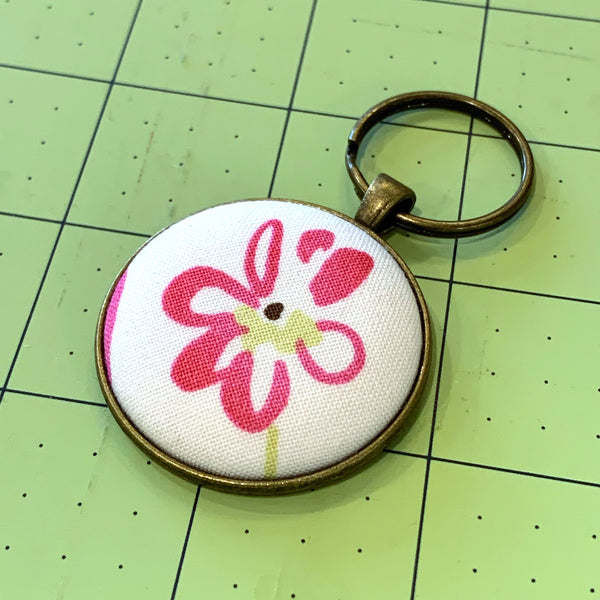
12. I wanted to add an extra bit of embellishment to my Key Fob Wristlet, so I made a quick Cover Button Pendant. Follow these instructions to make Flat Back Fabric Covered Buttons.
13. Carefully apply E6000 to the inside edges of the Pendant Bezel.
14. Press the assembled Fabric Cover Button into place.
15. Let dry for the recommended time, add a necklace or cord as we did, and enjoy.

To see other great Crafty Inspiration ideas, visit our DIY Project section here.
Wednesday Humor @ ILikeBigButtons.com October 13 2021
😂🤣😂
Our Sunset Yellow (B10) KAM Plastic Snap reminds me of brisk, but sunny Fall days and colorful Fall leaves.
If you are not into Sunset Yellow, we carry 9 other shades of yellow and 130+ unique colors of snaps.
Top DIY Craft Project Picks @ ILikeBigButtons.com October 08 2021
😍 These Marvel Key Fob Wristlets are a favorite in the I Like Big Buttons! household. 😍
ILikeBigButtons.com Supply List:
Quick and Easy Gift Idea @ ILikeBigButtons.com October 07 2021
Make these adorable Snap Barrettes to match or accent your loved ones favorite outfit or dress up their favorite t-shirt and jeans for an afternoon outing. Enjoy!
Supplies:
- 1-2 Completed Flat Back Fabric Cover Button (Choose your size, Size 20 through Size 36 all work great, size depends on the statement you want to make)
- 2 Snap Barrettes
- E6000 or comparable adhesive
Steps:
1. Follow these instructions to make Flat Back Fabric Covered Buttons.
2. Lightly scuff the back of the Cover Button so the glue will adhere better (not essential but recommended).
3. Clean both surfaces of dust.
4. Apply E6000 to back of Cover Button.
5. Press Snap Barrette into place and remove any extra Adhesive. On smaller sized Cover buttons center on the glue pad, as they increase in size adjust glue pad accordingly.
6. Let dry and enjoy.
7. Tada!
To see other great Cover Button ideas, visit our DIY Project section here.
Fabric Cover Button Pendant Bezel Necklaces @ ILikeBigButtons.com September 17 2021
I am in 💕 with these Cover Button pendants!!! Aren't they the cutest!?! They add a pop of style and originality to any outfit!
We carry them in handy Cover Button Pendant Bezel Kits with everything you need to get started.
To see other great Pendant Bezel and Cover Button ideas, visit our DIY Project section here.
So many 😍 Key Fob Wristlets @ ILikeBigButtons.com September 01 2021
So many 😍 Key Fob Wristlets.
ILikeBigButtons.com Supply List:
To see other great Key Fob Hardware, Pendant Bezel, and Cover Button ideas, visit our DIY Project section here.
School Must-Haves @ ILikeBigButtons.com August 24 2021
With the school year starting back up, I couldn't resist. 😄
Shop Cover Buttons @ ILikeBigButtons.com
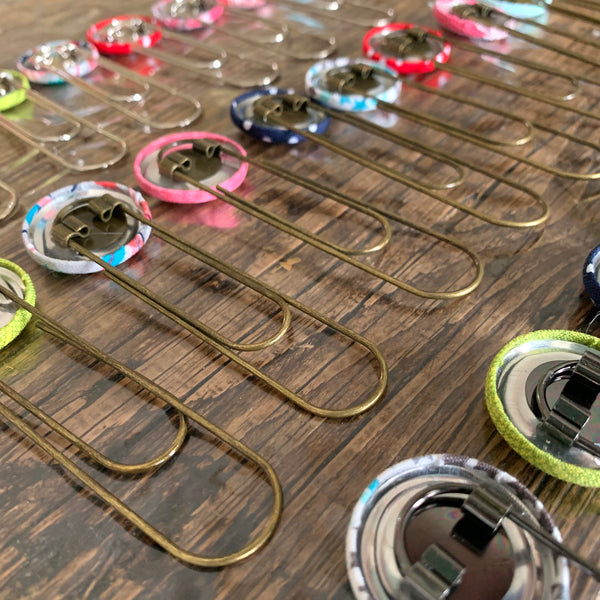
Shop Jumbo Paper Clips @ ILikeBigButtons.com
To see other great Cover Button and Jumbo Paper Clip ideas, visit our DIY Project section here.
Fabric Cover Buttons - Easy Peasy, Beautiful Impact! @ ILikeBigButtons.com August 19 2021
These aren't your grandma's Cover Buttons!!! Well, actually they are 😉 only better, with so many, many great uses for them.
💜 Flat Backs are used for crafts where you would like to glue a cover button: jewelry, bracelets, rings, earrings, necklaces, bobby pins and barrettes, scrapbooking, and much more.
💙 Wire Backs are used for fabric cover buttons in sewing, shoes, clothing, ponytail holders and much, much more.
Here are the 7 sizes we carry. From 1/2", which is about as small as your pinky nail, all the way up to 1 7/8" in diameter, about the size of the round side of a kiwi fruit.
We carry them in both flat back (glueable) and wire back (sewable).
• Size 20 (1/2 inch / 12 mm)
• Size 24 (5/8 inch / 15 mm)
• Size 30 (3/4 inch / 19 mm)
• Size 36 (7/8 inch / 23 mm)
• Size 45 (1 1/8 inch / 28 mm)
• Size 60 (1 1/2 inch / 38 mm)
• Size 75 (1 7/8 inch / 48 mm)
Assembling fabric Cover Buttons is fast and simple. In just seconds, you will have a button ready for your latest craft project.
Inspiration Board: Fabric Cover Buttons
Fabric Cover Button Jumbo Paper Clips @ ILikeBigButtons.com July 13 2021
 I'm in
  with Jumbo Paper Clips and Cover Buttons.
Quick & easy craft with stunning results!
Making Lace & Fabric Cover Button Earrings @ ILikeBigButtons.com June 09 2021
Supplies:
- Flat Back Cover Buttons (I used Size 24, Size 30, and Size 36 Cover Buttons)
- Cover Button Assembly Tools
- Cover Button Templates
- Fabric Scraps
- Lace Scraps
- E6000 Adhesive or Hot Glue
- Sharpie Permanent Marker
- Surgical Stainless Steel Earring Posts and Backs
Instructions:
1. Cut your fabric scrap. You will want a circle that is about twice the diameter of your button blank or use one of our handy Plastic Cover Button Templates.
2. Put your lace piece in the larger assembly tool piece (RIGHT SIDE DOWN). Then, put your fabric piece in the larger assembly tool piece (RIGHT SIDE DOWN). When you look into the tool you want to see the back of the fabric.
3. Place the button front (the domed piece) on top of the fabric. Leave the fabric edges hanging out.
4. Press the Cover Button edges down into the tool.
5. Place the back cover button piece on top of your fabric and button front. If the cover button will be subject to repeated tugging from the back, you may want to add a little e6000 adhesive before attaching the back.
6. Take the smaller piece of the assembly tool and with the open side down place it on the button back.
7. Press down. You may hear a pop when the last bit of the button back slips into place. If you take the tool out and the button is not completely secured, just put it back in and press down again.
8. When you take the small assembly tool piece off, the fabric edges will be secured underneath the button back.
9. Remove the button from the larger assembly tool piece.
10. Tada! First step complete.
11. Lightly scuff the back of the Cover Button so the glue will adhere better (not essential but recommended).

12. Clean both surfaces of dust. I used rubbing alcohol and a cotton swab.
13. Apply E6000 to back of Cover Button or Earring Post.
14. Press Earring Post into place and remove any extra Adhesive. On smaller sized Cover Buttons center the post, as they increase in size adjust post towards top.
15. Let dry, add Earring Backing/Nut, and enjoy.
16. Tada! Lace and Fabric Cover Button Earrings are great a gifts or as products for your shop.
How To Make A Needle Minder/Magnetic Pin Cushion @ ILikeBigButtons.com May 19 2021
I have been working on a lot of crafty projects recently and I needed a few new handy sewing accessories: Fabric Cover Button Needle Minder/Pin Cushion. I love the splash of color they add to my sewing station and their usefulness!
Supplies:
- 1 Completed Size 75 (1 7/8 inch / 48 mm) Fabric Cover Button
- Fabric Of Your Choice
- 1x Standard Round Magnet (Approximately 3/4" Round)
- E6000, Hot Glue, or comparable adhesive
I Like Big Buttons! - Picture Tutorial Below:
1. Cut your fabric scrap. You will want a circle that is about twice the diameter of your button blank. *TIP* Our All-In-One Cover Button Template makes creating the right size circle of fabric a breeze.
2. Put your fabric piece in the larger assembly tool piece (RIGHT SIDE DOWN). When you look into the tool you want to see the back of the fabric.
3. Glue the magnet inside the back of the Cover Button with Hot Glue or E6000.
4. Place the button front (the domed piece) on top of the fabric. Leave the fabric edges hanging out.
5. Press the cover button edges down into the tool. *TIP* To make it easier on my fingers, I use a sharpie marker to apply pressure.
6. Place the back cover button piece on top of your fabric and button front. *TIP* If the cover button will be subject to repeated tugging from the back, you may want to add a little e6000 adhesive before attaching the back.
7. Take the smaller piece of the assembly tool and with the open side down place it on the button back.
8. Press down. You may hear a pop when the last bit of the button back slips into place. If you take the tool out and the button is not completely secured, just put it back in and press down again. *TIP* I often use a flat piece of wood to apply pressure, again to save my fingers. It also helps to avoid the button back going in at an angle.
9. When you take the small assembly tool piece off, the fabric edges will be secured underneath the button back.
9. Remove the button from the larger assembly tool piece.
10. Tada! Now you have an attractive Pin Cushion/Needle Holder for your sewing room.
To see other great Fabric Cover Button ideas, visit our DIY Project section here.
Crafty Friday - Key Fob Wristlet and Key Chain @ ILikeBigButtons.com May 14 2021
😍 Made a WSU Key Fob Wristlet and Key Chain for a friend's daughter today using ILikeBigButtons.com supplies. I love how they turned out! 😍
ILikeBigButtons.com Supply List:
- Key Fob Hardware
- Pendant Bezels (Size 36 and Size 60)
- Cover Buttons (Size 36 and Size 60)
- Lobster Clasps
For more Crafty Inspiration, visit our Key Fob Hardware Inspiration Boards.
Jumbo Paper Clip Size Comparison April 08 2021
From Left to Right - Standard (1.25 Inch), Large (2 Inch), and Jumbo (3.5 Inch)
- Attach size 36 (7/8" - 23 mm), size 45 (1 1/8" - 28 mm), or size 60 (1 1/2" - 38 mm) flat back cover buttons.
- Glue on flat beads, paper punches, charms, gemstones, cabochons, silk flowers, and much more!
- An adhesive such as E-6000 works great for attaching your crafty items.
Courtesy of craftycjaeger Flower Embellished Jumbo Paper Clips

Making Cover Button Paper Clip Bookmarks @ ILikeBigButtons.com April 05 2021
 |
 |
 |
 |
How To Make Fabric Cover Button Jumbo Paper Clip Bookmarks:
Supplies:
- 1 Completed Flat Back Fabric Cover Button (Attach size 36 (7/8" - 23 mm), size 45 (1 1/8" - 28 mm), or size 60 (1 1/2" - 38 mm) flat back cover buttons.)
- 1 Jumbo Paper Clip
- E6000 or comparable adhesive
Instructions:
- Follow these instructions to make Flat Back Fabric Covered Buttons.
- Make sure the surfaces of the Cover Button back and Paper Clip gluepad are clean and free of oil.
- Apply E6000 to the back of the Cover Button.
- Press into place over the glue pad on the Paper clip at the desired height and remove any extra Adhesive. The bigger the Cover Button the higher you will want to center the cover button.
- Let dry and enjoy.
- Tada!
You are done! Use these adorable Paper Clips to hold your place in your favorite book or cookbook. Enjoy!
Making a Fabric Cover Button Metal Pacifier Clip @ ILikeBigButtons.com February 26 2021
 |
 |
 |
 |
 |
 |
 |
 |
 |
 |
 |
 |
 |
 |
 |
 |
 |
 |
 |
 |
 |
 |
 |
 |
 |
||
Supplies:
- 2 KAM Snap Sets
- KAM Snap Pliers and Awl
- Round Faced Metal Clips or Enamel Pacifier Clips
- 1 Size 36 Flat Back Cover Button
- Size 36 Assembly Tool
- Size 36 Template
- Fabric Scraps
- E6000 Adhesive
- Pre-made Pacifier Clips (see Pacifier Clip and Supply Tutorials)
Instructions:
- Using our Pacifier Clip and Supply Tutorials make either Ribbon or Fabric Pacifier Clips.
- Cut your fabric scrap. You will want a circle that is about twice the diameter of your button blank. I cut out a Piece of Fabric using my Size 36 Template.
- Put your fabric piece in the larger assembly tool piece (RIGHT SIDE DOWN). When you look into the tool you want to see the back of the fabric.
- Place the button front (the domed piece) on top of the fabric. Leave the fabric edges hanging out. Double check the transparent underside to see if your print is how you would like it. Then press the cover button fabric edges down into the tool.
- Add a dab of E6000 Adhesive to the middle of the cover button cap before installing the Flat Back.
- Place the back cover button piece on top of your fabric and button front.
- Take the smaller piece of the assembly tool and with the open side down place it on the button back.
- Press down. You may hear a pop when the last bit of the button back slips into place. If you take the tool out and the button is not completely secured, just put it back in and press down again.
- When you take the small assembly tool piece off, the fabric edges will be secured underneath the button back.
- Remove the button from the larger assembly tool piece. Tada! My Cover Button is ready to be adhered to a Round Faced Metal Clip.
- Here are the Cover Buttons I made in just a few minutes. Seriously easy, fun and so cute!
- Now take the E6000 Adhesive and put a medium size dab of glue on the back of the cover button about 1/2 of what would fill the back area of the back. This glue is great to work with so don't overly worry about getting the amount right. I was able to cleanly wipe of any excess off when I put on too much and I was also able to remove the button and add a little more when I under did it. This glue is very forgiving.
- Now place the Cover Button over the Round Faced Metal Pacifier Clips and straighten and center your button.
- Press firmly and let set to dry and cure 24-72 hours as recommended by the manufacturer (E6000).
- These are my finished products. I love them and think they turned out beautifully. Below are my examples, completed and installed on Pacifier Clips.
-
Tada!!!
Disclaimer: Keep in mind that although I have rough tested these I in no way recommend you leave your baby alone with these as there are small pieces and if not done properly they may come apart and become a choking hazard. I would recommend these clips under adult supervision only. The maker and/or parent assumes full responsibility when using these pacifier clips.
Making A Fabric Cover Button Full-Size Clothespin @ ILikeBigButtons.com February 23 2021
 |
 |
 |
 |
 |
 |
 |
 |
 |
How to Make Cover Button Bobby Full-Size Clothespins:
Supplies:
- 1 Completed Flat Back Fabric Cover Button (Attach Size 30 (3/4 inch / 19 mm), Size 36 (7/8 inch / 23 mm), or Size 45 (1 1/8 inch / 28 mm) flat back cover buttons.)
- 1x Full-Size Wooden Clothespin
- 1x Medium Plain Button
- E6000, Hot Glue, or comparable adhesive
Instructions:
- Cut your fabric scrap. You will want a circle that is about twice the diameter of your button blank.
- Put your fabric piece in the larger assembly tool piece (RIGHT SIDE DOWN). When you look into the tool you want to see the back of the fabric.
- Place the button front (the domed piece) on top of the fabric. Leave the fabric edges hanging out.
- Press the cover button edges down into the tool. *TIP* To make it easier on my fingers, I use a sharpie marker to apply pressure.
- Place the back cover button piece on top of your fabric and button front. *TIP* If the cover button will be subject to repeated tugging from the back, you may want to add a little e6000 adhesive before attaching the back.
- Take the smaller piece of the assembly tool and with the open side down place it on the button back.
- Press down. You may hear a pop when the last bit of the button back slips into place. If you take the tool out and the button is not completely secured, just put it back in and press down again. *TIP* I often use a flat piece of wood to apply pressure, again to save my fingers. It also helps to avoid the button back going in at an angle.
- When you take the small assembly tool piece off, the fabric edges will be secured underneath the button back.
- Remove the button from the larger assembly tool piece.
- Tada! Now to attach it to the Clothespin.
- Use Hot Glue or E6000 to adhere a small plain button to the underside of the Cover Button. This is to fill the space between the back and the edges. You can also use felt or some other small object. You just need it to be sturdy enough to offer support. A small plastic button works great for this. You will see that the button is now flush across the bottom. I cut off the little nubs of glue that leaked through the button holes.
- Now adhere the finished Cover Button to the Clothespin. Press into place and center it until you are pleased with the alignment. Set aside to dry.
- Tada! Additional uses:
- Add a thin magnet to the back and use on your magnetic board.
- Add a push pin to the back and use on your cork board.
How To Make A Fabric Cover Button Mini Clothespin
To see other great Fabric Cover Button ideas, visit our DIY Project section here.
Making Fabric Cover Button Bobby Pins @ ILikeBigButtons.com February 19 2021
 |
 |
 |
 |
How to Make Cover Button Bobby Pins:
Supplies:
- 1 Completed Flat Back Fabric Cover Button (Choose your size, Size 20 through Size 45 all work great, size depends on the statement you want to make)
- 1 Bobby Pin
- E6000 or comparable adhesive
Steps:
- Follow these instructions to make Flat Back Fabric Covered Buttons.
- Apply E6000 to back of Cover Button.
- Press Bobby Pin into place and remove any extra Adhesive. On smaller sized Cover buttons center the glue pad, as they increase in size adjust accordingly.
- Let dry and enjoy.
- Tada!
You are done! Wear these adorable Bobby Pins to match or accent your favorite outfit or dress up your favorite t-shirt and jeans for an afternoon outing. Enjoy!
Making Fabric Cover Button Earrings @ ILikeBigButtons.com February 16 2021
 |
 |
|
 |
 |
|
 |
 |
|
How to Make Cover Button Earrings:
Supplies:
- 2 Completed Flat Back Fabric Cover Button (Choose your size, Size 20 through Size 60 all work great, size depends on the statement you want to make)
- 1 set of Earring Post & Backs
- E6000 or comparable adhesive
Steps:
- Follow these instructions to make Flat Back Fabric Covered Buttons.
- Apply E6000 to the back of the Cover Button.
- Press Earring Post into place and remove any extra Adhesive. On smaller sized Cover buttons center the post, as they increase in size adjust the post towards the top.
- Let dry, add Earring Backing/Nut, and enjoy.
- Tada!
You are done! Wear these adorable Earrings to match or accent your favorite outfit or dress up your favorite t-shirt and jeans for an afternoon outing. Enjoy!
Valentine's Day Fabric Cover Button Barrettes @ ILikeBigButtons.com February 11 2021
 |
 |
 |
 |
 |
How to Make Valentine's Day Cover Button Snap Barrettes:
Supplies:
- 1-2 Completed Flat Back Fabric Cover Button (Choose your size, Size 20 through Size 36 all work great, size depends on the statement you want to make)
- 2 Snap Barrettes
- E6000 or comparable adhesive
Steps:
- Follow these instructions to make Flat Back Fabric Covered Buttons.
- Lightly scuff the back of the Cover Button so the glue will adhere better (not essential but recommended).
- Clean both surfaces of dust.
- Apply E6000 to back of Cover Button.
- Press Snap Barrette into place and remove any extra Adhesive. On smaller sized Cover buttons center on the glue pad, as they increase in size adjust glue pad accordingly.
- Let dry and enjoy.
- Tada!
You are done! Wear these adorable Snap Barrettes to match or accent your favorite outfit for Valentine's Day or dress up your favorite t-shirt and jeans for an afternoon outing. Enjoy!
Valentine's Cover Button Jumbo Paper Clip Bookmarks @ ILikeBigButtons.com February 10 2021
 |
 |
 |
 |
 |
 |
 |
|
Valentine's Day Fabric Cover Button Jumbo Paper Clip Bookmarks:
Supplies:
- 1 Completed Flat Back Fabric Cover Button (Attach size 36 (7/8" - 23 mm), size 45 (1 1/8" - 28 mm), or size 60 (1 1/2" - 38 mm) flat back cover buttons.)
- 1 Jumbo Paper Clip
- 1 6" Piece of Ribbon
- E6000 or comparable adhesive
Steps:
- Follow these instructions to make Flat Back Fabric Covered Buttons.
- Make sure the surfaces of the Cover Button back and Paper Clip gluepad are clean and free of oil.
- Apply E6000 to the back of the Cover Button.
- Press into place over the glue pad on the Paper clip at the desired height and remove any extra Adhesive. The bigger the Cover Button the higher you will want to center the cover button.
- Cut a 6" piece of Ribbon and knot it on the side of the Paper Clip. Slide it up against the Cover Button. Straighten and cut ends at an angle at the desired length.
- Let dry and enjoy.
- Tada!
You are done! Use these adorable Paper Clips to accent a Valentine for your special loved one or hold your place in your favorite book or cookbook. Enjoy!
Making Magnetic Pin Cushion/Needle Holder @ ILikeBigButtons.com February 08 2021
Supplies:
- 1 Completed Size 75 (1 7/8 inch / 48 mm) Fabric Cover Button
- Fabric Of Your Choice
- 1x Standard Round Magnet (Approximately 3/4" Round)
- E6000, Hot Glue, or comparable adhesive
I Like Big Buttons! - Picture Tutorial Below:
1. Cut your fabric scrap. You will want a circle that is about twice the diameter of your button blank. *TIP* Our All-In-One Cover Button Template makes creating the right size circle of fabric a breeze.
2. Put your fabric piece in the larger assembly tool piece (RIGHT SIDE DOWN). When you look into the tool you want to see the back of the fabric.
3. Glue the magnet inside the back of the Cover Button with Hot Glue or E6000.
4. Place the button front (the domed piece) on top of the fabric. Leave the fabric edges hanging out.
5. Press the cover button edges down into the tool. *TIP* To make it easier on my fingers, I use a sharpie marker to apply pressure.
6. Place the back cover button piece on top of your fabric and button front. *TIP* If the cover button will be subject to repeated tugging from the back, you may want to add a little e6000 adhesive before attaching the back.
7. Take the smaller piece of the assembly tool and with the open side down place it on the button back.
8. Press down. You may hear a pop when the last bit of the button back slips into place. If you take the tool out and the button is not completely secured, just put it back in and press down again. *TIP* I often use a flat piece of wood to apply pressure, again to save my fingers. It also helps to avoid the button back going in at an angle.
9. When you take the small assembly tool piece off, the fabric edges will be secured underneath the button back.
9. Remove the button from the larger assembly tool piece.
10. Tada! Now you have an attractive Pin Cushion/Needle Holder for your sewing room.
To see other great Fabric Cover Button ideas, visit our DIY Project section here.
How to Make Fabric Cover Buttons @ ILikeBigButtons.com February 02 2021
 |
 |
 |
 |
 |
 |
 |
 |
 |
 |
 |
 |
 |
 |
 |
How to Make Fabric Cover Buttons:
Cover Buttons are easy to assemble:
- Cut your fabric scrap. You will want a circle that is about twice the diameter of your button blank.
- Put your fabric piece in the larger assembly tool piece (RIGHT SIDE DOWN). When you look into the tool you want to see the back of the fabric.
- Place the button front (the domed piece) on top of the fabric. Leave the fabric edges hanging out.
- Press the cover button edges down into the tool.
- Place the back cover button piece on top of your fabric and button front. If the cover button will be subject to repeated tugging from the back, you may want to add a little e6000 adhesive before attaching the back.
- Take the smaller piece of the assembly tool and with the open side down place it on the button back.
- Press down. You may hear a pop when the last bit of the button back slips into place. If you take the tool out and the button is not completely secured, just put it back in and press down again.
- When you take the small assembly tool piece off, the fabric edges will be secured underneath the button back.
- Remove the button from the larger assembly tool piece.
- Tada!
To see other great Fabric Cover Button ideas, visit our DIY Project section here.
Christmas Gift Idea: Lace & Fabric Cover Button Earrings December 08 2020
Supplies:
- Flat Back Cover Buttons (I used Size 24, Size 30, and Size 36 Cover Buttons)
- Cover Button Assembly Tools
- Cover Button Templates
- Fabric Scraps
- Lace Scraps
- E6000 Adhesive or Hot Glue
- Sharpie Permanent Marker
- Stainless Steel Earring Posts and Backs
Instructions:
- Cut your fabric scrap. You will want a circle that is about twice the diameter of your button blank or use one of our handy Plastic Cover Button Templates.
- Put your lace piece in the larger assembly tool piece (RIGHT SIDE DOWN). Then, put your fabric piece in the larger assembly tool piece (RIGHT SIDE DOWN). When you look into the tool you want to see the back of the fabric.
- Place the button front (the domed piece) on top of the fabric. Leave the fabric edges hanging out.
- Press the Cover Button edges down into the tool.
- Place the back cover button piece on top of your fabric and button front. If the cover button will be subject to repeated tugging from the back, you may want to add a little e6000 adhesive before attaching the back.
- Take the smaller piece of the assembly tool and with the open side down place it on the button back.
- Press down. You may hear a pop when the last bit of the button back slips into place. If you take the tool out and the button is not completely secured, just put it back in and press down again.
- When you take the small assembly tool piece off, the fabric edges will be secured underneath the button back.
- Remove the button from the larger assembly tool piece.
- Tada! First step complete.
- Lightly scuff the back of the Cover Button so the glue will adhere better (not essential but recommended).
- Clean both surfaces of dust. I used rubbing alcohol and a cotton swab.
- Apply e6000 to back of Cover Button or Earring Post.
- Press Earring Post into place and remove any extra Adhesive. On smaller sized Cover Buttons center the post, as they increase in size adjust post towards top.
- Let dry, add Earring Backing/Nut and enjoy.
- Tada! You could also make the Cover Button Clip Ons Earrings and these are great a gifts or as products for your shop.
🌺 Cabochon Push Pin Kits and Cover Button Push Pin Kits 🌺 @ ILikeBigButtons.com September 01 2020

DIY Cherry Blossom Cabochons Push Pins/Thumb Tacks KIT (22 mm) - Makes 10

DIY Size 30 (3/4" (19 mm) Covered Button Push Pins/Thumb Tacks KIT - Makes 10
If you are looking for a super easy, fun, and impactful craft project, these decorative push pins are for you and just in time for the beginning of school.
Using our Cabochon DIY Push Pin Kit or Cover Button DIY Push Pin Kit, you can make these message or corkboard accessories that are super cute and well-received without much effort.
Place a small dab of E-6000 or a comparable adhesive on the metal circle glue pad on the push pins. Then simply press the flower cabochon or completed cover button into place and center it. Allow to dry for the recommended amount of time per adhesive's directions and enjoy!
The hardest part is waiting for the glue to dry. 😜
To see other great DIY STARTER KIT options, visit our DIY KITS section here.
Yes, ILikeBigButtons.com OPEN and Shipping! March 18 2020
Yes, I Like Buttons! OPEN and Shipping!
We have gotten a few questions about if we are open and shipping during this time. The answer is YES! We are all healthy and safely tucked at home as we practice social distancing.
I Like Big Buttons! is a completely e-commerce based, family-run business. Since we don't have a physical storefront, we are able to continue our operations as usual. All our items are in stock and ready to ship. Items purchased before 3 pm PT will go out the next business day via our USPS scheduled morning pickup.
My presence on social media may slow, and I ask for your patience with that. I have just become a full-time homeschooling mom for the next 6 weeks, on top of my responsibilities at I Like Big Buttons!, being a full-time wife, and a full-time momma. As many of you know, I am a momma of many, which means lots of "Mom, Mom, Mom!" as the day goes long. Lots of "How do I do this?" and "What am I supposed to do next?" Our school district has been amazing and was able to send all my kiddos home with lots of work, both online and in packet form, to keep them active.
For support or product questions, please contact us at support@ilikebigbuttons.com. We check our email support constantly, but may only get to our social media pages a few times a day. Facebook doesn't always notify us that you have asked a question, so we may not see it in a timely manner.
Thank you,
Gena
ILikeBigButtons.com
Size 24 (5/8 inch / 15 mm) Self Cover Buttons by ILikeBigButtons.com February 26 2020
We love our Cover Buttons! Easy to make and versatile they are one of my favorite go-to craft supplies.
We carry them in 7 great sizes. The second smallest, Size 24 (5/8"), is just slightly larger in diameter than a Skittle or M&M and available in both Wire Back (sewable) and Flat Back (glueable).
Size 24 (5/8 inch / 15 mm)
Size Reference
I Like Big Buttons! 💘 Cover Button Love Sale 💘
Cover Button Sets and Cover Button DIY Kits are 10% OFF | No Coupon Necessary
Size 24 Cover Buttons are great for smaller projects:
Lace & Fabric Cover Button Earrings
Fabric Cover Button Mini Clothespins
Fabric Cover Button Bobby Pins
Fabric Cover Buttons for your favorite outfit
To see other great Fabric Cover Button ideas, visit our DIY Project section here.
How To Make A Self Fabric Cover Button: 7 Fabric Cover Button Sizes February 21 2020
Easy Peasy! So Much Fun!
Cover Button Tips:
- The size of the fabric circle for each Cover Button size should be approximately twice the diameter of your button blank. If you would like a matching sized reusable plastic circle template, simply choose "Add Template" from the drop-down menu and the correct sized tool will be added to your order.
- When the circle of fabric and Cover Button Cap are snugly situated in the clear base of the Cover Button tool, flip the tool over and double-check the positioning of your fabric. If it has a pattern, you will see a preview of how the button will form and can make adjustments to the fabric before you install the back.
- You may want to add a dab of E6000 or comparable adhesive before installing the Cover Button Back as a precaution to ensure a permanent hold.
- Save your fingers: Tip #1 - Use the backside of a permanent marker or comparable item on the smaller sized Cover Button Caps to press them into the clear base of the Cover Button tool.
- Save your fingers: Tip #2 - Take a flat piece of wood and use it to apply even downward pressure on the pink plunger of the Cover Button installation tool when installing the back. Not so much pressure that you flatten the button, just until it pops into place.
- To remove the Cover Button from the clear base once it has been formed, bend the mold slightly and push up from the bottom to pop out the button.


