News
Reusable Snack Bag Tutorial - Courtesy of Nap-Time Creations and I Like Big Buttons! KAM Plastic Snaps June 09 2016
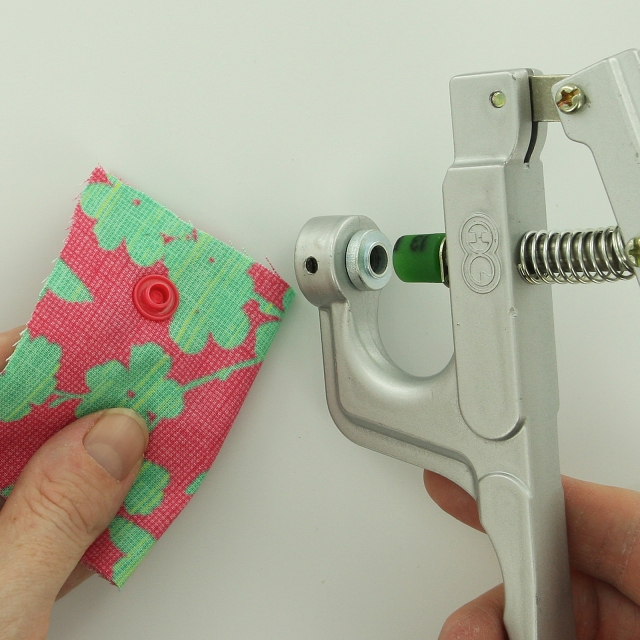
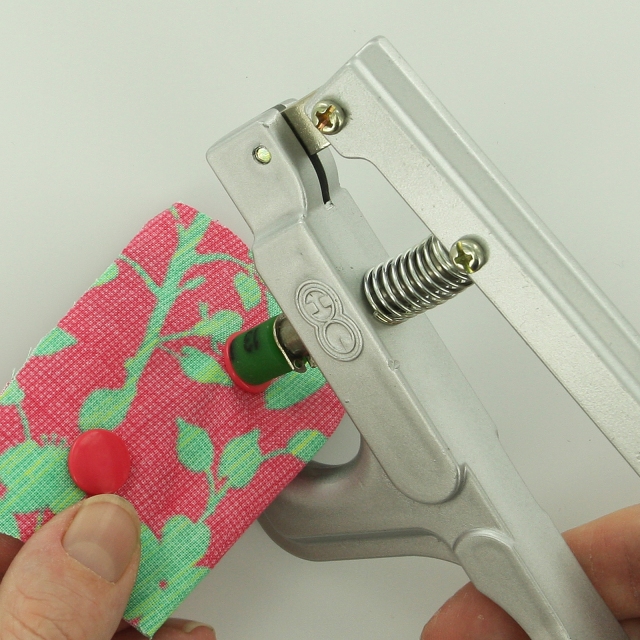
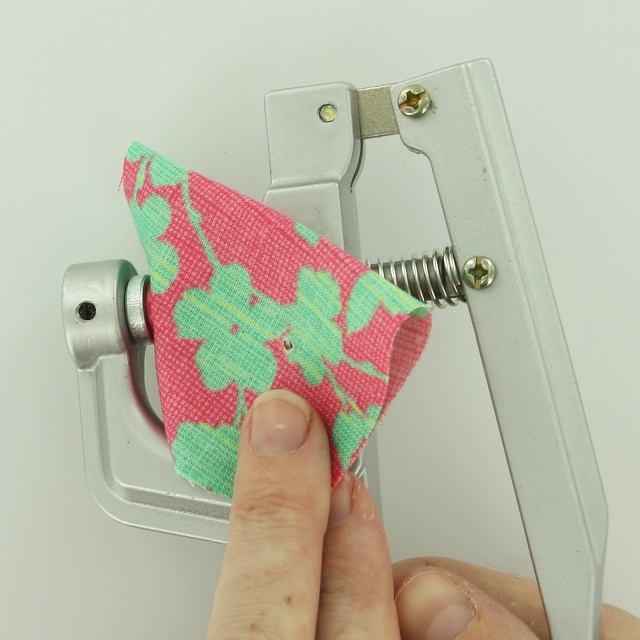
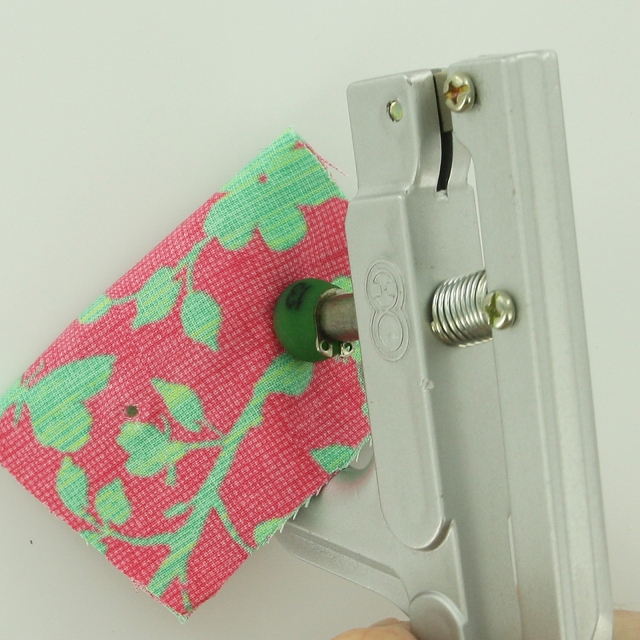
A while back, Emily of Nap-Time Creations made this adorable Snack Bag and shared how she did it with us. I thought this would be a great time to revisit the tutorial with a busy summer of outings ahead of us.
Supplies:
- Laminated/plastic fabric for the inside*
- Fabric of your choice for the outside
- 1 KAM Snap Set
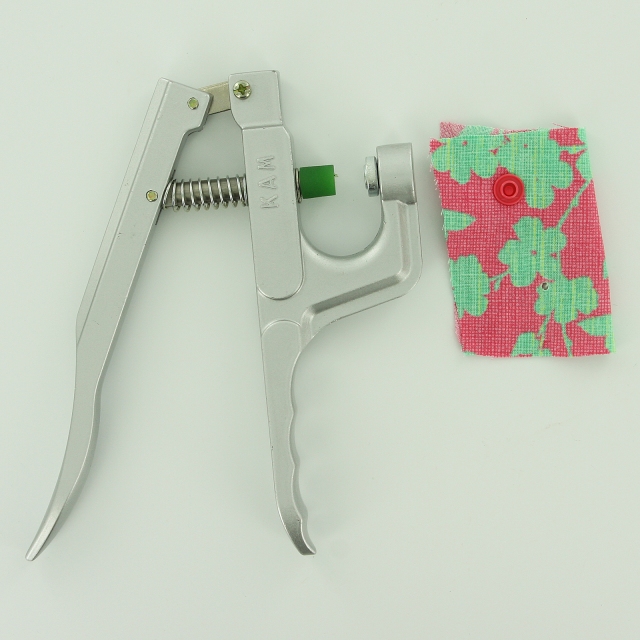
- KAM Snap Pliers and Awl
- Standard Sewing Machine
- Snack Bag - Full Tutorial
*Small size snack pack: cut 1 of laminate and 1 of regular fabric 12 1/2 x 4 1/2
**Large size reusable snack pack: cut 1 of laminate and 1 of regular fabric 5 1/2 x 16
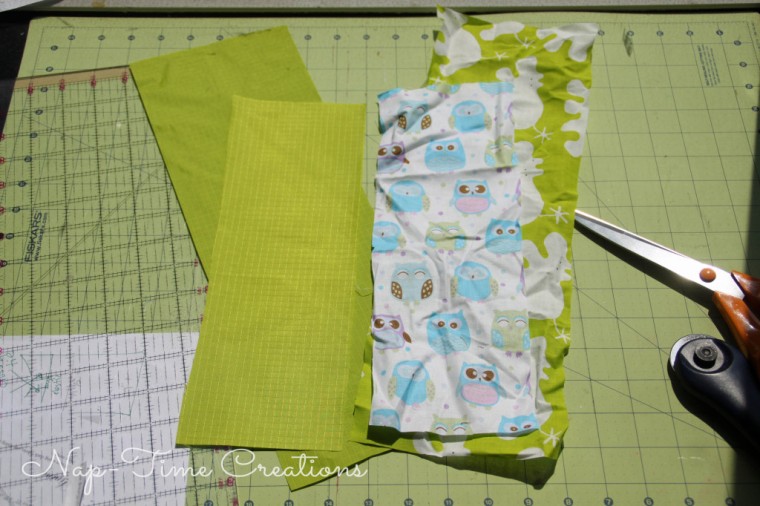
Instructions:
- Place the fabric right sides together and sew along the two long sides and one of the short sides. Leave one end open to turn ...
To read the rest of the Tutorial, go here.
Bandana Bib with KAM Snaps and a PDF Pattern June 07 2016
One of our most popular tutorials, Bandana Bibs are a great gift for those little droolers and mess makers in your life or as an outfit accessory. So cute! I, also, used our Heart Shaped KAM Snaps for added pizazz, check it out!
Just 6 days left in our KAM Snaps Heart and Star Starter Pack Kit with Pliers (Approximately 1000 Sets)!?! (A $90.00 value) Don't forget to ENTER:
Also, if you don’t want to wait, you can get 10% off our Heart Snaps on our website: HEART10
Or 10% off our Star Snaps on our website: STAR10
#ilikebigbuttons #giveaway #win #kamsnaps #snappress #bandanabib #tutorial
Supplies:
- Fabrics of your choice
- 1 Heart Shaped KAM Snap Set
- KAM Snap Pliers and Awl
- Bandana Bib PDF Pattern (may need to adjust for your child's size or add more KAM Snaps settings)
- Standard Sewing Machine
Instructions:
1. Download the Bandana Bib PDF Pattern. Print out the pattern making sure the 1″ square in the corner measures 1″ square when printed that will indicate the pattern is the right size.
2. Cut out the pattern.
3. Place your pattern, with long straight side on fabric folded in half, and pin in place.
4. Cut the 2 pieces of Fabric you will use.
5. Place Fabrics right sides together.
6. Pin together.
7. Sew pieces together with a 1/4" seam allowance, back stitching at the start and finish of sewing, make sure to leave a 3-4" gap so that you can pull the piece right side out.
8. Pull piece right side out and make sure to push all the round and square corners out until they lay flat.
9. Fold in the opening's seams and pin in place.
10. Stitch a finish stitch 1/8" to 1/4" all the way around the bib, making sure to ease your way around the left and right tabs. I do a couple stitches, stop, then lift the foot, turn the fabric slightly, put the foot down, and do a couple more stitches and repeat. Make sure the back stitch at the beginning and end of your sewing.
11. Use the template to mark the KAM Snap placement, you many want to check the measurement of your child's neck and adjust the pattern or snap placement accordingly. This bib worked for a toddler but with an extra set of snaps can work for more sizes.
12. I decided as I was getting ready to install the KAM Snaps to go with our new Heart Shaped snaps. Install the Heart Shaped KAM Snap Cap and Stud in the left and a Cap and Socket on the right tab.
13. Interested in Heart Shaped KAM Snaps, check out our great 25 colors, in smaller package quantities for more great variety!
14. Totally cute, don't you think! ;) Happy Snapping!!!
Smart Phone Case and Wristlet with KAM Snaps and Key Fob Hardware May 31 2016
Today's inspiration came to me as I was packing the kids up for a walk down the road to the neighbors to check out their yard sale and visit. I thought I wish I had a case for my iPhone and a place to put a couple "just in case" dollars but instead, I held my phone and tucked the money into my bra :P and headed out with all the kiddos in tow. When I got home, I whipped this up. I am prepared for next time :).
Supplies:
- Fabric or Fabrics of your choice
- Interfacing
- 2x 10" Piece of 1″ Cotton Webbing
- 2x 10″ Piece of Ribbon
- 1 KAM Snap Set
- KAM Snap Pliers and Awl
- 1 Key Fob Hardware and Split Ring
- Smart Phone Case PDF Pattern (works for iPhone 4s and iphone 5, may need to adjust the pattern for other models of phones)
- Standard Sewing Machine and Iron
Instructions:
1. Download the Smart Phone Case PDF Pattern. Print out the pattern making sure the 1″ square in the corner measures 1″ square when printed that will indicate the pattern is the right size.
2. Cut out each Pattern piece as many times as instructed.
3. You will end up with:
2 pieces of Fabric/1 Interfacing (back)
2 pieces of Fabric/1 Interfacing (front)
2 piece of Fabric/1 Interfacing (pocket)
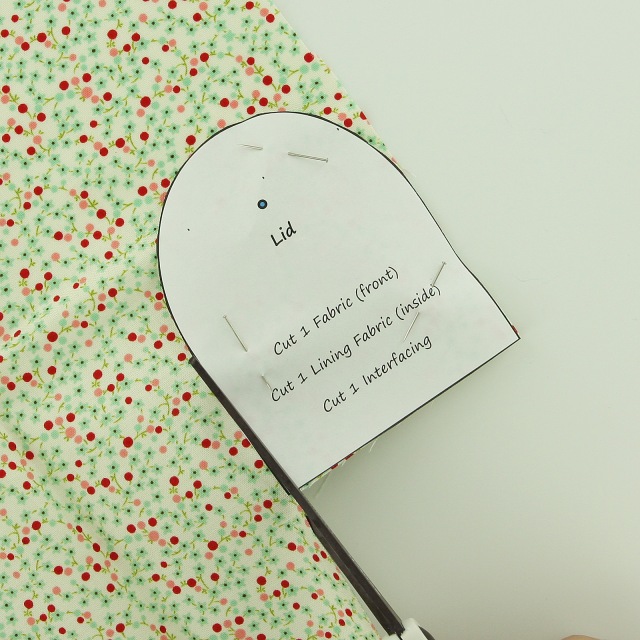
2 pieces of Fabric/1 Interfacing (lid)
4. Iron the Interfacing onto a piece of Fabric for matching side making sure to iron it to the wrong side of the Fabric.
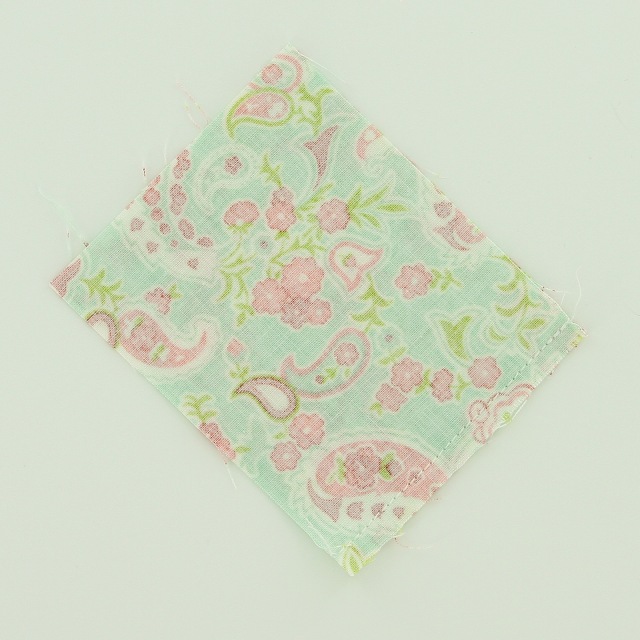
5. Place right sides of Fabric for Pocket together and sew 1/4" seam along the top of the piece.
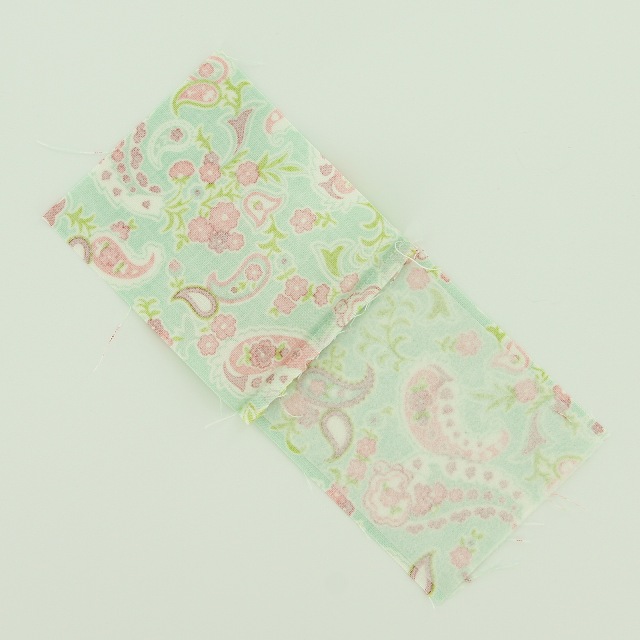
6. Iron Fabric for the Pocket open and then over wrong sides together forming the Pocket face.
7. Take 1 of the 10" pieces of Ribbon and 1" Cotton Webbing and sew them together. I stitched a straight line as close to the edge as possible on the Ribbon.
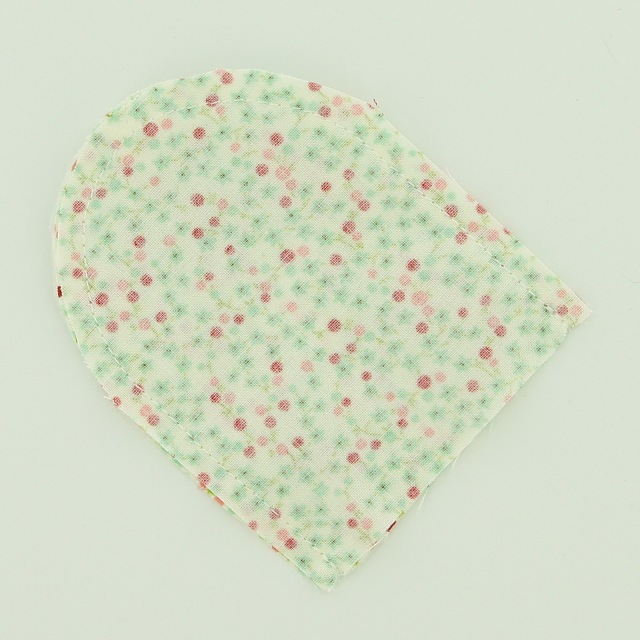
8. Take the 2 pieces of Fabric for the Lid/Lip of the case, put them right side together, and sew them with a 1/4" allowance.
9. Turn the Lid right side out and iron flat.
10. Then take the Fabric (right side up), I am using more of those recycled holey jeans :), that will be the Back and place the Cotton Webbing/Ribbon strip (right side up) centered across it with just a bit of it hanging off the top edge.
11. Place the internal Back Fabric wrong side up.
12. Pin them together.
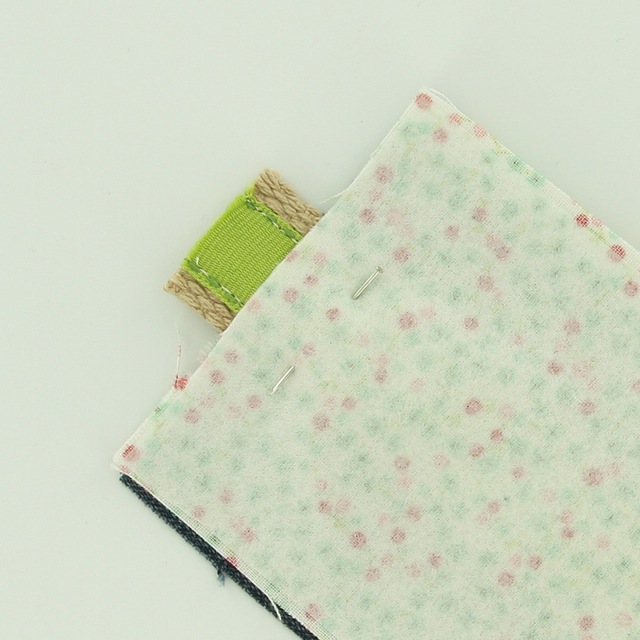
13. Stitch a 1/4" seam along the piece, back stitching to reinforce Cotton Webbing/Ribbon strip. Cut away some of the excess Cotton Webbing/Ribbon if needed.
14. Iron back the Fabric and fold over, wrong sides together. Now stitch a 1/4" seam allowance across the top of the Back piece.
15. Now slide the Split Ring from the Key Fob Hardware on the Cotton Webbing/Ribbon Strip.
16. Now leave about 1" to 1 1/2" overlapped Cotton Webbing above the Back of the Case and pin the Cotton Webbing/Ribbon centered down the back of the Fabric.
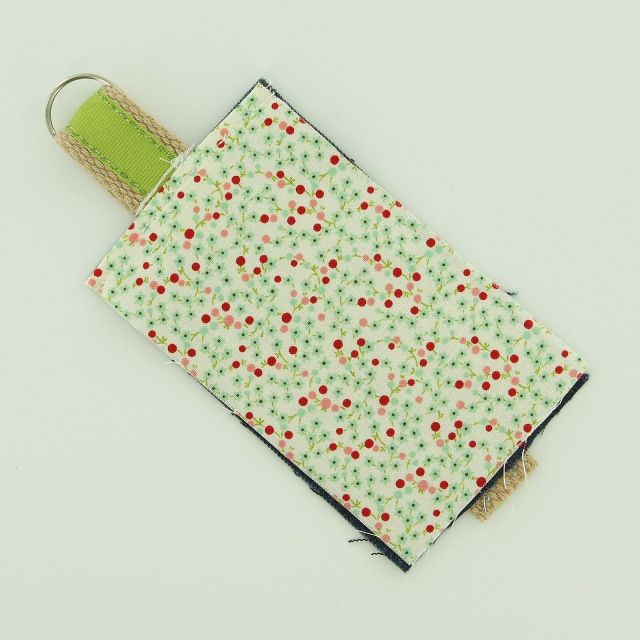
17. Now stitch it in place down the back, with the internal Back out of the way, not as pictured, and I also stitched along the Cotton Webbing/Ribbon to gather the loop.
18. It will look like this.
19. Center the Lid along the back, pin and sew with a 1/4" seam allowance. This maybe should have been done a couple steps sooner so that I didn't have 2 stitch lines across the Back but I was when I got to it.
20. Place the finished Front down right side up, I added a 1/4" top stitch to the top of each piece (Front, Pocket and Back).
21. Add the Pocket right side up.
22. Place the Back wrong side up and pin it all together.
23. Sew a 1/4" seam allowance all the way around making sure to back stitch at the beginning and end.
24. Turn the whole thing right side out and push the corners out to get them as square as possible.
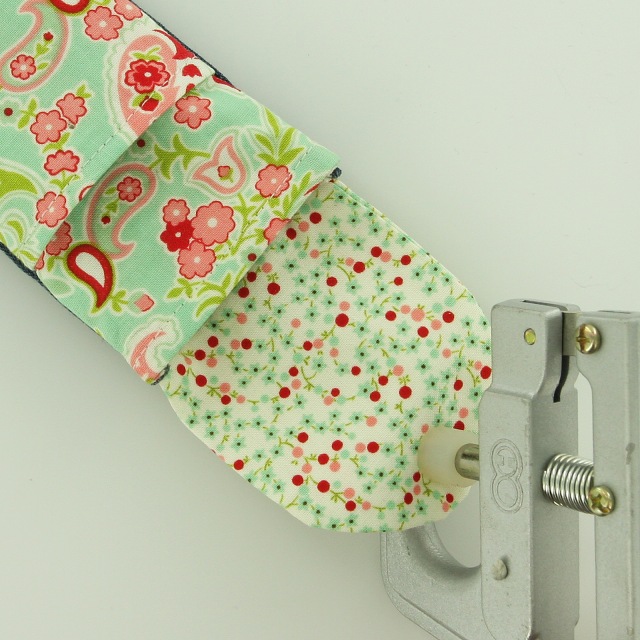
25. Install the KAM Snap Cap and Socket in the Pocket.
26. Install the KAM Snap Cap and Stud in the Lid.
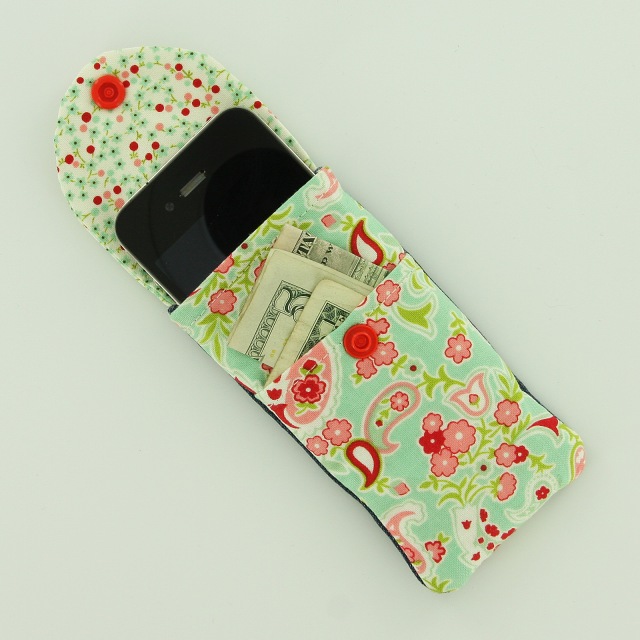
27. What it looks like with KAM Snaps installed.
28. This pattern will work with iPhone 4 or iPhone 5, you may need to adjust the pattern somewhat if you have a different model.
29. Snapped closed.
30. Add a Wristlet to complete your project. Check out our Key Fob Hardware Wristlet Tutorials to see how to make our Cotton Webbing and Ribbon Wristlets.
Making a “No Sew” Leash for a Toddler Cup with KAM Snaps May 26 2016
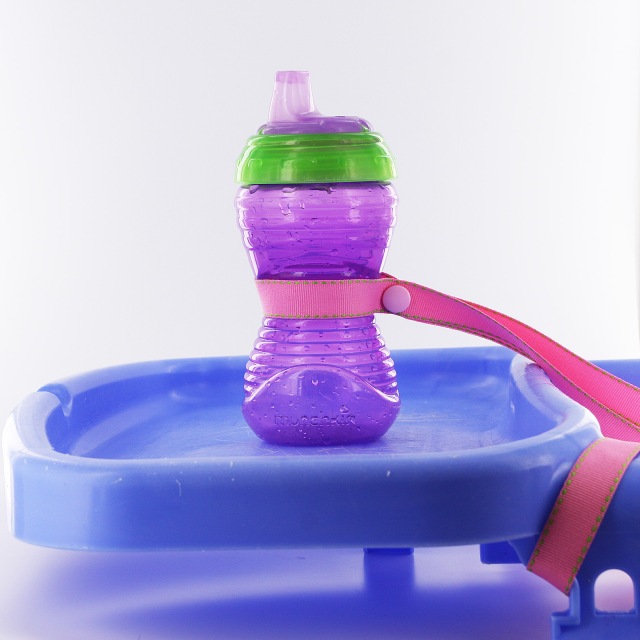
A while back, I tackled making a Leash for a toddler cup. My toddlers love to chuck food, cups, dishes, toys, you name it they will throw it from their highchair. KAM Snaps to the rescue!
With a couple minutes and a few supplies, you can make this handy Leash and eliminate a least one thing from flying through the air.
Supplies:
- 4-5' of Grosgrain Ribbon
- 3 KAM Snap Sets
- KAM Snap Pliers and Awl
- Lighter or Chef's Torch
Instructions:
1. Measure off a piece of Grosgrain ribbon that is long enough to wrap around both the arms of the high chair, around the cup and enough length for your child to lift the cup to their mouth comfortably. I went with 5' but 4 1/2' would have been enough.
2. The ribbon I was using was made of polyester so I used a lighter to seal the ends of the ribbon so it doesn't fray. (If you are unsure, you may want to practice on a scrap piece if this is your first time or you are unsure of the what the material is made of.)
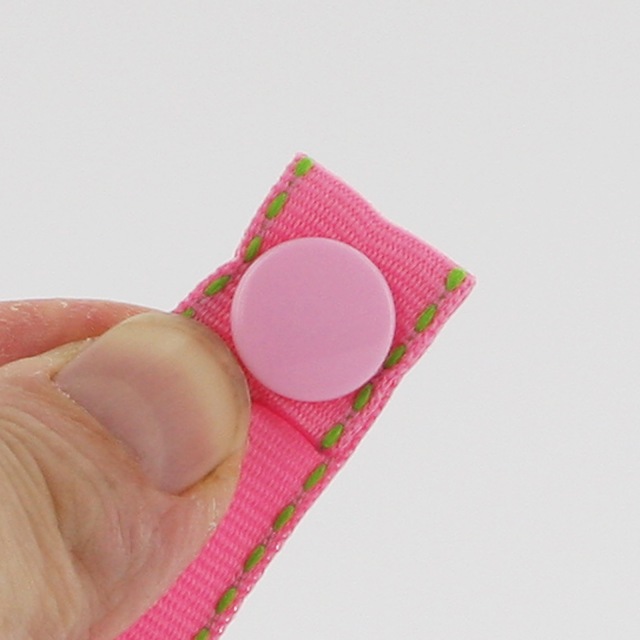
3. To make the ends more secure and long lasting, I folded the ribbon over about 1/2" to help reinforce the ends and pushed the cap through.
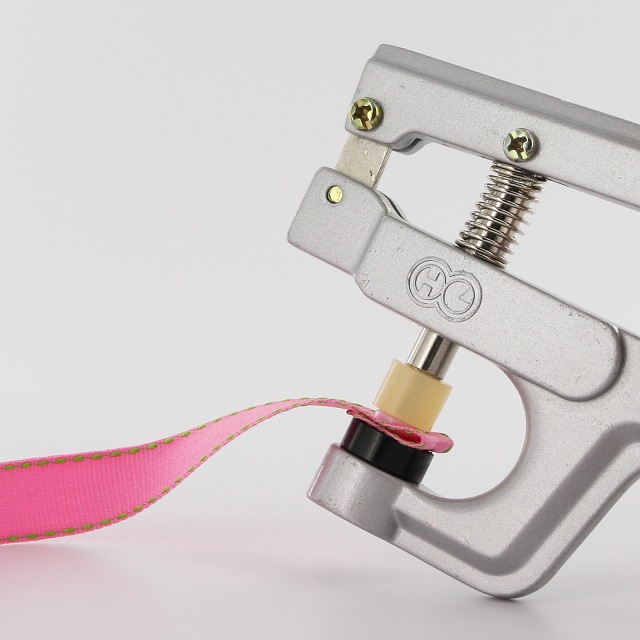
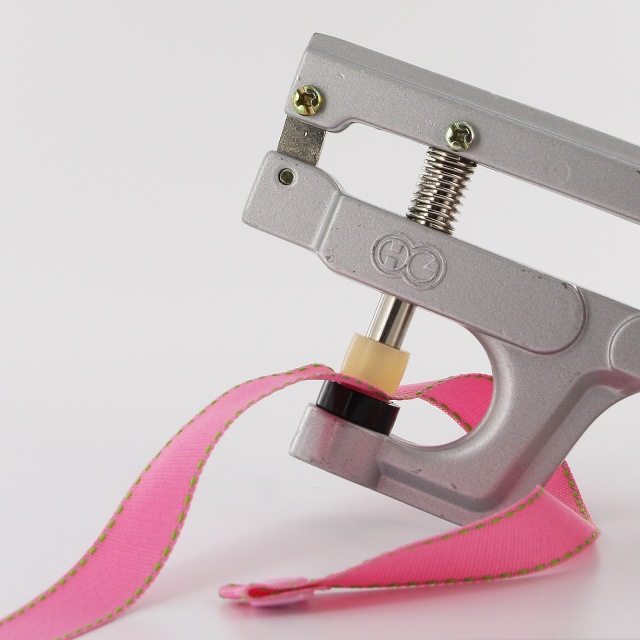
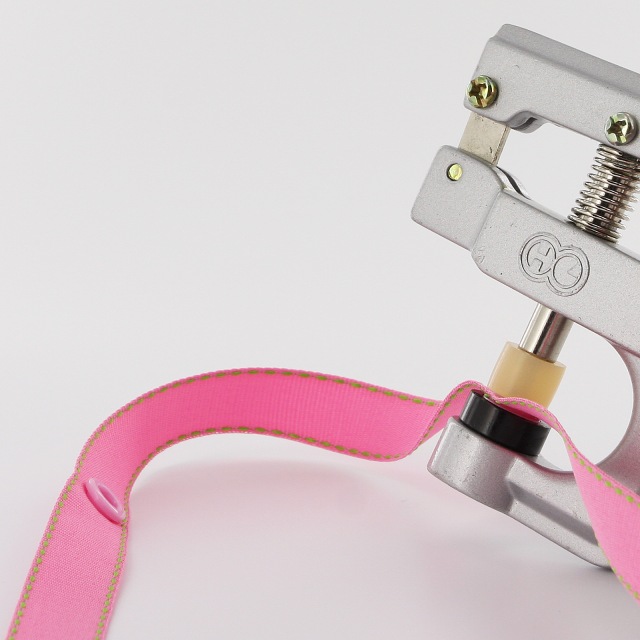
4. Install the KAM Snap at each end.
5. Measure or wrap the ribbon around the arms of the highchair and install a snap where the ribbon intersects. On my highchair it was 8" but each brand will vary. Install a KAM Snap on each end about 8" (or your measurement) in from the end.
6. Install the ribbon on your highchair, put a Toddler Cup in the ribbon and pull until you have two equal lengths. Now pinch the ribbon loosely together around the cup, loose enough to allow for different cup sizes but tight enough to hold the cup well. Install a set of snaps at the point where the ribbon met.
7. Installed it should look like this.
8. Tada! Enjoy your throw-free cup zone! My toddler was suspicion of it at first but after grunting at it for while :) she happily settled into drinking from her cup and eating her snack.
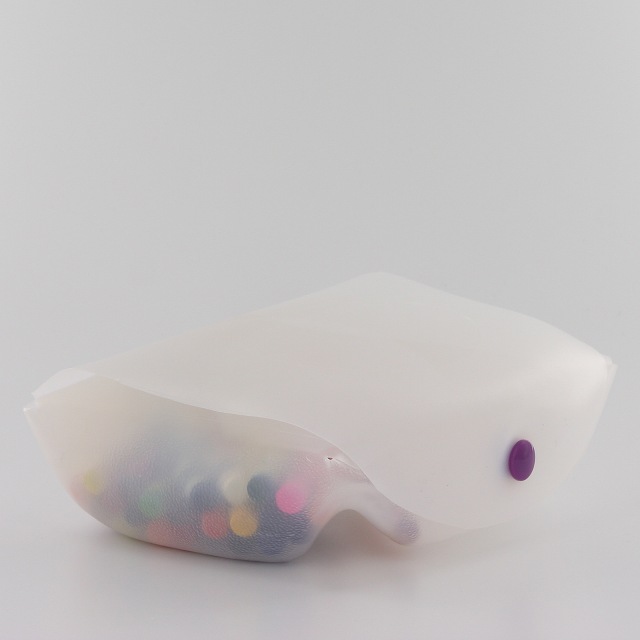
Turning a Milk Jug into a Storage Container with KAM Snaps May 24 2016
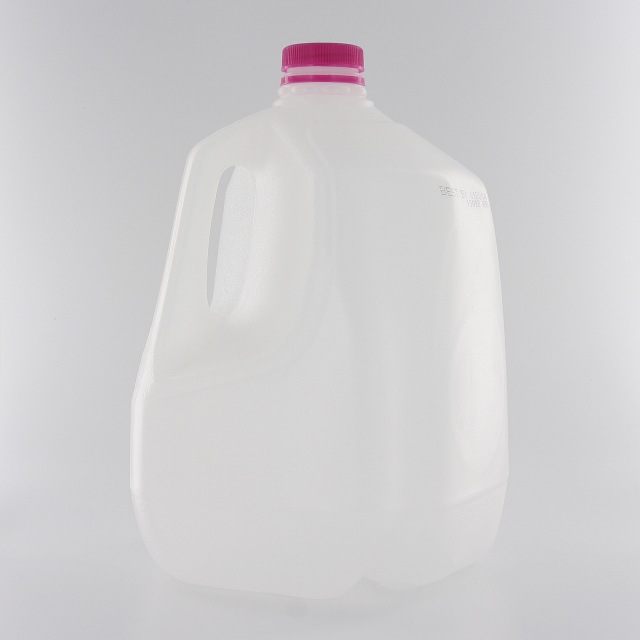
Today I am recycling one of the most common items in our house. With so many kids, we are constantly going through milk and I have collected quite the stack of Milk Jugs. What to do with them all!?!
Supplies:
- 1 Milk Jug
- Scissors
- Marker
- 1 Set of KAM Snaps
- 1 KAM Snaps Plier and Awl
Instructions
1. Take a clean, rinsed, dried Milk Jug and remove all the labels and date stamps.
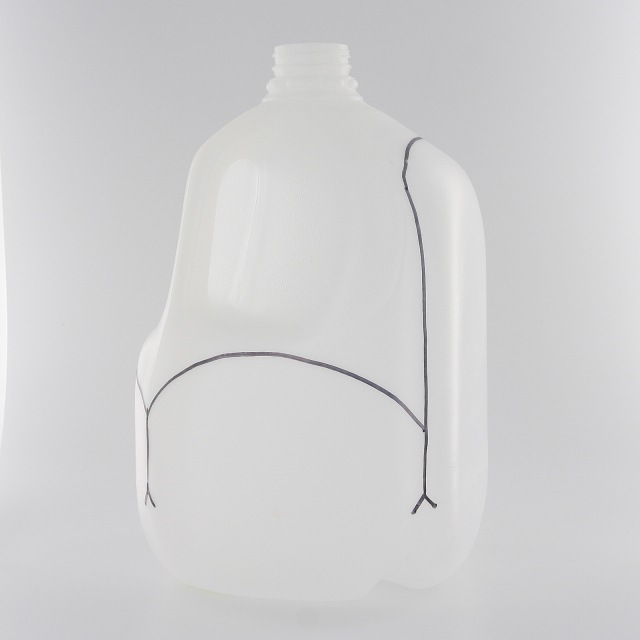
2. Trace the outline of the shape you want to cut. You will have one tall, full length flap and 3 half size flaps. Stay about an 1 to 1 1/2 above the bottom of the container.
3. Cut the Milk Jug on the lines. The Milk Jug will fold inward about were the dashes are, the dashes are just a visual, no extra cutting is needed.
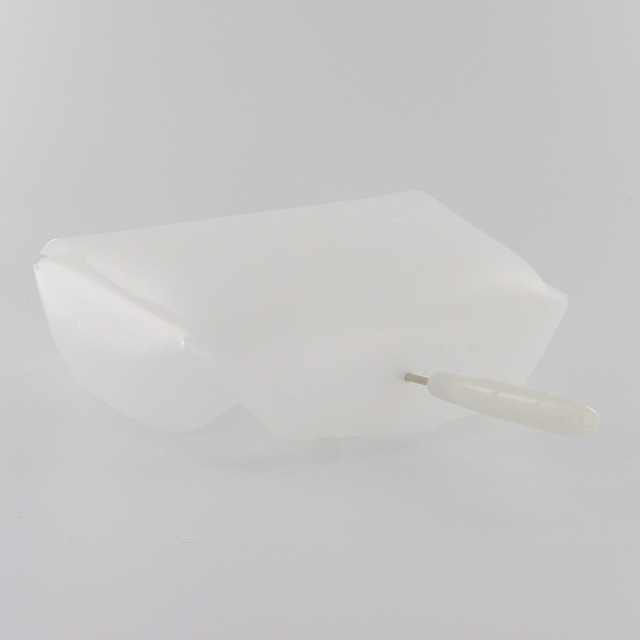
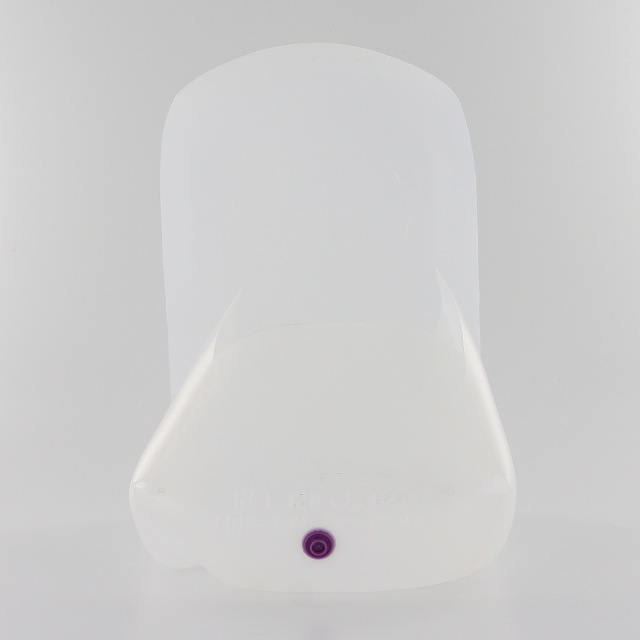
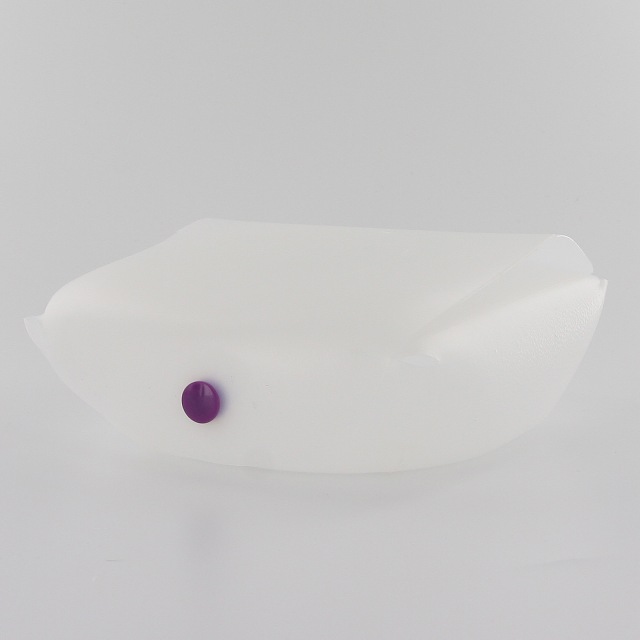
4. Fold the front flap in, then the 2 side flaps and finally the tall flap over and down. Use your Awl to decide on the position of the snap and poke it through both the flap and the body of the jug.
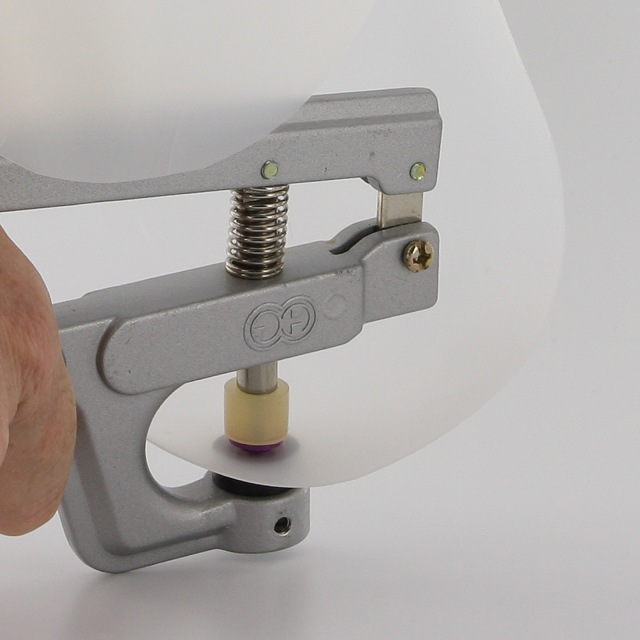
5. Attach the inside KAM Snap to the body of the Milk Jug, Stud facing out. This may require a KAM tabletop Press, if you only have pliers, you may need to adjust the length of the front flap.
6. Now attach the KAM Snap to the tall flap, Socket inward, Cap on top.
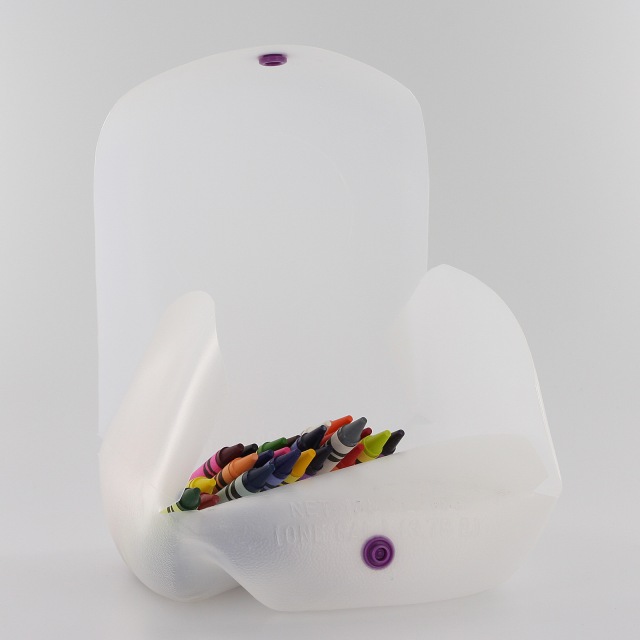
7. Snap and Go!!! You can use this container to store sandwiches, snacks, toys or as I plan, crayons for each kid. I making a different one for each kid with their "color" of KAM Snaps.
Cover Button Metal Pacifier Clips with Cover Buttons, Round Faced Metal Suspender Clips and KAM Snaps May 17 2016
How to make a Cover Button Metal Pacifier Clips with Cover Buttons, Round Faced Metal Suspender Clips and KAM Snaps
Today I am making Cover Button Pacifier Clips using Round Faced Metal Pacifier Clips (Metal Suspender Clips), Size 36 Cover Buttons, and KAM Snaps, of course ;). I have had a lot of questions in the last year about how to make these clips so I decided to take it on. Keep in mind that although I have rough tested these I in no way recommend you leave your baby alone with these as there are small pieces and if not done properly they may come apart and become a choking hazard. I would recommend these clips under adult supervision only. The maker and/or parent assumes full responsibility when using these pacifier clips.
That being said I did rough test these and was unable to break them apart after they had proper time to dry and cure. I didn't take a hammer to them :) but I did my best to undo my hard work and was not able to.
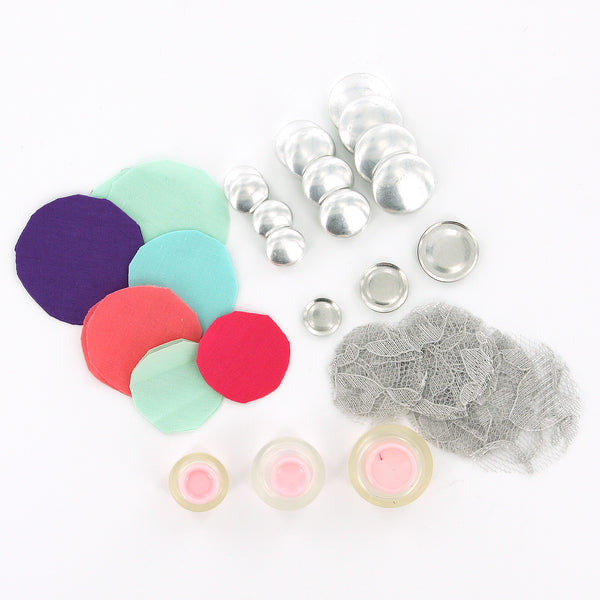
Supplies:
- 2 KAM Snap Sets
- KAM Snap Pliers and Awl
- Round Faced Metal Clips or Enamel Pacifier Clips
- 1 Size 36 Flat Back Cover Button
- Size 36 Assembly Tool
- Size 36 Template
- Fabric Scraps
- E6000 Adhesive
- Pre-made Pacifier Clips (see Pacifier Clip and Supply Tutorials)
Instructions:
1. Using our Pacifier Clip and Supply Tutorials make either Ribbon or Fabric Pacifier Clips.
2. Cut your fabric scrap. You will want a circle that is about twice the diameter of your button blank. I cut out a Piece of Fabric using my Size 36 Template.
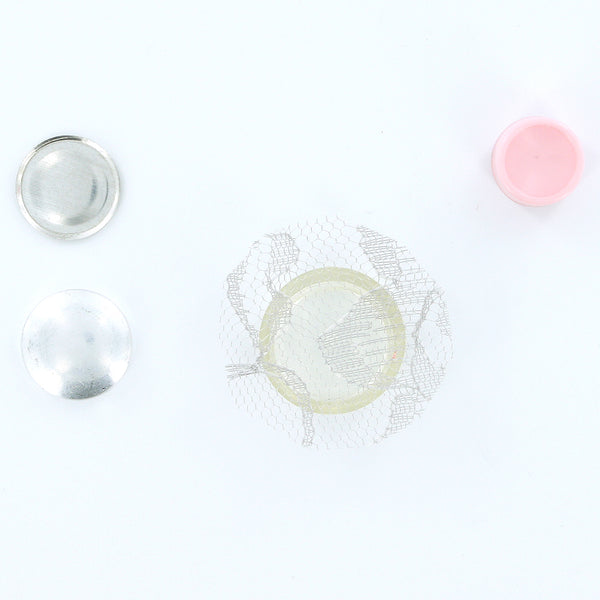
3. Put your fabric piece in the larger assembly tool piece (RIGHT SIDE DOWN). When you look into the tool you want to see the back of the fabric.
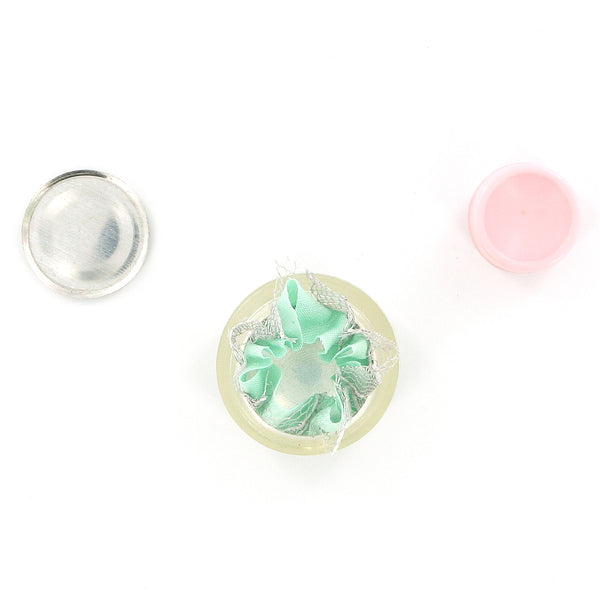
4. Place the button front (the domed piece) on top of the fabric. Leave the fabric edges hanging out. Double check the transparent underside to see if your print is how you would like it. Then press the cover button fabric edges down into the tool.
5. Add a dab of E6000 Adhesive to the middle of the cover button cap before installing the Flat Back.
6. Place the back cover button piece on top of your fabric and button front.
7. Take the smaller piece of the assembly tool and with the open side down place it on the button back.
8. Press down. You may hear a pop when the last bit of the button back slips into place. If you take the tool out and the button is not completely secured, just put it back in and press down again.
9. When you take the small assembly tool piece off, the fabric edges will be secured underneath the button back.
10. Remove the button from the larger assembly tool piece. Tada! My Cover Button is ready to be adhered to a Round Faced Metal Clip.
11. Here are the Cover Buttons I made in just a few minutes. Seriously easy, fun and so cute!
12. Now take the E6000 Adhesive and put a medium size dab of glue on the back of the Cover Button about 1/2 of what would fill the back area of the back. This glue is great to work with so don't overly worry about getting the amount just right. I was able to cleanly wipe of any excess off when I put on too much and I was also able to remove the button and add a little more when I under did it. This glue is very forgiving.
13. Now place the Cover Button over the Round Faced Metal Pacifier Clips and straighten and center your button.
14. Press firmly and let set to dry and cure 24-72 hours as recommended by the manufacturer (E6000).
15. These are my finished products. I love them and think they turned out beautifully. Below are my examples, completed and installed on Pacifier Clips.
16. Tada!!!
Disclaimer: Keep in mind that although I have rough tested these I in no way recommend you leave your baby alone with these as there are small pieces and if not done properly they may come apart and become a choking hazard. I would recommend these clips under adult supervision only. The maker and/or parent assumes full responsibility when using these pacifier clips.
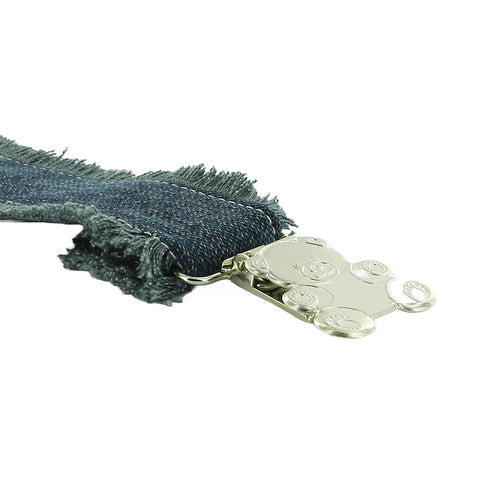
Recycling Jeans into a Pacifier Clip using KAM Snaps and a Pacifier Clip May 12 2016
Recycling Jeans into a Pacifier Clip using KAM Snaps and a Pacifier Clip
Every time I do a load of jeans in the laundry, I inevitable find ANOTHER pair of jeans with the knees split from seam to seam and, really, how many jean shorts can a boy use :P. They even wear though patches and re-enforced knees. I have active boys :). I have been trying to find creative ways to recycle holey jeans. Today I am recycling a pair of holey jeans into a Pacifier Clip.
Supplies for a Recycled Jean Pacifier Clip:
- 1 Pair of Holey Jeans
- 1 Pacifier Clip
- 1 KAM Snap Sets
- KAM Snap Pliers and Awl
- Standard Sewing Machine
Instructions:
1. Using an old, holey pair of Jeans cut two 1 1/2" x 14" strips of material.
2. Pin the material, wrong sides together, right sides facing out.
3. Stitch around the strip of fabric about a 1/4 to 3/8" in all the way round making sure to back stitch at the start and end.
4. Pull on the edges to fray the jean material up to the stitch you made. I used a crafty child :) with a cutting board and a fork. It will also fray over time but I was going for a this look.
5. Put the Pacifier Clip on the Fabric strip about 1″ in.
6. Fold back 1″ of the strip back onto itself.
7. Straight stitch across the Fabric strip just behind the Pacifier Clip and again a 1/2″ later, I did a Zig-Zag Stitch for fun, just before the end of the doubled over Fabric strip. Make sure to set the stitch both times.
8. Make sure that the internal snap in a comfortable distance to accommodate the width of the handle, I spaced my KAM Snaps about 2″ apart using the Pacifier I have with the biggest handle.
9. Now on the side where the Pacifier will be attached, I installed a Cap and Socket about 1/2″ from the edge. I used Size 20 snaps for this tutorial but either Size 20 or Size 16 will work great.
10. Now snap the Pacifier in place, attach to your child’s outfit and go.
11. Tada! Okay, I think this may be my favorite so far. How cute! Happy Snapping!!!
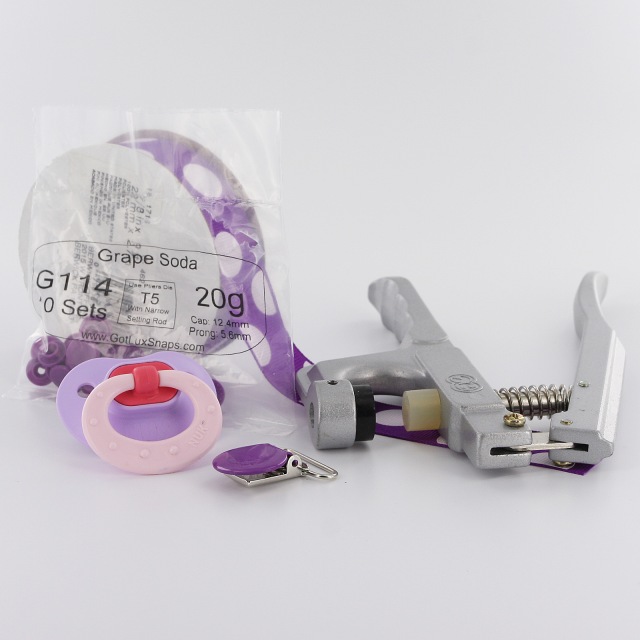
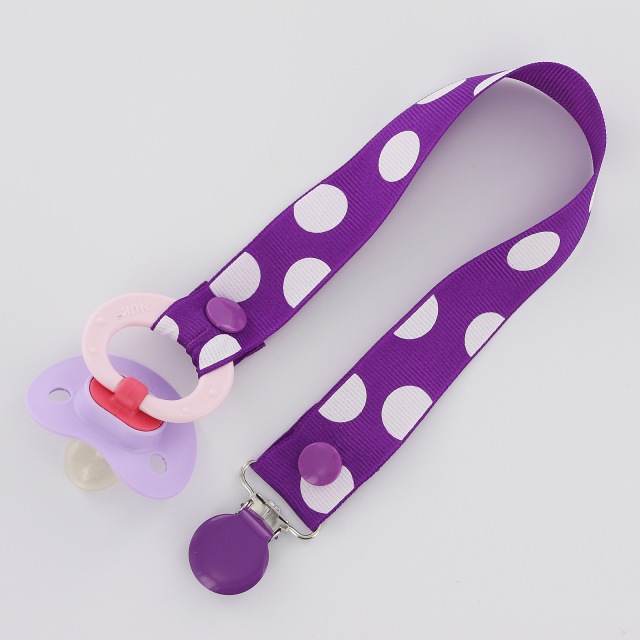
How to make a "No Sew" Pacifier Clip with KAM Snaps and an Enamel Clip May 10 2016
Making a "No Sew" Pacifier Clip with KAM Snaps and Enamel Clip
Today, I am making a "No Sew" Pacifier Clip. All the usefulness, no sewing necessary!
Supplies for a "No Sew" Pacifier Clip:
- Pacifier with Hinged Handle
- 14-15" of 7/8" Grosgrain Ribbon
- 1 Enamel Clip or Plastic Clip
- 2 KAM Snap Sets
- KAM Snap Pliers and Awl
- Fabric Tac
- Lighter or Chef's Torch
Instructions:
1. Choose a 7/8" or 3/4" Grosgrain Ribbon, cut a 14" to 16" length of ribbon. I did 7/8" Grosgrain Ribbon and I cut it 16" long so when it was completed it was approximately 12" long.
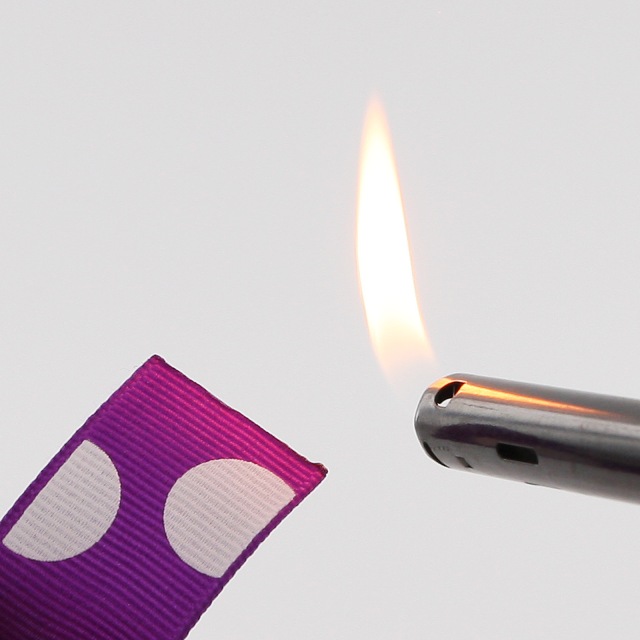
2. The ribbon I was using was made of polyester so I used a lighter to seal the ends of the ribbon so it doesn't fray. (If you are unsure, you may want to practice on a scrap piece if this is your first time or you are unsure of the what the material is made of.)
3. Then I used a bit of Fabric Tac and folded over an 1" of the ribbon back on itself to reinforce the ribbon and pressed it firmly and let it dry. Repeat on the opposite end.
4. Once dry, I installed a Cap and Socket in each end of the ribbon about 1/2" from the edge. I used Size 20 snaps for this tutorial but either Size 20 or Size 16 will work great.
5. On the side that will hold the Enamel Clip I simply folded the ribbon over at the 1" mark and installed a Cap and Stud where it would meet. I, then, feed the Enamel Clip onto the ribbon and snapped it into place. It may have been easier to thread on the pacifier clip before installing any Snap parts but I was able to feed it through without much trouble.
6. Now on the side where the Pacifier will be attached, adjust the internal snap in a comfortable distance to accommodate the width of the handle. I went an additional 1/2" for the Pacifier, I used.
7. Now snap the Pacifier in place, attach to your child's shirt and go.
8. Tada! Happy Snapping!!!
Cover Button FAQs: How To Convert Wire Back To Flat Back Tip #2 April 13 2016
-
Assembling fabric covered buttons is easy and fun but did you know you can convert Wire Back Cover Buttons to Flat Back Cover Buttons in 1 simple step?
- Watch how easy it is below:
I Like Big Buttons! - How To Covert Wire Back To Flat Back
To see other great Fabric Cover Button ideas, visit our DIY Project section here.
I Like Big Buttons! How to remove Plastic Snaps with a Cuticle Cutter (Socket) February 22 2016
How to remove a plastic snap (socket side) with Cuticle Cutters. In most cases, you can reuse the socket if done with care.
Supplies:
- Broken or incorrectly installed plastic snaps
- Cuticle Cutter
Want our KAM Plastic Snap Removal Pliers, shop here.
Crafty Saturday! February 20 2016
Working on a project using ILikeBigButtons.com for a new sweet cousin. Can't wait to meet her!!!
#ilikebigbuttons #sootherblanket #pacifierclip #craftsupplies #lazysaturday #kamsnaps #plasticsnaps
Cover Button FAQs: How To Assemble A Fabric Cover Button Tip #1 February 09 2016
- Assembling fabric covered buttons is easy and fun but here is a handy trick to make it even simpler.
- This tip is great for saving your thumbs or when using slightly thicker fabric.
How To Assemble A Fabric Cover Button Tip #1
To see other great Fabric Cover Button ideas, visit our DIY Project section here.
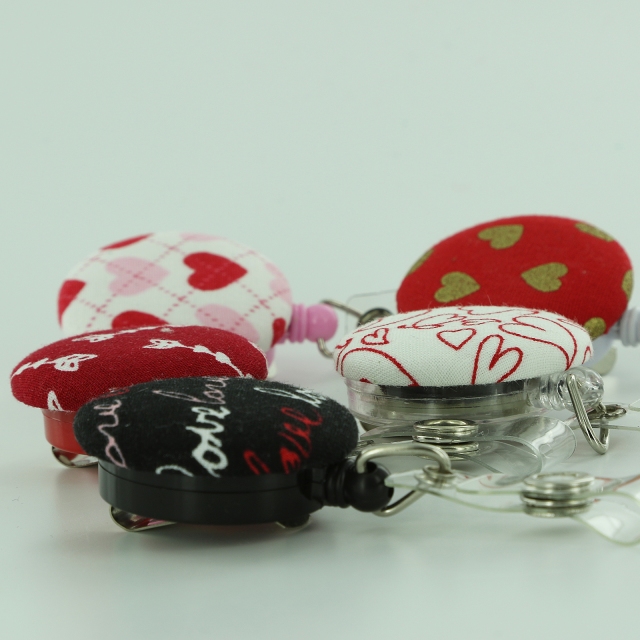
Valentine's Day Fabric Cover Button Badge Reels February 04 2016
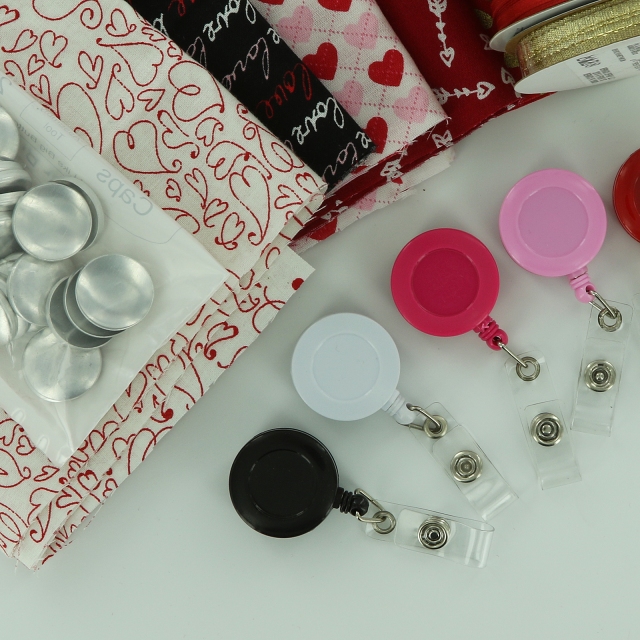
Use these adorable Valentine's Day Badge Reels to hold your ID for work, school, or play. Enjoy!
Supplies:
- 1 Completed Flat Back Fabric Cover Button (Size 45 sits on top of Badge Reel, Size 60 rest over Badge Reel)
- 1 Badge Reel
- E6000 or comparable adhesive
- Sand Paper
Steps:
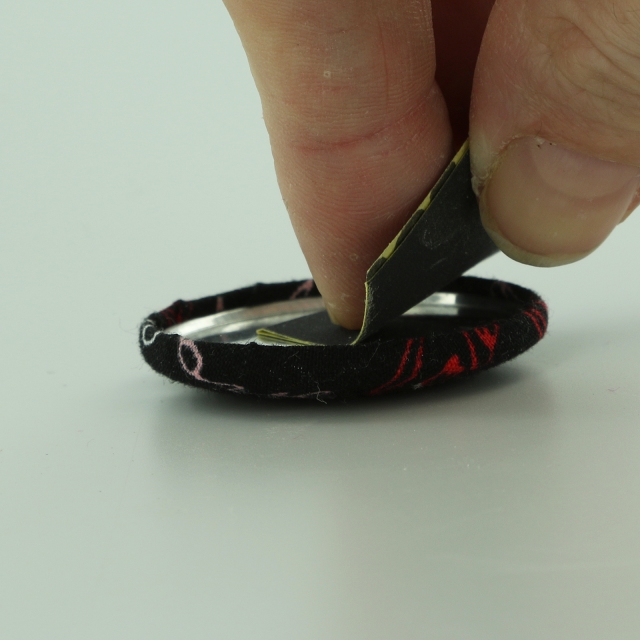
1. Follow these instructions to make Flat Back Fabric Covered Buttons.
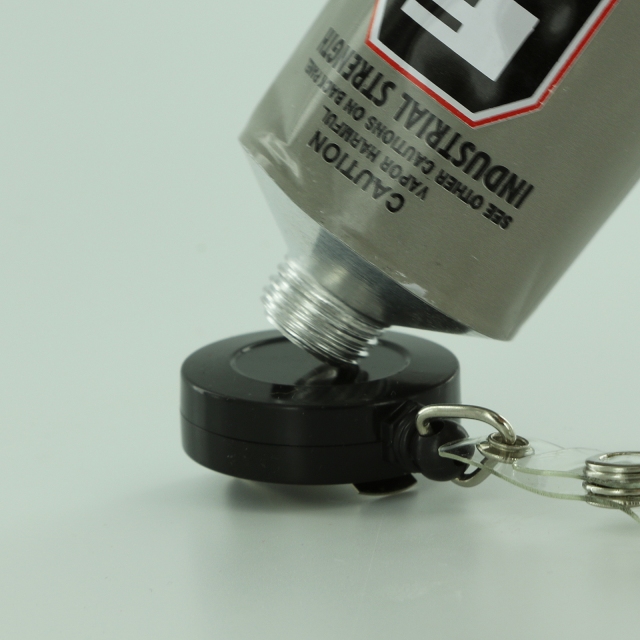
2. Lightly scuff the top of the Badge Reel so glue will adhere better (not essential but recommended).
3. Lightly scuff the back of the Cover Button so glue will adhere better (not essential but recommended).
4. Clean both surfaces of dust.
5. Apply E6000 to back of Cover Button or Badge Reel.
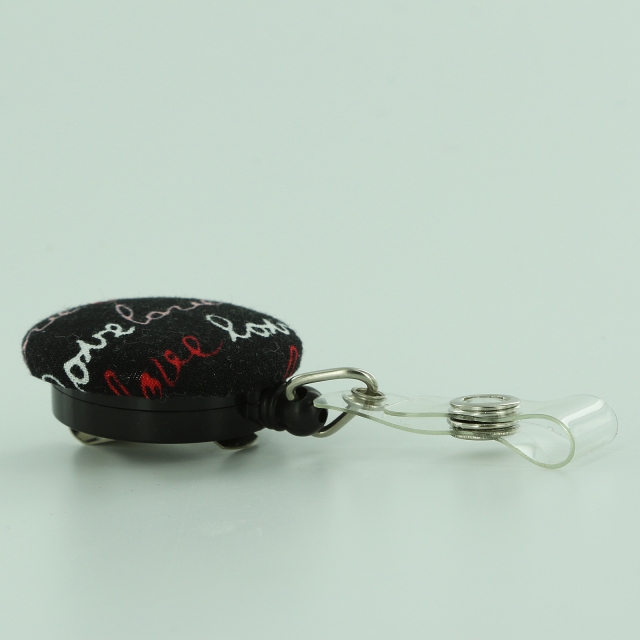
6. Press into place over the face of the Badge Reel and remove any extra Adhesive.
7. Let dry and enjoy.
8. Tada!
View Full Tutorial, plus many other great Fabric Cover Button ideas here.
Valentine's Day Fabric Cover Button Barrettes January 27 2016
Wear these adorable Snap Barrettes to match or accent your favorite outfit for Valentine's Day or dress up your favorite t-shirt and jeans for an afternoon outing. Enjoy!
Supplies:
- 1-2 Completed Flat Back Fabric Cover Button (Choose your size, Size 20 through Size 36 all work great, size depends on the statement you want to make)
- 2 Snap Barrettes
- E6000 or comparable adhesive
Steps:
1. Follow these instructions to make Flat Back Fabric Covered Buttons.
2. Lightly scuff the back of the Cover Button so the glue will adhere better (not essential but recommended).
3. Clean both surfaces of dust.
4. Apply E6000 to back of Cover Button.
5. Press Snap Barrette into place and remove any extra Adhesive. On smaller sized Cover buttons center on the glue pad, as they increase in size adjust glue pad accordingly.
6. Let dry and enjoy.
7. Tada!
View Full Tutorial, plus many other great Fabric Cover Button ideas here.
Valentine's Day Fabric Cover Button Jumbo Paper Clip Bookmarks January 19 2016
Use these adorable Paper Clip Bookmarks to accent a Valentine for your special loved one or hold your place in your favorite book or cookbook. Enjoy!
Supplies:
- 1 Completed Flat Back Fabric Cover Button (Attach size 36 (7/8" - 23 mm), size 45 (1 1/8" - 28 mm), or size 60 (1 1/2" - 38 mm) flat back cover buttons.)
- 1 Jumbo Paper Clip
- 1 6" Piece of Ribbon
- E6000 or comparable adhesive
Steps:
1. Follow these instructions to make Flat Back Fabric Covered Buttons.
2. Make sure the surfaces of the Cover Button back and Paper Clip gluepad are clean and free of oil.
3. Apply E6000 to the back of the Cover Button.
4. Press into place over the glue pad on the Paper Clip at the desired height and remove any extra Adhesive. The bigger the Cover Button the higher you will want to center the cover button.
5. Cut a 6" piece of Ribbon and knot it on the side of the Paper Clip. Slide it up against the Cover Button. Straighten and cut ends at an angle at the desired length.

6. Let dry and enjoy.
7. Tada!

View Full Tutorial, plus many other great Fabric Cover Button ideas here.
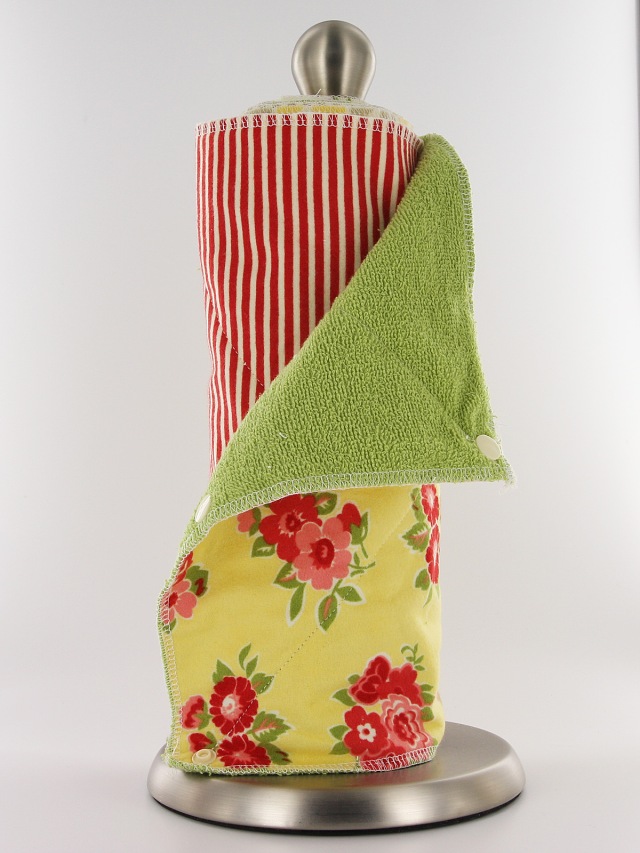
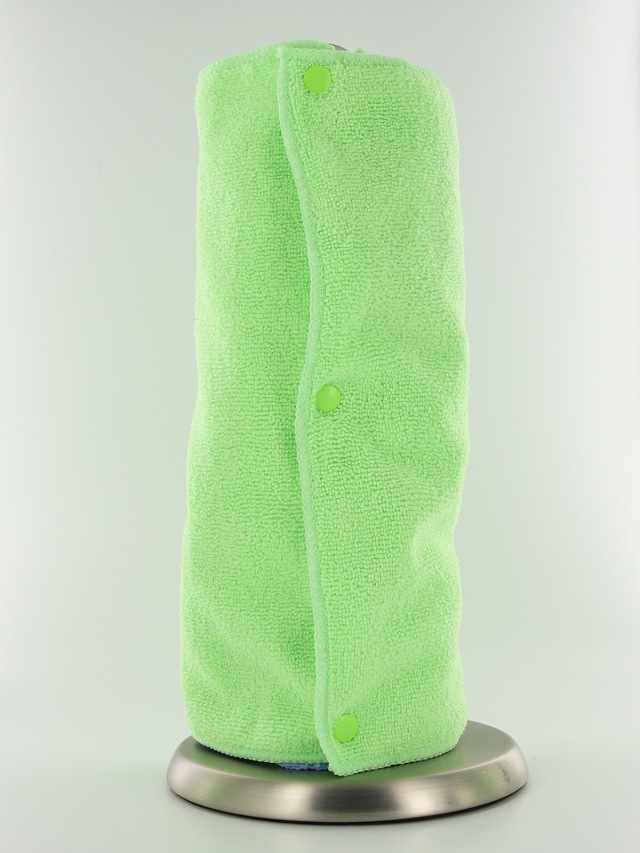
An I Like Big Buttons Christmas! Idea #7: 3 Ways To Make Unpaper Towels with KAM Snaps December 21 2015
Gift Idea #7: Unpaper towels make a great, attractive, and functional gift for your loved ones. We have 3 easy tutorials that show you how to make them. Standard Sewing Machine, Serger, or "No Sew" just pick your skill level and you can have these decorative and functional unpaper towels in your kitchen.
Supplies:
- 12 11"x11" Flannel squares
- 12 11"x11" Terry Cloth or Micro Fiber squares
- 72 KAM Snap Sets
- Rotary Cutter or Scissors
- Cutting Mat
- Serger
- KAM Snap Pliers and Awl
Instructions:
- Choose your flannel, I went to Etsy, of course, and found almost too many choices :). I finally settled on Moda's Marmalade collection. See More
#ilikebigbuttons #kamsnaps #plasticsnaps #unpapertowels #christmasideas
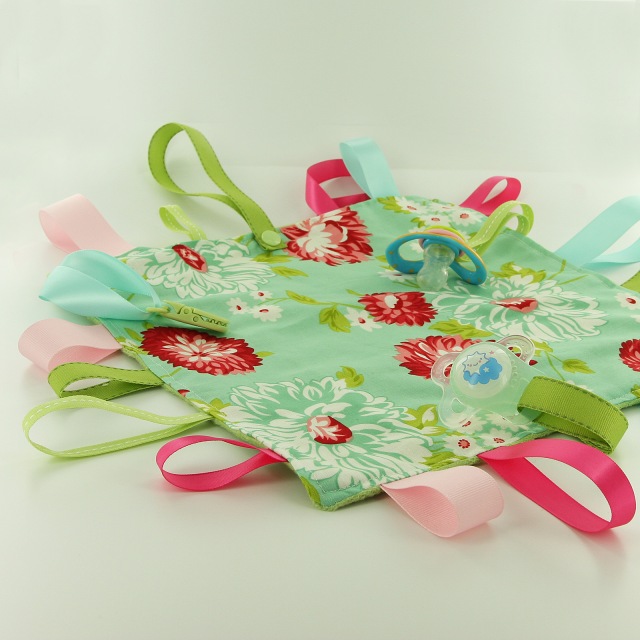
An I Like Big Buttons Christmas! Idea #6: How to make a Sensory Ribbon Baby Tag Blanket with KAM Snaps & Pacifier Supplies December 16 2015
Gift Idea #6: Fun and functional, Sensory Ribbon Tag Blanket with BONUS accessories make a great gift for any sweet little person in your life. Use KAM Snaps or a KAM Pacifier Clip to make your blanket attachable or unthrowable :). Add KAM Snaps, MAM Pacifier Rings or Pacifier O-Rings to add a Pacifier holder to your tag blanket. I used them all :P to show you the different options.
Supplies:
- 2 12″x12″ Pieces of Fabric (1 Cotton and 1 Minky)
- 8x 5″ Piece of Ribbons (mix of Grosgrain and Satin)
- 7x 8" Piece of Ribbons (mix of Grosgrain and Satin)
- 1x 12" Piece of Ribbon
- 1 KAM Snap Set
- KAM Snap Pliers and Awl
- 1 KAM Pacifier Clip
- 1 MAM Pacifier Ring
- 1 Pacifier O-Ring
- Standard Sewing Machine
Instructions:
1. Cut the Fabric and Minky material to 12"x12" squares and cut your mix of ribbon 8 in 5" lengths, 7 in 8" lengths, and 1 in 12" length. See More
#ilikebigbuttons #kamsnaps #plasticsnaps #sootherblanket #christmasideas
An I Like Big Buttons Christmas! Idea #5: How to Make Key Fob Hardware Wristlets December 09 2015
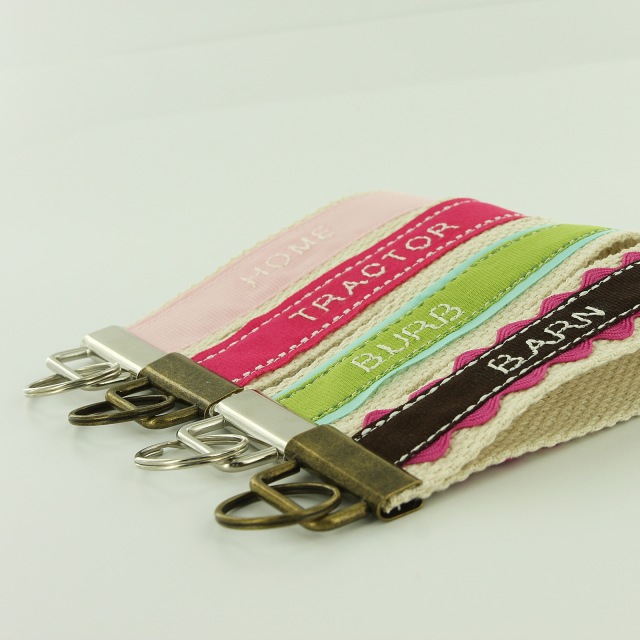
Gift idea #5: Key Fob Hardware Wristlets are a great useful and personal gift to give. Key Fob Hardware is simple to use and produces amazing results. Just add your fabric, ribbon, webbing, or embroidery for an instant, elegant wristlet. Check it out!
Four fun and simple tutorials:
- Fabric and Cotton Webbing Wristlet
- Ribbon and Cotton Webbing Wristlet
- Making a Smart Phone Case with Wristlet using Key Fob Hardware, KAM Snaps and PDF Pattern
- Making a Embroidered Key Fob Hardware Wristlet
#ilikebigbuttons #keyfob #keyfobwristlets #christmasideas
An I Like Big Buttons Christmas! Idea #1: How to make a Bandana Bib with KAM Snaps and a PDF Pattern November 13 2015
Gift idea #1: One of our most popular tutorials, Bandana Bibs are a great gift for those little droolers and mess makers in your life or as an outfit accessory. So cute! I, also, used our newly stocked Heart Shaped KAM Snaps for added pizazz, check it out!
Supplies:
- Fabrics of your choice
- 1 Heart Shaped KAM Snap Set
- KAM Snap Pliers and Awl
- Bandana Bib PDF Pattern (may need to adjust for your child's size or add more KAM Snaps settings)
- Standard Sewing Machine
Instructions:
- Download the Bandana Bib PDF Pattern. Print out the pattern making sure the 1″ square in the corner measures 1″ square when printed that will indicate the pattern is the right size. ... See More
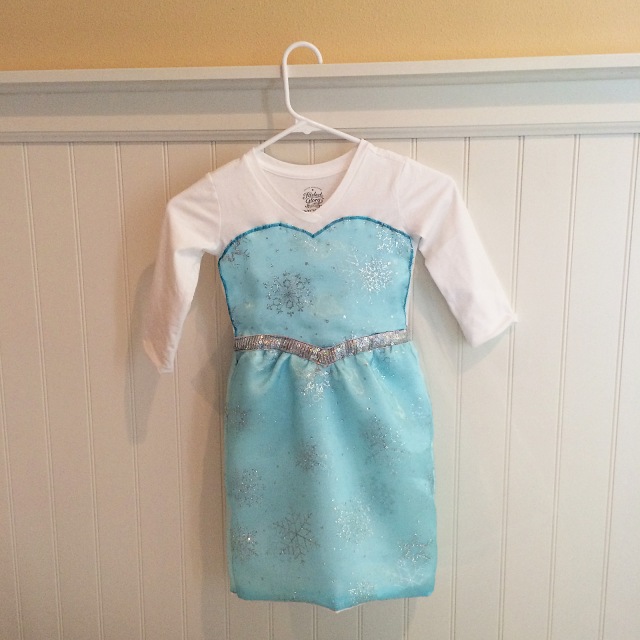
How to make a Snow Queen Inspired Costume with KAM Snaps October 27 2015
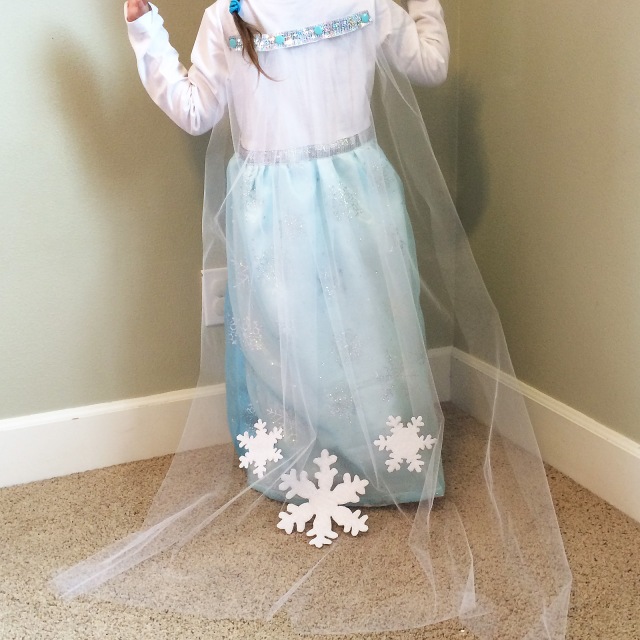
Last year I made a set of Snow Queen Inspired Costumes for my littlest girls. My preschool aged daughter is obsessed with Frozen and Elsa as all girls her age. She told me the other day, "Mama, Elsa and I are good friends because we both LOVE tutus." :) She, of course, insisted that she needed a Elsa dress for Halloween and her little sister an Anna dress but I, in my wisdom, decided if I had to make 2 dresses they would be full size and mini me sized version of the same dress with KAM Snaps. I think they turned out great and I made them just big enough that they work this year too. Yay, me :)!
Supplies:
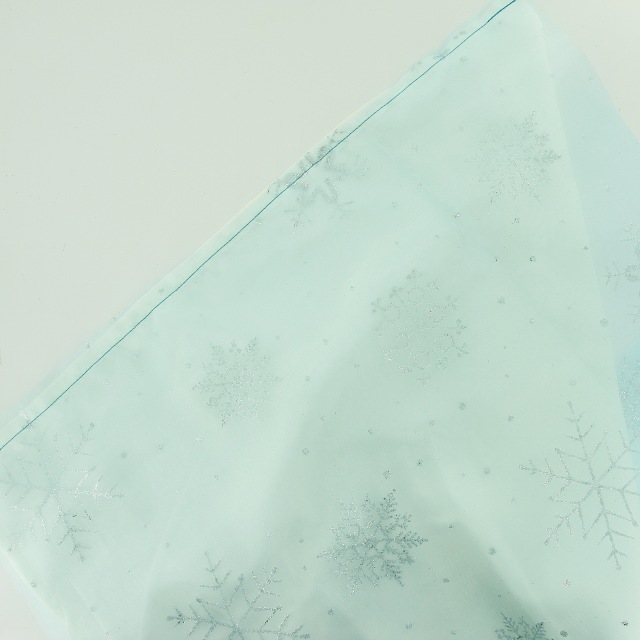
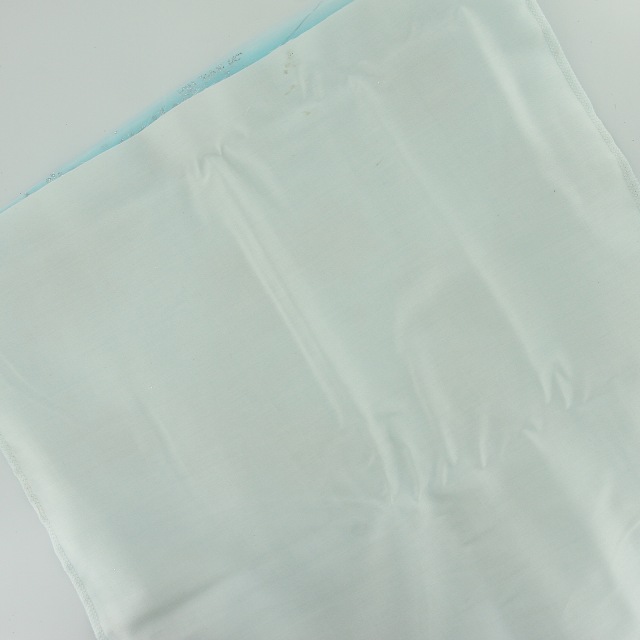
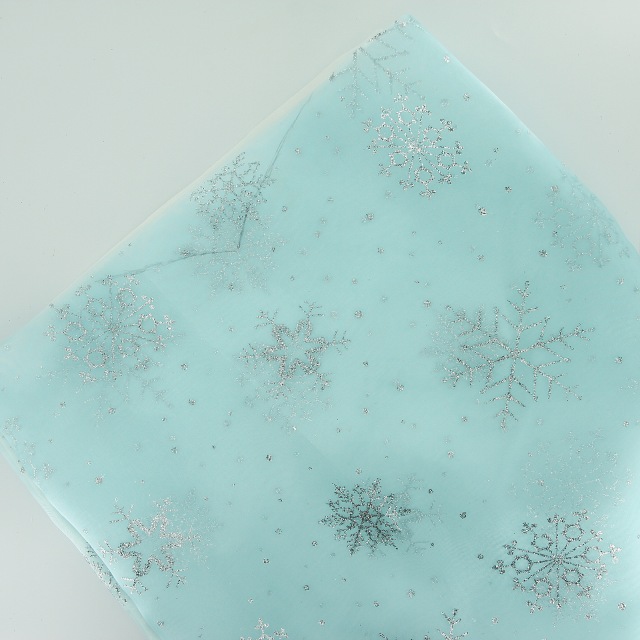
- 1 Yard of Snow Queen Snowflake Organza
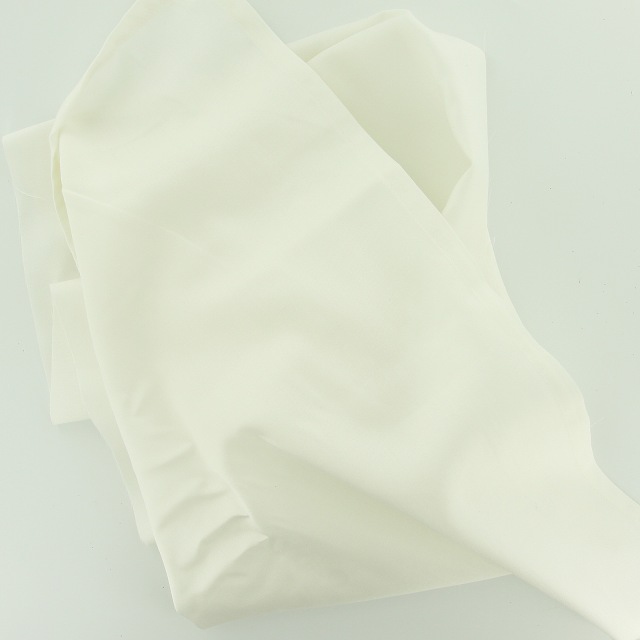
- 1 Yard of White Fabric
- 1 Yard of Tulle (White)
- 4 Sheets of Felt (White)
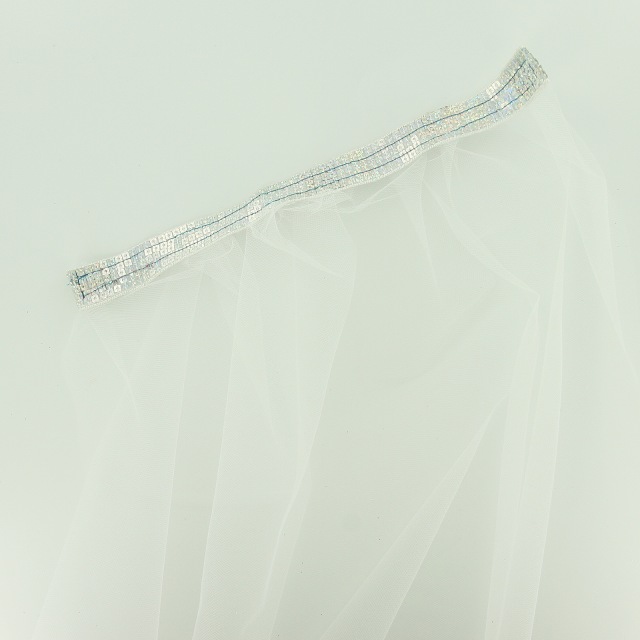
- Silver Sequined Ribbon
- Teal thread
- 4 KAM Snap Sets
- KAM Snap Pliers and Awl
- Serger Sewing Machine
- Standard Sewing Machine
- Long Sleeve T-Shirt (we went with White)
How To Remove a Plastic Snap (stud) with KAM Snap Removal Pliers March 19 2015
How to remove a plastic snap (stud side) with KAM Snap Removal Pliers.
Supplies:
- Broken or incorrectly installed plastic snaps
- KAM Snap Removal Pliers
Instructions:
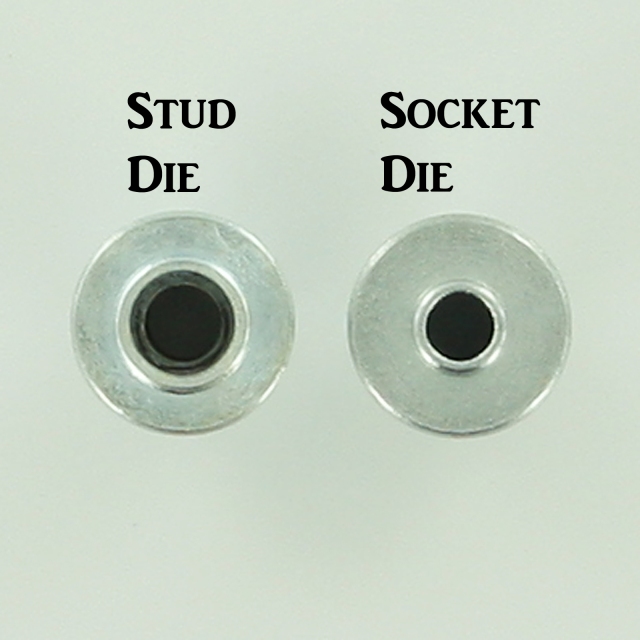
1. With the die die installed, locate the broken snap.
2. Turn snap cap side up with stud facing down.
3. Place broken snap in pliers, stud face down. The stud will settle in the raised dome in die.
4. Apply firm pressure to the snap with the KAM Snap Removal Pliers. You will hear a pop when the snap has broken.
5. This is what the cap and stud will look like once they have been broken.
6. Tada! It is that easy!!!
Lace & Fabric Cover Button Earrings February 09 2015
Today, I am working on some cute Lacy Earrings using Fabric Cover Buttons*. I made these as gifts for some of my trendy cousins for Christmas and they loved them. Check them out!
Supplies:
- Flat Back Cover Buttons (I used Size 24, Size 30, and Size 36 Cover Buttons)
- Cover Button Assembly Tools
- Cover Button Templates
- Fabric Scraps
- Lace Scraps
- E6000 Adhesive or Hot Glue
- Sharpie Permanent Marker
- Surgical Stainless Steel Earring Posts and Backs
Instructions:
1. Cut your fabric scrap. You will want a circle that is about twice the diameter of your button blank or use one of our handy Plastic Cover Button Templates.
2. Put your lace piece in the larger assembly tool piece (RIGHT SIDE DOWN). Then, put your fabric piece in the larger assembly tool piece (RIGHT SIDE DOWN). When you look into the tool you want to see the back of the fabric.
3. Place the button front (the domed piece) on top of the fabric. Leave the fabric edges hanging out.
4. Press the Cover Button edges down into the tool.
5. Place the back cover button piece on top of your fabric and button front. If the cover button will be subject to repeated tugging from the back, you may want to add a little e6000 adhesive before attaching the back.
6. Take the smaller piece of the assembly tool and with the open side down place it on the button back.
7. Press down. You may hear a pop when the last bit of the button back slips into place. If you take the tool out and the button is not completely secured, just put it back in and press down again.
8. When you take the small assembly tool piece off, the fabric edges will be secured underneath the button back.
9. Remove the button from the larger assembly tool piece.
10. Tada! First step complete.
11. Lightly scuff the back of the Cover Button so the glue will adhere better (not essential but recommended).
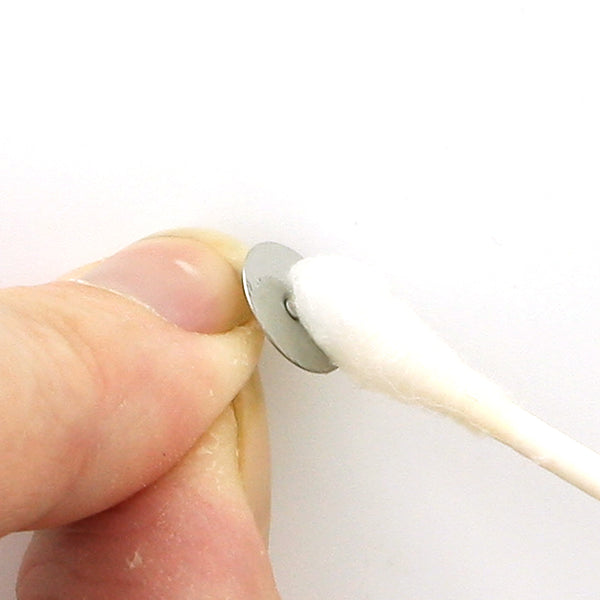
12. Clean both surfaces of dust. I used rubbing alcohol and a cotton swab.
13. Apply E6000 to back of Cover Button or Earring Post.
14. Press Earring Post into place and remove any extra Adhesive. On smaller sized Cover Buttons center the post, as they increase in size adjust post towards top.
15. Let dry, add Earring Backing/Nut, and enjoy.
16. Tada! You could also make the Cover Button Clip Ons Earrings and these are great a gifts or as products for your shop.
Fabric Cover Button Christmas Card Tutorial December 12 2014
Fabric Cover Button Christmas Cards
Today, I am working on some cute Christmas cards using Fabric Cover Buttons*. Check them out!
*Just a reminder our Cover Buttons are 10%OFF on our website today using Coupon Code: COVERBUTTON10
Supplies:
- Flat Back Cover Buttons (I used Size 20, Size 24, and Size 30 Cover Buttons)
- Cover Button Assembly Tools
- Cover Button Templates
- Fabric Scraps
- E6000 Adhesive or Hot Glue
- Sharpie Permanent Marker
- Card Stock or Pre-Made Card
Instructions:
1. Cut your fabric scrap. You will want a circle that is about twice the diameter of your button blank or use one of our handy Plastic Cover Button Templates.
2. Put your fabric piece in the larger assembly tool piece (RIGHT SIDE DOWN). When you look into the tool you want to see the back of the fabric.


3. Place the button front (the domed piece) on top of the fabric. Leave the fabric edges hanging out.
4. Press the cover button edges down into the tool.

5. Place the back cover button piece on top of your fabric and button front. If the cover button will be subject to repeated tugging from the back, you may want to add a little e6000 adhesive before attaching the back.

6. Take the smaller piece of the assembly tool and with the open side down place it on the button back.
7. Press down. You may hear a pop when the last bit of the button back slips into place. If you take the tool out and the button is not completely secured, just put it back in and press down again.

8. When you take the small assembly tool piece off, the fabric edges will be secured underneath the button back.


9. Remove the button from the larger assembly tool piece.
10. Tada! First step complete.

11. Using a ruler, I made 8 straight lines of varying lengths. Then I drew a bow on top of each and a small ornament top.


12. Then in your best print write Merry Christmas. Who else doesn't like their own handwriting :P ? I need to practice my pretty cursive more often.

13. I think it turned out lovely. You could also make the Cover Buttons actual earrings with our Earring Supplies: Earring Posts or Clip Ons and it could double as a gift and Christmas Card.
How To Make "No Sew" Pom Pom Organza/Chiffon Flower Shoe Clips November 19 2014
How To Make "No Sew" Pom Pom Organza/Chiffon Flower Shoe Clips
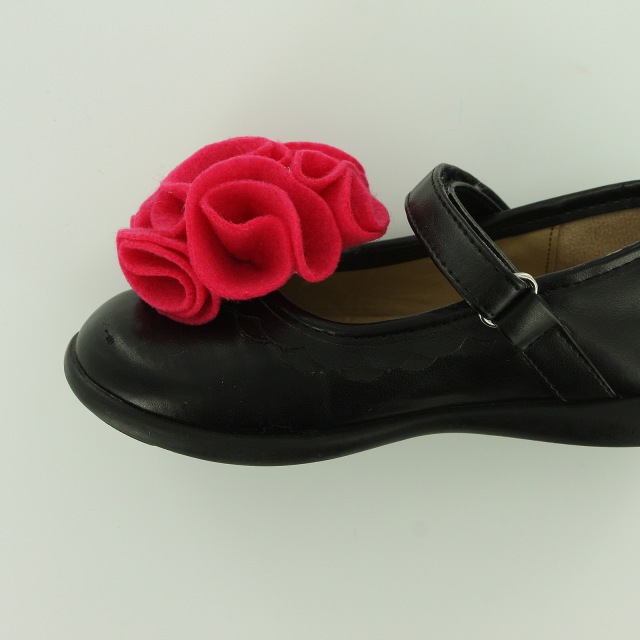
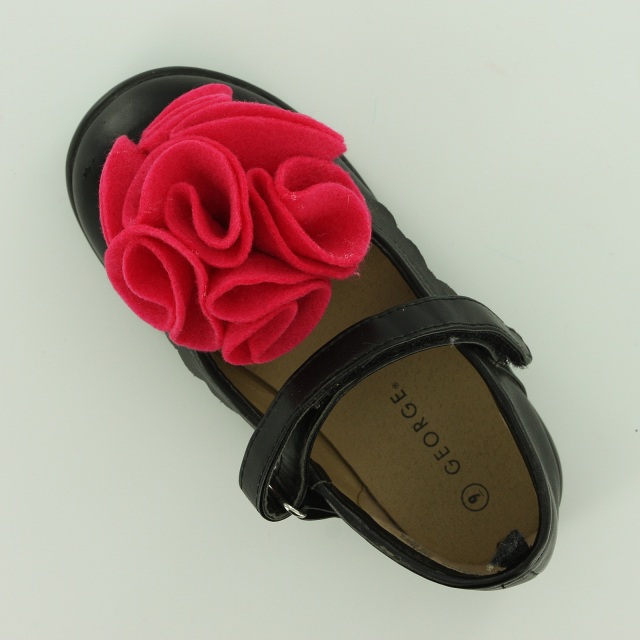
Today, I made a cute set of "No Sew" Pom Pom Organza/Chiffon Flowers for my daughter's shoes. A sweet accent to otherwise ordinary shoes!
Supplies:
- Organza or Chiffon of your choosing
- 1"-1 1/2" circle of White Felt
- Pair of Shoe Clips
- Scissors or Accucut Die Machine
- Hot Glue Gun/Glue or E6000
Instructions:
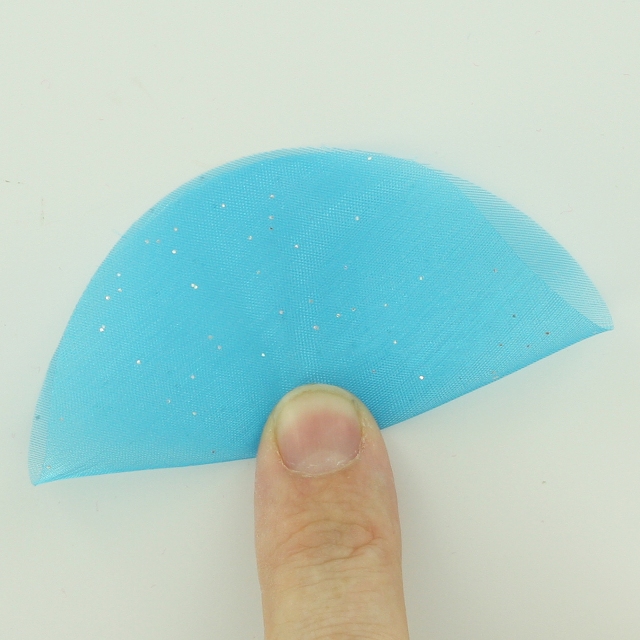
1. Cut 12+ Organza Fabric circles in the size and pattern you desire. I used my Accucut Die Machine and cut 3 1/2" circles. Also, cut 2x 1" to 1 1/2" White Felt circles.
2. Fold the Organza in half.
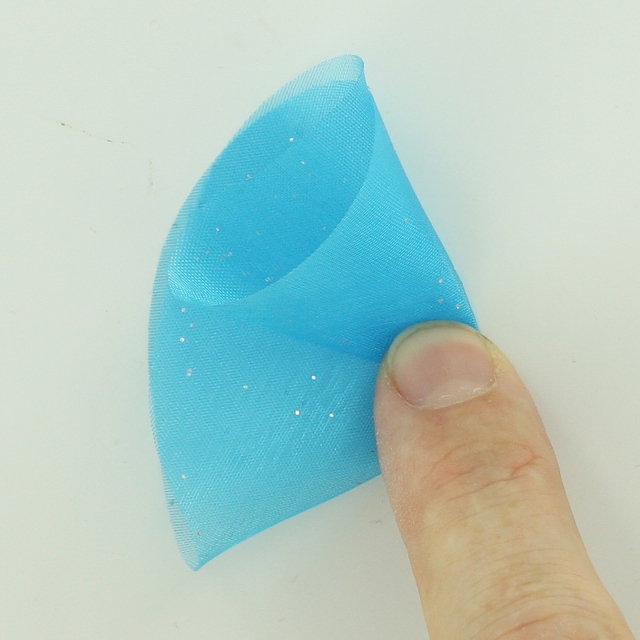
3. Fold the Organza again 1/3 of the way.
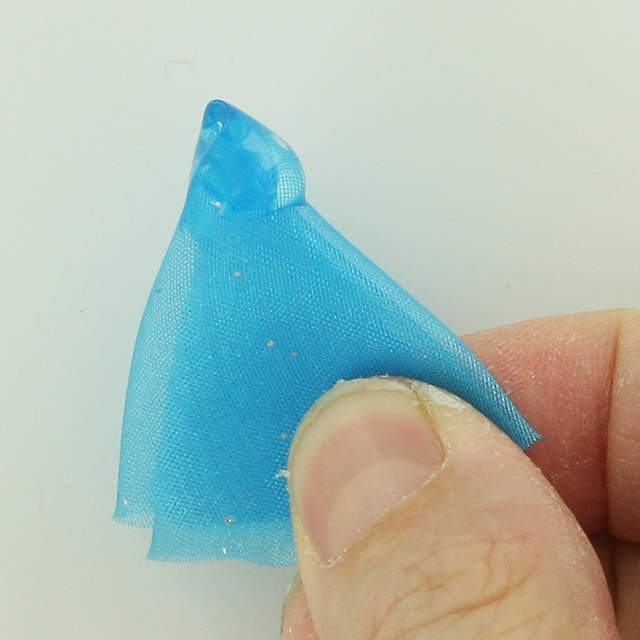
4. Put a drop of Hot Glue in the bottom corner of the Organza.
5. Fold the last 1/3 of the Organza over on the Hot Glue dab.
6. Put Hot Glue all around the tip of the Organza and press into the center of the White Felt circle backing.
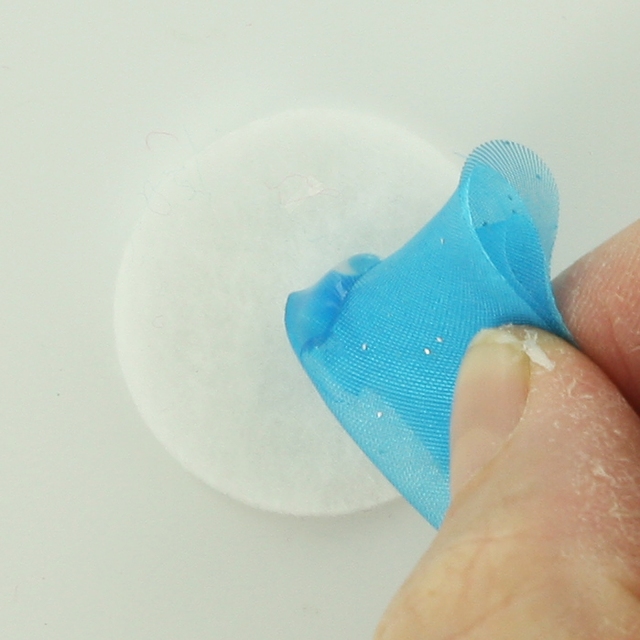
7. Like so and repeat around the circle until you fill it in. It reminds me of the school craft we use to do with different colored tissue paper and glue to make a picture :). I added a couple extra dabs of hot glue and brought some of the internal Organza petals closer together.
8. Add a large dab of Hot Glue or E6000 to the back of the White Felt circle.
9. Press the Shoe Clip firmly into the Hot Glue and let it dry. Repeat steps to make a matching set.
10. Tada!
11. I have also made "No Sew" Pom Pom Flowers with Felt and Fabric, see tutorials for details. These little flowers would also work great for headbands, brooches, or anywhere you would like a bit of fun, colorful, embellishment.
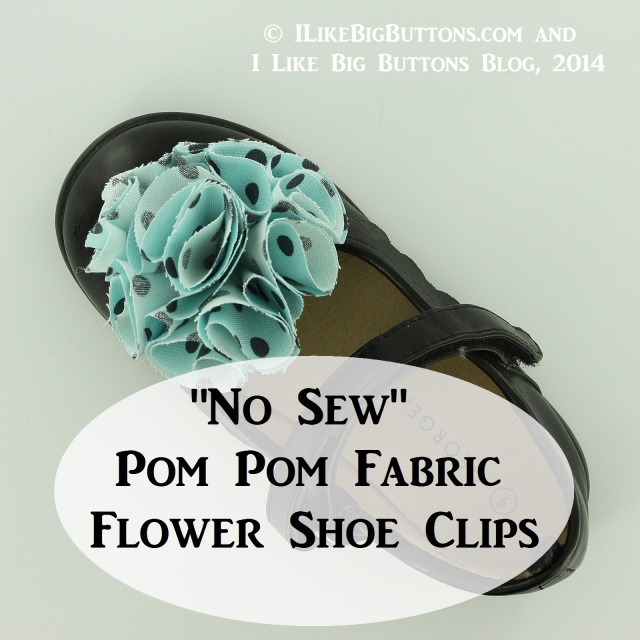
How To Make "No Sew" Pom Pom Fabric Flower Shoe Clips November 13 2014
How To Make "No Sew" Pom Pom Fabric Flower Shoe Clips
Today, I made a cute set of "No Sew" Pom Pom Cotton Fabric Flowers for my daughter's shoes. A sweet accent to otherwise ordinary shoes!
Supplies:
- Cotton Fabric of your choosing
- 1"-1 1/2" circle of White Felt
- Pair of Shoe Clips
- Scissors or Accucut Die Machine
- Hot Glue Gun/Glue or E6000
Instructions:
1. Cut 12+ Cotton Fabric circles in the size and pattern you desire. I used my Accucut Die Machine and cut 2 1/2" circles. Also, cut 2x 1" to 1 1/2" White Felt circles.
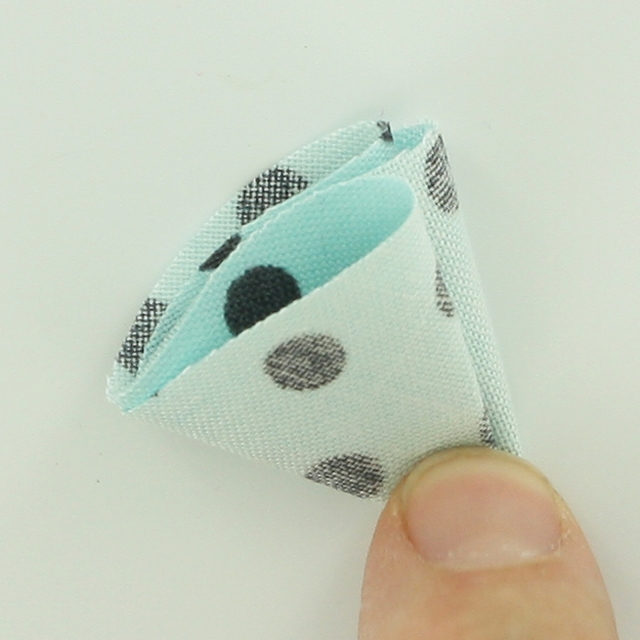
2. Fold the Fabric in half. I choose to fold it right sides together feeling that it would eventually expose more of the pattern. It think it was a push but I liked how it turned out.
3. Fold the Fabric again 1/3 of the way.
4. Put a drop of Hot Glue in the bottom corner of the Fabric.
5. Fold the last 1/3 of the Fabric over on the Hot Glue dab.
6. Put Hot Glue all around the tip of the Fabric and press into the center of the White Felt circle backing.
7. Like so and repeat around the circle until you fill it in. It reminds me of the school craft we use to do with different colored tissue paper and glue to make a picture :). I added a couple extra dabs of hot glue and brought some of the internal Fabric petals closer together.
8. Add a large dab of Hot Glue or E6000 to the back of the White Felt circle.
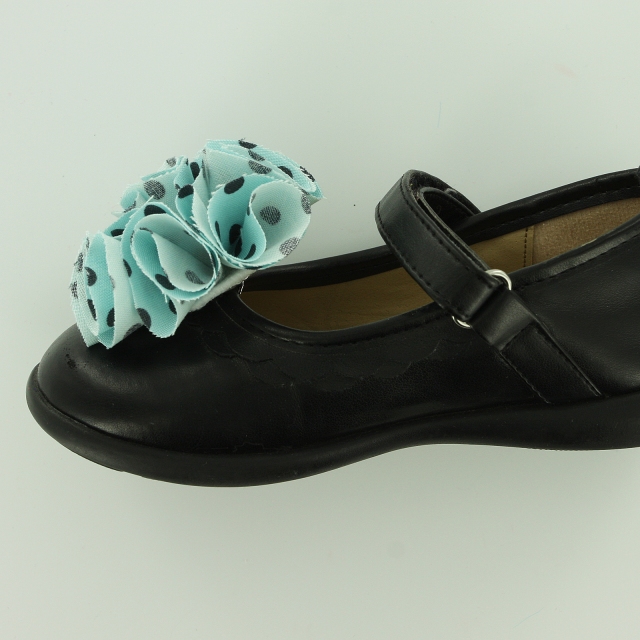
9. Press the Shoe Clip firmly into the Hot Glue and let it dry. Repeat steps to make a matching set.
10. Tada!
11. I have also made "No Sew" Pom Pom Flowers with Felt and Organza, see tutorials for details. These little flowers would also work great for headbands, brooches, or anywhere you would like a bit of fun, colorful, embellishment.
How To Make "No Sew" Pom Pom Felt Flower Shoe Clips November 05 2014
How To Make "No Sew" Pom Pom Felt Flower Shoe Clips
Today, I made a cute set of "No Sew" Pom Pom Felt Flowers for my daughter's shoes. So cute! Adds just the right amount of fun and a splash of color to otherwise ordinary shoes.
Supplies:
- Sheet of Colored Felt and Sheet of White Felt
- Pair of Shoe Clips
- Scissors or Accucut Die Machine
- Hot Glue Gun/Glue or E6000
Instructions:
1. Cut 12+ Felt circles in the size you desire. I used my Accucut Die Machine and cut 2 1/2" circles. Also, cut 2x 1" to 1 1/2" White Felt circles.
2. Fold the Felt in half.
3. Fold the Felt again 1/3 of the way.
4. Put a drop of Hot Glue in the bottom corner of the Felt.
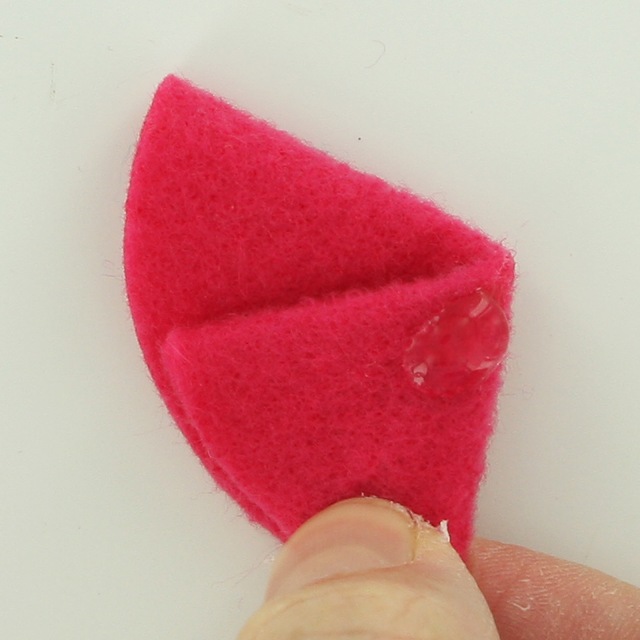
5. Fold the last 1/3 of the Felt over on the Hot Glue dab.
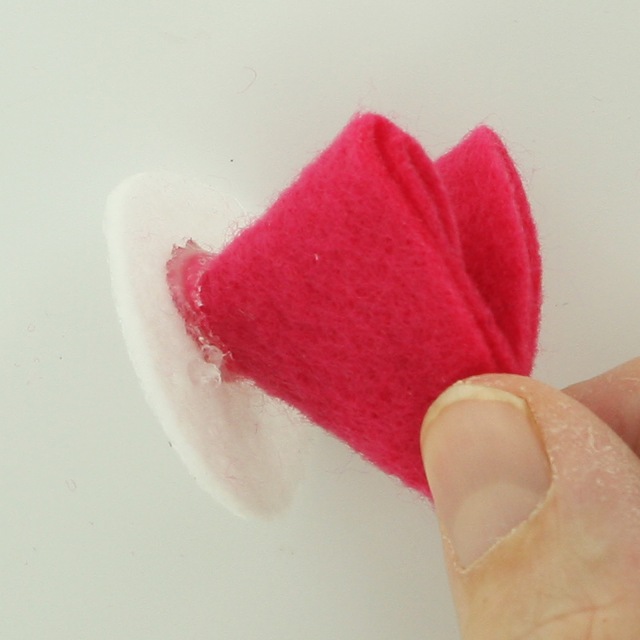
6. It will look like this.
7. Put Hot Glue all around the tip of the Felt and press into the center of the White Felt circle backing.
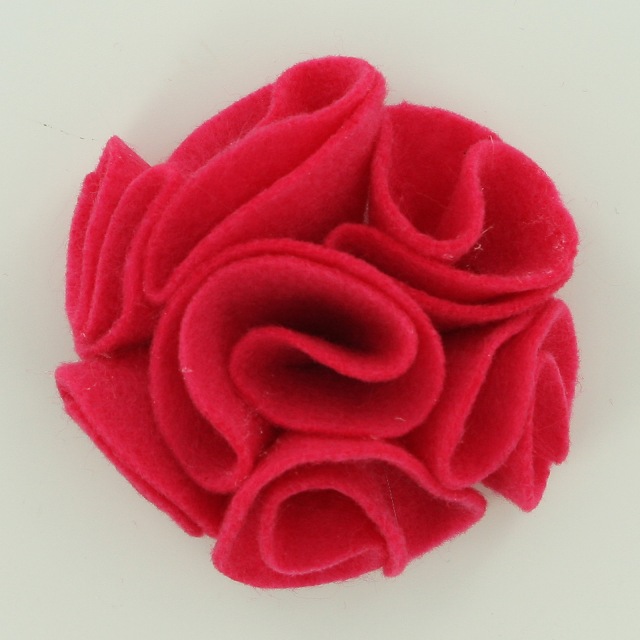
8. Like so and repeat around the circle until you fill it in. It reminds me of the school craft we use to do with different colored tissue paper and glue to make a picture :). I added a couple extra dabs of hot glue and brought some of the internal Felt petals closer together.
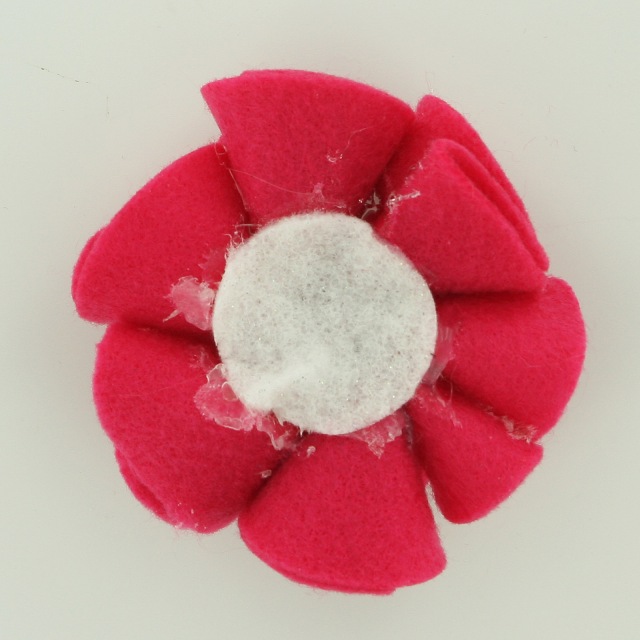
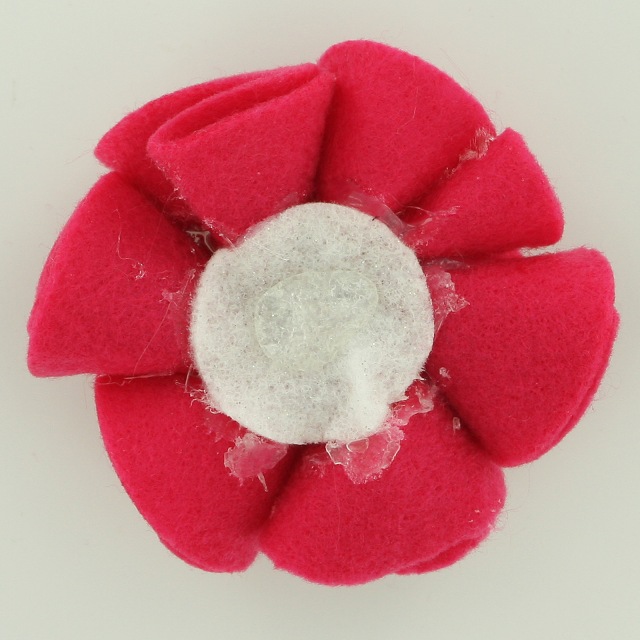
9. Add a large dab of Hot Glue or E6000 to the back of the White Felt circle.
10. Press the Shoe Clip firmly into the Hot Glue and let it dry. Repeat steps to make a matching set.
11. Tada!
12. I have also made "No Sew" Pom Pom Flowers with Fabric and Organza, tutorials to come shortly. These little flowers would also work great for headbands, brooches, or anywhere you would like a bit of fun, colorful, embellishment.
30 Days of KAM Snaps and Beyond!!! How to make a Snow Queen Inspired Costume with KAM Snaps October 29 2014
How to make a Snow Queen Inspired Costume with KAM Snaps
Day #39
Today I am making a set of Snow Queen Inspired Costumes for my littlest girls. My preschool aged daughter is obsessed with Frozen and Elsa as all girls her age. She told me the other day, "Mama, Elsa and I are good friends because we both LOVE tutus." :) She, of course, insisted that she needed a Elsa dress for Halloween and her little sister an Anna dress but I, in my wisdom, decided if I had to make 2 dresses they would be full size and mini me sized version of the same dress with KAM Snaps. I haven't made a dress in years so bare with my efforts. My girls are thrilled and that is all that matters to me.
Supplies:
- 1 Yard of Snow Queen Snowflake Organza
- 1 Yard of White Fabric
- 1 Yard of Tulle (White)
- 4 Sheets of Felt (White)
- Silver Sequined Ribbon
- Teal thread
- 4 KAM Snap Sets
- KAM Snap Pliers and Awl
- Serger Sewing Machine
- Standard Sewing Machine
- Long Sleeve T-Shirt (we went with White)
Instructions:
1. Make a paper template sweetheart bodice shape, it will look like this.
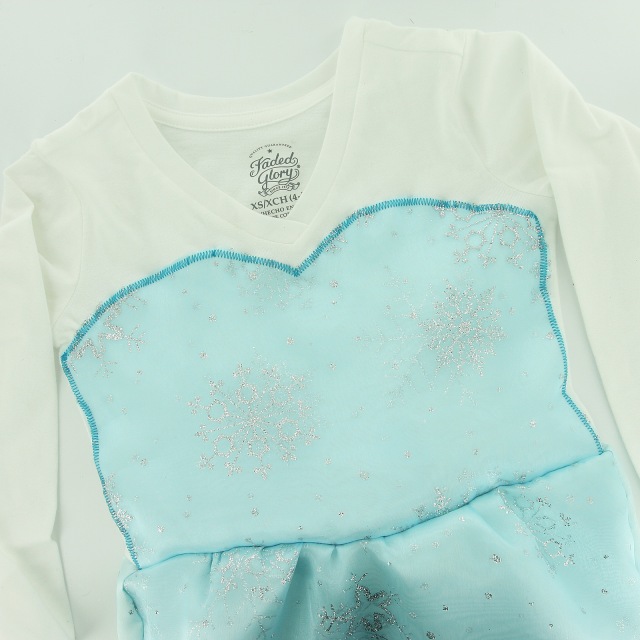
2. The organza was super thin so I did a double layer of it so that it looked more blue. I considered painting the t-shirt blue first in the area that the organza would lay or putting a layer of solid blue material underneath but I was in a time crunch and this was the quickest remedy. I pinned the bodice in place.
3. With teal thread I zig zag stitched the heart shaped bodice in place.
4. I cut out 2 layers of white fabric, width of shirt measurement was twice the width of the t-shirt so that I can gather the material and length of shirt I measured from about half way down the bodice to the floor. I used a flat sheet for the white fabric that I had laying around. Cut out 2 or 3 layers of snowflake organza with same measurements. For the same reason as above, I put 2 layers on the front side, to brighten the blue color, and just 1 layer on back as it will not be viewed as much.
5. Laying the white fabric right side up and the 2 layers of organza fabric wrong side up, I pinned and then sewed the bottom seam together with a 1/4" seam allowance. Repeat with back pieces.
6. Fold the sets of fabric right side out.
7. Pin the front and back pieces together with right sides together and serge the left and right sides from top to bottom.
8. Turn right side out, I also sketched a matching heart shaped V in the front of the dress. I wasn't sure exactly how to make this happen so it was a see as we go idea :).
9. Sew a basting stitch about 1/2" below the edge of the fabric in the front of the dress. Repeat in the back making sure to leave extra thread to grip when pulling the string to gather the fabric.
10. Gather the fabric so that it becomes the size of the t-shirt.
11. Choose how much of the bodice you want showing. I found that I wanted less than half to show. Otherwise, the dress looks a bit out of scale so I went about halfway between an empire waist and true waist height for the waist. Turn the shirt inside out and place over the shirt, shirt will be upside down, skirt right side up, and pin in place. I used a ruler to make sure my pinning stayed level along the t-shirt. Pinning the sweet heart front was difficult. It was counter intuitive to me but after a couple tries I got it. I did turn the dress right side out a couple times to make sure it was lining up right.
12. Sew the skirt in place. I used a 1/2" seam allowance.
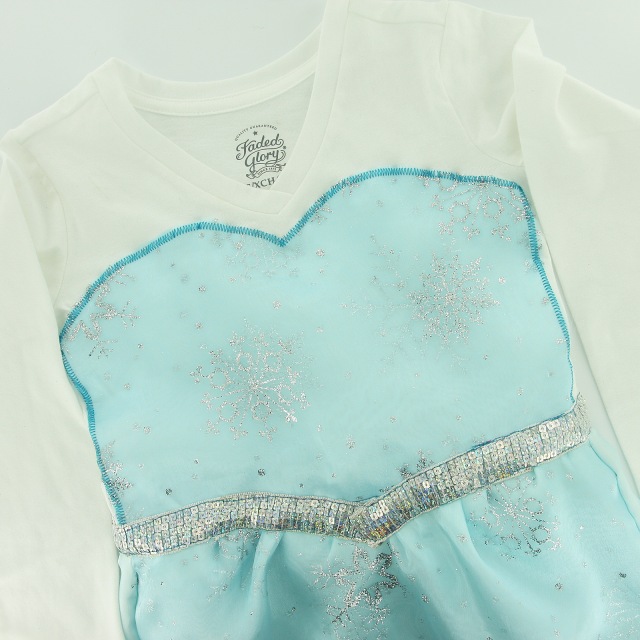
13. Pin the Silver Sequined Ribbon in place, scooping down to accentuate the heart shaped waist line and pin in place.
14. Sew in place along the edges both on the top and bottom with a back stitch at the start and finish.
15. Take a length of white tulle, double the measurement of the width of the t-shirt. Use a basting stitch and gather the tulle with the same technique as the shirt. Take a length of the Silver Sequin Ribbon, wrap the top of the tulle, I also added a strip of felt to the back of the tulle to sandwich it to ribbon and add stability where the snaps are going to be applied. Pin in place.
16. Sew it all together.
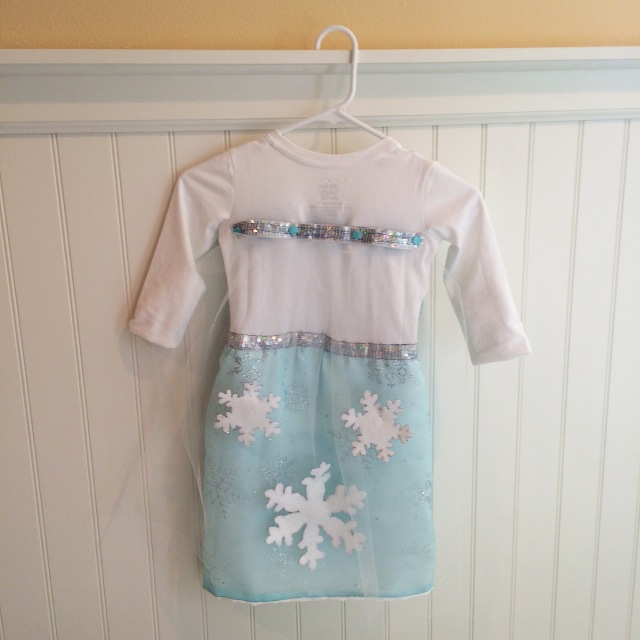
17. Add KAM Snaps Cap and Stud, 1 at each end and 2 to the left and right of the middle.
18. Repeat same spacing on the back of the t-shirt with a Cap and Socket. I used a 1" square of felt on the inside to stabilize the KAM Snap in the t-shirt.
19. Cut out and add some felt snowflakes, I found the snowflake shapes in Google images, sew in place.
20. Tada! Here is the mini me version.
21. Tada! Here is the full size version. She is shooting snow out of her hands :) can you tell.
22. I also went with a longer cape for the bigger sister.
How to make a Peacock Costume and a "No Sew" Tutu with KAM Snaps October 23 2014
Day #38
Today, I am made a Halloween costume for my Peacock loving girl. I was inspired by my friend, Barbara of Das Mach Ich Nachts (Roughly translates to "I'm doing this at night"), earlier this year she made the most amazing costume for her daughter here. I was inspired to make one for my daughter with some adjustments. Less fine details, more "No Sew" and KAM Snaps, of course :).
Supplies:
- 1-2 Yards of Fabric (I used Royal Blue Fleece)
- 4-6 Sheets of Felt
- Elastic for Tutu
- 4-8 Spools of Tulle (15-25 Yards each)
- 2 KAM Snap Sets
- KAM Snap Pliers and Awl
- Accucut Die Cutter and Dies or Scissors to cut out the Peacock Feathers
- Standard Sewing Machine
- Long Sleeve T-Shirt (we went with Teal)
- Long Black Leggings
Instructions:
1. Barbara's orginal Peacock Costume Tutorial, I adjusted her pattern for times sake and went with a "less is more" approach. I reasoned to myself that this costume will mostly be viewed in the dark and a lot of the details of the costume will be lost :). I, also, own a Accucut Die Cutter (great tool!) with handy dandy Circle dies so I decided to do circle shaped feathers rather than tear drop shaped. I used a 4.5", 3.5", and 2.5" circle dies.
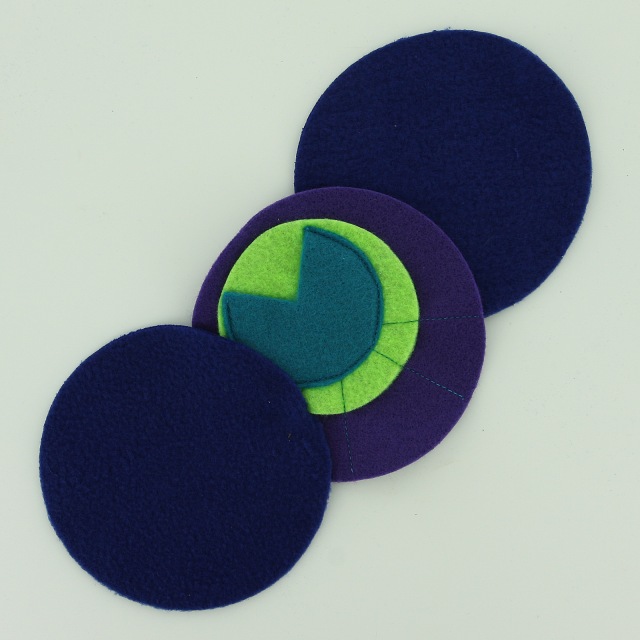
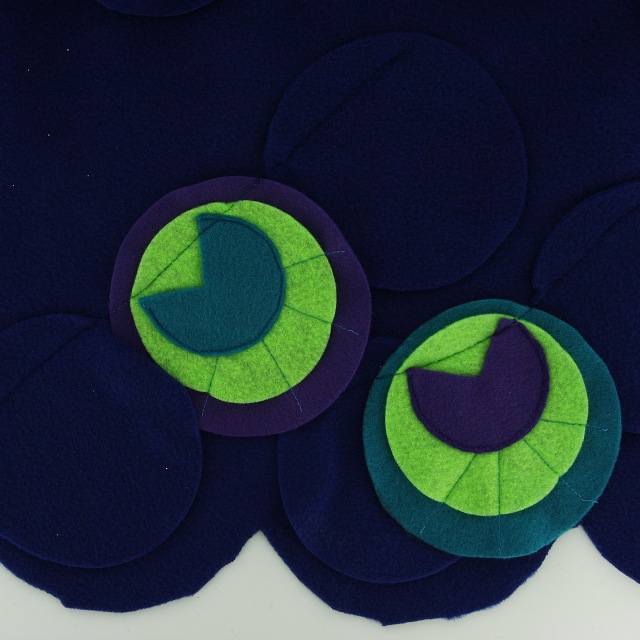
2. These can easily be done by hand but I was able to run 4 layers of Felt at a time. Awesome! My daughter wanted 2 different sets of Feathers in Purple, Apple Green and Teal. We alternated between Purple and Teal as the front and back circle with the Apple Green always as the middle piece. This was my fashionista's preference :).
3. I also cut out 2x 4.5" Royal Blue Fleece for each feather. We made 16 Peacock "Eye" Feather total and about 40 Royal Blue Fleece Circles.
4. Take the 2.5" Felt circles and cut a wedge out of each of them.
5. They will look like this.
6. Take each 4.5" Circle and lay the 3.5" Circle off center.
7. Stitch 2 "V"s in Teal thread from the edge to the middlish and back to the edge again to stabilize the circles together.
8. Lay the 2.5" 3/4 Circle on top slightly off center again.
9. Stitch around the edge of the circle, repeat 16 times. My daughter and I did this with dueling sewing machines and it took just a few minutes to complete.
10. Now lay out and plan your cape, I laid out my yardage of Royal Blue fleece and had my daughter lay down on it to get her wing span :). Then using one of the 4.5" Circle feathers, starting at the top edge I chalked the round shape and worked my way down. I drew a rough sketch of what I did above. I did one side and folded fabric and half and cut both sides at once.
11. Then I laid the feathers like this and pinned them in place in a random pattern to fill in the cape.
12. I straight stitched across my sets of feathers using back stitch at the start and end of each set to make sure they were secure.
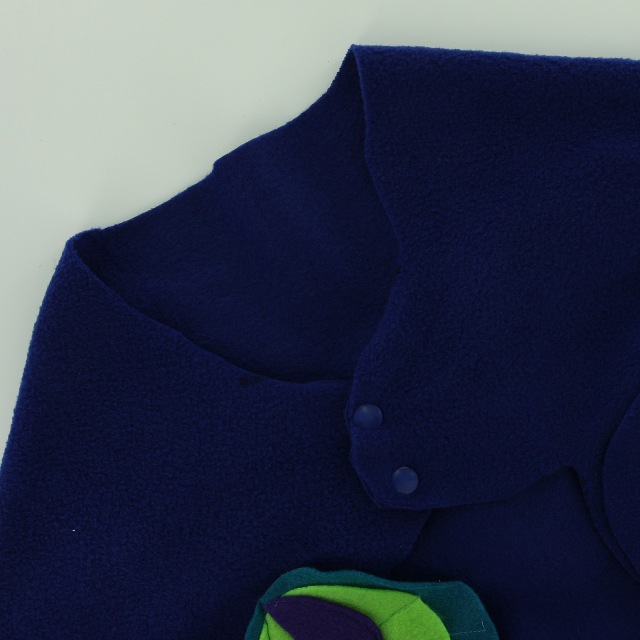
13. On the tabs in the front of the cap, I doubled over the fleece and put a 2 sets of KAM Snaps in on the left and right. The Cape is finished. You can do more or less details. I didn't bother finishing the edges of the fleece as it will not fray. This may get used a couple times at most and then as dress up for siblings and cousins, so I didn't feel the extra effort was necessary. On to the "No Sew" Tutu!!!
14. Make the Elastic waist for your Tutu by wrapping tutu around your child's waist. Stitch the Elastic together by going back and forth repeatedly with a zig zag stitch or straight stitch.
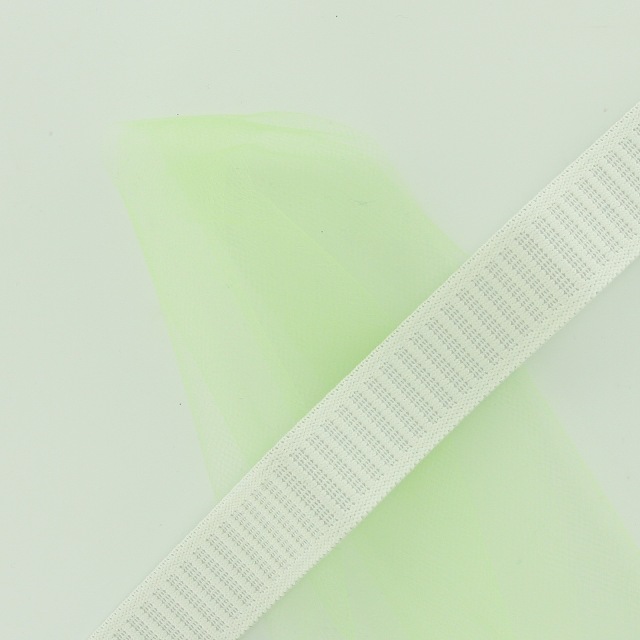
15. Cut your spools of Tulle into lengths, mine were for an older girl so I did measured to just below her knee and doubled that measurement. I cut my Tulle in 5" pieces and it took 8 spools to complete the skirt. It is very full but that was the look I was going for.
16. Take 1-2 pieces of Tulle fold them in half and place them behind the Elastic.
17. Bring the Tulle ends up, over the Elastic and thread them through the open Tulle loop from behind.
18. Pull taut and repeat.
19. It will end up like this. We used Purple, Purple Glitter, Teal, Teal Glitter, and Apple Green Tulle.
20. Here is my proud Peacock! She loves it and she and I had a wonderful time making it together :).
30 Days of KAM Snaps and Beyond!!! How to make a Reversible Finished Edge Coffee Cozy with KAM Snaps and Free PDF Pattern October 16 2014
Day #37
How to make a Reversible Coffee Cozy with KAM Snaps and Free PDF Pattern
A couple days ago, I made a couple cute Coffee Cozys for my cousin's birthday. Here is the second promised tutorial showing how to make the Reversible Finished Edge Coffee Cozy. KAM Snaps to the rescue again!
Supplies:
- Fabric of your choosing
- Insulation/batting layer
- 2 KAM Snap Sets
- KAM Snap Pliers and Awl
- Standard Sewing Machine
Instructions:
1. Download the Reversible Finished Edge Coffee Cozy PDF Pattern. Print out the pattern making sure the 1″ square in the corner measures 1″ square when printed that will indicate the pattern is the right size. This pattern works on standard sized 12 ounce and 16 ounce cups. My models were Dixie and Chinet brands.
2. Cut out each Pattern piece as many times as instructed. The first time I made this the pattern, though it fitted the cup as a paper template, did not fit when fully finished. I have added an additional 2" to the pattern to adjust for the loss in length as fabric sewn and fitted (the pattern has been adjusted and 1/4" seam allowance tabs were added). Make sure to wash and dry your fabrics before making this pattern if you plan to wash them later to avoid shrinkage.
3. Original picture of pattern on fabric (pattern has been adjusted).
4. Cut out 3 pieces, front and back fabric and interlining because this is going to be an exposed layer I used Felt. You can use whichever material you like, this layer is for protection from the heat of the cup of coffee, tea, or hot chocolate.
5. Pin the 3 layers of fabric together. Bottom fabric right side up, batting, and top fabric right side down.
6. Starting just off center on the bottom, stitch all a 1/4" seam allowance all the way around the Cozy stopping 2-3" from finishing. Leaving an opening to turn the piece right side out.
7. Turn the Cozy right side out, I used a small butter/frosting knife to get the corners as square as possible.
8. Carefully fold and pin the opening closed.
9. Top stitch a 1/4" seam allowance all the way around the Cozy making sure to back stitch at the beginning and end of your work.
10. Install 2 KAM Snap Caps and 2 Studs on the left side and install 2 KAM Snap Caps and 2 Sockets on the other side. I have included "blue dots" on the template to approximate where to place them but it is best to wrap the snap-free Coffee Cozy around a Coffee Cup to see how it fits and where you would like to place the snaps. I placed the top and bottom KAM Snaps about 1/2" down from the finished seam edge of the Cozy.
11. Here is the finished product both front and back. You will note that it is reversible and that I coordinated the snaps so that it has different color snaps parts on each side. Just seemed extra fun :)!
12. Tada! I think they turned out great! I did another tutorial to show the Reversible Frayed Edge Coffee Cozy too. Check it out here!!!
- Previous
- Page 5 of 5


