Cover Button Embellished Pacifier Clips by I Like Big Buttons! May 30 2017
I have had a lot of questions in the last couple years about how to make these clips so I decided to take it on. A Pacifier Clip made extra adorable with the added Cover Button accent, they are a great accessory to add to your baby's wardrobe for any special occasion or just because.
Supplies:
- 2 KAM Snap Sets
- KAM Snap Pliers and Awl
- Round Faced Metal Clips or Enamel Pacifier Clips
- 1 Size 36 Flat Back Cover Button
- Size 36 Assembly Tool
- Size 36 Template
- Fabric Scraps
- E6000 Adhesive
- Pre-made Pacifier Clips (see Pacifier Clip and Supply Tutorials)


Instructions:
1. Using our Pacifier Clip and Supply Tutorials make either Ribbon or Fabric Pacifier Clips.

2. Cut your fabric scrap. You will want a circle that is about twice the diameter of your button blank. I cut out a Piece of Fabric using my Size 36 Template.

3. Put your fabric piece in the larger assembly tool piece (RIGHT SIDE DOWN). When you look into the tool you want to see the back of the fabric.


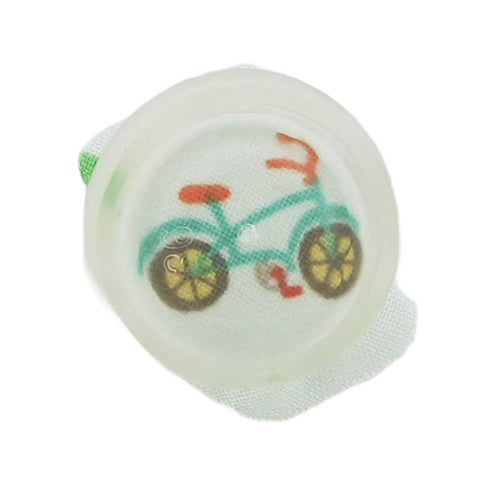
4. Place the button front (the domed piece) on top of the fabric. Leave the fabric edges hanging out. Double check the transparent underside to see if your print is how you would like it. Then press the cover button fabric edges down into the tool.

5. Add a dab of E6000 Adhesive to the middle of the cover button cap before installing the Flat Back.

6. Place the back cover button piece on top of your fabric and button front.
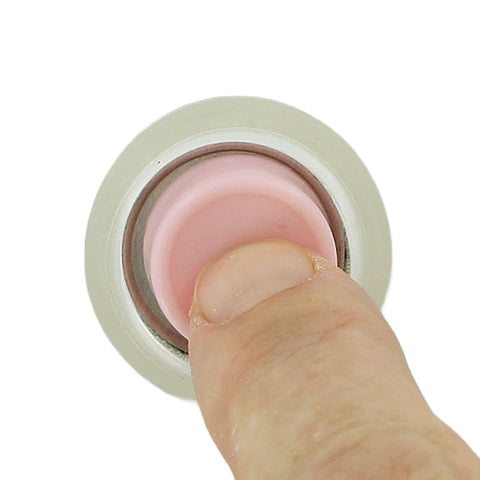
7. Take the smaller piece of the assembly tool and with the open side down place it on the button back.
8. Press down. You may hear a pop when the last bit of the button back slips into place. If you take the tool out and the button is not completely secured, just put it back in and press down again.

9. When you take the small assembly tool piece off, the fabric edges will be secured underneath the button back.

10. Remove the button from the larger assembly tool piece. Tada! My Cover Button is ready to be adhered to a Round Faced Metal Clip.

11. Here a the Cover Buttons I made in just a few minutes. Seriously easy, fun and so cute!

12. Now take the E6000 Adhesive and put a medium size dab of glue on the back of the Cover Button about 1/2 of what would fill the back area of the back. This glue is great to work with so don't overly worry about getting the amount just right. I was able to cleanly wipe of any excess off when I put on too much and I was also able to remove the button and add a little more when I under did it. This glue is very forgiving.

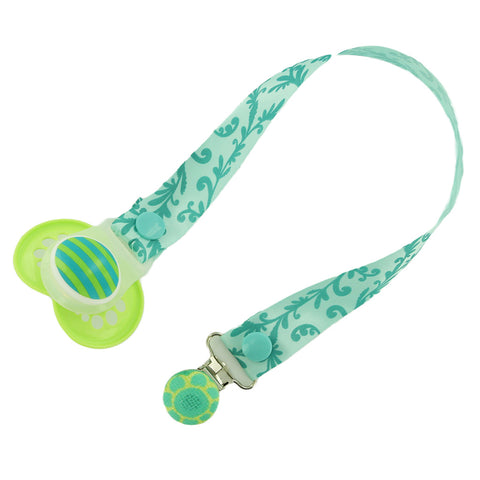
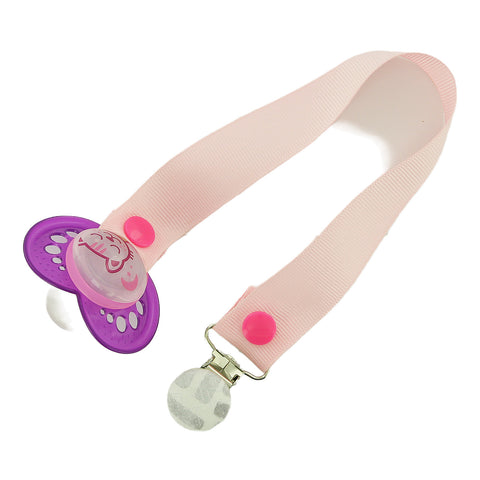
13. Now place the Cover Button over the Round Faced Metal Pacifier Clips and straighten and center your button.

14. Press firmly and let set to dry and cure 24-72 hours as recommended by the manufacturer (E6000).

15. These are my finished products. I love them and think they turned out beautifully. Below are my examples, completed and installed on Pacifier Clips.


16. Tada!!!
Disclaimer: Keep in mind that although I have rough tested these I in no way recommend you leave your baby alone with these as there are small pieces and if not done properly they may come apart and become a choking hazard. I would recommend these clips under adult supervision only. The maker and/or parent assumes full responsibility when using these pacifier clips.