Upcycled Recycled Teenage Shirt into a Toddler Dress with KAM Snaps
 |
 |
 |
 |
 |
 |
 |
 |
 |
 |
 |
 |
 |
 |
 |
 |
 |
 |
 |
 |
 |
 |
 |
 |
 |
||
Supplies:
- 1 Teen Shirt (the one I used was Size 12)
- 1 Teen Belt
- 4 KAM Snap Sets (I used 2 colors G96 Mirror and B47 Neon Pink)
- KAM Snap Pliers and Awl
- Serger Sewing Machine
- Standard Sewing Machine
Instructions:
- I had my daughter try on the shirt. It was a great length and just a bit wide. I pinched about 1" on each side and the shirt seemed to lay nicely and would be a comfortable size for her. Lucky for me this shirt also flaired out at the waist giving it a built in skirt effect. I took the shirt off her and turned it inside out and marked 1" in on each side following the line of the shirt.
- Using my Serger, I followed the line I had drawn. I love my Serger, sewing and cutting all at once, love it! :)
- Next, I marked the center and cut down about 4 inches.
- Using the seam that I cut off when sizing the dress, I made a "interfacing" for the KAM Snap opening in the back. It is about 6" long as it will need to be folded over at the top and run past the opening at the bottom. Cut or rip the seam just a little more than the 4" you will need for the opening. Leave the bottom 1" attached.
- With the dress right side out, place the "interfacing" right side down and pin together round the opening.
- Sew a 1/4" seam allowance all the way around making a V.
- Turn the dress inside out and fold the interfacing inward and pin in place. Also pin the top under to create finished top seam.
- Sew a 1/8" seam allowance from the left top edge with back stitch and beginning and end. Follow the edge of the material down the V and back up again.
- Install 2 KAM Snap Caps and Sockets on the left side 2" to 2 1/2" apart and install 2 KAM Snap Caps and Studs on the right side with the same spacing making sure they line up.
- It will look like this. The dress part is complete now, on to the Belt.
- I took the belt and loosely wrapped it around my daughters waist to decide on the size. Then I installed 2 KAM Snap Caps and Sockets on the piece that will lay in the front (Caps up). I cut off the excess belt past the front KAM Snaps in a clean V. Then I cut off the metal buckle and installed 2 KAM Snap Caps and Studs on the back side (Caps down).
- Tada! Way, way cuter! Now on to the wrap cuff bracelet.
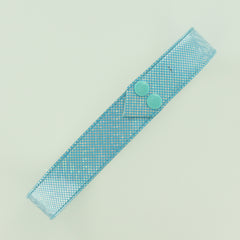
- Using one of the seams that I cut off the dress when I was sizing it, I turned it wrong side out and pinned it together.
- Sew a 1/4" seam allowance with back stitches at both the beginning and end to set the stitch.
- Turn the whole tube right side out.
- It may be hard to see but my princess wanted flowers on her bracelet so I used an embroidery stitch on my sewing machine to add them.
- Add KAM Snap Cap and Socket to one end (Cap up) and install the KAM Snap Cap and Stud to the other end (Cap down). Tada!
- I think it turned out great and my little model was delighted! Happy Snapping!