Making a Peacock Costume and a "No Sew" Tutu with KAM Snaps
 |
 |
 |
 |
 |
 |
 |
 |
 |
 |
 |
 |
 |
 |
 |
 |
 |
 |
 |
 |
 |
 |
 |
 |
Supplies:
- 1-2 Yards of Fabric (I used Royal Blue Fleece)
- 4-6 Sheets of Felt
- Elastic for Tutu
- 4-8 Spools of Tulle (15-25 Yards each)
- 2 KAM Snap Sets
- KAM Snap Pliers and Awl
- Accucut Die Cutter and Dies or Scissors to cut out the Peacock Feathers
- Standard Sewing Machine
- Long Sleeve T-Shirt (we went with Teal)
- Long Black Leggings
Instructions:
- Barbara's orginal Peacock Costume Tutorial, I adjusted her pattern for times sake and went with a "less is more" approach. I reasoned to myself that this costume will mostly be viewed in the dark and a lot of the details of the costume will be lost :). I, also, own a Accucut Die Cutter (great tool!) with handy dandy Circle dies so I decided to do circle shaped feathers rather than tear drop shaped. I used a 4.5", 3.5", and 2.5" circle dies.
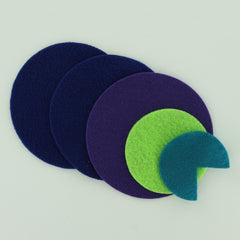
- These can easily be done by hand but I was able to run 4 layers of Felt at a time. Awesome! My daughter wanted 2 different sets of Feathers in Purple, Apple Green and Teal. We alternated between Purple and Teal as the front and back circle with the Apple Green always as the middle piece. This was my fashionista's preference :).
- I also cut out 2x 4.5" Royal Blue Fleece for each feather. We made 16 Peacock "Eye" Feather total and about 40 Royal Blue Fleece Circles.
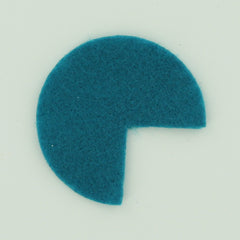
- Take the 2.5" Felt circles and cut a wedge out of each of them.
- They will look like this.
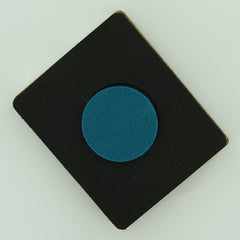
- Take each 4.5" Circle and lay the 3.5" Circle off center.
- Stitch 2 "V"s in Teal thread from the edge to the middlish and back to the edge again to stabilize the circles together.
- Lay the 2.5" 3/4 Circle on top slightly off center again.
- Stitch around the edge of the circle, repeat 16 times. My daughter and I did this with dueling sewing machines and it took just a few minutes to complete.
- Now lay out and plan your cape, I laid out my yardage of Royal Blue fleece and had my daughter lay down on it to get her wing span :). Then using one of the 4.5" Circle feathers, starting at the top edge I chalked the round shape and worked my way down. I drew a rough sketch of what I did above. I did one side and folded fabric and half and cut both sides at once.
- Then I laid the feathers like this and pinned them in place in a random pattern to fill in the cape.
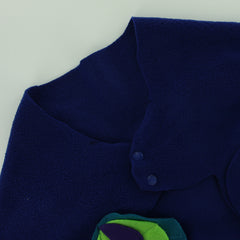
- I straight stitched across my sets of feathers using back stitch at the start and end of each set to make sure they were secure.
- On the tabs in the front of the cap, I doubled over the fleece and put a 2 sets of KAM Snaps in on the left and right. The Cape is finished. You can do more or less details. I didn't bother finishing the edges of the fleece as it will not fray. This may get used a couple times at most and then as dress up for siblings and cousins, so I didn't feel the extra effort was necessary. On to the "No Sew" Tutu!!!
- Make the Elastic waist for your Tutu by wrapping tutu around your child's waist. Stitch the Elastic together by going back and forth repeatedly with a zig zag stitch or straight stitch.
- Cut your spools of Tulle into lengths, mine were for an older girl so I did measured to just below her knee and doubled that measurement. I cut my Tulle in 5" pieces and it took 8 spools to complete the skirt. It is very full but that was the look I was going for.
- Take 1-2 pieces of Tulle fold them in half and place them behind the Elastic.
- Bring the Tulle ends up, over the Elastic and thread them through the open Tulle loop from behind.
- Pull taut and repeat.
- It will end up like this. We used Purple, Purple Glitter, Teal, Teal Glitter, and Apple Green Tulle.
- Here is my proud Peacock! She loves it and she and I had a wonderful time making it together :).