Making a Bandana Bib with KAM Snaps and a PDF Pattern

|
 |
 |
 |
 |
 |
 |
 |
 |
 |
 |
 |
 |
 |
Supplies:
- Fabrics of your choice
- 1 Heart Shaped KAM Snap Set
- KAM Snap Pliers and Awl
- Bandana Bib PDF Pattern (may need to adjust for your child's size or add more KAM Snaps settings)
- Standard Sewing Machine
Instructions:
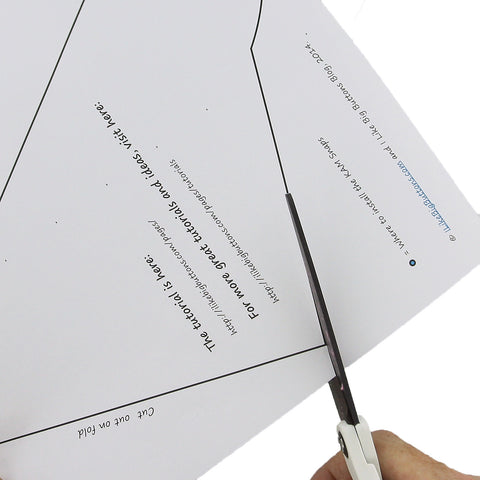
- Download the Bandana Bib PDF Pattern. Print out the pattern making sure the 1″ square in the corner measures 1″ square when printed that will indicate the pattern is the right size.
- Cut out the pattern.
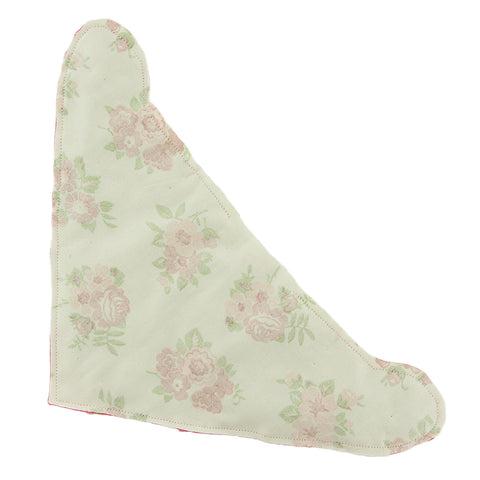
- Place your pattern, with long straight side on fabric folded in half, and pin in place.
- Cut the 2 pieces of Fabric you will use.
- Place Fabrics' right sides together.
- Pin together.
- Sew pieces together with a 1/4" seam allowance, backstitching at the start and finish of sewing, make sure to leave a 3-4" gap so that you can pull the piece right side out.
- Pull piece right side out and make sure to push all the round and square corners out until they lay flat.
- Fold in the opening's seams and pin in place.
- Stitch a finish stitch 1/8" to 1/4" all the way around the bib, making sure to ease your way around the left and right tabs. I do a couple stitches, stop, then lift the foot, turn the fabric slightly, put the foot down, and do a couple more stitches and repeat. Make sure the backstitch at the beginning and end of your sewing.
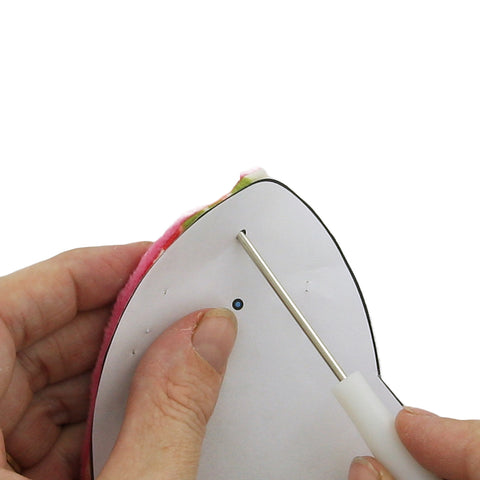
- Use the template to mark the KAM Snap placement, you may want to check the measurement of your child's neck and adjust the pattern or snap placement accordingly. This bib worked for a toddler but with an extra set of snaps can work for more sizes.
- I decided as I was getting ready to install the KAM Snaps to go with our new Heart Shaped snaps. Install the Heart Shaped KAM Snap Cap and Stud in the left and a Cap and Socket on the right tab.
- Interested in Heart Shaped KAM Snaps, check out our great colors, in smaller package quantities for more great variety!
- Totally cute, don't you think! ;) Happy Snapping!!!