
I Like Big Buttons!® Tip of the Week

On high-stress spots, double-stack snaps. Placing two Size 20s close together shares the load and keeps your project secure.

June is the perfect time to stock up on colorful KAM snaps for all your summer sewing and crafting ideas.
Whether you're making bibs, bags, wallets, baby items, household essentials, or apparel, ILikeBigButtons has the KAM snaps and crafting supplies you need to bring your projects to life. Choose from a huge variety of colors to match every creation. 

Shop now and keep those handmade projects snapping together all summer long!
What are you using KAM snaps for this month? 

Been there crafted that!

Stock up for your summer handmade project! ILikeBigButtons has KAM snaps, key fob hardware, cover buttons, pacifier supplies, and more for your craft stash. Shop now and get creating!
ILikeBigButtons.com—Where Crafting is a Snap!💕
#ILikeBigButtons #CraftSupplies #DIYSupplies #kamsnaps #CoverButtons
#KeyFobHardware #HandmadeSupplies

Have lots of fabric scraps? Cover Buttons are a great way to recycle your scraps into works of art.
#CoverButtonCrafts #DIYWithCoverButtons #CoverButtonProjects #CraftingWithButtons #SewingWithButtons #ilikebigbuttons #CraftingCommunity

I will clean the house today. Oh look, craft supplies! 💕
ILikeBigButtons.com—Where Crafting is a Snap!
#ilikebigbuttons #craftstore #craftquotes #crafthumor #kamsnaps #keyfobhardware #coverbuttons #wherecraftingisasnap

Snaps scatter easy. Use a small tackle boxes--to keep your caps, sockets, and studs from turning into chaos mid-project.
#ILikeBigButtons #KAMSnaps #CraftingTips #SewingHack #DIYProjects #CraftSupplies #SewingMadeSimple #KAMSnapsToTheRescue

Craft like no one is watching! 💕
ILikeBigButtons.com—Where Crafting is a Snap!
https://ilikebigbuttons.com/
#ilikebigbuttons #craftstore #craftquotes #crafthumor #kamsnaps #keyfobhardware #coverbuttons #wherecraftingisasnap

Go BIG! with Size 60 or Size 75 for statement pieces like earrings, brooches, or bag accents-larger sizes grab attention and give more room for bold prints.
#CoverButtonCrafts #DIYWithCoverButtons #CoverButtonProjects #CraftingWithButtons #SewingWithButtons #ilikebigbuttons #CraftingCommunity

PSA: Don't criticize the size of my craft stash—unless you think it should be bigger. 💕
ILikeBigButtons.com—Where Crafting is a Snap!
#ilikebigbuttons #craftstore #craftquotes #crafthumor #kamsnaps #keyfobhardware #coverbuttons #wherecraftingisasnap

Crafting each day keeps the crazy away! 💕
ILikeBigButtons.com—Where Crafting is a Snap!
#ilikebigbuttons #craftstore #craftquotes #crafthumor #kamsnaps #keyfobhardware #coverbuttons #wherecraftingisasnap
Add a set of Cover Button earrings to a Birthday, St. Patrick's Day, or other special moments card for extra embellishment and a sweet personalized gift.
#CoverButtonCrafts #DIYWithCoverButtons #CoverButtonProjects #CraftingWithButtons #SewingWithButtons #ilikebigbuttons #CraftingCommunity

Sew much fabric, sew little time.

Flip over the tool base with the fabric/cap in it. This is a preview of how the button will look and the time to make adjustments before installing the back.
#CoverButtonCrafts #DIYWithCoverButtons #CoverButtonProjects #CraftingWithButtons #SewingWithButtons #ilikebigbuttons #CraftingCommunity
If you are anything like me, arthritis or hand fatigue has started to creep up on you, especially when working on a big cover button project. My sweet husband was kind enough to create a universal cover button press die for my DK-93 tabletop press, so I can create buttons to my heart's content. I wanted to share this with you because this has been a game-changer for me and has made button forming a breeze.
It’s a little “McGyvered,” but this will give you an idea of how to do it.
Supplies
-
Bolt: M8–1.25 × 40mm (M8–1.25 = bolt size + thread pitch & 40mm = bolt length)
-
Nut: matches M8–1.25 threads
-
Washer: large enough to fit inside the Size 75 pink pusher
-
Size 75 pink pusher (or similar-sized/shaped item)
-
Epoxy (or similar strong adhesive)
-
Flat platform material (wood or metal) to cover the bottom die location
-
Your button tool (correct size for the button you’re making)
- KAM DK-93 Tabletop Press

Part 1: Make the threaded “top die” adapter
1. Assemble the bolt: Thread the washer onto the bolt. Thread the nut onto the bolt after the washer. (You’ll be embedding the washer/nut end into the pusher.)
2. Prep the pink pusher: Place the Size 75 pink pusher upside down (open side facing up).
3. Fill with epoxy: Fill the pusher about halfway with epoxy (or similar adhesive).
4. Insert the bolt assembly: Press the bolt/washer/nut into the epoxy-filled pusher. Center it carefully so it stays straight.
5. Let it cure: Allow the epoxy to dry/cure for the full recommended time (per the epoxy instructions).
6. Install the adapter: Once fully cured, thread the bolt/pusher assembly into the top die location of your press.

Part 2: Create a flat base at the bottom die location
1. Place a flat, sturdy platform (wood or metal) over the bottom die location. This base needs to be about 2"x2".
2. The goal is an even, level surface to set your button and button tool on.

Part 3: Press the button
1. Assemble your I Like Big Buttons! cover button normally: Fabric + cap + back, using your button tool like you normally would.
2. Add the pink pusher: Place the pink pusher on top, “sandwiching” the button together.
3. Center everything: Position the button under the threaded adapter so the button is centered, the back is level, and the pink pusher is straight on top.
4. Press gently first: Pull down on the press lever slowly and gently until you see the back settle into place. Stop, check alignment, and see if the back is popped into place.
5. Increase pressure only if needed: If the back isn't fully set, press again with slightly more pressure.
Tip: Too much force can flatten the button's dome, so start light until you get a feel for it.


To see other great Fabric Cover Button ideas, visit our DIY Project section here.

Supplies:
Instructions:
1. Stain the 2" wood discs with the color of your choice and let them dry.

2. Make 2x Size 75 Cover Buttons for each ornament you would like to make.

How to Make Fabric Cover Buttons:
Cover Buttons are easy to assemble:
- Cut your fabric scrap. You will want a circle that is about twice the diameter of your button blank.
- Put your fabric piece in the larger assembly tool piece (RIGHT SIDE DOWN). When you look into the tool you want to see the back of the fabric.
- Place the button front (the domed piece) on top of the fabric. Leave the fabric edges hanging out.
- Press the cover button edges down into the tool.
- Place the back cover button piece on top of your fabric and button front. If the cover button will be subject to repeated tugging from the back, you may want to add a little e6000 adhesive before attaching the back.
- Take the smaller piece of the assembly tool and with the open side down place it on the button back.
- Press down. You may hear a pop when the last bit of the button back slips into place. If you take the tool out and the button is not completely secured, just put it back in and press down again.
- When you take the small assembly tool piece off, the fabric edges will be secured underneath the button back.
- Remove the button from the larger assembly tool piece.
- Tada!


3. Cut and knot a length of string. I used about a ~7" piece of metallic embroidery floss. I used a glue dot to adhere it to the inside of 1 of the Size 75 Cover Buttons, leaving about a 2.5" loop above the edge of the cover button.


4. I placed a large dollop of E6000 over the string, in the center of the button back, and pressed it to the wood disc, making sure it was centered and the exposed edges looked uniform. Repeat on the other side using the button without a string loop. You may want to allow drying time between gluing. I had large clips and was able to do both sides, then clamp them together to let them dry, but this might not be ideal for some crafters.

5. Allow to dry for the recommended dry time (24 hours - full cure time 24 to 72 hours).

5. Tada! You have some beautiful macaron-inspired ornaments. Perfect for your Christmas tree or general decoration.


To see other great Fabric Cover Button ideas, visit our DIY Project section here.

At I Like Big Buttons!®, we’re proud of our 20+ years in the craft supplies industry—and the over 70,000 reviews we’ve received across Amazon, eBay, Etsy, and our own store. Our customers’ words speak volumes about the quality of our products, our fast shipping, and our exceptional customer service. In this post, we’re excited to a sampling of the feedback from our community that shows why crafters keep coming back.
Quality That Inspires Creativity
Our products are designed to help you bring your creative visions to life. Don’t just take our word for it—here’s what real customers have to say:
“Perfect as always, the only store I buy KAM snaps from!”
– Dana on KAM® Snaps
“I've been purchasing snaps and hardware for years from I Like Big Buttons and couldn't be happier! All orders are packaged neatly and they arrive on time...every time! Thank you!”
– Brenda on KAM® Snaps
These testimonials reflect our commitment to offering top-quality supplies that make your projects not only possible but also professional-looking.
Fast, Reliable Shipping
When inspiration strikes, you need your supplies ASAP. Our customers appreciate our speedy delivery:
“I received the plier plus the selected snap buttons. Shipping was fast and instructions and troubleshooting are included. I am excited to use it for my projects.”
– Thi on Starter Pack (100 Sets)
“Fast shipping and just as described. Thank you for the gift as well!”
– Tracey on 1" and 1.25" - Key Fob Hardware Starter KIT - Silver and Antique Brass
For us, getting your order out the door quickly is just as important as the quality of our products. Orders placed before 3 PM PT ship the very next business day—so you’re never left waiting when a project deadline is looming.
Exceptional Customer Service
We’re more than just a supplier—we’re your partner in creativity. Our customers notice the personal touch in our service:
“Thank you guys for the awesome customer service....the new vise is AMAZING!! How did I live without it, and I know my arthritic hands and fingers are grateful!! This is THE BEST SHOP for all your hardware needs!!”
– Brenda on KAM® Snap Press
“These snaps work great and I will definitely be back to get more colors and sizes! I ordered over a weekend and received by the following Wednesday - fast shipping and even had a little something extra as a thank you!”
– Chantel on KAM® Snaps
We are ready to help, whether you have a question about a product or need a bit of guidance to make your project a success.
Join Our Creative Community
At I Like Big Buttons!®, your reviews not only validate our efforts—they inspire new ideas and keep us motivated to deliver the best in quality and service.
Drop us an email, tag us in your projects, or share your story—we love seeing what you create! 💕 Share them with us in our ILBB Facebook Fan Group or tag us on Instagram at @ilikebigbuttons_com using hashtag #ilikebigbuttons
Ready to get inspired?
Explore our full range of craft supplies and see why thousands of crafters trust I Like Big Buttons! for their creative projects.
👉 Shop Now
Happy Crafting,
The I Like Big Buttons! Team
Supplies:
- 2 Completed Flat Back Fabric Cover Button (Choose your size, Size 20 through Size 60 all work great, size depends on the statement you want to make)
- 1 set of Earring Post & Backs
- E6000 or comparable adhesive
Steps:
1. Follow these instructions to make Flat Back Fabric Covered Buttons.
2. Apply E6000 to back of Cover Button.

3. Press Earring Post into place and remove any extra Adhesive. On smaller sized Cover buttons center the post, as they increase in size adjust post towards top.

4. Let dry, add Earring Backing/Nut, and enjoy.


5. Tada!
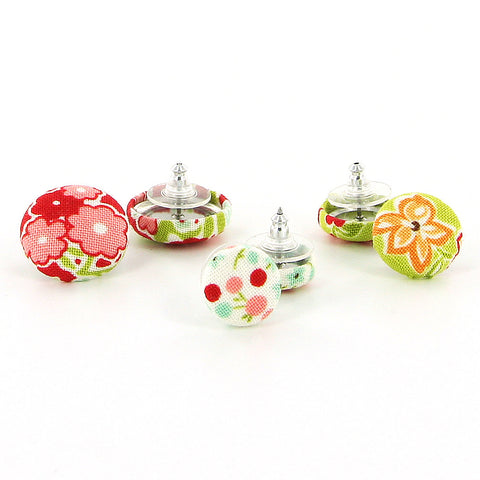
You are done! Wear these adorable Earrings to match or accent your favorite outfit or dress up your favorite t-shirt and jeans for an afternoon outing. Enjoy!
Crafting Humor of the Day 😅
It’s all fun and games… until that snap goes on backwards! 🙈 (But don’t worry — our KAM Snap Removal Pliers have your back 💪)
#ILikeBigButtons #CraftingLaughs #KAMSnaps #SewingHumor #DIYFails #CraftingCommunity #MakersGonnaMake #ItsASnap

📢 Have You Read Our Latest I Like Big Buttons! Newsletter?
Stay in the loop with the latest updates, exclusive deals, and how-to videos from I Like Big Buttons! 🎉
If you’re not subscribed yet, don’t miss out! Click here to join the fun and be the first to know about our special offers and crafty inspiration.
✉️ What You’ll Get:
✔️ One email per month with the latest sales
✔️ A bi-monthly email featuring giveaways or flash sale alerts
Subscribe today and never miss a button-tastic deal! 💌 👉 ILikeBigButtons.com
One of our all-time favorite tutorials — and a customer favorite too! These Bandana Bibs are the perfect handmade gift for the little droolers, snackers, and stylish cuties in your life.
This easy-to-follow PDF pattern shows you how to sew and snap your way to adorable results. Plus, we used our new Heart-Shaped KAM Snaps for a little extra love.
 So easy to make and cute! I love the splash of color Mini Fabric Cover Button Needle Minders add to my sewing station and their usefulness!
Supplies:
I Like Big Buttons! - Picture Tutorial Below:

1. Cut your fabric scrap. You will want a circle that is about twice the diameter of your button blank. *TIP* Our Size 45 Acrylic Cover Button Template makes centering and creating the right size circle of fabric a breeze.
 2. Put your fabric piece in the larger assembly tool piece (RIGHT SIDE DOWN). When you look into the tool, you want to see the back of the fabric.


3. Use a glue dot to adhere the magnet inside the back of the Cover Button. *TIP* If you are making multiple needle minders at once, make sure to space them out; otherwise, the strong neodymium magnets will attract each other and go flying across your crafting surface. :P

4. Place the button front (the domed piece) on top of the fabric. Leave the fabric edges hanging out.

5. Press the Cover Button edges down into the tool. *TIP* To make it easier on my fingers, I use a sharpie marker to apply pressure.

6. Gently tug the edges of the fabric to make sure it is smoothly situated in the tool. If you are trying to center a pattern, flip the tool over and check the fabric's positioning. Make adjustments if necessary. Press the fabric edges into the open back of the cover button cap.

7. Place the flat back Cover Button piece on top of your fabric and button front. *TIP* Make sure that all the edges are tucked neatly into the back before assembly.

8. Take the smaller PINK piece of the assembly tool and, with the open side down, place it on the button back.

9. Press down. You may hear a pop when the last bit of the button back slips into place. If you take the tool out and the button is not completely secured, just put it back in and press down again. *TIP* I often use a flat piece of wood to apply pressure, again to save my fingers. It also helps prevent the button back from going in at an angle and helps the back slide into place with the extra bulk the magnet adds.
10. When you take the small assembly tool piece off, the fabric edges will be secured underneath the button back.


11. Remove the button from the larger assembly tool piece.
12. Tada! Now you have an attractive Mini Pin Cushion/Needle Holder for your sewing room.


To see other great Fabric Cover Button ideas, visit our DIY Project section here.
Supplies:

Instructions:
1. Cut 3 Pieces of 12"x6" and 1 Piece of Interfacing. This will make a Medium Sized Crayon Roll and will hold 9-10 Crayons. You can adjust your Fabric length up or down to hold more or less Crayons. About 2" when to edges, seams and Snap placement.

2. Iron the Interfacing on the wrong side of the fabric that will be the back of the Crayon Roll.

3. Iron the Piece of Fabric in half that will become the pocket to hold the Crayons and lay it on the Piece of Fabric that will be its backing.

4. Pin them together.

5. Every 1" sew a straight line down, back stitching at the beginning.

6. Take the back piece, Fabric and Interfacing, and the front piece, Fabric Pocket, place right sides together and sew a 1/4" seam on three sides. Set the stitch at both ends.
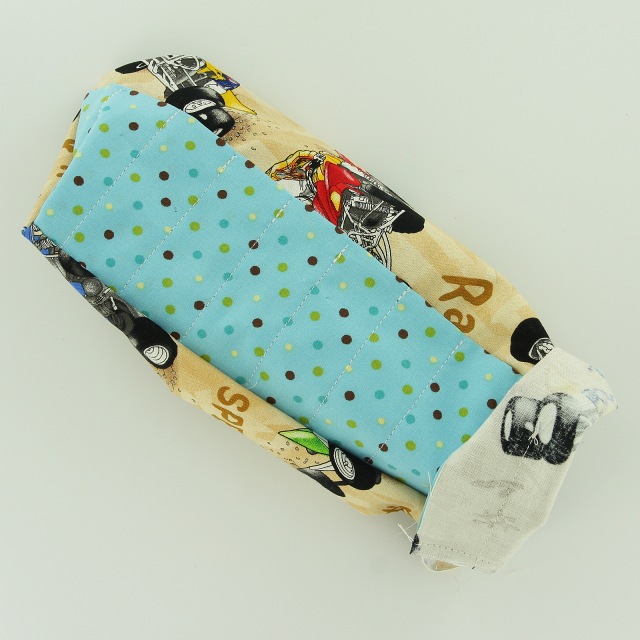
7. Turn the Fabric right side out and push out the corners.
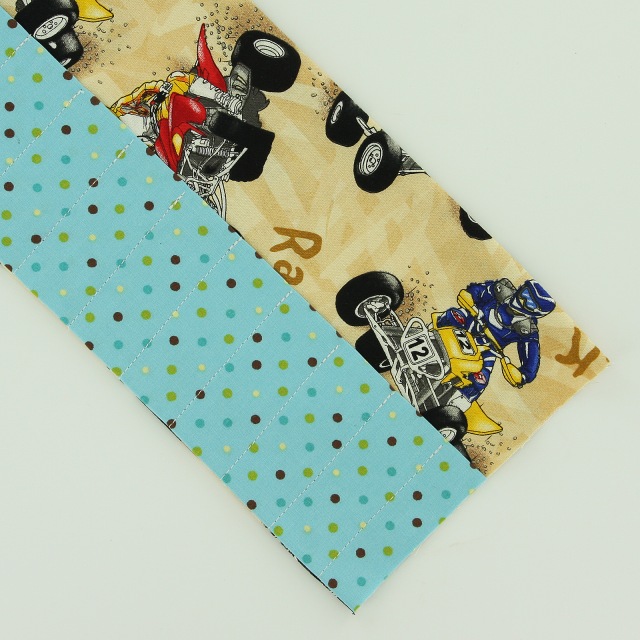
8. Iron it flat.

9. Fold in the unfinished edge about 1/4" and iron flat. Pin flat.
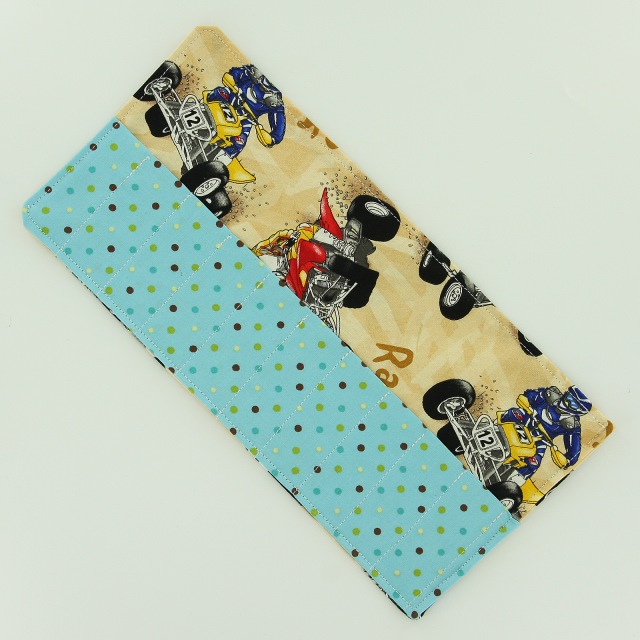
10. Sew all the way around the Crayon Roll with a 1/8" seam. Make sure to back-stitch at the beginning and end.

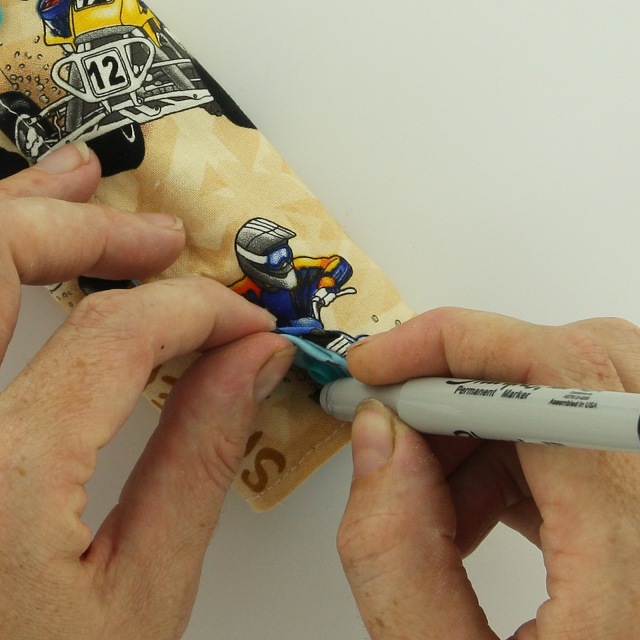
11. On the top right corner of the Crayon Roll, poke a hole for the KAM Snap Cap and Stud with your Awl, a 1/2" in and 1/2" down. Repeat on the bottom right corner a 1/2" in and 1/2" up.

12. Install the KAM Snap, I used G115 Turquoise for this project to match the fabrics my youngest son picked out. Repeat.

13. This is what it will look like.


14. To figure out the placement of the KAM Snap Cap and Sockets, add Crayons and roll it up.
15. I then marked the placement of the KAM Snaps.

16. Now install the KAM Snap Caps and Sockets. The second round of snaps landed in the middle of one of the crayon spots. As this was my first attempt at a Crayon Roll, there is a learning curve. It could still hold a Crayon. It just wouldn't sit down in the pocket as well. I would adjust for the placement of the Snaps a little differently next time, maybe. :P

17. The finished product will look like this.


18. Add Crayons, Roll, and Go! Tada!!!

19. Easy, functional and a crowd pleaser!
It’s never too early to start on holiday gifts and décor! Some of our top picks for handmade holiday projects:

Cover Buttons – Perfect for ornaments, stocking stuffers, and handmade gifts.
Earring Supplies – Create festive holiday earrings in minutes!
Key Fob Hardware – Make personalized keychains for everyone on your list!

Pro Tip: Order early—holiday crafting season gets busy, and you don’t want to miss out on your favorite supplies!

Crafting forever, housework whenever.

A
bezel keychain is stylish, functional, and a great scrap-busting project!
How to Make It:

Select a cover button kit and your favorite fabric scraps.
Glue the cover button into a pendant bezel and thread it on a split ring.
Tada! You have a stylish, no-sew keychain.
Tip: Make themed key rings for different occasions—florals for spring, cozy plaids for fall!

🚚 Need Craft Supplies Fast? We’ve Got You Covered! 📦 Our Supplies Are In Stock & Ready to Ship!
At I Like Big Buttons!, we know that when inspiration strikes, you don’t want to wait weeks for supplies to arrive. That’s why we’re committed to fast, reliable shipping—so you can get back to creating as soon as possible!
✅ Everything You Need, In Stock & Ready to Go!
No long wait times or backorders here! Our KAM snaps, key fob hardware, cover button kits, and more are ready to ship from our warehouse—no delays, no stress.
✅ Fast Shipping, Every Time
We ship Monday–Friday, and if you place your order before 3 PM PT, it ships the next business day!
✅ Reliable Service You Can Trust
With hundreds of happy crafters and small business owners, we take pride in providing quality supplies, fast shipping, and excellent customer service—so you can craft with confidence.
💡 Ready to stock up on craft supplies?
👉 Shop Now and get your order on its way ASAP!
Let’s Keep Creating Together!
We’d love to hear from you! What inspires your crafting journey? How has I Like Big Buttons!® been a part of your creativity?
Drop us an email, tag us in your projects, or share your story—we love seeing what you create! 💕 Share them with us in our ILBB Facebook Fan Group or tag us on Instagram at @ilikebigbuttons_com using hashtag #ilikebigbuttons
Thanks for being part of this amazing crafting community—We can’t wait to see what you make! Need supplies for your next project? Shop now and keep the creativity flowing!
Happy crafting! 🎨✨

Cut it out—it's craft time! 💕

Supplies:
- 1 Completed Size 75 (1 7/8 inch / 48 mm) Fabric Cover Button
- Fabric Of Your Choice
- 1 or 2 Standard Round Magnet (Approximately 3/4" Round)
- E6000, Hot Glue, or comparable adhesive
I Like Big Buttons! - Picture Tutorial Below:
1. Cut your fabric scrap. You will want a circle that is about twice the diameter of your button blank. *TIP* Our All-In-One Cover Button Template makes creating the right size circle of fabric a breeze.
2. Put your fabric piece in the larger assembly tool piece (RIGHT SIDE DOWN). When you look into the tool you want to see the back of the fabric.

3. Glue the magnet inside the back of the Cover Button with Hot Glue or E6000.

4. Place the button front (the domed piece) on top of the fabric. Leave the fabric edges hanging out.
5. Press the cover button edges down into the tool. *TIP* To make it easier on my fingers, I use a sharpie marker to apply pressure.
6. Place the back cover button piece on top of your fabric and button front. *TIP* If the cover button will be subject to repeated tugging from the back, you may want to add a little e6000 adhesive before attaching the back.
7. Take the smaller piece of the assembly tool and with the open side down place it on the button back.
8. Press down. You may hear a pop when the last bit of the button back slips into place. If you take the tool out and the button is not completely secured, just put it back in and press down again. *TIP* I often use a flat piece of wood to apply pressure, again to save my fingers. It also helps to avoid the button back going in at an angle.

9. When you take the small assembly tool piece off, the fabric edges will be secured underneath the button back.
9. Remove the button from the larger assembly tool piece.
10. Tada! Now you have an attractive Pin Cushion/Needle Holder for your sewing room.

To see other great Fabric Cover Button ideas, visit our DIY Project section here.
 Made with love (and a lot of KAM snaps). 💕
📢 Have You Read Our Latest I Like Big Buttons! Newsletter?
Stay in the loop with the latest updates, exclusive deals, and how-to videos from I Like Big Buttons! 🎉
If you’re not subscribed yet, don’t miss out! Click here to join the fun and be the first to know about our special offers and crafty inspiration.
✉️ What You’ll Get:
✔️ One email per month with the latest sales
✔️ A bi-monthly email featuring giveaways or flash sale alerts
Subscribe today and never miss a button-tastic deal! 💌 👉 ILikeBigButtons.com

Supplies:

1. Cut an 11" section of Cotton Webbing and Fabric strip, create an 11"x2.25" strip of Fabric and an 11"x1" strip of Heat N Bond. If desired, you can make the wristlet longer, some crafters go as large as 12-14" but 11" is a nice universal size.
2. I made a template out of chipboard that was 12"x1.25" to help me achieve a consistent size and look. Fold in and iron the fabric to 1.25" wide.
3. Center and iron Heat N Bond to the underside of the Fabric strip.
4. Remove Heat N Bond backing, turn the finished Fabric Strip right side up, and iron to Cotton Webbing, making sure to center it.
5. Stitch along the edge of your Fabric strip, securing the edge onto the webbing. Work slowly, keeping close to the edge. Go the whole length on both sides.
6. Fold the Cotton Webbing in half, right sides facing out and match up the ends. Secure with Sewing Clips and stitch the ends together with a zigzag stitch. Trim any loose threads and lightly coat the end in Fray Stop or equivalent liquid to help resist fraying over time.

7. Tuck the sewn seam ends into the
Key Fob Hardware, making sure that the Cotton Webbing is in there evenly and not hanging out one end or the other.

9. Add the Key Ring and Yay!!! You are done. Good Job!!!
* Instructions for 1.25" Key Fob Hardware (adjust accordingly if using 1" Hardware)
To see all our Key Fob Hardware Tutorials, visit our Projects section here.

Crafting is all about creativity, and at I Like Big Buttons!, we love helping you turn simple supplies into stylish, functional, and fun projects! Whether you’re looking for quick DIY gifts, something practical for everyday use, or just a reason to break out your craft stash, here are five fresh ideas to spark your inspiration.
1. DIY Barely-Sew Snap Pouches ✨
Perfect for storing small essentials like earbuds, coins, or travel tissues, these barely-sew snap pouches come together in minutes with just fabric, a KAM snap, and some creativity!
How to Make It:
- Cut a sturdy fabric rectangle and fold it into an envelope shape.
- Secure the sides with a simple straight stitch.
- Attach a KAM snap as a closure.
- Decorate with buttons or fabric paint for a personalized touch!
💡 Tip: Use waterproof fabric for a durable, wipeable pouch!

2. Fabric Cover Button Hair Ties 🎀
Upgrade your everyday hair accessories by covering buttons with fabric to create one-of-a-kind hair ties!
How to Make It:
- Select a cover button kit and your favorite fabric scraps.
- Follow the kit instructions to cover the button.
- Attach an elastic hair tie to the back using glue or by looping it through the shank.
💡 Tip: Use matching fabric to coordinate with your outfits!

3. Snap-On Hand Towels for Kitchen & Bath 🏡
Tired of hand towels slipping off the rack? Snap them in place with an easy KAM snap hack!
How to Make It:
- Fold the top edge of a hand towel over a few inches.
- Sew the folded section down to create a flap.
- Attach two KAM snaps so the towel can snap over a handle or bar.
💡 Tip: Use fun-colored snaps to match your kitchen or bathroom décor!

4. Easy Pendant Bezel Key Ring 🔑
A bezel keychain is stylish, functional, and a great scrap-busting project!
How to Make It:
- Select a cover button kit and your favorite fabric scraps.
- Glue the cover button into a pendant bezel and thread it on a split ring.
- Tada! You have a stylish, no-sew keychain.
💡 Tip: Make themed key rings for different occasions—florals for spring, cozy plaids for fall!

Get Crafting with I Like Big Buttons!
Which of these ideas are you excited to try? We’d love to see your creations—tag us on social media and show off your handmade magic!
Need supplies? Shop now to stock up on KAM snaps, key fob hardware, cover buttons, and more!
Happy crafting! 🎨🧵

🏞️ Our I Like Big Buttons! family is at the lake. 🚣
Any and all orders made between July 26th through August 4th will ship on August 5th.
Any product and/or order questions will be answered when we return on August 5th.
You can find answers to most of your product questions by visiting our plethora of FAQs and product guides located under the HELP tab on our website HERE.
Thank you for understanding,
Gena and the I Like Big Buttons! Crew


