News
Christmas Gift Idea #2: Key Fob Wristlets @ ILikeBigButtons.com December 02 2021

- 11"x2.25" fabric strip (of your choosing)
- 1" or 1.25" cotton webbing (depending on Key Fob Hardware Size)
- Heat N Bond or Fusible Tape
- 1" or 1.25" Key Fob Hardware set
- Key Fob Hardware Pliers
- Sewing Clips
- Fray Stop
- Sewing Machine
- Iron

2. I made a template out of chipboard that was 12"x1.25" to help me achieve a consistent size and look. Fold in and iron the fabric to 1.25" wide.
4. Remove Heat N Bond backing and turn finished Fabric Strip right side up and iron to Cotton Webbing making sure to center it.
5. Stitch along the edge of your Fabric strip, securing the edge onto the webbing. Work slowly, keeping close to the edge. Go the whole length on both sides.

6. Fold the Cotton Webbing in half, right sides facing out and match up the ends. Secure with Sewing Clips and stitch the ends together with a zigzag stitch. Trim any loose threads and lightly coat the end in Fray Stop or equivalent liquid to help resist fraying over time.

8. Using your Key Fob Hardware pliers squeeze the Key Fob Hardware closed a little at a time. I like to go back and forth a couple times so that I don't over-crimp one side too much.


9. Add the Key Ring and Yay!!! You are done. Good Job!!!
* Instructions for 1.25" Key Fob Hardware (adjust accordingly if using 1" Hardware)
To see all our Key Fob Hardware Tutorials, visit our Projects section here.
How to make Fabric Key Fob Hardware Wristlets by I Like Big Buttons! October 28 2016

Today, I am making a Fabric Key Fob Hardware Wristlets. While we wait for our Key Fob Starter Kit Giveaway to end (Monday, 10/31/16), I decided to make a few adorable Key Fob Wristlets to show just how easy and fun they are to make.
Supplies:
- 10" x 5" Fabric of your Choosing
- 10″ x 2.5" Piece of Fusible Fleece or 10" x 5" Fusible Interfacing
- 1 Key Fob Hardware and Split Ring
- Key Fob Hardware Pliers
- Sewing Clips
- Standard Sewing Machine
- Fray Check
♥♥♥♥♥♥♥♥♥♥♥♥♥♥♥♥♥♥♥♥♥♥♥♥♥♥♥♥♥♥♥♥♥♥♥♥♥♥♥♥♥♥♥♥♥♥♥♥♥♥♥♥

Instructions:
1. Cut a 10" x 5" section of Fabric of your choosing and 10" x 2.5" Fusible Fleece.

2. Iron Fusible Fleece to the center of the fabric. Fold and iron the Fabric in half with the wrong sides together.

3. Unfold and iron the Fabric in half again long sides to the center.
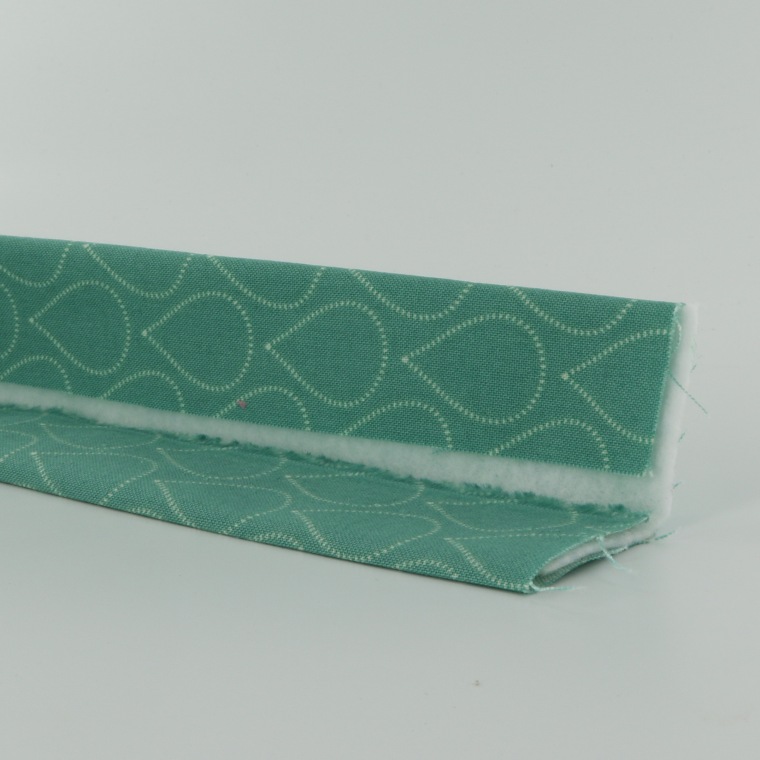
4. It will look like this when you get done.

5. Use your Sewing Clips to pin the Wristlet flat.

6. Stitch along the edge of your Fabric strip, I stitched 1/4" in. Remove the Sewing Clips as you go. Work slowly, keeping close to the edge and as straight of a line as possible.

7. Repeat 1/4" stitching along the opposing edge.
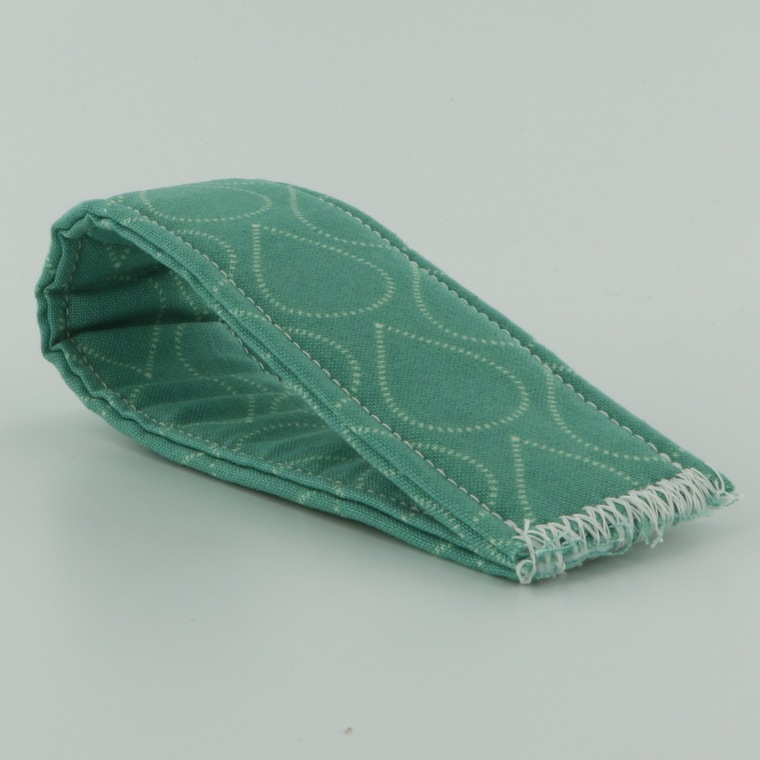
8. Fold the Fabric Wristlet Strip in half, right sides facing out and match up the ends.
9. Stitch the ends together with a zig zag stitch. I went back and forth a few times to insure it held.
10. Trim any loose threads. Use Fray Check to seal the end of the exposed Fabric edge.

11. Tuck the sewn seam ends into the Key Fob Hardware, making sure that the Fabric Wristlet is centered.

12. Using Key Fob Hardware Pliers squeeze the Key Fob Hardware closed with gentle pressure. Sometimes, I go back and forth from left to right added a little bit of pressure to each side until it eases together. Our Key Fob Hardware Pliers make this easy to do.
13. Note the adjustable screw set to the distance I want the pliers to go to.

14. Add the Split Ring and Yay!!!

15. I love them and now I have a few new sets to share!!!
An I Like Big Buttons Christmas! Idea #5: How to Make Key Fob Hardware Wristlets December 09 2015

Gift idea #5: Key Fob Hardware Wristlets are a great useful and personal gift to give. Key Fob Hardware is simple to use and produces amazing results. Just add your fabric, ribbon, webbing, or embroidery for an instant, elegant wristlet. Check it out!
Four fun and simple tutorials:
- Fabric and Cotton Webbing Wristlet
- Ribbon and Cotton Webbing Wristlet
- Making a Smart Phone Case with Wristlet using Key Fob Hardware, KAM Snaps and PDF Pattern
- Making a Embroidered Key Fob Hardware Wristlet
#ilikebigbuttons #keyfob #keyfobwristlets #christmasideas


How to make Embroidered Ribbon Key Fob Hardware Wristlets October 01 2014
How to make Embroidered Ribbon Key Fob Hardware Wristlets
Today, I am making embroidered ribbon Key Fob Hardware Wristlets. Just a couple weeks ago, my mom, sister and I had a girl's weekend at my home. In between long rounds of talking and catching up (we talk every week by phone ;), eating good food, chasing kids, and being put to work. They graciously volunteered to help me do some of the tedious day to day work for my business. We snuck in some time to make a few Key Fob Hardware Wristlets for them. Here are some examples of how they turned out.
Supplies:
- Ribbon of your choosing (Narrower than the Cotton Webbing)
- 1x 10″ Piece of 1.25″ Cotton Webbing
- 1x 10″ Piece of Ribbon
- 1 Key Fob Hardware and Split Ring
- Key Fob Hardware Pliers
- Fray Check
- Wonder Clips
- Standard Sewing Machine with Embroidery option


Instructions:
1. Cut a 10" section of the Cotton Webbing and Ribbon of your choosing.

2. The ribbon I was using was made of polyester so I used a lighter to seal the ends of the ribbon so it doesn't fray. (If you are unsure, you may want to practice on a scrap piece if this is your first time or you are unsure of the what the material is made of.)
-
If you would like (I didn't do it this time but have in the past): Cut a 10" section of Heat N Bond, keeping it thinner than your ribbon.
-
Iron the Heat N Bond to your Cotton Webbing, making sure to center it. This is not a necessary step but it makes it easier to sew the Ribbon on especially with embroidered ribbon.
-
Iron the Ribbon to the Cotton Webbing.

3. Using my Standard Sewing Machine with Embroidery options, I picked the word I wanted on my ribbon and sewed it on my ribbon. I folded my ribbon in half and estimated about where the letters would end up and came up with about 2 1/2" to 3" down to get the font centered on the Wristlet once finished.
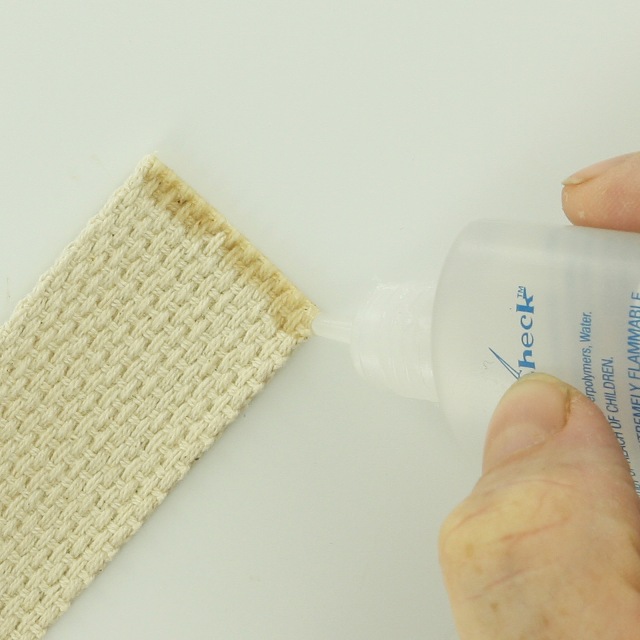
4. Use Fray Check to seal the end of the Cotton Webbing.

5. I laid out my Ribbon and Rick Rack how I wanted it to look using my Wonder Clips. Love them!
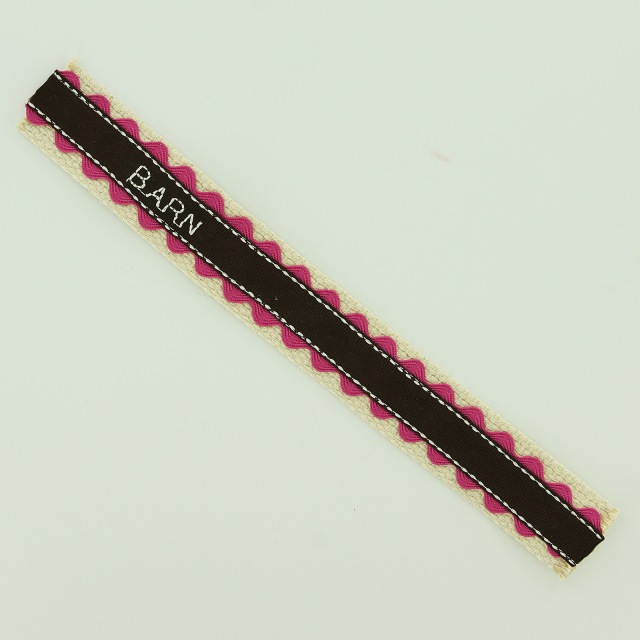
6. Sew up one side of the Ribbon and down the other. The Ribbon should now be securely attached to the Cotton Webbing.

7. Fold the Cotton Webbing in half, right sides facing out and match up the ends.
8. Stitch the ends together with a 1/4" seam allowance.
9. Trim any loose threads.

10. Tuck the sewn seam ends into the Key Fob Hardware, making sure that the Cotton Webbing is centered.

11. Using Key Fob Hardware Pliers squeeze the Key Fob Hardware closed with gentle pressure.
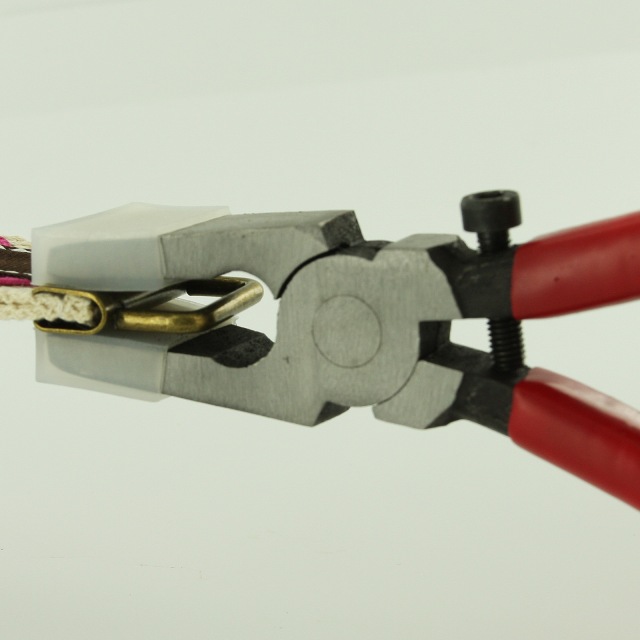
12. Note the adjustable screw set to the distance I want the pliers to go to.

13. Add the Split Ring and Yay!!!


14. I love them and now I have a set for myself too!
Antique Brass Key Fob Hardware November 22 2013
Who needs some more Antique Brass craft items? Well, I do. Brand New! Antique Brass Key Fob Hardware with Split Rings are now available here in 1" and 1.25".
Check them out! I hope you love them as much as I do!
Key Fob Hardware is simple to use and produces amazing results. Just add your fabric, ribbon, or webbing for an instant, elegant wristlet.
Rubber tipped glass pliers or welding lock grip pliers work great for attaching this hardware. Make sure they are padded or covered with tape to prevent scratching.
You can do it! See how easy it is with one of our step by step tutorials:
Where to buy:
http://ilikebigbuttons.com/collections/key-fob-hardware
