News
An I Like Big Buttons Christmas! Idea #4: How To Make Fabric Cover Button Christmas Cards December 04 2015

Gift idea #4: These charming Christmas cards are adorable and easy to make using Fabric Cover Buttons. You could embellish these additionally by make the Cover Buttons actual earrings with our Earring Supplies: Earring Posts or Clip Ons and it could double as a gift and Christmas Card. Check it out!
Supplies:
- Flat Back Cover Buttons (I used Size 20, Size 24, and Size 30 Cover Buttons)
- Cover Button Assembly Tools
- Cover Button Templates
- Fabric Scraps
- E6000 Adhesive or Hot Glue
- Sharpie Permanent Marker
- Card Stock or Pre-Made Card
Instructions:
1. Cut your fabric scrap. You will want a circle that is about twice the diameter of your button blank or use one of our handy Plastic Cover Button Templates. See More
#ilikebigbuttons #tutorials #coverbuttons #christmas #christmascards

An I Like Big Buttons Christmas! Idea #3: How To Make Fabric Cover Button Earrings December 01 2015
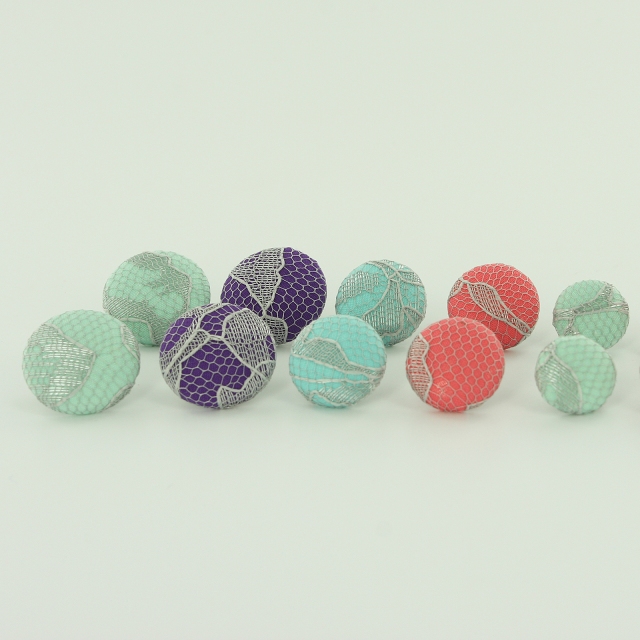
Gift idea #3: Super easy with a lot of impact these cute Earrings using Fabric Cover Buttons and Earring Backs or Clip On Earring Backs. I made these as gifts for some of my trendy cousins last Christmas and they loved them. Easy to embellish, monogram or personalize and add extra pizzazz to your loved ones attire!
Supplies:
- 2 Completed Flat Back Fabric Cover Button (Choose your size, Size 20 through Size 60 all work great, size depends on the statement you want to make)
- 1 set of Earring Post & Backs
- E6000 or comparable adhesive
Steps:
- Follow these instructions to make Flat Back Fabric Covered Buttons. See More
Pin for Later:
#ilikebigbuttons #earrings #tutorials #coverbuttons #coverbuttonearrings

Fabric Cover Button Christmas Card Tutorial December 12 2014
Fabric Cover Button Christmas Cards
Today, I am working on some cute Christmas cards using Fabric Cover Buttons*. Check them out!
*Just a reminder our Cover Buttons are 10%OFF on our website today using Coupon Code: COVERBUTTON10
Supplies:
- Flat Back Cover Buttons (I used Size 20, Size 24, and Size 30 Cover Buttons)
- Cover Button Assembly Tools
- Cover Button Templates
- Fabric Scraps
- E6000 Adhesive or Hot Glue
- Sharpie Permanent Marker
- Card Stock or Pre-Made Card


Instructions:
1. Cut your fabric scrap. You will want a circle that is about twice the diameter of your button blank or use one of our handy Plastic Cover Button Templates.

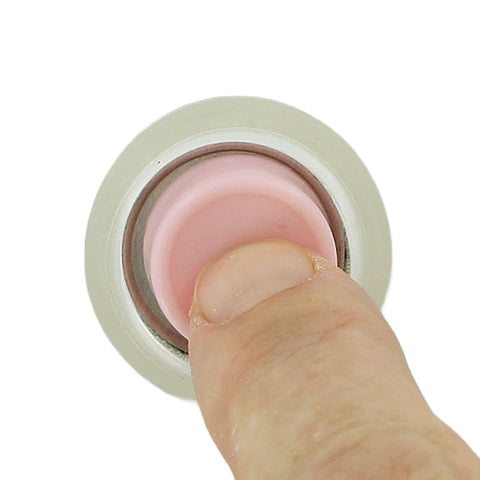
2. Put your fabric piece in the larger assembly tool piece (RIGHT SIDE DOWN). When you look into the tool you want to see the back of the fabric.


3. Place the button front (the domed piece) on top of the fabric. Leave the fabric edges hanging out.

4. Press the cover button edges down into the tool.

5. Place the back cover button piece on top of your fabric and button front. If the cover button will be subject to repeated tugging from the back, you may want to add a little e6000 adhesive before attaching the back.

6. Take the smaller piece of the assembly tool and with the open side down place it on the button back.
7. Press down. You may hear a pop when the last bit of the button back slips into place. If you take the tool out and the button is not completely secured, just put it back in and press down again.

8. When you take the small assembly tool piece off, the fabric edges will be secured underneath the button back.


9. Remove the button from the larger assembly tool piece.

10. Tada! First step complete.

11. Using a ruler, I made 8 straight lines of varying lengths. Then I drew a bow on top of each and a small ornament top.


12. Then in your best print write Merry Christmas. Who else doesn't like their own handwriting :P ? I need to practice my pretty cursive more often.

13. I think it turned out lovely. You could also make the Cover Buttons actual earrings with our Earring Supplies: Earring Posts or Clip Ons and it could double as a gift and Christmas Card.
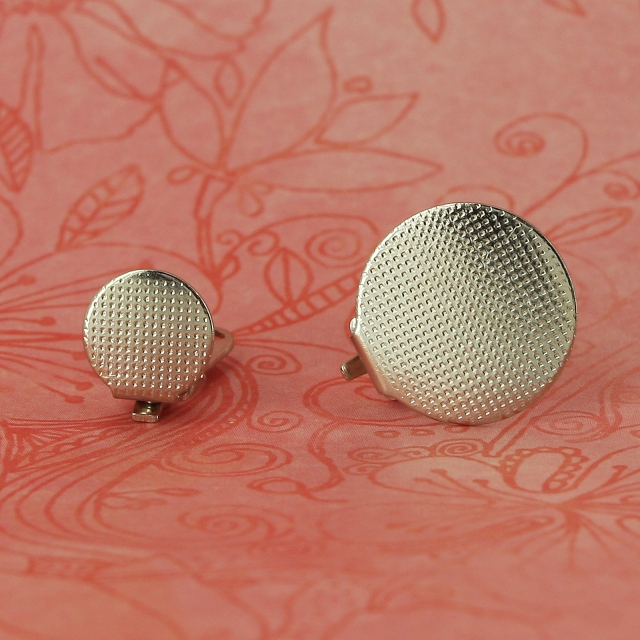
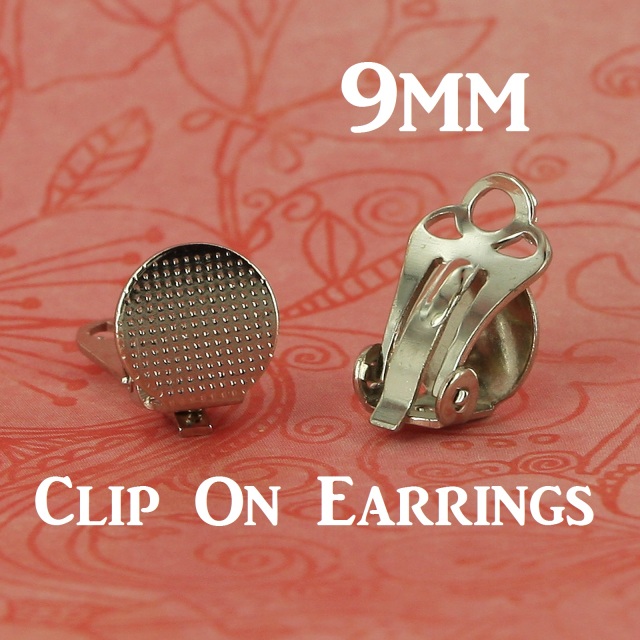
New Arrivals!!! Clip On Earring Backs for Fabric Cover Button Earrings December 02 2014
We are excited to announce that we now carry Clip-On Earring Backs in 2 sizes for our line of Cover Buttons! We thrilled to offer a non-pierced earring option for our customers. You can purchase them with or without rubber cushions that help provide support and comfort for earring wearing.
Check them out!


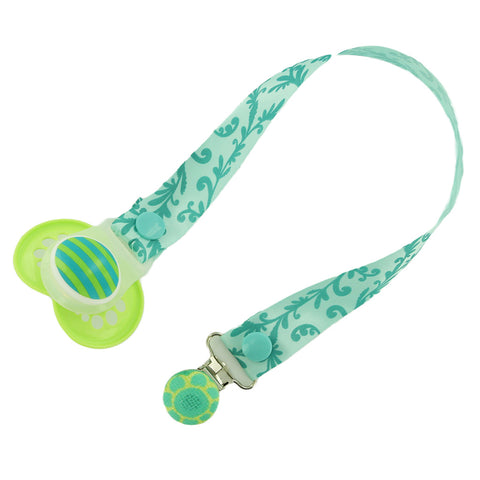
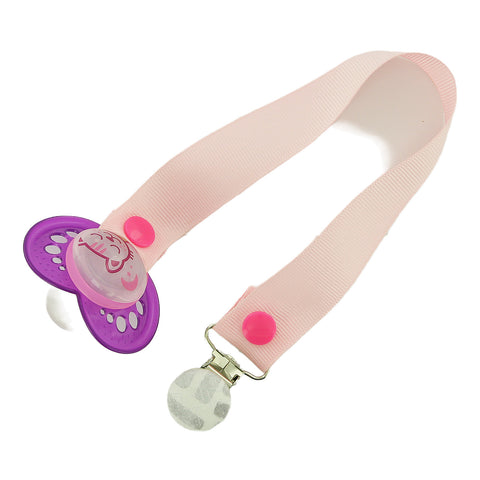
30 Days of KAM Snaps and Beyond!!! How to make Cover Button Metal Pacifier Clips with Cover Buttons, Round Faced Metal Suspender Clips and KAM Snaps September 24 2014
Day #35
How to make a Cover Button Metal Pacifier Clips with Cover Buttons, Round Faced Metal Suspender Clips and KAM Snaps
Today I am making Cover Button Pacifier Clips using Round Faced Metal Pacifier Clips (Metal Suspender Clips), Size 36 Cover Buttons, and KAM Snaps, of course ;). I have had a lot of questions in the last year about how to make these clips so I decided to take it on. Keep in mind that although I have rough tested these I in no way recommend you leave your baby alone with these as there are small pieces and if not done properly they may come apart and become a choking hazard. I would recommend these clips under adult supervision only. The maker and/or parent assumes full responsibility when using these pacifier clips.
That being said I did rough test these and was unable to break them apart after they had proper time to dry and cure. I didn't take a hammer to them :) but I did my best to undo my hard work and was not able to.
Supplies:
- 2 KAM Snap Sets
- KAM Snap Pliers and Awl
- Round Faced Metal Clips or Enamel Pacifier Clips
- 1 Size 36 Flat Back Cover Button
- Size 36 Assembly Tool
- Size 36 Template
- Fabric Scraps
- E6000 Adhesive
- Pre-made Pacifier Clips (see Pacifier Clip and Supply Tutorials)


Instructions:
1. Using our Pacifier Clip and Supply Tutorials make either Ribbon or Fabric Pacifier Clips.

2. Cut your fabric scrap. You will want a circle that is about twice the diameter of your button blank. I cut out a Piece of Fabric using my Size 36 Template.

3. Put your fabric piece in the larger assembly tool piece (RIGHT SIDE DOWN). When you look into the tool you want to see the back of the fabric.


4. Place the button front (the domed piece) on top of the fabric. Leave the fabric edges hanging out. Double check the transparent underside to see if your print is how you would like it. Then press the cover button fabric edges down into the tool.

5. Add a dab of E6000 Adhesive to the middle of the cover button cap before installing the Flat Back.

6. Place the back cover button piece on top of your fabric and button front.
7. Take the smaller piece of the assembly tool and with the open side down place it on the button back.
8. Press down. You may hear a pop when the last bit of the button back slips into place. If you take the tool out and the button is not completely secured, just put it back in and press down again.

9. When you take the small assembly tool piece off, the fabric edges will be secured underneath the button back.

10. Remove the button from the larger assembly tool piece. Tada! My Cover Button is ready to be adhered to a Round Faced Metal Clip.

11. Here a the Cover Buttons I made in just a few minutes. Seriously easy, fun and so cute!

12. Now take the E6000 Adhesive and put a medium size dab of glue on the back of the cover button about 1/2 of what would fill the back area of the back. This glue is great to work with so don't overly worry about getting the amount right. I was able to cleanly wipe of any excess off when I put on too much and I was also able to remove the button and add a little more when I under did it. This glue is very forgiving.

13. Now place the Cover Button over the Round Faced Metal Pacifier Clips and straighten and center your button.

14. Press firmly and let set to dry and cure 24-72 hours as recommended by the manufacturer (E6000).

15. These are my finished products. I love them and think they turned out beautifully. Below are my examples, completed and installed on Pacifier Clips.


16. Tada!!!
Disclaimer: Keep in mind that although I have rough tested these I in no way recommend you leave your baby alone with these as there are small pieces and if not done properly they may come apart and become a choking hazard. I would recommend these clips under adult supervision only. The maker and/or parent assumes full responsibility when using these pacifier clips.
Just received this Awesome note from one of our Amazing customers about our Cover Buttons!!! September 11 2014
Just received this Awesome note from one of our Amazing customers:
"Hello there!! Yesterday I received the special size 30 cover buttons kit to make a start of 10 buttons and oh my gosh they are fantastic!!! So I just placed an order...!! I am so hooked!!!! Excellent shipping too!! P.S. even my 17 year old son thought they were cool to make!!!... I will be leaving you excellent feedback too!! Looking forward to getting the other stuff that I have just ordered too!!! Thank you!! Sincerely Cindy"
:) That is wonderful! I am so glad you like them. They are so easy and fun to make! Thank you for taking the time to share your joy :)! Have a great week! Thank you, I Like Big Buttons!
Have you checked out our Cover Buttons recently? If not here's a link to them in our store.
You can make so many great things with Cover Buttons.

Embellished Cover Button Badge Reels:
![]()
Cover Button Earrings:

Cover Button Cufflinks:

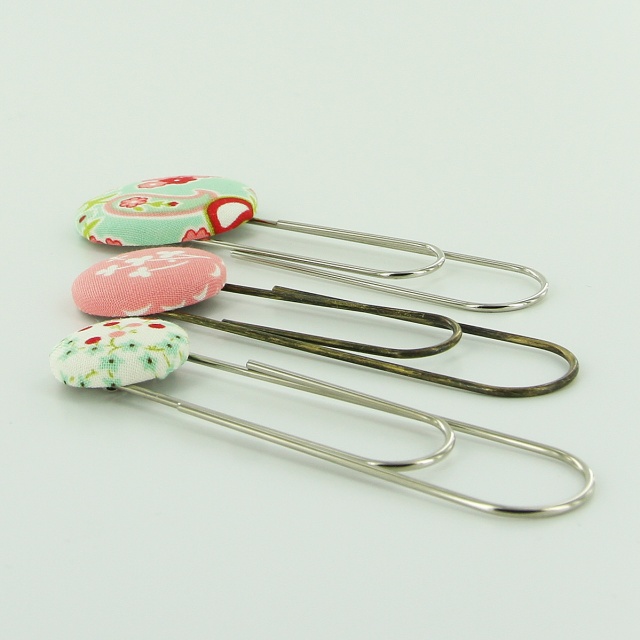
Cover Button Paper Clips:
Cover Button Push Pins:

Cover Button Bobby Pins:

Cover Button Barrettes:

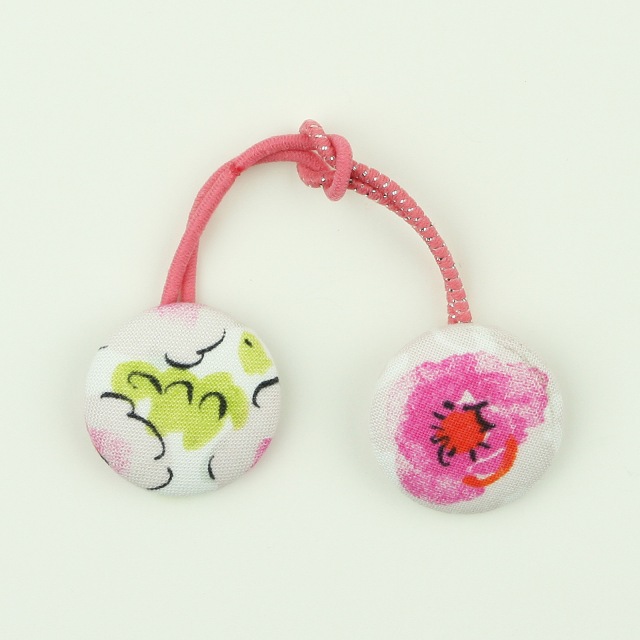
And Cover Button Ponytail Holders:
These are just a few of the options. Check out all our tutorials here.
- Previous
- Page 2 of 2