30 Days of Snaps!!! Day #30: How to make a Mini Hobo Purse with KAM Snaps and a PDF Pattern August 04 2014
Day #30
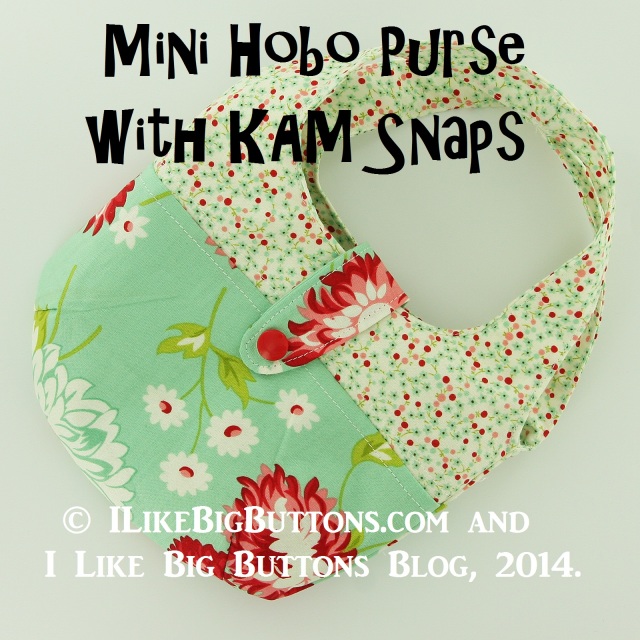
Today I am making a Mini Hobo Purse with KAM Snaps for my mini fashionista :P. There is sure something about miniaturizing any project that makes it even cuter! I hope you like it as much as I do.
Making a Mini Hobo Purse with KAM Snaps and PDF Pattern
Supplies:
- Fabric or Fabrics of your choice
- Interfacing
- 1 KAM Snap Set
- KAM Snap Pliers and Awl
- Mini Hobo Purse PDF Pattern
- Standard Sewing Machine and Iron

Instructions:
1. Download the Mini Hobo Purse PDF Pattern. Print out the pattern making sure the 1″ square in the corner measures 1″ square when printed that will indicate the pattern is the right size.

2. Cut out each Pattern piece as many times as instructed.

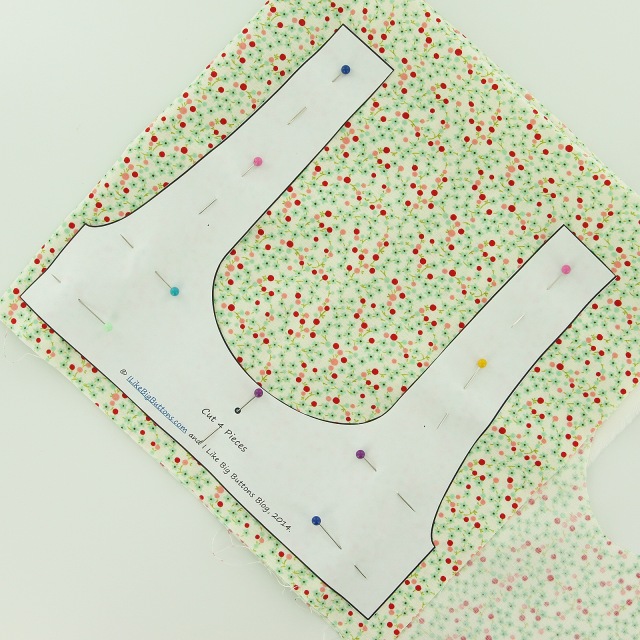

3. You will end up with:
- 4 pieces of Fabric/2 Interfacing (body of purse)
- 4 pieces of Fabric/2 Interfacing (top and handle of purse)
- 2 pieces of Fabric (lid/tab)

4. Iron the Interfacing onto a 2 pieces of Fabric that will be used for the outer body of the purse and 2 pieces of the handle for the outer side making sure to iron it to the wrong side of the Fabric. If you would like you can do interfacing on all the pieces or use a heavier weight fabric than I used. I was making this as an accent purse for my little girl so it will not get as much abuse as a daily use purse would.
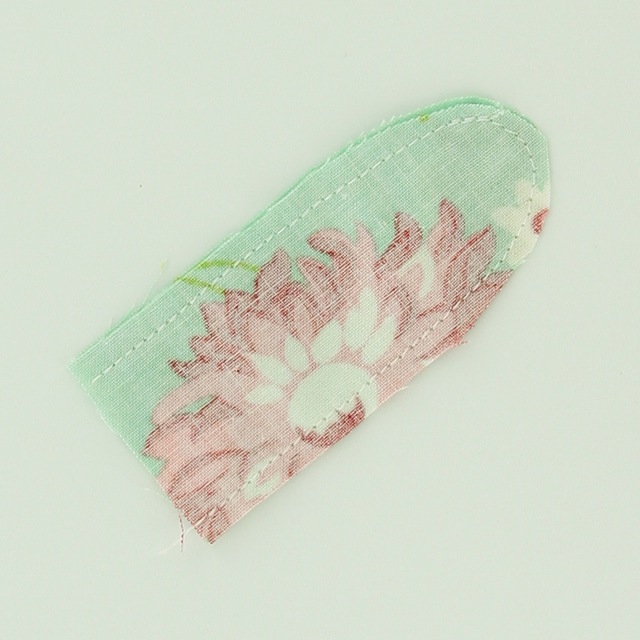
5. Take the 2 pieces of Fabric for the Lid/Tab of the case, put them right side together, and sew them with a 1/4" allowance.


6. Turn the Lid right side out and iron flat and top stitch a 1/8" stitch around the piece.

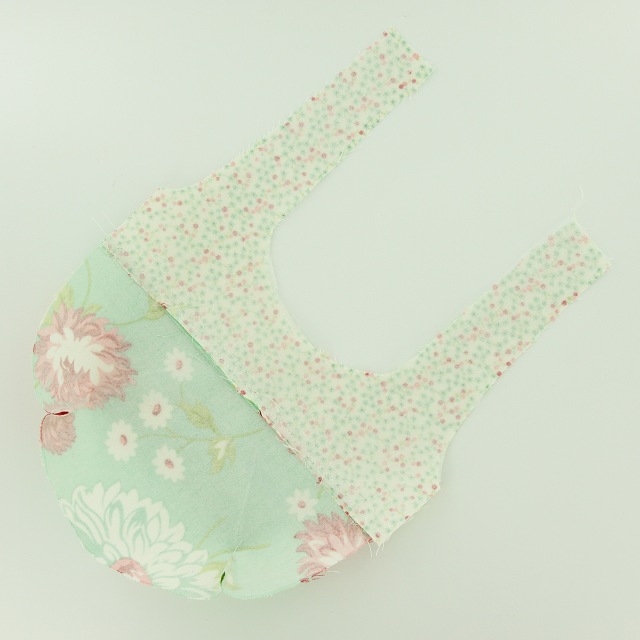
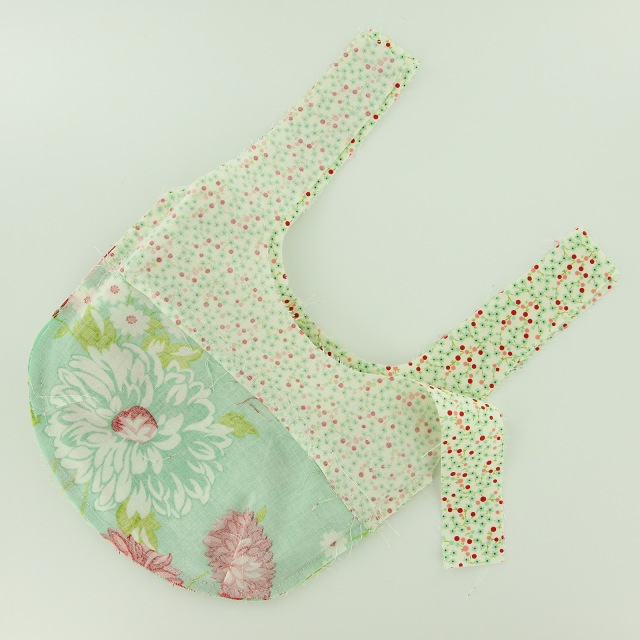
7. Pin the handle piece to the body of the purse, right sides together, and sew the pieces together with a 1/4" seam allowance. Repeat 4 times.
8. Iron flat.

9. Straight stitch an accent stitch 1/4" above where the 2 styles of Fabric meet and 1/4" above. Repeat 4 times.

10. Now add darts to the 2 bottom corner of each of the pieces. I placed a pin 1" in and started 1/4" out and sewed towards the edge until I reached no fabric (creating a triangle). Repeat 8 times, 2 times for each piece.


11. Pin the sides and bottom of 2 pieces together right sides together. Repeat with the other 2 pieces.

12. Sew 1/4" seam allowance on both sets and turn one right side out.
13. Turn the 1 pieces right side out and tuck the other piece inside it, it should be wrong side out still.

14. Take the little Tab you sewed and put it in between the 2 back pieces in the center, rounded side down and pin it in place. When you turn everything right side out it will be right side out in the back seam.

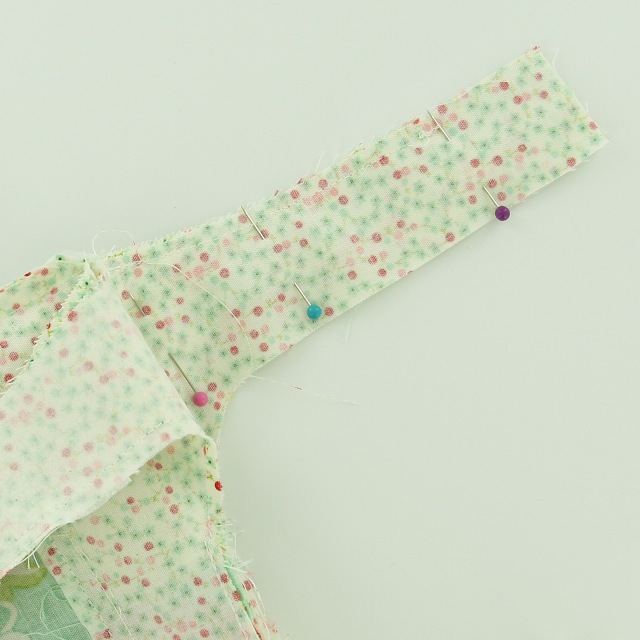
15. Pin the length of the handles together, back 2 together front 2 together on both the left and right. Pin together the top front and back of the purse together also as pictured.

16. On the outer side of each handle, sew 1/4" seam allowance starting 2" below where the pieces start down to the bottom making sure to back stitch at the top and bottom.

17. On the front internal handle and top of the purse, starting 2" from the top sew a 1/4" seam allowance around from the left to the right, stopping 2" below the top. Make sure to back stitch and the beginning and end of this stitch.
18. On the back internal handle and top of the purse (with the Tab located in it), start your 1/4" seam allowance stitch just before the Tab and sew from left to right stopping 2" below the top. Make sure to back stitch and the beginning and end of this stitch.


19. Now the not so fun part :P. We need to turn the whole purse right side out. With some patience, it will right itself. I also used the back of the seam ripper to help get the handles right side out.
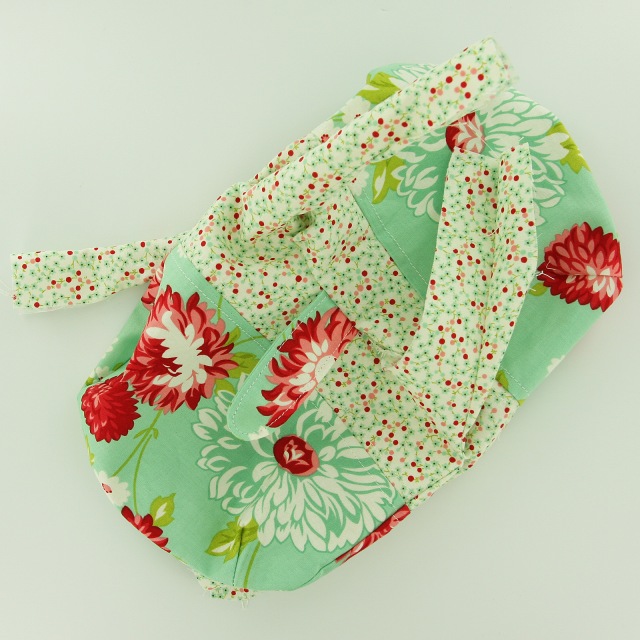

20. Once you have it right side out, pin the top handles together making sure to pin the the handles next to each other on the left and right together. Repeat 4 times.
21. Now sew them together with a 1/4" seam allowance.


22. Then iron in any exposed edges 1/4" and pin all open seams together. It took quite a few pins to do this properly so that it laid nicely and looked right.

23. Top stitch each handle, inside and out as close to the edge as you are comfortable with, I did a 1/8" seam here.

24. Install the KAM Snap Cap and Socket in the Front of the Purse.
25. Install the KAM Snap Cap and Stud in the Tab.
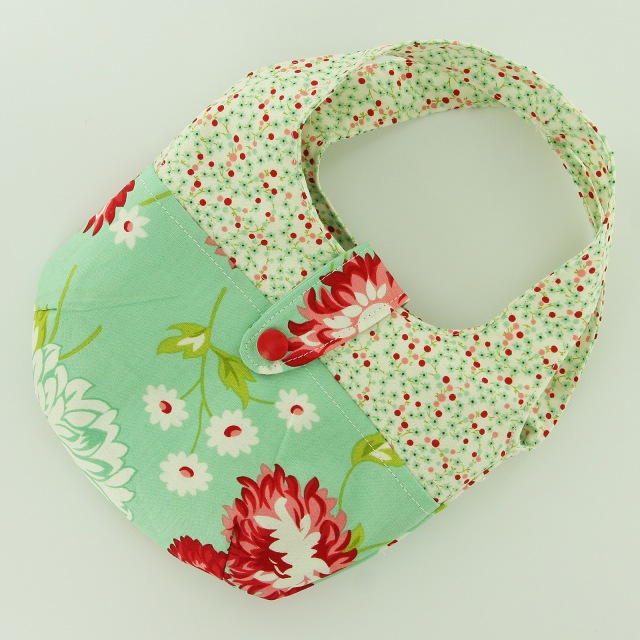

26. What it looks like with KAM Snaps installed.
27. Snapped closed. Tada! As a note of after thought, I could have gone with a sold piece for the internal lining of the purse. At the time, I dreamed and built it that didn't come to mind. If you would like to do so place the pattern for the body of the purse and handle of the purse together and overlap them 1/4" or so and tape the patterns together (please double check my measurements on it, if that is your plan). Happy Snapping!!!