30 Days of Snaps!!! Day #21: How to make a Cuff Bracelet with Recycled Jeans, Embroidery and KAM Snaps June 26 2014
Day #21
Making a Recycled Jean Cuff Bracelet with Embroidery and KAM Snaps
Today I am making another Cuff Bracelet. Once my little princess saw what her big sister had made, she :) requested her own in "Pink", of course. As an added detail, I also used the embroidery settings on my sewing machine to stitch butterflies on the Cuff. My little princess picked out her KAM snap colors: B47 Neon Pink and G99 Lilac and she is now happily sporting her own stylish Cuff Bracelet.
Supplies for a Recycled Jean Cuff Bracelet with Embroidery detail:
- 1 Pair of Holey Jeans
- 2 KAM Snap Sets
- KAM Snap Pliers and Awl
- Standard Sewing Machine with Embroidery option
Instructions:
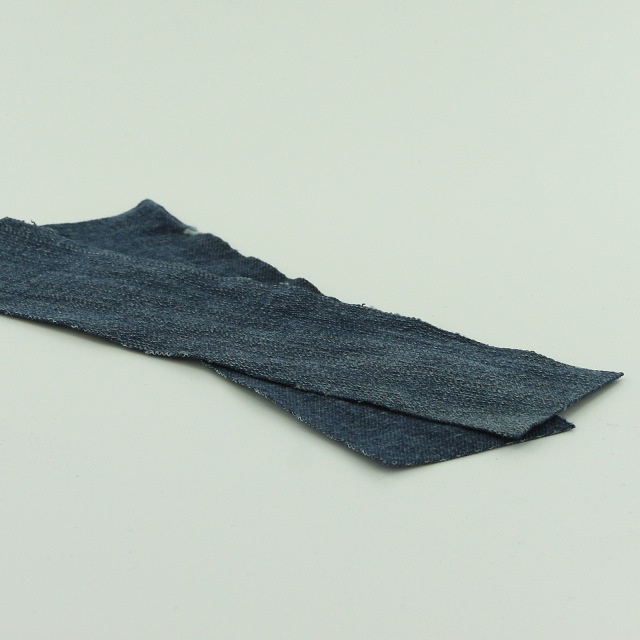
1. Using an old, holey pair of Jeans cut two 2″ by size of wrist plus 1 1/2″ strips of material, for my model’s wrist I did about 6″.
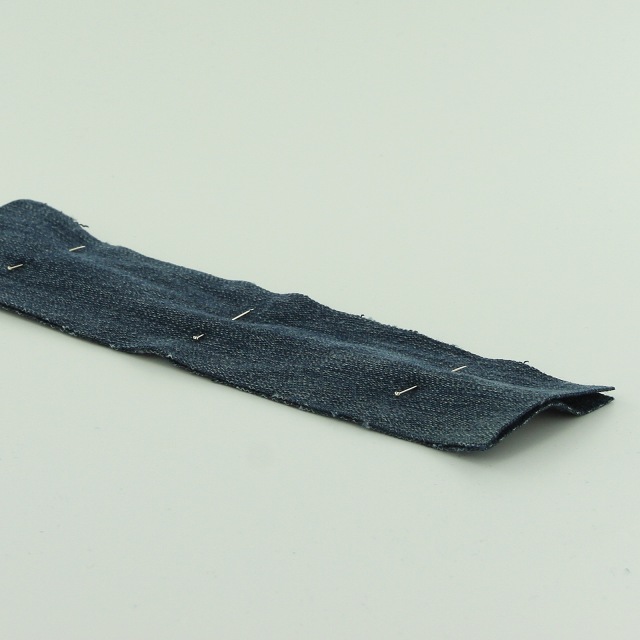
2. Pin the material, wrong sides together, right sides facing out.
3. Stitch around the strip of fabric about a 3/8″ in all the way round making sure to back stitch at the start and end.

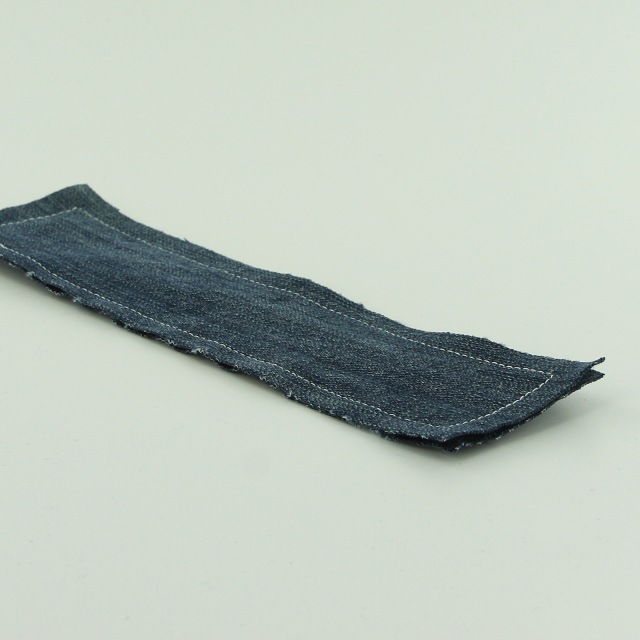
4. Pull on the edges to fray the jean material up to the stitch you made. It will also fray over time but I was going for a this look.

5. As an added embellishment, I ran a row of butterflies up and down the Cuff Bracelet.

6. One side I installed 2 Caps and 2 Sockets, I installed each 1/8″ off the corner seam on both ends. Repeat on other side, making sure to put the 2 Caps and 2 Studs on the opposite sides from the other end so that when you overlap the Cuff to snap it that the sockets and studs meet. I found it easiest to wrap the Cuff around my model’s wrist to make sure I positioned the second set of snaps correctly the first time.
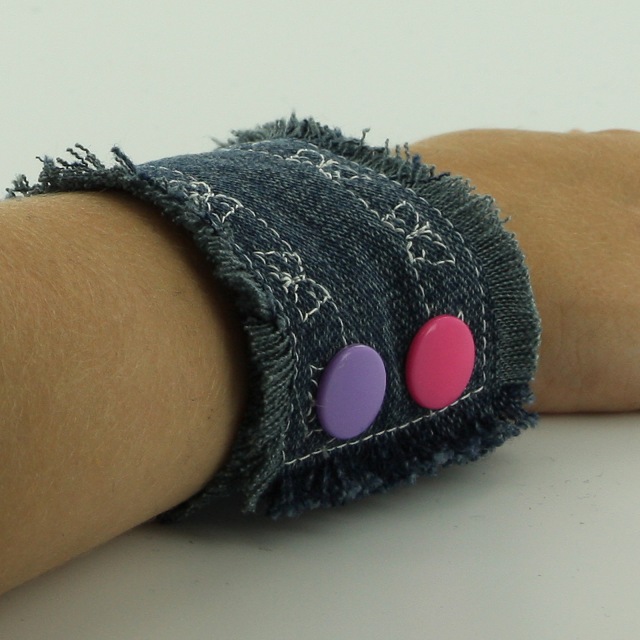
7. Tada! It turned out wonderful and made my little princess very happy. Happy Snapping!!!